Tricks of the developer under iOS. Splash screen
Introduction
Greetings, habravchane!
During the development of applications for iOS, I have accumulated some tricks that I would like to share with you.
Immediately I warn you that I try to keep pace with the times, so the examples will be under iOS> = 5.0 and use Storyboard and ARC, but nothing prevents them from being ported to 4. *.
')
If you have been developing for iOS for a long time, most of what I have said will be obvious, but at the same time I would like you to join the discussion and tell you how you implement this.
Interested - I ask for a cat (The post contains screenshots of Interface Builder areas, so I’m warning you about traffic).
Splash screen
By default, iOS provides a mechanism for displaying a picture of downloading an application as specifying png-files under certain permissions; this is not to surprise anyone now. But iOS is famous for its transitions, animations and other things, it looks cool and thanks to the Core Animation API it's not at all difficult.
I always liked the start screen of Skype.app, when the application logo went up after loading, and input elements appeared on the screen. Beautiful and easy.
Using Storyboard, the task becomes trivial:
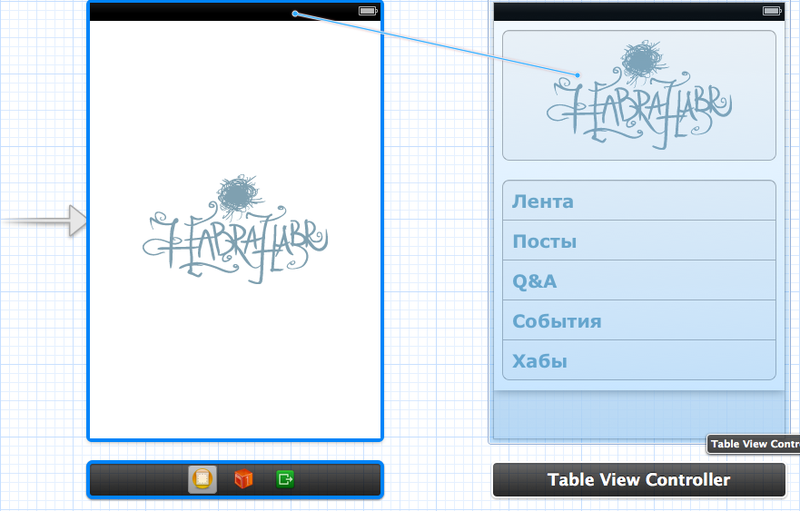
Suppose we have some screen, which we get at the start of the application:
And our Default.png looks like this:

If we start the application now, we will first see Default.png, and then immediately get to the start screen. Looks not very good? To fix this, we will create another screen, the initial state of which will be identical in appearance to our Default.png and will contain a UIImageView outlet. let's start it and specify the base class, for example, SplashScreenViewController:

View is very simple, background + UIImageView with the logo in the center. It will be connected to SplashScreenViewController through an outlet named imageView.
Now create a segue from the newly created screen to the start screen.
For those who are just exploring Storyboard, or simply forgot, I remind you that in order to create a Segue not by an event, but simply as a link, you have to start dragging it from the StatusBar of the original ViewController, and call it manually (as I’ll show further in code):
Options:
- identifier: splash
- Style: Custom
- Segue Class: SplashSegue (we will create this class a bit later)
The code for this example would look something like this:
@interface SplashSegue : UIStoryboardSegue @end @interface SplashScreenViewController : UIViewController @property IBOutlet UIImageView *imageView; @end @implementation SplashScreenViewController - ( void ) viewDidAppear:(BOOL)animated { [super viewDidAppear:animated]; // Cocoa [UIView animateWithDuration:1.0 delay:0.2 options:0 animations:^ { // ( // , , // CGRect frame = self.imageView.frame; frame.origin.y = 15.0; self.imageView.frame = frame; } completion:^( BOOL completed ) { // [self performSegueWithIdentifier:@"splash" sender:self]; }]; } @end @implementation SplashSegue - ( void ) perform { // presentModalViewController. // animated, NO, .. // . [[self sourceViewController] presentModalViewController:[self destinationViewController] animated:NO]; } @end Now, if we launch our application, first we will see the logo with Default.png, then (imperceptibly for the user) the screen will change to our SplashScreen, the animation will move upward, and then the screen will also change to the starting one.
This simple in mind, the task of animation of the transition from the boot screen to the start teaches us:
- Programmatically create transitions (segue) between screens in Storyboard
- Implement your own Segue logic
- Do not be afraid to use the built-in Cocoa tools and perform what is estimated by man-made people for people :)
I myself am engaged in this platform relatively recently and sometimes I lack such lessons here, and I am sure that there will be those to whom it will also be useful, so do not judge strictly if it turns out to be useless to you;)
UPD:
Added a video demo of the effect in the emulator
Source: https://habr.com/ru/post/161455/
All Articles