Own module for admin on Webasyst
Quite often, customers ask for the unknown, so you have to rehtovat the engine in the tail and in the mane. Webasyst is incomprehensible and mysterious from the point of view of code logic, and there are very few adequate manuals on the Internet. Therefore, I will write here what I learned from my own hard experience of trial and error. There are several varieties of modules in the webcaster, I plan to write about each of them, but I will only talk about how to embed my modules in the engine, and not about programming directly.
It is assumed that php is owned by anyone who reads this article.
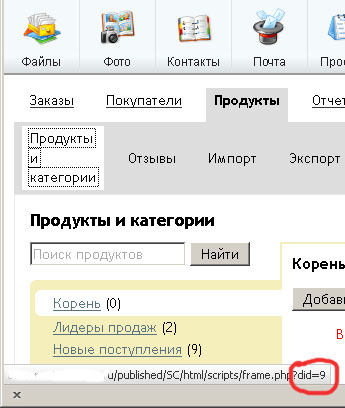
To begin with, each element in the admin has its own did.
For example did bookmark products is equal to 9
')
This number corresponds to the xID in the SC_divisions table.
The creation of the admin module begins with the fact that we are introducing a new entry into the SC_divisions table.
Note that xParentID = 9 . This means that the parent of this module will be products. Those. This module will be a tab in the Products tab. For the position between the tabs, the xPriority parameter is responsible .
Look at what xID auto-increment assigned to us, remember it. Suppose in our case it is 209 .
Next we go to the table SC_division_interface. Here, on the one hand, everything is clear, but on the other, not very. And in this “not very” lies the most important.
Important fields for us:
xDivisionID - Obviously, this is the ID of our module. We agreed that this is 209 .
xInterface - This field stores the name of the module, and, oddly enough, the path to the module.
To understand what tsiferka means before the name of the modules, let's look at the table SC_module_configs .
If you look at the ConfigKey fields, you can see that they follow the folder structure inside / published / SC / html / scripts / modules .
Yeah. And we would like to enter your module in adminscreens . Let's see what the ModuleConfigID for adminscreens is . This is 48 .
Now for us there are no mysteries, and we can safely write:
Fine. Half done.
Now go to / published / SC / html / scripts / modules / adminscreens / _methods , and create the files there:
mymodule.xml
mymodule.php
You should pay attention to those places in mymodule.php , where there is the text mymodule . It must match your module name. Otherwise, nothing will work.
There are very few. Namely, to give the admin the opportunity to see this module. For some reason this moment is omitted in all similar articles, but it is not easy to guess. It usually happens that the module works, and we do not see it. To discover this, I had to thoroughly shovel the Webasyst code. The solution is:
We look at the U_ACCESSRIGHTS label . Add a line:
The main thing in this line is what? That's right - SC__209 . And 209 is the number of our module.
It remains to add the translation pgn_mymodule
And that's all. Now, if we go to the “Products” tab, we will see inside the “My Module” tab, where the code from mymodule.php will be executed.
It is assumed that php is owned by anyone who reads this article.
To begin with, each element in the admin has its own did.
For example did bookmark products is equal to 9
')
This number corresponds to the xID in the SC_divisions table.
The creation of the admin module begins with the fact that we are introducing a new entry into the SC_divisions table.
INSERT INTO `SC_divisions` SET xName='pgn_mymodule', xParentID=9, xEnabled=1, xPriority=100;Note that xParentID = 9 . This means that the parent of this module will be products. Those. This module will be a tab in the Products tab. For the position between the tabs, the xPriority parameter is responsible .
Look at what xID auto-increment assigned to us, remember it. Suppose in our case it is 209 .
Next we go to the table SC_division_interface. Here, on the one hand, everything is clear, but on the other, not very. And in this “not very” lies the most important.
Important fields for us:
xDivisionID - Obviously, this is the ID of our module. We agreed that this is 209 .
xInterface - This field stores the name of the module, and, oddly enough, the path to the module.
To understand what tsiferka means before the name of the modules, let's look at the table SC_module_configs .
If you look at the ConfigKey fields, you can see that they follow the folder structure inside / published / SC / html / scripts / modules .
Yeah. And we would like to enter your module in adminscreens . Let's see what the ModuleConfigID for adminscreens is . This is 48 .
Now for us there are no mysteries, and we can safely write:
INSERT INTO SC_division_interface SET xDivisionID=209, xInterface=48_mymodule;Fine. Half done.
Now go to / published / SC / html / scripts / modules / adminscreens / _methods , and create the files there:
mymodule.xml
<?xml version="1.0" encoding="UTF-8"?> <interfaces> <interface> <name>My Module</name> <key>mymodule</key> </interface> </interfaces> mymodule.php
<?php /** * Created by JetBrains PhpStorm. * User: xilix * Date: 24.11.12 * Time: 23:32 */ /** * @package Modules * @subpackage AdministratorScreens */ class MymoduleController extends ActionsController { function mymodule(){ } function main(){ $Register = &Register::getInstance(); /*@var $Register Register*/ $smarty = &$Register->get(VAR_SMARTY); /*@var $smarty Smarty*/ // , // } } ActionsController::exec('MymoduleController'); ?> You should pay attention to those places in mymodule.php , where there is the text mymodule . It must match your module name. Otherwise, nothing will work.
There are very few. Namely, to give the admin the opportunity to see this module. For some reason this moment is omitted in all similar articles, but it is not easy to guess. It usually happens that the module works, and we do not see it. To discover this, I had to thoroughly shovel the Webasyst code. The solution is:
We look at the U_ACCESSRIGHTS label . Add a line:
INSERT INTO U_ACCESSRIGHTS SET AR_ID='ADMIN', AR_PATH='/ROOT/SC/FUNCTIONS', AR_OBJECT_ID=SC__209, AR_VALUE=1;The main thing in this line is what? That's right - SC__209 . And 209 is the number of our module.
It remains to add the translation pgn_mymodule
INSERT INTO `SC_local` (`id`, `lang_id`, `value`, `group`, `subgroup`) VALUES
('pgn_mymodule', 1, ' ', 'general', 'prd'),
('pgn_mymodule', 2, 'My module', 'general', 'prd');
And that's all. Now, if we go to the “Products” tab, we will see inside the “My Module” tab, where the code from mymodule.php will be executed.
Source: https://habr.com/ru/post/160313/
All Articles