Behind the Scenes of Android: Something You May Not Know

0. Table of Contents
- 1. Preface
- 2. Hack eMMC memory HTC Desire HD to change the identification information of the phone
- 3. Creating a werewolf phone using cryptography
- 4. False security: an overview of unauthorized data access threats.
- 5. Conclusion
')
1. Preface
Mobile gadgets have become an integral part of our daily life, we trust them with our most intimate secrets, and the loss of such a device can lead to serious consequences. Today, much attention is paid to the coverage of mobile security issues: conferences, meetings are held, large players produce complex products for personal and corporate protection of mobile devices. But how effective are such tools when the device is already lost? How comfortable they are in everyday use - constant inconvenience with additional software, increased battery consumption, increased risk of system errors. What advice can I give to those who worry about the safety of their mobile data? Do not store anything important on your smartphone? Then why is he so needed - do not send the birds into space, in fact?
Today I want to talk with you about devices running the Android OS, created by my esteemed Google company. As an example, I use a good past years smartphone from HTC - Desire HD. Why him? Firstly, it was with him that we began our research in the field of security of Android devices, and secondly, it is still an up-to-date smartphone with the full range of functions of the average Googlephone. It supports all versions of Android, in it the standard HTC look at the organization of the file system and the standard layout of the internal memory partitions. In general, the perfect simulator for defense and attack.
With this report, I spoke at the recent ZeroNights 2012 conference, and now I want to present it to the community. I hope it will be interesting to you and even a little useful.
2. From A to Z: the history of the low-level hacking of the read-only eMMC memory of the HTC Desire HD smartphone
As we know, the eMMC device memory is divided into blocks, each of which carries certain information, this is how an approximate tree of memory blocks of HTC Desire HD smartphone looks like

We are interested in the contents of / dev / block / mmcblk0p7 and, as luck would have it, the usual S-OFF hack does not allow us to climb. More precisely, you can see, but to change - sorry.
What is there that even the lack of a digital signature verification does not allow writing there?
In HTC partition 7, the most important device information was hidden: CID , the state of the “ S-ON \ S-OFF ” flag, IMEI, and radio module settings. Confident in the impenetrability of their protection, HTC stores this data in clear text.
After conducting a deep analysis of the market for devices for “restoring” Android smartphones, the HXC Dongle device ( www.hxcdongle.com ), created by unknown Chinese craftsmen, was found and purchased. The device promised all kinds of manipulations with almost all models of HTC Android phones.
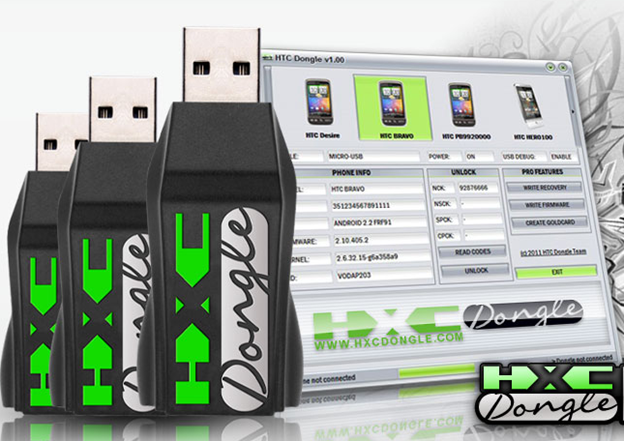
The product consisted of a USB smart card reader and the sim card itself. An application was downloaded from the manufacturer's website (hxcdongle.com), which, using a smart card to verify its authenticity, performed any manipulations on the stock device that was not rooted, including the notorious S-OFF, change of CID and something else.
At the same time, the device itself was connected to the PC with an ordinary USB-miniUSB cord and all operations went through ADB (Android Debug Bridge). This led to the idea that all the "magic" is created on the device itself.
The reverse engineering of the process was required, for this it was necessary to intercept the USB exchange via ADB. We must pay tribute to the masters from the Middle Kingdom - they provided such an option of events that when using most USB sniffers, the program directly spoke about the presence of an intercepting driver, or the system simply fell into BSOD.
However, this did not stop us and after a brief research, we finally saw the whole process, and also intervened and received the cherished dumps.
A sequence of actions was restored from the dumps, which was a shell command, and some files were downloaded to the device. Most of the files turned out to be well-known utilities (albeit cleverly renamed) - root-exploit, busybox and / dev / block / mmcblk0p7 dumps before and after the change + a stripping script that cleans up traces.
But among them was the actual utility, which, using a unique key generated by the timestamp kernel, removed the write protection. The strings command on this file gave us text strings of error messages, which Google brought us to the source code of the gfree utility by Scotty2 (known person in the XDA community, a talented hacker), who could briefly (before reboot) remove the protection of the microcircuit and change Secure_Flag all in the same mmcblk0p7
The search for contact with the author led me to the # g2root channel of the freenode.net IRC network, where I learned that Scotty2 had not been seen for a long time, but his comrade, the hacker under the nickname Guhl , who was co-author of gfree, got in touch with me. At first he was very angry that with the help of their work, the Chinese earn money, all the more without even mentioning the names of the creators and cutting all the copyrights out of the program's body. Then, after reviewing the results of our research, he became interested in the changes that the Chinese made to the wpthis.ko module, thereby making RW access to partition 7 permanent.
How is such a tricky write protection organized, and why does gfree know how to turn it off (this is the key to getting S-OFF)?
Partition 7 is protected from recording in 2 stages:
-Program protection in the memory sector
-Protective instruction in the kernel, causing a reboot when a write attempt is detected
GFree consists of two parts: the userlevel application and the kernel module, which is loaded during operation, then, if the module is successfully loaded, commands are sent to it, depending on the keys set.
As we know from the kernel, we have direct access to the hardware and the wpthis.ko module provides the eMMC memory chip (Quallcomm MSM7XXX) with a control signal for the reset cycle (reset_and_init_emmc) via the voltage supply to the 88 leg:
void powercycle_emmc() { gpio_tlmm_config(PCOM_GPIO_CFG(88, 0, GPIO_OUTPUT, GPIO_NO_PULL, GPIO_2MA), 0); // turn off. gpio_set_value(88, 0); mdelay(200); // turn back on. gpio_set_value(88, 1); mdelay(200); } Bootloader when the device is booted, configures the eMMC chip, setting its write protection. Rebooting the eMMC chip resets the write protection settings. Scotty managed to find a way (the 88th leg of the chip, shutting off and applying voltage to it, leads to the correct reboot of the eMMC controller.
After that, we are one step away from accessing the entry in / dev / block / mmcblk0p7 in online mode; only the core with the protective function prevents us. To bypass this protection, we will have to assemble our kernel from the source code, making small changes to it. From the set of sources, we are interested in the file drivers / mmc / card / block.c
In it, look for the line #if 1 and just change it to #if 0 . What is curious is that in kernel mode there is no native reboot command, so BUG () is used, which creates an error leading to a reboot.
#if 1 if (board_emmc_boot()) if (mmc_card_mmc(card)) { if (brq.cmd.arg < 131073) {/* should not write any value before 131073 */ pr_err("%s: pid %d(tgid %d)(%s)\n", func, (unsigned)(current->pid), (unsigned)(current->tgid), current->comm); pr_err("ERROR! Attemp to write radio partition start %d size %d\n", brq.cmd.arg, blk_rq_sectors(req)); BUG(); return 0; } #endif Protection works like this: when both systems are turned on, when you try
#dd if=/sdcard/mmcblk0p7 of=/dev/block/mmcblk0p7 The phone just restarts. If the kernel has already been modified, the recording will take place, but in fact it will not be recorded - the reboot will return everything back.
What kind of vulnerability? Of course, this is a hardware vulnerability - the manufacturer of the device left a loophole for overwriting memory, which should always remain Read-Only, this is also a personal vulnerability - the identification information of the phone can be changed and this will make it difficult to find it in case of loss / theft.
But also this vulnerability - the vulnerability of mobile operators. Experiments with partition7 showed that operators do not have an IMEI number filter — devices with any IMEI, including duplicate and obviously not corresponding to reality, can be registered on the network. The operators are certainly aware of the problem, but they are probably connected hand and foot ... by Chinese phones. The fact is that a large share of the phone market belongs to devices with the same IMEI number. Disconnecting these devices from the network will result in the loss of a large number of clients.
Well, now we will talk about more mundane things - protecting our device from theft of information stored on it. First, I will talk about how to protect themselves, and then - from what.
3. Paranoid Android: creating a werewolf phone using cryptography
Since the advent of android devices on the market, enthusiasts have been looking for ways to secure their data as much as possible and to unleash the potential of a greatly curtailed, but still Linux kernel Android OS.
It all started with The Guardian Project (https://guardianproject.info), which released the port of the famous linux-utility cryptsetup , which implements the capabilities of the DM-crypt kernel module for transparent data encryption. Since Android OS can use native encryption (albeit very crooked and unreliable), this module is present in all runoff cores. Such a powerful tool, however, was used by the author for completely unserious purposes - the banal creation of cryptocontainers for storing files and folders. We went further, finding a way to use this utility to encrypt user data on the fly, but not only ...
So, let's take a look at creating a secure smartphone based on Android OS 2.3-4.1 using the example of HTC Desire HD .
All important data is stored in two places (this follows from the areas accessible to the user for writing):
/data/ /mnt/sdcard Therefore, the most obvious option is to “just” encrypt them using cryptsetup. In fact, everything turns out to be much more complicated and interesting: firstly, you have to solve the problem of opening and mounting cryptocontainers at the smartphone download stage — you need to edit the kernel, adding to the download sequence, invoking the interactive password entry menu and operations with cryptocontainers, secondly, you need to create your own menu to enter a password at the stage of loading the device. There were similar projects, but none of them reached the release - the inevitable problems of damage to the cryptocontainer during a power outage nullified the security benefits.
We went another way - the crypto-OS is separated from the main system, thus, any problems will not prevent the phone from switching on and functioning and the kernel should not be tormented.
Let's look at an example of step-by-step execution of our cryptophone.

We will need:
- Phone on Android version 2.3-4.1
- Root
- installed package of console utilities busybox
- installed console manager of crypto containers lm.cryptsetup
- USB Debug mode enabled
- ROM manager reboot binary
I recommend using some custom rum that already has it all, for example Leedroid Rom for HTC Desire HD
1. We need to create containers for storing secure data, let's start with / data / container:
In the / data / directory we will create an empty file with a size of 800mb (remember, in Desire HD we have 1GB of internal memory available, you must leave at least 200mb for the functioning of an open system) -
#busybox dd if=/dev/zero of=/data/secure0 bs=1M count 800 We tie it to a loopback device -
#losetup /dev/block/loop3 /data/secure0 Let's format in Luks-format using 128-bit AES encryption -
#lm.cryptsetup luksFormat –c aes-plain /dev/block/loop3 Let's open our new cryptocontainer for further customization -
#lm.cryptsetup luksOpen /dev/block/loop3 data Where data is the name we have chosen for the crypto container.
Let's create ext4 file system in our crypto-container -
#mke2fs –T ext4 –L Secure0 -F /dev/mapper/data The container for / data / is ready until we set it aside and work on the SD card, after saving the progress and closing the file correctly -
#lm.cryptsetup luksClose data Now we need the parted command, it is in the custom recovery menu, where I will use it (being in the custom RecoveryWorkMod Recovery, we have access to ADB with Root rights), we will remap the SD-card, we will make one section 2 - open and encrypted -
parted /dev/block/mmcblk1 where mmcblk1 is our complete SD card (while mmcblk0 is all eMMC memory)
We display the contents -
print Pay attention to the full size of the card, remember it. By default, the HTC DHD comes with an 8GB card, and we will keep it.
Delete the first and only section of the SD card -
rm 1 Create two new ones, first open in fat32, 4GB in size -
mkpartfs primary fat32 0 4032 Then the workpiece for the cryptocontainer, we do it in ext2, but this is not important, we reformat anyway -
mkpartfs primary ext2 4032 8065 As you can see, the first digit is the boundary of the first section, the second is the boundary of memory.
Exit and reboot -
quit Now in the SD card we have 2 partitions, / dev / block / mmcblk1p1 is 4GB of open flash drive, which is mounted to the PC when you connect the phone with a usb cord and / dev / block / mmcblk1p2 is a hidden partition of 4GB, which is nowhere mounted (linux, however, quite quickly recognizes it). In other words, with a superficial assessment, the first thought is a fake SD card, this often happens in half the face value.
We continue to work with the SD card. Now, instead of a file, we have a block device (card section), which means we will not need a loopback device, we format the entire section in Luks at once -
#lm.cryptsetup luksFormat –c aes-plain /dev/block/mmcblk1p2 Open the created container -
#lm.cryptsetup luksOpen /dev/block/mmcblk1p2 sdcard Where sdcard is the selected name for the SD card container
Format open container in fat32 -
#mkfs.vfat -n Seccard0 /dev/mapper/sdcard We close the sd card container, it is completely ready, and do not touch it before the system finally works -
#lm.cryptsetup luksClose sdcard Let's fill the data container, because now it is empty, and in this form the system will not work.
Execute commands to open -
#losetup /dev/block/loop3 /data/secure0 #lm.cryptsetup luksOpen /dev/block/loop3 data Create a folder in the root (previously remounting it in rw), where we will mount our cryptocontainer -
#mount –o remount,rw / #mkdir /DATA #mount –t ext4 /dev/mapper/data /DATA You need to copy all the folders from the original / data / except ../dalvik-cache/ (the program will create the content when you first start the cryptosystem) and ../d/ and without the secure0 file itself -
# cp -a /data/app /DATA # cp -a /data/app-private /DATA # cp -a /data/backup /DATA # cp -a /data/data /DATA # cp -a /data/dontpanic /DATA # cp -a /data/drm /DATA # cp -a /data/etc /DATA # cp -a /data/htcfs /DATA # cp -a /data/local /DATA # cp -a /data/misc /DATA # cp -a /data/property /DATA # cp -a /data/secure /DATA # cp -a /data/system /DATA # cp -a /data/zipalign.log /DATA # mkdir /DATA/d # mkdir /DATA/dalvik-cache Now we have a double of our system with all the data, unmount and close the container -
# umount /DATA # lm.cryptsetup luksClose data 2. Now we need to make from these two containers with data the second OS, loaded and unloaded according to our desire "on hot"
There are possible options, I will describe the very first, from which we started.
So what needs to be done? We need to replace the contents of / data / and / mnt / sdcard / on the fly with the contents of the prepared cryptocontainers, and when it will be necessary - go back. Since the system is alive, it just will not work. We use commands that allow us to stop the visible part of Android, while keeping the core working.
Here is an example of one of the crypto mode entry algorithms:
#setprop ctl.stop zygote #mount -o remount,rw rootfs / #mkdir /DATA #mkdir /mnt/SDCARD #mount -o move /mnt/sdcard /mnt/SDCARD #lm.cryptsetup luksOpen /dev/block/mmcblk1p2 sdcard #mount -t vfat /dev/mapper/sdcard /mnt/sdcard #mount -o remount,ro rootfs / #mount /dev/block/mmcblk0p26 /DATA #losetup /dev/block/loop5 /DATA/secure0 #lm.cryptsetup luksOpen /dev/block/loop5 data #umount /data -l #mount -t ext4 /dev/mapper/data /data #setprop ctl.start zygote #killall zygote The algorithm is very rough and everything can be done much simpler and more efficient, but this is just an example. In any case, the program for android to handle such an algorithm will either have to be written, or roughly use any program for executing scripts with interactive support.
After completing this scenario, we will find ourselves in crypto mode, which so far 1 to 1 looks like the original. In order not to be confused, it is better to immediately change the "wallpaper" and the location of the icons. Losses in the speed and duration of the smartphone are almost imperceptible, which allows you to be in this mode constantly.
3. We need to think of a way to safely complete the work in crypto mode.
Incorrect shutdown in 1 case out of 10 will result in damage to the file system and make the crypto mode not loadable (but all the data can be retrieved intact, though manually digging through the container), which means that the standard shutdown and reboot options are not suitable for us.
Turning off the phone painlessly will help us with this script:
#sync #setprop ctl.stop zygote #setprop ctl.stop runtime #setprop ctl.stop keystore #fuser /data -m -k #umount /data #/lm.cryptsetup luksClose data #/system/bin/reboot There is no need to worry about the crypto section on the SD card, nothing will happen to fat32.
Now we have a double bottom phone. How to use it? You can hide in crypto mode mistresses, business partners, insider information, a collection of German films or Internet troll tools. Obviously, when choosing a password of due complexity, breaking a cryptocontainer is not a trivial task. So we put the pinlock, disable the ADB - and our data is behind a stone wall.
4. False security: an overview of how to extract data from a Google phone.
Above, we looked at a non-trivial way to deafly protect our mobile data, but we did not say a word - are we protecting ourselves from what? A lot of copies are broken in Android OS security issues, a lot of reports have been made, products have been released, but the main defense-defense efforts are still directed at an external enemy - remote hacks, viruses, and traffic interception. But the highest degree of threat is, as always, physical access to the device. If the device fell into bad hands, then with a high degree of probability the information will leave its dungeons and will delight the intruder.
We will put ourselves in the place of the attacker and try to create an algorithm for hacking the device, which we can touch. Imagine that we again have HTC Desire HD in our hands, locked with a graphic key or pinlock, where to start?
1. We get access to data
The way to access the data depends on the initial conditions, but there will be two conditions - the presence of Android USB Debugging On and Root access.
Taking into account the fact that a huge number of smartphones are rushing and reflashing right after unpacking the box, there is a great chance to get everything on a silver platter, because in most custom firmware ADB access is enabled by default, and in some of them the corresponding display has been removed. So the first tip is to check the status of USB Debugging and turn it off if turned on.
The next vulnerability of S-OFF devices is custom recovery. If you have S-OFF, then most likely you are stitched with a custom, if you are stitched with a custom, then most likely you have custom recovery, and custom recovery is one continuous hole. Here you have in one bottle both Root, and non-disconnectable USB Debugging, and then we do “mount –a” and for the time being the data. How to fight? The cryptography mentioned above is the only way out. Why? Therefore, even if the firmware of the native recovery does not help - the attacker in the same way again casts the fastboot with the caste, and then according to the instructions.
The option is more complicated: the S-ON phone, the OS does not get - pinlock, ADB is off, there is no stock recovery and in general there is no root. Hopeless case? As if not so.
There is such a thing, called XTC Clip , is a clone of the factory HTC device for low-level work with phones of different models of this manufacturer (from Hero to Sensation). Allows you to make S-OFF without data loss (as opposed to the official unlock bootloader) and never loaded into the OS.
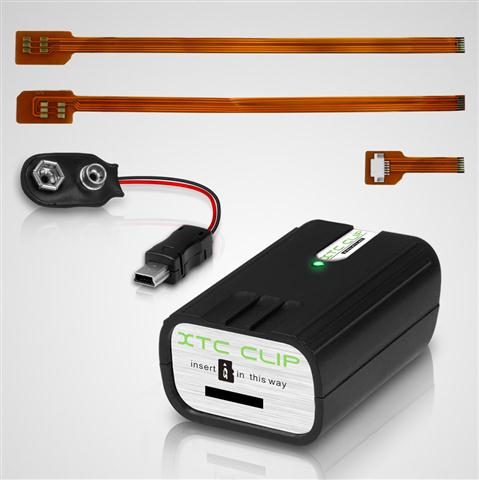
Work with the device consists of 3 stages:
- 1. Connecting to a PC running Windows as a USB disk with the program
- 2. Creation of the so-called GoldCard from the SD card (service information is written on the card for reading from the engineering menu of the phone)
- 3. Phone downloads to the engineering menu via a cable inserted into the phone’s SIM connector and then reset the Secure Flag to 0 position
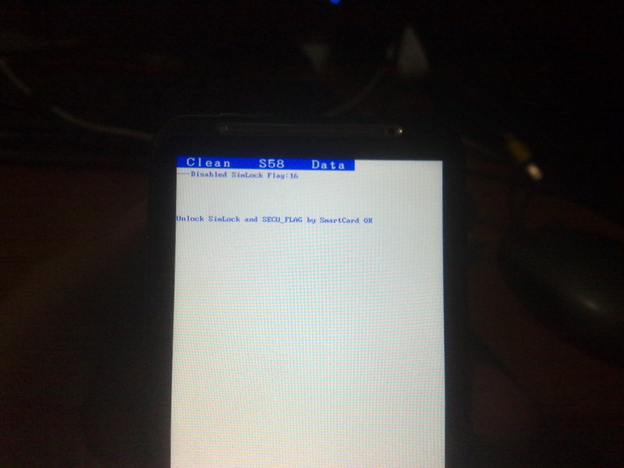
Then we sew Recovery again and go to step 2
2. What to take?
After getting access in the Root mode to the inside of the smartphone, we can completely clean it out. For example, having completely copied the / data / directory, we will receive, in fact, a complete copy of the user's system settings - accounts, programs, software settings, access points, and so on. It can simply be inserted into the phone of the same model with approximately the same OS version and get a clone of the device under attack.
And you can take only what is interesting, for example:
/data/system/accounts.db This is the SQlite database of your accounts, the trouble is that all the passwords in it are in clear text (Google does not consider this a problem, since accessing this section is a violation of the security of the device, not the OS), we put a program like sqlitebrowser on a PC (http://sourceforge.net/projects/sqlitebrowser/)
All your accounts with passwords in a readable form, take it and use it!
What we have more interesting?
Phonebook!
/data/data/com.android.providers.contacts/databases/contacts2.db Here we have the contacts and call history.
Dig further, sms -
/data/data/com.android.providers.telephony/databases/mmssms.db All the taste in the table Treads.
Well, you can just remove the pinlock and use the phone in normal mode, also through ADB -
adb shell # sqlite3 /data/data/com.android.providers.settings/databases/settings.db sqlite> update secure set value=65536 where name='lockscreen.password_type'; sqlite> .exit # exit adb reboot If sqlite3 is not in our recovery, then you need to download it separately and run it through ADB
3. How to defend?
- 1. Do not use Android
- 2. Do not take phones for which there is Root and S-OFF
- 3. Encrypt, encrypt and encrypt again
The first option is not an option - to those who do not use, Android’s security problems are not interesting, the second option does not give any guarantees - today isn’t, and tomorrow will be. How to use the third option, I told you.
Conclusion
Today we have examined several issues regarding the vulnerability of Android-based smartphones, some of which are also characteristic of tablets under this axis. With regard to the vulnerability of the hardware, allowing to change the identification data of the device - this is a problem of the vendor and operators, and they will have to look for ways to solve it, we, in turn, have to keep “informational hygiene”, know the dangers in person and measure protection efforts with the value of the protected data.
Everyone who mastered - thank you very much for your attention!
Source: https://habr.com/ru/post/160035/
All Articles