DIY aeromodelling. Thermal cutting technology of foam
How many of you have built a model airplane yourself? I will try to tell about this fascinating lesson in several articles and I will begin the cycle on applied aeromodelling.
In my first article I will talk about the well-known (at least, I first read about it in 1994 in one of the first technical books bought with my mother) the method of processing foam. Despite his age, he can help someone with prototyping bulk parts.
Why do you need it?
')
By itself, foam plastic in aeromodeling is rarely used: too fragile. However, forms made from it can serve as the basis for the manufacture of parts made of composite materials (the simplest example is papier-mâché), the simplicity of processing makes it extremely convenient for prototyping, and its low specific weight allows it to remain inside solid parts.
A small boring foreword about the quality of materials and unconventional solutions: fate brought me to study at the Hong Kong University of Science and Technology (HKUST) for a year; I didn’t realize the necessary tools to take from the house (and there are not enough different things everywhere), so I apologize for the decisions in the form of twists from a wire from a twisted pair and the like. For example, I do not have a single nut on hand.
For me, a linguist by training and a programmer in the last four years, aeromodelling has become an outlet in a series of monotonous training days.
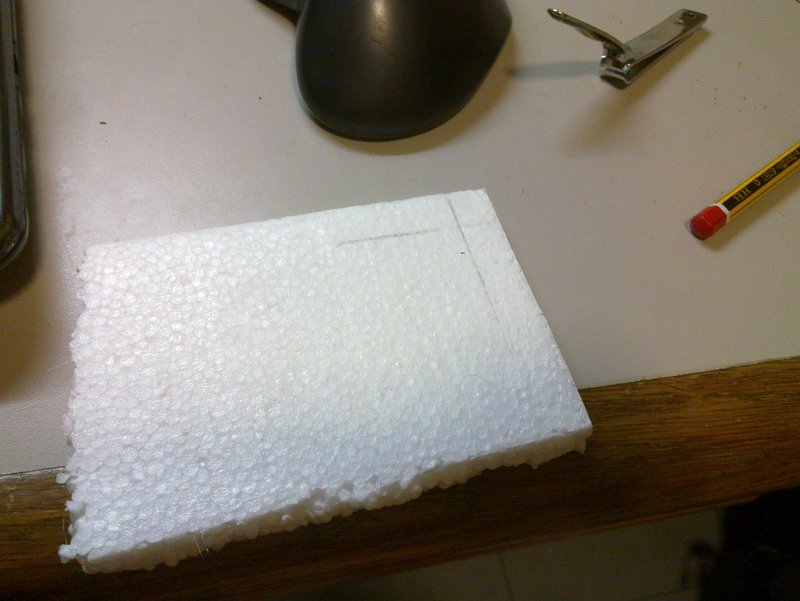
First of all, we need a blank from a piece of foam of appropriate dimensions.
I decided to take a thin plate to demonstrate the technology and cut something flat.
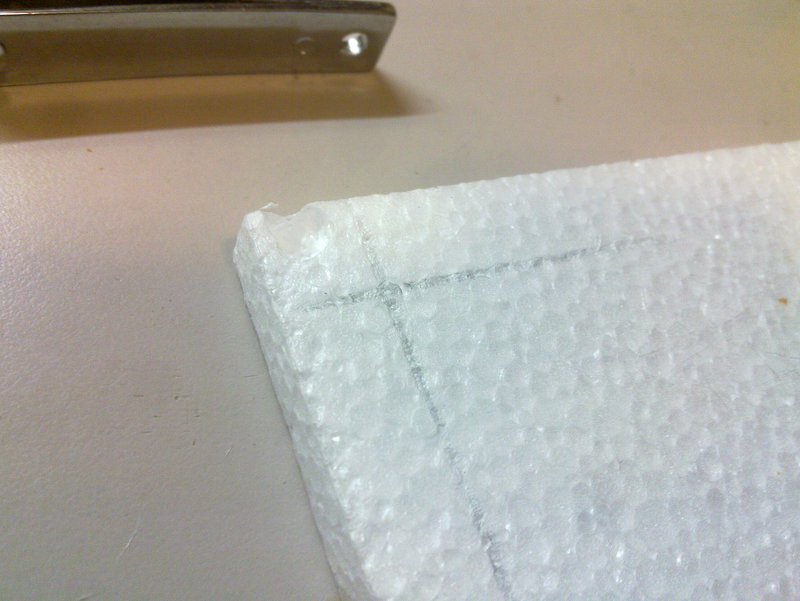
Cutting will be much more convenient if there is a gap between the template and the edge of the workpiece; I chose 10 mm.
The indentation must coincide on both sides if we want to get detail with right angles. For V-shaped wings you will need to shift one plane relative to another, but more on that later.
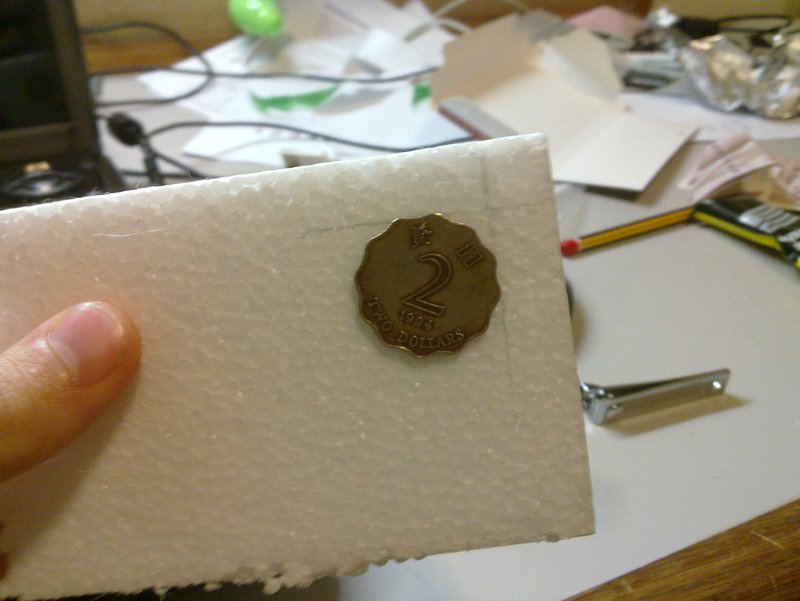
As a template for the first test, a coin of two Hong Kong dollars (2 HK $) was chosen.

Templates from two sides are glued to the workpiece.
Attention: acetone or toluene-containing adhesives (“Moment,” for example) dissolve polystyrene, leaving deep holes in the workpiece. In this case, it is necessary to wait about five minutes before it is almost completely dry before gluing, otherwise there is a risk to dissolve the workpiece!
Hot wire is used as a cutter. Remembering the advice from the book of the Soviet period, I went to a music store and bought a set of strings. For cutting the thinnest is used, the first.
Having estimated the existing power source, I measured a piece of string with resistance of 0.7 Ohm. The length seems sufficient.
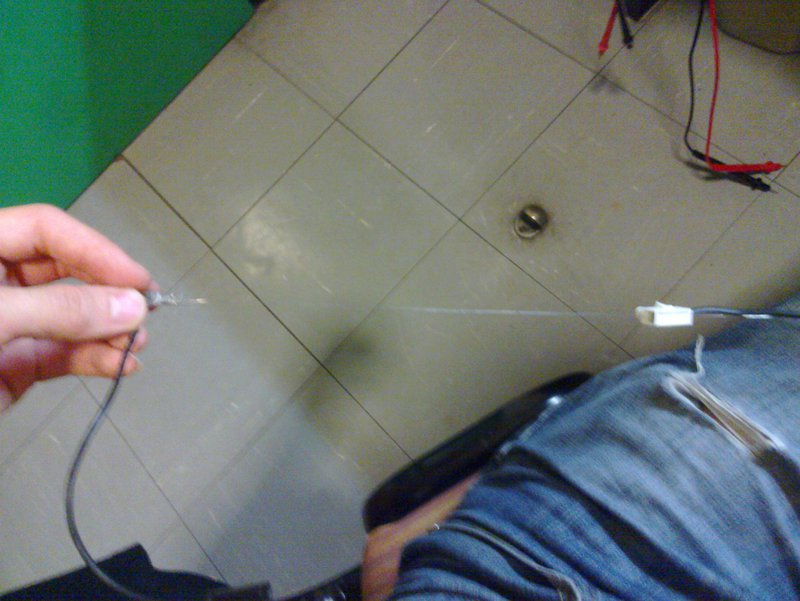
Build quality is terrible, but there was nothing more at hand. Wires and then had to take what horrible.
I use a transformer from a Denon shaggy receiver found in a garbage dump in the city (1970s, judging by its appearance) for power.

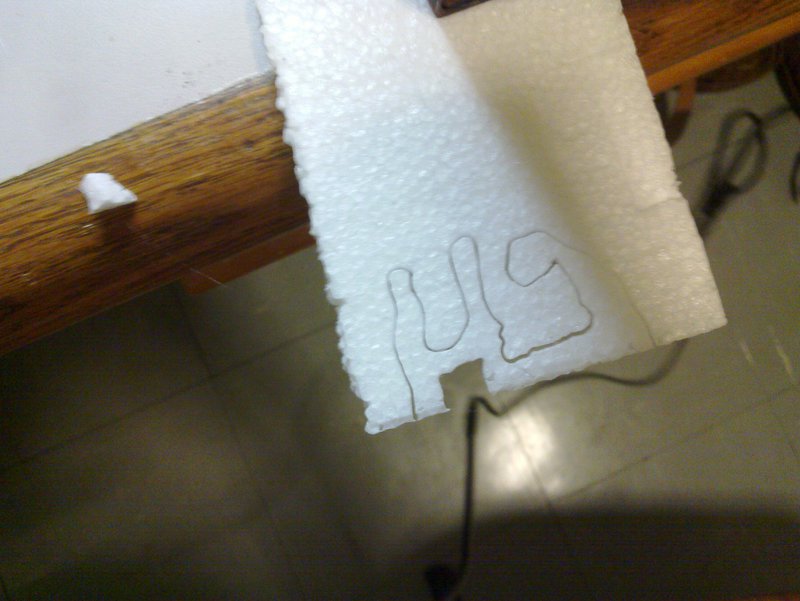
After a small adjustment of the length of the string, it was possible to achieve at the same time a small width of the cut (only one and a half times the thickness of the string. I remembered the programming past and wanted to cut out “Hello, Habr”, but failed. I left it as it is.
The width (~ 80 mm) of the blank is cut as well - apparently, the temperature is optimally selected for this source. The multimeter bought here has the function of measuring the temperature, but alas, the measuring bridge is incorrectly assembled in it: when the temperature rises, its readings fall, although initially it showed about +28 degrees - the room is now a little less. Based on the temperature difference, I assume that the temperature of the string is 120-130 degrees.

String easily (about 3-4 cm / sec) cuts the foam, leaving no large melted holes, almost does not burn cardboard.
There are two main techniques for working with this cutter.
In the first case, the workpiece is fixed, the master with both hands moves the ends of the string. This method is optimal for figures with a complex profile.
In the second case, the string is tensioned, and the master moves the workpiece relative to it. This method is more convenient for cutting at a strictly defined angle without a template.
As a result, I got a polyhedron in the shape of a coin:

In the next article I will try to tell you about the production of the wing's volumetric profile using this technology.
If something was not clear - ask, I will try to highlight.
See you!
In my first article I will talk about the well-known (at least, I first read about it in 1994 in one of the first technical books bought with my mother) the method of processing foam. Despite his age, he can help someone with prototyping bulk parts.
Why do you need it?
')
By itself, foam plastic in aeromodeling is rarely used: too fragile. However, forms made from it can serve as the basis for the manufacture of parts made of composite materials (the simplest example is papier-mâché), the simplicity of processing makes it extremely convenient for prototyping, and its low specific weight allows it to remain inside solid parts.
A small boring foreword about the quality of materials and unconventional solutions: fate brought me to study at the Hong Kong University of Science and Technology (HKUST) for a year; I didn’t realize the necessary tools to take from the house (and there are not enough different things everywhere), so I apologize for the decisions in the form of twists from a wire from a twisted pair and the like. For example, I do not have a single nut on hand.
For me, a linguist by training and a programmer in the last four years, aeromodelling has become an outlet in a series of monotonous training days.
Stocking
First of all, we need a blank from a piece of foam of appropriate dimensions.
I decided to take a thin plate to demonstrate the technology and cut something flat.
Cutting will be much more convenient if there is a gap between the template and the edge of the workpiece; I chose 10 mm.
The indentation must coincide on both sides if we want to get detail with right angles. For V-shaped wings you will need to shift one plane relative to another, but more on that later.
As a template for the first test, a coin of two Hong Kong dollars (2 HK $) was chosen.
Templates from two sides are glued to the workpiece.
Attention: acetone or toluene-containing adhesives (“Moment,” for example) dissolve polystyrene, leaving deep holes in the workpiece. In this case, it is necessary to wait about five minutes before it is almost completely dry before gluing, otherwise there is a risk to dissolve the workpiece!
Cutter
Hot wire is used as a cutter. Remembering the advice from the book of the Soviet period, I went to a music store and bought a set of strings. For cutting the thinnest is used, the first.
Having estimated the existing power source, I measured a piece of string with resistance of 0.7 Ohm. The length seems sufficient.
Build quality is terrible, but there was nothing more at hand. Wires and then had to take what horrible.
I use a transformer from a Denon shaggy receiver found in a garbage dump in the city (1970s, judging by its appearance) for power.
Test
After a small adjustment of the length of the string, it was possible to achieve at the same time a small width of the cut (only one and a half times the thickness of the string. I remembered the programming past and wanted to cut out “Hello, Habr”, but failed. I left it as it is.
The width (~ 80 mm) of the blank is cut as well - apparently, the temperature is optimally selected for this source. The multimeter bought here has the function of measuring the temperature, but alas, the measuring bridge is incorrectly assembled in it: when the temperature rises, its readings fall, although initially it showed about +28 degrees - the room is now a little less. Based on the temperature difference, I assume that the temperature of the string is 120-130 degrees.
String easily (about 3-4 cm / sec) cuts the foam, leaving no large melted holes, almost does not burn cardboard.
There are two main techniques for working with this cutter.
In the first case, the workpiece is fixed, the master with both hands moves the ends of the string. This method is optimal for figures with a complex profile.
In the second case, the string is tensioned, and the master moves the workpiece relative to it. This method is more convenient for cutting at a strictly defined angle without a template.
As a result, I got a polyhedron in the shape of a coin:
In the next article I will try to tell you about the production of the wing's volumetric profile using this technology.
If something was not clear - ask, I will try to highlight.
See you!
Source: https://habr.com/ru/post/156467/
All Articles