Installation and initial configuration of Check Point R75
Check Point Software Technologies is one of the world leaders in the field of Internet security. Check Point firewalls are used in many banking institutions. Unfortunately, there is practically no information on the configuration of these devices on the web. Let's try to fill this gap.
The operation of any firewall is based on blocking (deny) or allowing (permit) traffic based on predefined rules. Check Point uses the following technologies to delimit traffic:
')
Messages in the network are divided into packets, which describe the destination IP address and, in fact, the data itself. Packages are transmitted alternately and often along different routes. When the packets reach the destination address, they are formed into clear messages to the upstream protocols.
Packet filtering is the main function of any firewall, operating on 3 (network) and 4 (transport) levels of the OSI model. In general, a typical firewall rule includes the following elements:
Packet filtering is the most primitive function of a firewall, since the data itself is not analyzed.
Checking the connection status - a technology developed and patented by CheckPoint, additionally includes viewing package data at level 4, and not just reading the information from the header. During the work, a table of compounds is compiled for analyzing current connections. The connection table is used to collect the information necessary to inspect packages correctly. For example, checking the connection status provides protection against port scanning by blocking all ports until required is requested.
Intelligent Application Analysis is a set of additional functions integrated into a firewall and intrusion prevention system (IPS) that can detect and prevent network attacks at the highest levels of the OSI model.
CheckPoint Firewall can work on operating systems: Windows, Solaris, SPLAT, IPSO, GAiA.
SPLAT - OS based on RedHat Linux;
IPSO - OS installed on Nokia firewalls, a division of which was purchased by CheckPoint;
GAiA is a new OS combining the capabilities of SPLAT and IPSO.
Consider installing a firewall on the OS SPLAT.
After booting from cdrom, we see a greeting, which tells us that if enikey is not pressed within 90 seconds, the installation will stop. We press eniky, we pass to the following window.

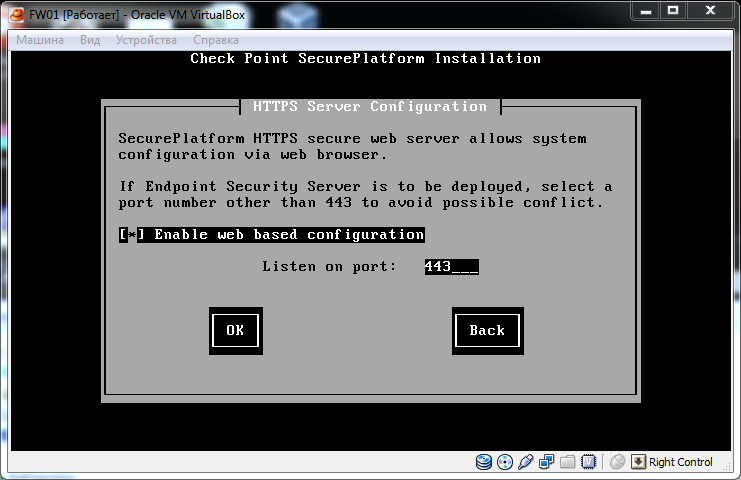
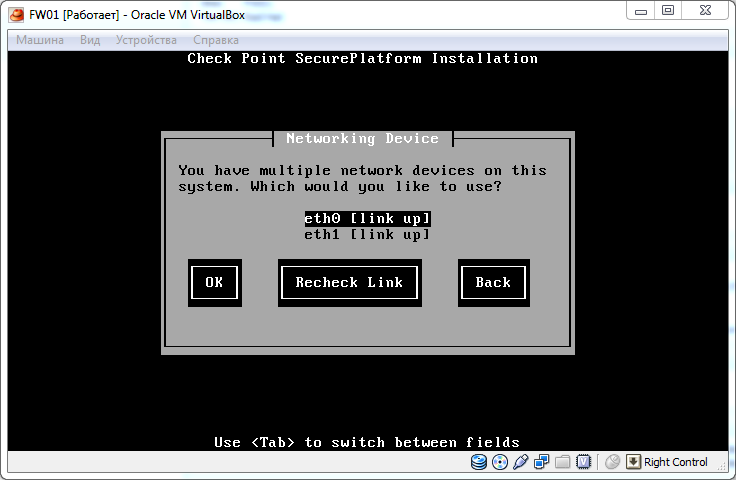
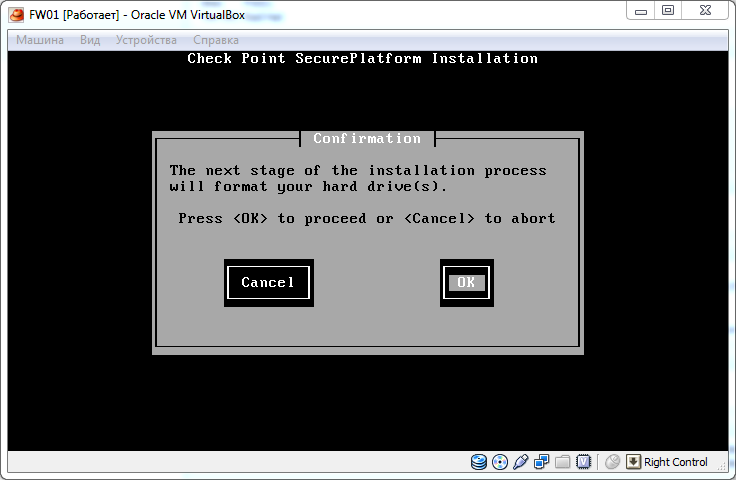
Below are screenshots of the installation process. Comments are superfluous.


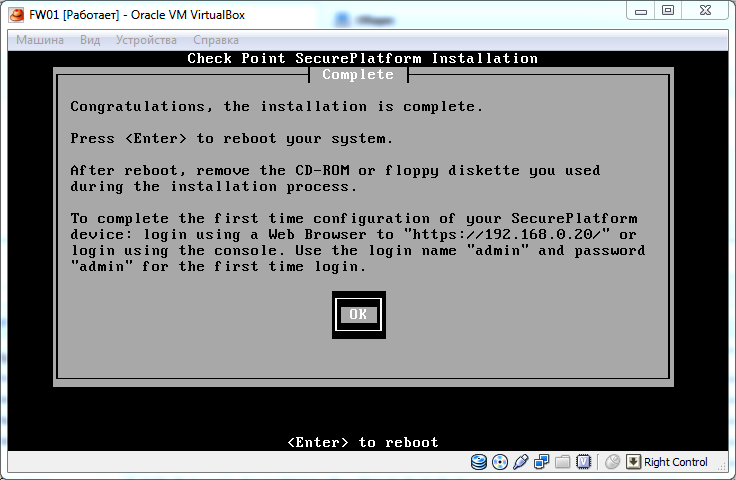
This completes the main part of the installation. By default, when installing the username admin , password admin .
After the reboot, you will be prompted to change the login and password:

cpconfig is a utility used to fine tune the operating system. If there is no DHCP server on the network, then you must manually enter the IP addresses. Run cpconfig , press N.
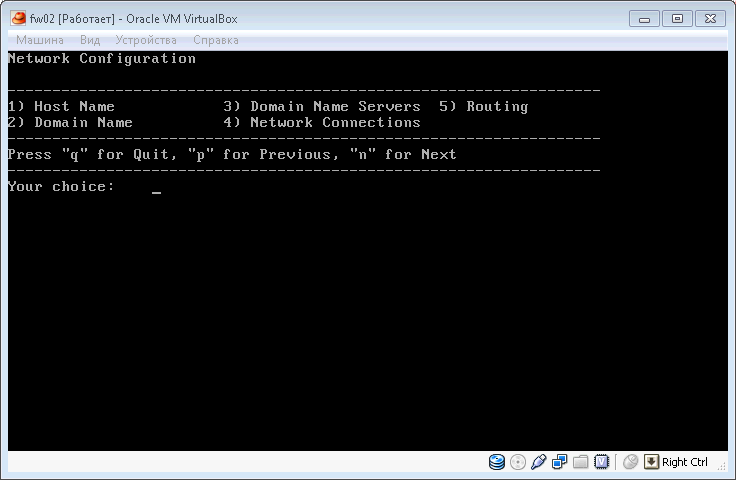
Select item 4: Network Connections , then Configure Connections , configure interface ip-addresses.
Next, we need to configure the required functionality of the modules. To do this, go to the web interface at the above address using the https protocol, enter your credentials and get into the installation wizard. We click Next, we get to the window where you can edit the configuration of additional network adapters. The next item is the default route configuration, further description of DNS servers, domain name, time settings, setting up management capabilities via telnet / ssh.
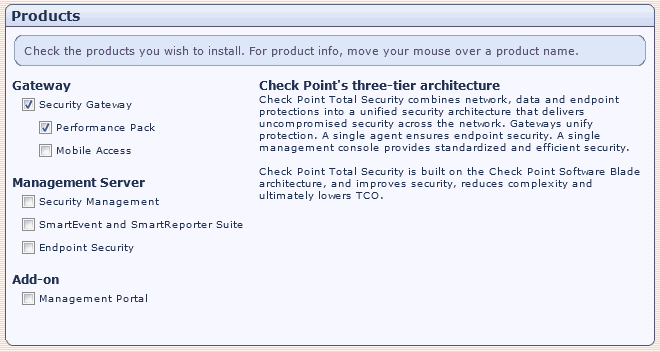
The next item is the choice of products to install.
The CheckPoint firewall consists of two main parts: the management module (Management Server) and, in fact, the firewall itself (Gateway). These parts, in turn, are also divided by functionality, as can be seen in the figure. Ideally, each product should be installed on a separate server. We will get closer to the ideal and install the Security Gateway along with the Performance Pack on one server, and the Management Server with the Security Management module on the other.
We put daws, click Next twice.
Next, you must enter the initialization key for the SIC (Secure Internal Communication) protocol. The SIC protocol is used for communication between the management server and CheckPoint modules, we will need it in the future. Enter any sequence of characters twice and click Next. Tofinish installing products click Finish.

Everything, installation process was completed.
Similarly, you must install the Management Server management module.
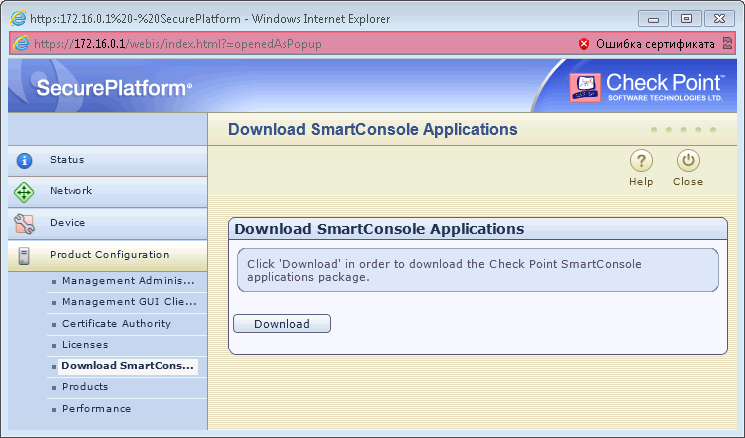
To connect to the management server, a client is required, which can be downloaded from the north via a web interface. The client is in the Product Configuration group, then Download SmartConsole.
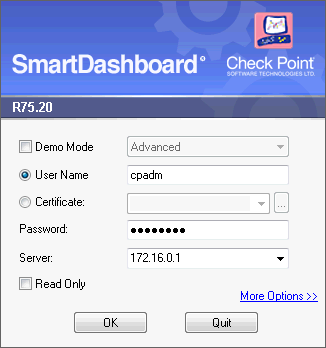
After downloading the client must be installed. All ticks leave default. The basic settings of the firewall are made through the SmartDashboard client.
In our laboratory work the following topology will be used:
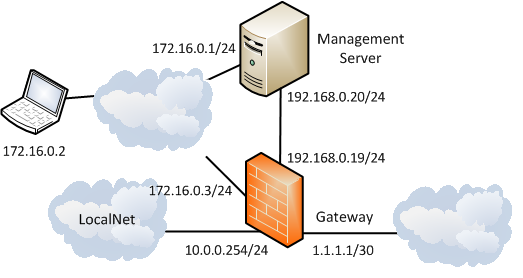
Networks:
192.168.0.0/24 - network for interaction between the control module and the firewall;
172.16.0.0/24 - a network for managing devices over ssh / web;
10.0.0.0/24 - the internal network of the enterprise;
1.1.1.1/30 - interface on the Internet.
After connecting to the management server in the Network Objects tree there is only the management server itself, in my case its name is FWM.
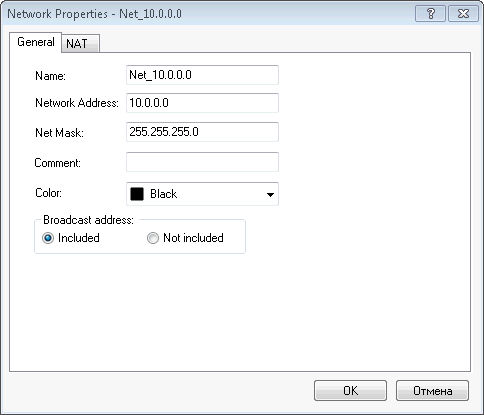
We describe the internal network of our firewall, we need them in the future. In the Network Objects section, right-click on the Networks item and add the network. This must be done with all networks except the external one.
To manage firewalls, you need to add them to the management server.
To do this, right-click on the Network Objects item, then Security Management / Gateway, select Classic Mode mode.
Fill in the items Name, IP address.
To establish a trust connection, you need the SIC push key, which we inserted when installing the firewall module. If for some reason you have forgotten the key, you can interrupt it via the web interface (Product Configuration -> SIC).
Press the Communication button and enter the key, then press the Initialize button. Connection established.
Now you can read the configuration of the firewall automatically. Click the Get button to read the version and the firewall software. In the Network Security tab, put one tick Firewall. It'll be enough.

Go to the item Topology in the left column. Click the Get button to read the topology.
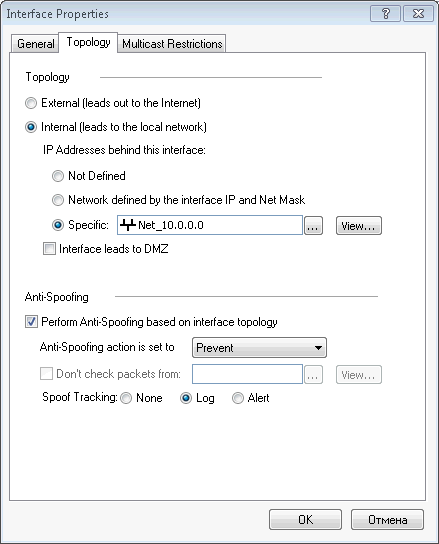
To use the anti-spoofing function (protection against ip address spoofing), you must specify the type of interface: external or internal and define networks that can work through this interface. Select the interface and click the Edit button.
In the Topology tab, we specify the type of interface and determine the network that will work through it. You can also specify a previously created group of networks or hosts.
Click Ok twice. Firewall added.
Now create a few rules. First, add a clean-up rule to ban everything. In the main menu, select the Rules item, then Add rule, Below. The column Action is changed to drop (reject). When you select drop, the packet is dropped (eaten), the sender does not know about it, and if you select reject, the packet is discarded, the sender is notified.
All incomprehensible items are left by default. At the initial training stage, the Source, Destination, and Service columns are adequate.
After creating the rules, they must be installed on firewalls. In the main menu, select the item Policy, then Install Policy.
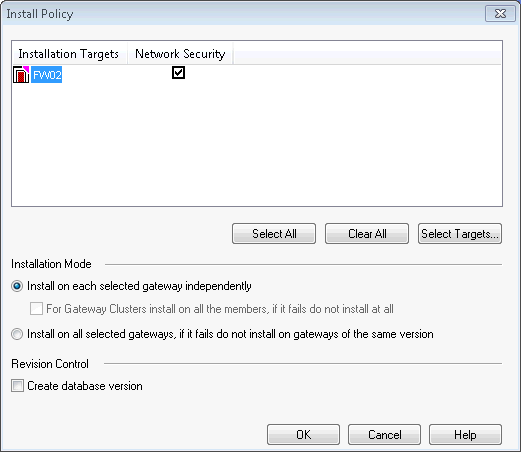
Press the Ok button to start the installation.
On this major note we complete our laboratory work. If the topic of CheckPoint settings will be relevant for a respected community, I will continue to publish posts about setting up a firewall.
Network traffic control mechanisms
The operation of any firewall is based on blocking (deny) or allowing (permit) traffic based on predefined rules. Check Point uses the following technologies to delimit traffic:
- packet filtering;
- stateful inspection;
- Application Intelligence.
')
Packet filtering
Messages in the network are divided into packets, which describe the destination IP address and, in fact, the data itself. Packages are transmitted alternately and often along different routes. When the packets reach the destination address, they are formed into clear messages to the upstream protocols.
Packet filtering is the main function of any firewall, operating on 3 (network) and 4 (transport) levels of the OSI model. In general, a typical firewall rule includes the following elements:
- ip source address;
- ip address of the recipient (destination address);
- source port;
- receiver port (destanation port);
- protocol.
Packet filtering is the most primitive function of a firewall, since the data itself is not analyzed.
Check connection status
Checking the connection status - a technology developed and patented by CheckPoint, additionally includes viewing package data at level 4, and not just reading the information from the header. During the work, a table of compounds is compiled for analyzing current connections. The connection table is used to collect the information necessary to inspect packages correctly. For example, checking the connection status provides protection against port scanning by blocking all ports until required is requested.
Intelligent Application Analysis
Intelligent Application Analysis is a set of additional functions integrated into a firewall and intrusion prevention system (IPS) that can detect and prevent network attacks at the highest levels of the OSI model.
Installing CheckPoint Modules
CheckPoint Firewall can work on operating systems: Windows, Solaris, SPLAT, IPSO, GAiA.
SPLAT - OS based on RedHat Linux;
IPSO - OS installed on Nokia firewalls, a division of which was purchased by CheckPoint;
GAiA is a new OS combining the capabilities of SPLAT and IPSO.
Consider installing a firewall on the OS SPLAT.
After booting from cdrom, we see a greeting, which tells us that if enikey is not pressed within 90 seconds, the installation will stop. We press eniky, we pass to the following window.
Below are screenshots of the installation process. Comments are superfluous.
This completes the main part of the installation. By default, when installing the username admin , password admin .
After the reboot, you will be prompted to change the login and password:
cpconfig is a utility used to fine tune the operating system. If there is no DHCP server on the network, then you must manually enter the IP addresses. Run cpconfig , press N.
Select item 4: Network Connections , then Configure Connections , configure interface ip-addresses.
Next, we need to configure the required functionality of the modules. To do this, go to the web interface at the above address using the https protocol, enter your credentials and get into the installation wizard. We click Next, we get to the window where you can edit the configuration of additional network adapters. The next item is the default route configuration, further description of DNS servers, domain name, time settings, setting up management capabilities via telnet / ssh.
The next item is the choice of products to install.
The CheckPoint firewall consists of two main parts: the management module (Management Server) and, in fact, the firewall itself (Gateway). These parts, in turn, are also divided by functionality, as can be seen in the figure. Ideally, each product should be installed on a separate server. We will get closer to the ideal and install the Security Gateway along with the Performance Pack on one server, and the Management Server with the Security Management module on the other.
We put daws, click Next twice.
Next, you must enter the initialization key for the SIC (Secure Internal Communication) protocol. The SIC protocol is used for communication between the management server and CheckPoint modules, we will need it in the future. Enter any sequence of characters twice and click Next. To
Everything, installation process was completed.
Similarly, you must install the Management Server management module.
Connecting to the management server
To connect to the management server, a client is required, which can be downloaded from the north via a web interface. The client is in the Product Configuration group, then Download SmartConsole.
After downloading the client must be installed. All ticks leave default. The basic settings of the firewall are made through the SmartDashboard client.
Configuring Check Point Modules
In our laboratory work the following topology will be used:
Networks:
192.168.0.0/24 - network for interaction between the control module and the firewall;
172.16.0.0/24 - a network for managing devices over ssh / web;
10.0.0.0/24 - the internal network of the enterprise;
1.1.1.1/30 - interface on the Internet.
After connecting to the management server in the Network Objects tree there is only the management server itself, in my case its name is FWM.
We describe the internal network of our firewall, we need them in the future. In the Network Objects section, right-click on the Networks item and add the network. This must be done with all networks except the external one.
To manage firewalls, you need to add them to the management server.
To do this, right-click on the Network Objects item, then Security Management / Gateway, select Classic Mode mode.
Fill in the items Name, IP address.
To establish a trust connection, you need the SIC push key, which we inserted when installing the firewall module. If for some reason you have forgotten the key, you can interrupt it via the web interface (Product Configuration -> SIC).
Press the Communication button and enter the key, then press the Initialize button. Connection established.
Now you can read the configuration of the firewall automatically. Click the Get button to read the version and the firewall software. In the Network Security tab, put one tick Firewall. It'll be enough.
Go to the item Topology in the left column. Click the Get button to read the topology.
To use the anti-spoofing function (protection against ip address spoofing), you must specify the type of interface: external or internal and define networks that can work through this interface. Select the interface and click the Edit button.
In the Topology tab, we specify the type of interface and determine the network that will work through it. You can also specify a previously created group of networks or hosts.
Click Ok twice. Firewall added.
Now create a few rules. First, add a clean-up rule to ban everything. In the main menu, select the Rules item, then Add rule, Below. The column Action is changed to drop (reject). When you select drop, the packet is dropped (eaten), the sender does not know about it, and if you select reject, the packet is discarded, the sender is notified.
All incomprehensible items are left by default. At the initial training stage, the Source, Destination, and Service columns are adequate.
After creating the rules, they must be installed on firewalls. In the main menu, select the item Policy, then Install Policy.
Press the Ok button to start the installation.
On this major note we complete our laboratory work. If the topic of CheckPoint settings will be relevant for a respected community, I will continue to publish posts about setting up a firewall.
Source: https://habr.com/ru/post/156207/
All Articles