VPN for iPhone
Organization of a VPN server for use with iOS devices
After reading the article Warm and Lamp Internet has preoccupied with the problem of raising the VPN server, which can be used with iOS devices.
To use OpenVPN you need Jailbreak. This option was not considered by me.
')
iOS supports L2TP, PPTP, Cisco IPSec.
Cisco IPSec works with the appropriate hardware. PPTP is sometimes cut by cellular operators. Based on this, L2TP was chosen.
I already had a VQ7 server from Hetzner with Ubuntu 12.04 32 bit installed, so all experiments were performed on this server.
IPSec installation
OpenSwan installed
sudo aptitude install openswan During installation, you are prompted to create an x509 certificate. This is not necessary, as access will be used for the key phrase.
IPSec configuration:
sudo nano /etc/ipsec.conf The configuration is as follows:
version 2.0 config setup nat_traversal=yes # NAT virtual_private=%v4:10.0.0.0/8,%v4:192.168.0.0/16,%v4:172.16.0.0/12 oe=off protostack=netkey conn L2TP-PSK-NAT rightsubnet=vhost:%priv also=L2TP-PSK-noNAT conn L2TP-PSK-noNAT authby=secret pfs=no auto=add keyingtries=3 rekey=no ikelifetime=8h keylife=1h type=transport left=YOUR.SERVER.IP.ADDRESS leftprotoport=17/1701 right=%any rightprotoport=17/%any Configuring access to the server using IPSec:
sudo nano /etc/ipsec.secrets The file should contain one line:
YOUR.SERVER.IP.ADDRESS %any: PSK "YourSharedSecret" The reference to the pre-shared key must be removed , otherwise IPSec will not be able to initialize.
YOUR.SERVER.IP.ADDRESS in both files is the IP address of your server.
% any in /etc/ipsec.secrets determines which addresses can be accessed from. In this case, access from all addresses is allowed.
YourSharedSecret is the key that will be used for IPSec access.
In order for IPSec to work properly, additional settings are made:
sudo nano /root/ipsec Content:
iptables --table nat --append POSTROUTING --jump MASQUERADE echo 1 > /proc/sys/net/ipv4/ip_forward for each in /proc/sys/net/ipv4/conf/* do echo 0 > $each/accept_redirects echo 0 > $each/send_redirects done /etc/init.d/ipsec restart The first two lines are actually used for L2TP
Making the script executable:
sudo chmod +x /root/ipsec Add it to rc.local
Install L2TP:
Installs xl2tpd:
sudo aptitude install xl2tpd L2TP setup:
sudo nano /etc/xl2tpd/xl2tpd.conf Content:
[global] ipsec saref = yes [lns default] ip range = 10.1.2.2-10.1.2.255 local ip = 10.1.2.1 refuse chap = yes refuse pap = yes require authentication = yes # , IPSec ppp debug = yes pppoptfile = /etc/ppp/options.xl2tpd length bit = yes Additional settings:
sudo nano /etc/ppp/options.xl2tpd Content:
require-mschap-v2 ms-dns 8.8.8.8 # DNS Google ms-dns 8.8.4.4 # DNS Google asyncmap 0 auth crtscts lock hide-password modem debug name l2tpd # , proxyarp lcp-echo-interval 30 lcp-echo-failure 4 Add users:
sudo nano /etc/ppp/chap-secrets File format
# user server password ip test l2tpd testpassword * test - username
l2tpd - service name from /etc/ppp/options.xl2tpd
testpassword - password for user
* - the range of allowed addresses for the user login (format 10.254.253.128/25)
After this, restarting IPSec and L2TPD should activate the entire system:
sudo /etc/init.d/ipsec restart sudo /etc/init.d/xl2tpd restart IPhone setup:
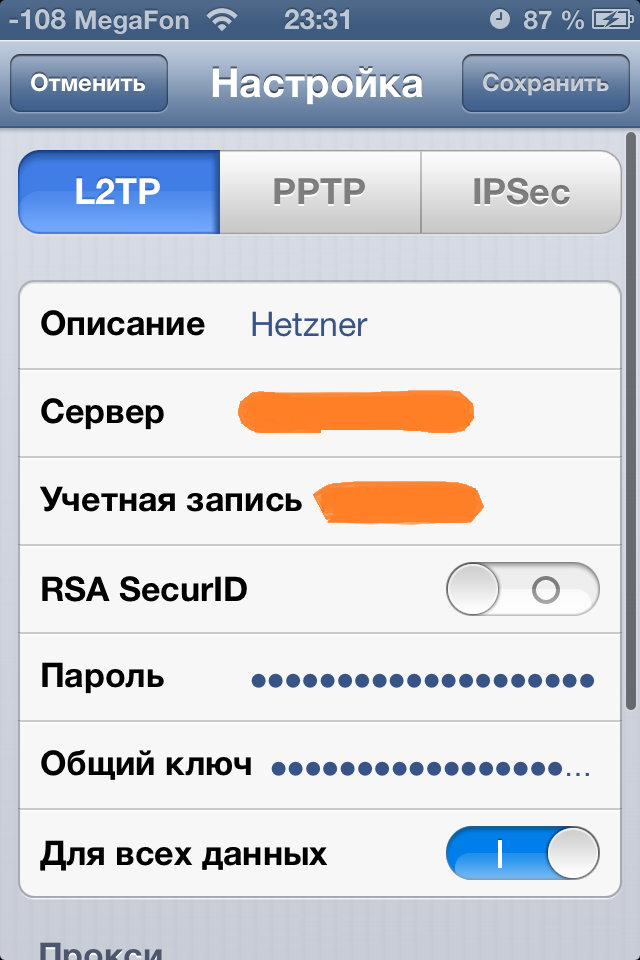
Settings> General> VPN> Add VPN configuration.

Description - Connection Name
Server - the IP address of your server
The account is user from the / etc / ppp / chap-secrets file
Password - password from / etc / ppp / chap-secrets
Shared Key - YourSharedSecret from /etc/ipsec.secrets
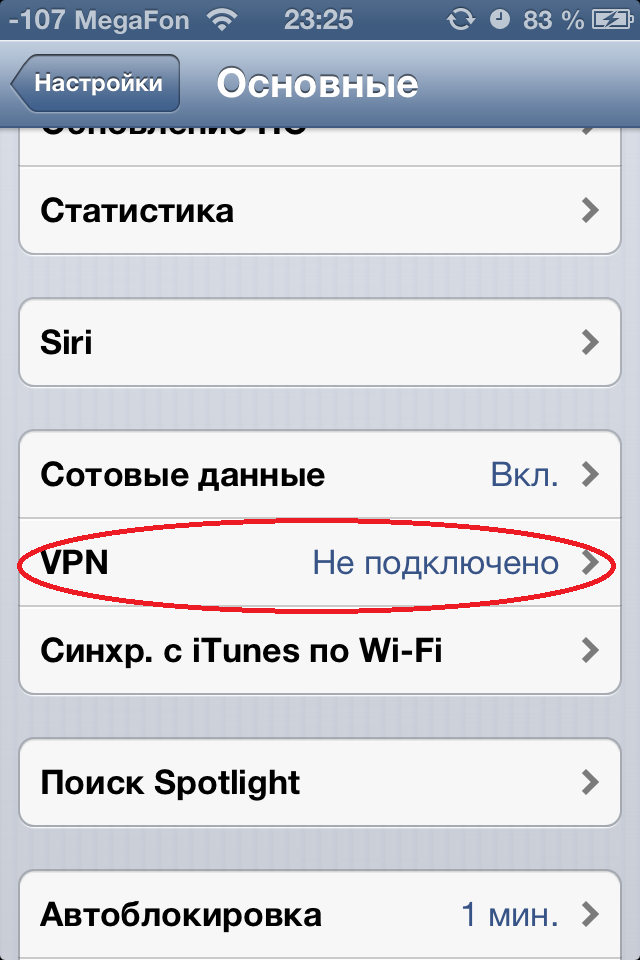
After that, in the Settings menu and in the Settings> General> VPN menu, you can enable VPN. If all goes well, the corresponding icon will appear.


VPN will need to be turned on manually with each use.
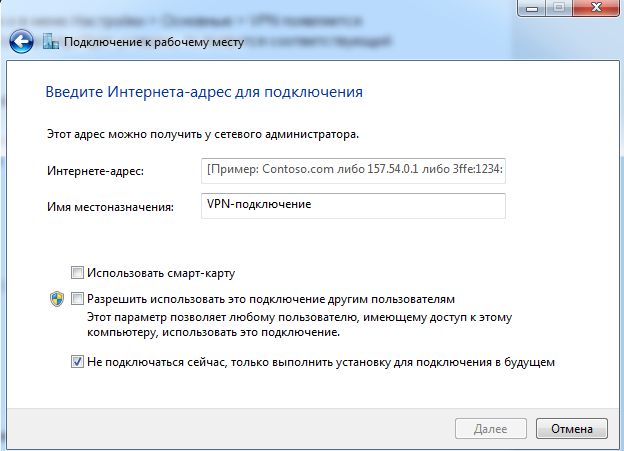
Setting up a connection in Windows 7
In the Network and Sharing Center, installing a new network connection, creating a new connection:
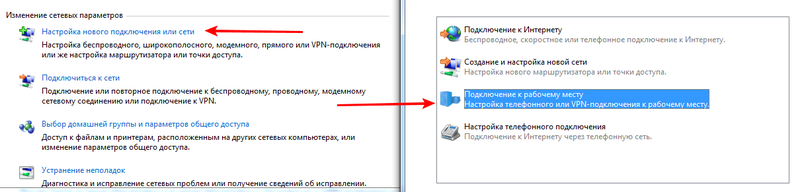
Create a new VPN connection:
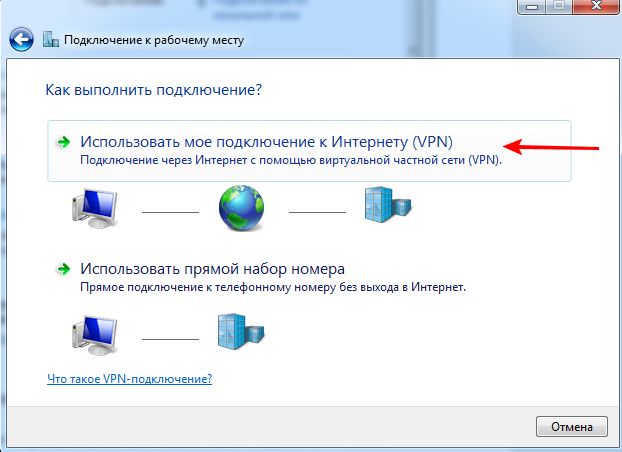
In the field “Internet address” enter the IP of your server. Do not connect immediately.
After that, go to the properties of the new connection and in the settings specify the use of L2TP, enter the key YourSharedSecret from /etc/ipsec.secrets

When connecting, specify the login and password from / etc / ppp / chap-secrets.
When writing the article were used materials link1 , link2
Source: https://habr.com/ru/post/155929/
All Articles