Introduction to working with AppHarbor - a cloud for ASP.NET applications
 Each of you probably wants to see your application on the Internet. How many times have we asked Google, Yandex, Bing and others: “Free ASP.NET hosting”. Sometimes in order to show a prototype to a potential client, discuss the project or just boast to the girl, they say, that's what I did. Often you need to find a hosting service for this, but it requires a certain amount of time, effort and money. The alternative is simple - put the application "cloud". And to make it really easier than it seems. There is such a wonderful service AppHarbor . You can place your ASP.NET applications on it, connect the database, search, cache and much more, see the list here . This is done, as you will see, quite simple and does not require any special knowledge, i.e. AppHarbor assumes the entire load on the work of hardware and software for the operation of your site. By the way, about the free. I was a little deceiving, this is all happiness for free, but only until a certain moment of maximum growth of your project, and if you want to use some kind of paid add-ons. Those. You will post the prototype, but if you need hosting for a large project you will have to fork out, but I think by that time you will already have a clearer vision of the development of your project. If you still like it, please see the prices . For me, AppHarbor is a testing ground, but the more I use it, the more I like it.
And so we start
AppHarbor’s address is as surprising as appharbor.com . Click Sign up and register, confirm email and do other formalities.
')

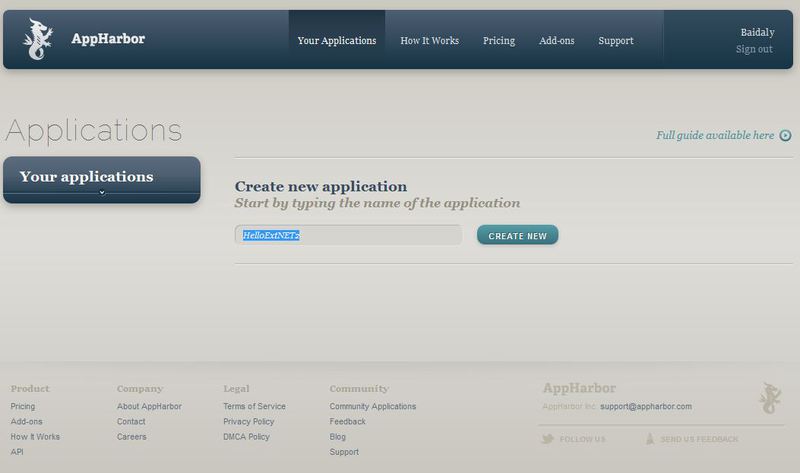
After all these actions we have an account and we can log in and start working. Enter the name of the application, in this case, let it be HelloExtNET2 and click “Create New”.
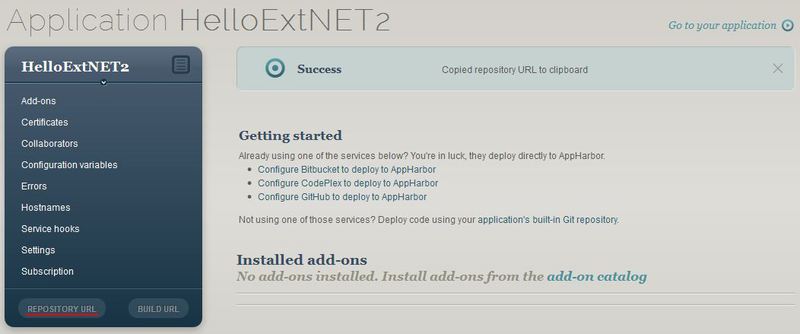
And we will see the management page for our newly created application.

How is AppHarbor arranged read here .
First of all, we will just need to upload our application source code. Note that you do not need to flood the assembly of your project. AppHarbor will collect, test and flood your application, you can also upload several versions. But in order to do this, we need Git.
I will not go into all the details of version control systems and Git in particular. You can download it from here , and read in detail here . If you are not at all familiar with version control systems, then read to start here.
From now on, I mean that you only have a naked Git. We are not interested in any graphical interfaces now, which of course does not prohibit them to be installed and considered.
Open the command prompt (Win + R -> cmd) and go to the directory of our project. ( By the way, I had one rather curious case after which I never called directories folders. When I asked my instructor on “Operating Systems”, something about the properties of a folder in Linux. And I heard the following speech: “Word Folder never Do not use! Only if you speak with illiterate aunts or small children. A competent specialist should use such words as a directory and a directory from an English directory - directory, pointer. And once again, I will hear that you call the directory a folder, I can not vouch for myself! " Everything it was with sprinkling saliva, raising the voice, blood pressure and eyes bulging, and I and the whole group remembered this lesson for a long time )
Then, initialize the repository in our directory:
git init git add . And then we commit to the repository: git commit –m “First commit” .
Since Git is a decentralized system, this data is currently stored only in yours. Those. they are now not on any server, but only at your place. Those. if your hard drive breaks right now, your project will disappear. But do not despair, because there are so many places (GitHub, CodePlex, your local working server with Git) where you can upload your project. But at the moment with Git we will post our project on AppHarbor.
On the page with our application there is a Repository URL button. When you click on it, the path to the repository for your project is copied to your buffer.
The following command will add a remote node to your repository:
git remote add appharbor <, > Run the command to list the remote repositories:
git remote -v You should display two lines, like these:
appharbor Baidaly@appharbor.com/helloextnet2.git (fetch)
appharbor Baidaly@appharbor.com/helloextnet2.git (push)
Finally, send our project to AppHarbor:
git push appharbor master 
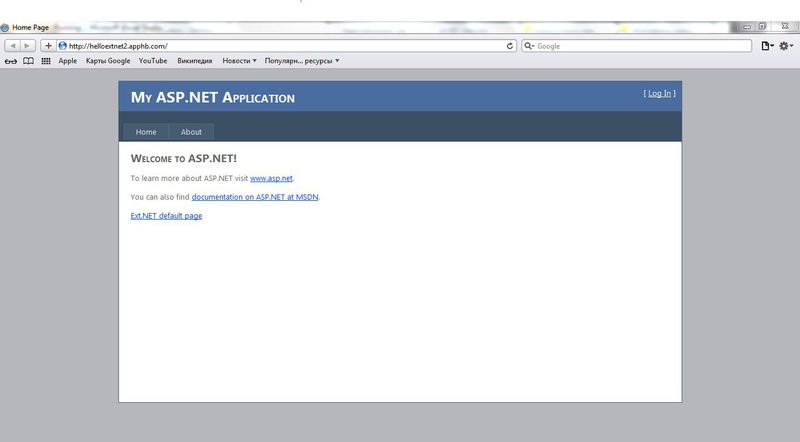
And now we can look at our application. To do this in AppHarbor, on the page of our application, click on the link Go to your application:

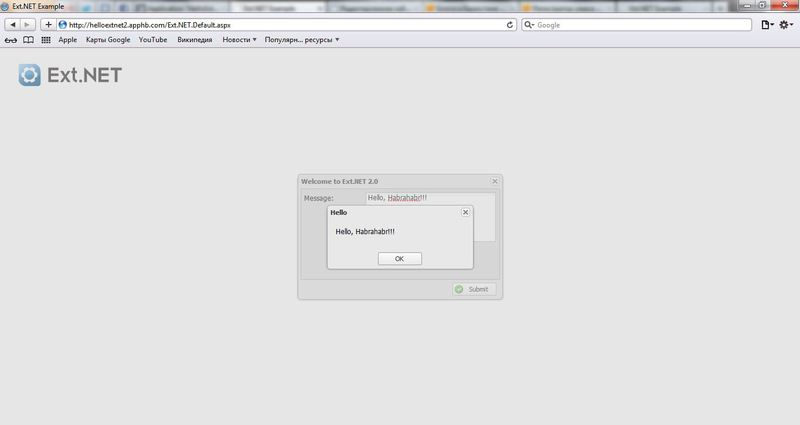
And we will see our application, but the default is not a page with an Ext.NET window, but a template ASP.NET page. If we click on the “Ext.NET default page”. And now we will see approximately the same page that was created in the first Ext.NET lesson .
Link to the repository in github
Link to the project itself on AppHarbor
Enjoy reading!
Source: https://habr.com/ru/post/154133/
All Articles