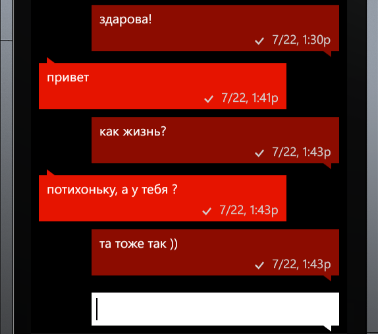
Message Hub style message list
If you have already developed applications for Windows Phone 7, you may have already noticed the absence of some controls, such as Hub Tile, a grouped list, or a list of messages. Some of them can be found in the Silverlight Toolkit for Windows Phone library. But what to do when we need to create an application similar to the standard Message Hub? The main problem is that in standard LisBox, elements are placed from top to bottom, while in the message hub - the opposite.
I want to demonstrate one of the solutions to this problem. We need only the standard ListBox control, the System.Windows.Interaction library from the Blend SDK, and some knowledge of the transformation of visual components.
So. As I said, the standard ListBox places its elements in the VirtualizingStackPanel from top to bottom. Writing your VirtualizingStackPanel, which will place elements from bottom to top, can take a very long time. In addition, the standard VirtualizingStackPanel already contains the logic of virtualization, which solves the problem of consuming huge amounts of memory. All we need is to turn the ListBox upside down, so that the new elements are placed below. To do this, use the ScaleTransform:
')
Now our ListBox is upside down, but left up. In order to return it to its place, you need to specify the center of transformation. In our case, this is the middle of the vertical, ie:
As you can see, the elements of our ListBox are also inverted. In order to return them to the normal position, we will use the same method that we used for the entire list.
MVVM fans can look like an extra code in .xaml.cs files. I usually write all the additional logic in Behavior's from the System.Windows.Interaction library. To do this, create a class MirrorBehavior with the code:
It remains only to apply it to our controls:
This solution is good because it uses standard styles and built-in virtualization.
I want to demonstrate one of the solutions to this problem. We need only the standard ListBox control, the System.Windows.Interaction library from the Blend SDK, and some knowledge of the transformation of visual components.
So. As I said, the standard ListBox places its elements in the VirtualizingStackPanel from top to bottom. Writing your VirtualizingStackPanel, which will place elements from bottom to top, can take a very long time. In addition, the standard VirtualizingStackPanel already contains the logic of virtualization, which solves the problem of consuming huge amounts of memory. All we need is to turn the ListBox upside down, so that the new elements are placed below. To do this, use the ScaleTransform:
')
<ListBox> <ListBox.RenderTransform> <ScaleTransform ScaleX="1" ScaleY="-1"> </ListBox.RenderTransform> </ListBox> Now our ListBox is upside down, but left up. In order to return it to its place, you need to specify the center of transformation. In our case, this is the middle of the vertical, ie:
_scaleTransform.CenterY = ListBox.ActualHeight / 2; As you can see, the elements of our ListBox are also inverted. In order to return them to the normal position, we will use the same method that we used for the entire list.
MVVM fans can look like an extra code in .xaml.cs files. I usually write all the additional logic in Behavior's from the System.Windows.Interaction library. To do this, create a class MirrorBehavior with the code:
public class MirrorBehavior : Behavior<Control> { private readonly ScaleTransform _transform = new ScaleTransform(); public MirrorBehavior() { _transform.ScaleX = 1; _transform.ScaleY = -1; } protected override void OnAttached() { UpdateCenter(); AssociatedObject.SizeChanged += AssociatedObject_SizeChanged; AssociatedObject.RenderTransform = _transform; } protected override void OnDetaching() { AssociatedObject.RenderTransform = null; AssociatedObject.SizeChanged -= AssociatedObject_SizeChanged; ResetCenter(); } private void AssociatedObject_SizeChanged(object sender, SizeChangedEventArgs e) { UpdateCenter(); } private void UpdateCenter() { _transform.CenterY = AssociatedObject.ActualHeight / 2; } private void ResetCenter() { _transform.CenterY = 0; } } It remains only to apply it to our controls:
<ListBox ItemsSource="{Binding Messages}"> <i:Interaction.Behaviors> <Interactivity:MirrorBehavior /> </i:Interaction.Behaviors> <ListBox.ItemTemplate> <DataTemplate> <ContentControl HorizontalContentAlignment="Stretch" VerticalContentAlignment="Stretch" ContentTemplate="{StaticResource MessageTemplate}" Content="{Binding}"> <i:Interaction.Behaviors> <Interactivity:MirrorBehavior /> </i:Interaction.Behaviors> </ContentControl> </DataTemplate> </ListBox.ItemTemplate> </ListBox> This solution is good because it uses standard styles and built-in virtualization.
Source: https://habr.com/ru/post/153917/
All Articles