LEGO laptop docking station
 My first laptop was warming better than the heater, because I was trying to blow hot air directly into the table, to which there was a couple millimeters of force. It was a pity for special coasters of money, but an unjustly abandoned box with a bunch of LEGO Technic details was gathering dust in the closet, from which a frame was assembled with four wheels instead of legs in the corners.
It soon became clear that typing on an elevated laptop keyboard was inconvenient, so an external one was bought, and a mouse for her was bought. The wires were tangled, and the laptop was often taken to the university, and every time I returned home I stuck two wires into it.
Then I had an external hard drive for backups, which had little power from a single USB port, and there was no fourth free laptop. This problem was solved by a USB hub with external power, but the wired hell at the workplace became unbearable. Then I decided to take the matter more seriously and took out the box a second time.
')
The design turned out so successful that in five years with minor modifications I traveled four apartments with me and carried the third laptop. Photos and brief description under the cut.
Frame

This is what a docking station looks like without a filling. The laptop legs gently fit into the grooves in the wheels. Due to the fact that they are rubber, the clutch is almost perfect (which cannot be said about the clutch of the docking station itself with the table, but this does not cause any inconvenience). The fourth wheel is defective, because the new laptop in this place strongly sticks out the battery.
Numbers in the photo indicate places for:
- USB hub with external power (it sticks out, it is often stuck into it, and therefore the mount is the toughest for it);
- external HDD (gently falls on the flexible hoses);
- another USB hub (held due to the fact that the mount repeats the relief of its bottom).
Filling

Wires
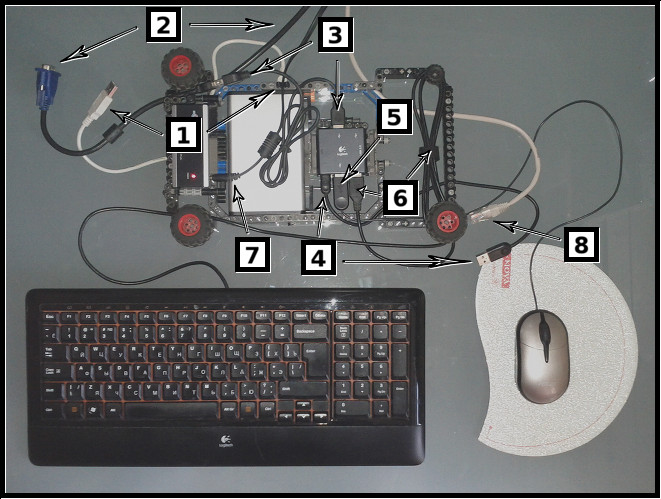
- Cable to connect the hard drive to the hub [1] (in the HDD connector is plugged permanently).
- VGA cable; fixed by the wheel.
- The hub [1] connects to the laptop not directly, but through the hub [3].
- Cable for connecting a hub [3] to a laptop.
- Mouse.
- Keyboard; the excess part of the wire is wound on the axles of the wheels.
- External power for the hub [1].
- Ethernet
Connection

Pay attention to the two "bumps" between which the cable runs (this is not the only place with a similar mount). They allow you to fix the wire, even when it is not connected to a laptop.
findings
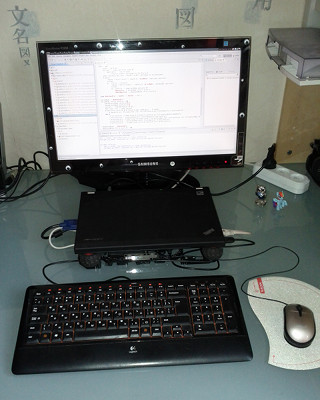 The main indicator of convenience is that I have not noticed this design for a long time, it just lies on the table and performs its function. As a bonus, due to the hub with external power, convenient charging for different USB devices was obtained.
Minuses:
- price, if there is no old unnecessary parts inventory;
- terrible dust collector.
Pros:
- flexibility: even when changing a laptop, reworking takes a maximum of an hour;
- LEGO is fun =)
Source: https://habr.com/ru/post/153263/
All Articles