Artificial heart

In this topic, nothing new, innovative or exciting will be available. If you have already passed the flashing of lights on the microcontroller a long time ago, then you most likely will not be interested and you will only waste your time. Anyone who is just starting to learn microcontrollers, I suggest here is such a simple example of how you can beautifully set flashing LEDs (and at the same time add on your valuable experience).
I warned you. If you want to see what happened to me (a lot of pictures ), then I ask for cat.
Idea:
Initially, the idea was to make an imprint of a photo on a textolite ( like this ) from nortonix , plus add a beautiful highlight. Then, in the course of long reflections before bedtime, the final idea was formulated, the essence of which lies in the flashing heart, in the center of which there will be a photo of the girl. Then I remembered that I had already seen this in a Habré from Terehoff . But still decided to do in their own way. Moreover, I have a
So, what I used in the project "artificial heart" :
')
- 32 LEDs (any color, which is closer to the soul);
- 1 tricolor LED (RGB);
- 4 buttons;
- 1 micron Tiny2313 (heart of the heart);
- 4 shift registers (classic, 595);
- a piece of PCB, two pieces of plexiglass, a cloud of resistors and all sorts of small gadgets.
In general, I used everything that came under my arms. I do not understand how, but it always goes with me. Here, even a toothpick here prisobachil.
So let's go!
0) We write a microcontroller control program so that it knows when and which leg to raise or lower (I used for this CodeVision AVR and AVR Studio for debugging).
1) In a proteus (or other simulator) we draw our project, download the firmware, check if it works.

Note: carefully watch what kind of work in you is chosen for the LEDs, remember that the analog way of working is eating a lot of resources.
If yes, then
2) we make the layout of the circuit based on the actual pinout and the type of the body of the circuit elements,
if not, return to step 0.
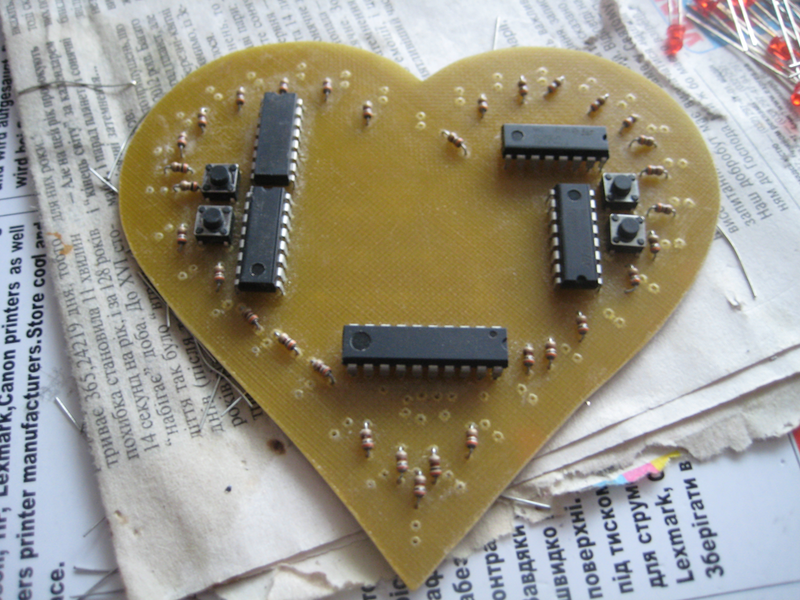
3) With the help of loot we transfer the drawing to a future board.

4) We poison, we cut, we drill, we prick.

5) Insert the circuit elements into the holes, solder,

Handle it thoroughly.
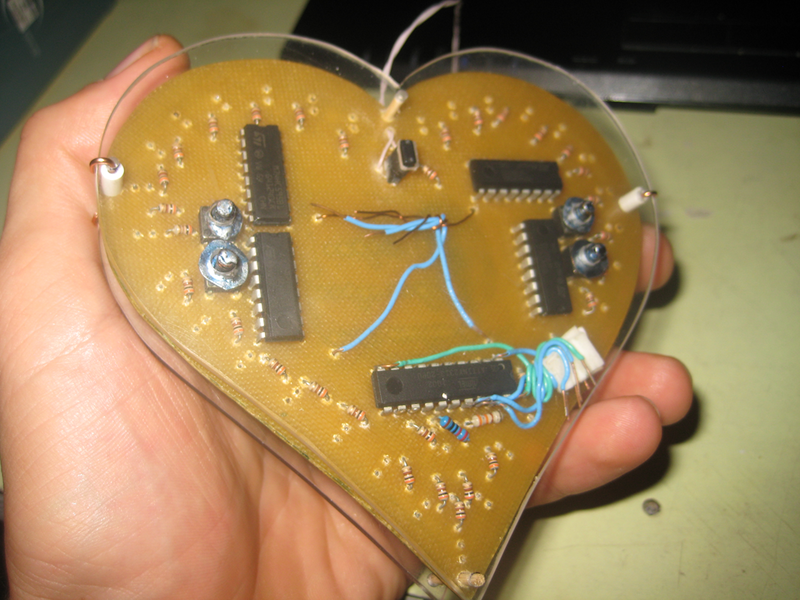
Here you can see how I got stuck, forgetting to connect the buttons when setting the board, as a result - mgtf jumpers.

We paint,

6) flashing

7) connect 5 V and admire.

If it works, then
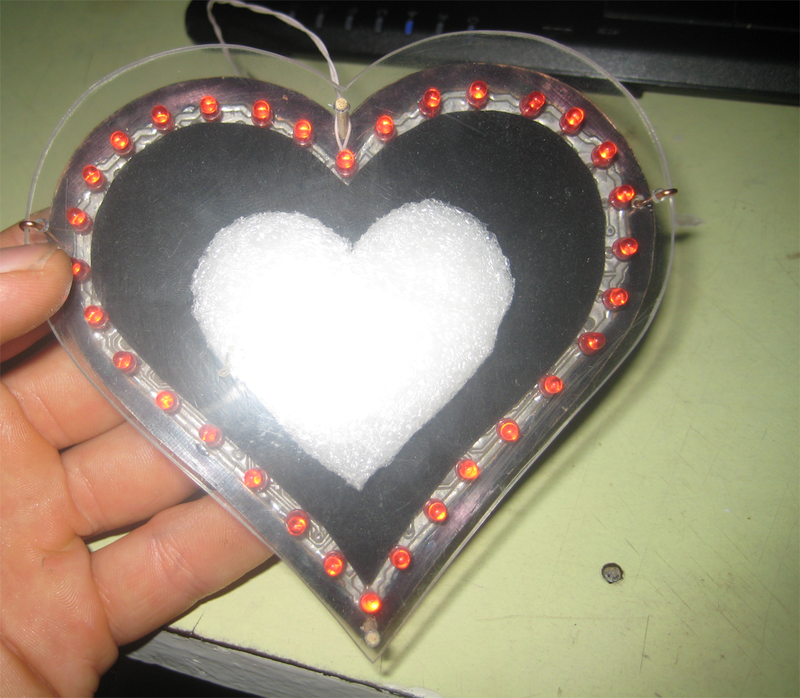
8) Urrrrr! Works! proceed to the installation of auxiliary gadgets (Plexiglas, heart, buttons, pins, power connector).
Matched black background, and a white heart, inside which is a tricolor diode.

Look from behind
look in front
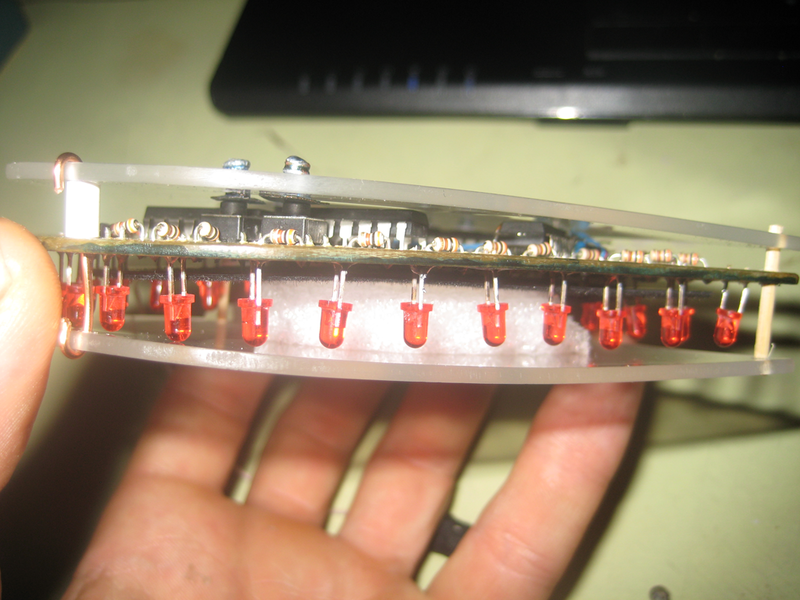
looking from the side.
If not, go back to step 2 (which happened in my case, as I sometimes get really hard. This time, I won’t add my mind how, but I forgot to connect two buttons, so you will see jumpers from the wire in the photo. Brake )
9) Make the final test of robustness:

And finally, a small video:
As a result, as you can see, it was in vain that I was drawing a drawing of a girl to a board — it still closed my heart. In vain I put a programming connector on the board (I couldn’t have the place, I don’t know) Well, there was still a lot of things he did wrong and wrong, but he was still satisfied with the result - and this is the main thing.
Thanks for attention.
PS Yes, you can do a hundred times better. Yes, I know, everything is elementary. There is nothing easier. And I agree with you, but only, and only after all this has been done. Although in theory he seemed to know how, but in fact he made so many mistakes that I will not voice everything - they will laugh for sure. This topic just wanted to remind once again that no matter what level of knowledge / skills you are, do everything to the end, regardless of all obstacles, and you will receive a reward!
Something video is not attached. I apologize for illiteracy. The video here is youtu.be/cy9f3qK6wxI
Source: https://habr.com/ru/post/152541/
All Articles