HTML5: Sensors for those who are not used to waiting
 The market for mobile computers began to change rapidly, in addition to standard components, ultrabooks, following tablets and smartphones, are equipped with sensors and touchscreens. Sensors provide developers with new perspectives that allow them to create new models for using their software products. Look at the market of mobile applications, there you will not surprise anyone with the opportunity to play games using an accelerometer, gyroscope, compass as a game controller.
Add support for sensors in desktop applications now is not difficult, all the necessary API is already available. For desktop applications in Windows 7 and Windows 8 there is a Sensor and Location Platform , which allows you to get information about the supported sensors and read their data. In Windows UI applications, you can use the API for working with sensors in Windows RT.
And what about web applications? Here, too, progress does not stand still, the W3C consortium is developing the Sensor API for the web. Moreover, the functions for working with sensors have already been partially implemented in some versions of mobile browsers, for example, handling of the Device Orientation event.
A couple of weeks I became interested in the use of sensors in web applications, and found that none of the Windows browsers support them. It would be possible to relax and wait until support appears, but, as they say, this is not our method. At one time, in order to satisfy my curiosity, I studied the possibility of creating extensions for Google Chrome including NPAPI plug-ins, which are essentially DLL libraries, and they can implement almost any interaction with the platform. I decided to put this experience into practice and the result was the Sensors for Chrome extension.
')
How it works
As I said before, the expansion is based on the NPAPI plugin, which works with sensors via the API Sensor and Location Platform. When loading a plug-in, it lists all available sensors, searches for an inclinometer or 3D compass. If the sensor is found, the plugin registers the interface and starts receiving notifications from the platform containing information about the new sensor readings. After receiving this data, it redirects them to the background extension page, which, in turn, sends them to the page in the active browser tab.
To receive data, the page registers a listener and receives data as it arrives. A piece of code that receives data on a page looks like this:
window.addEventListener("message", function(event) { if (event.data.type && (event.data.type == "INCLINOMETER_DATA")) { event.data.x; event.data.y; event.data.z; } }, false); In the event.data object, x, y, z values will be available which can be interpreted depending on the application's tasks.
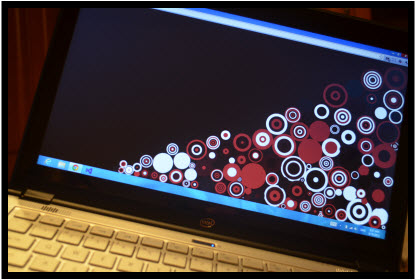
In addition to the extension, I also created a test simple Maze application and slightly modified the sample code from mr doob - Ball Pool .
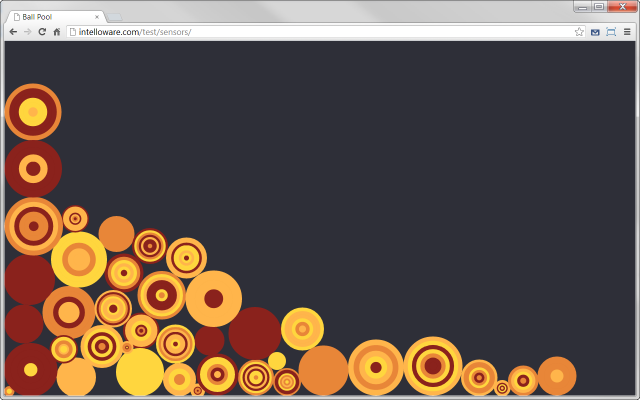
Both applications are implemented using Box2D, in both the change in the position of the device affects gravity. An example of a data entry handler from an inclinometer:
window.addEventListener("message", function(event) { if(event.data.type && (event.data.type == "INCLINOMETER_DATA")) { gravity.x = Math.sin((event.data.y) * Math.PI / 180) ; gravity.y = Math.sin((Math.PI / 4) + event.data.x * Math.PI / 180); } }, false); If you do not have at hand an “iron” with sensors, but you already want to try it, you can use the “virtual” sensors described in this article .
In general, if you can not wait to "play" with the sensors and you are a developer of HTML5 - here you have a ready-made solution. Use, experiment, who knows, perhaps in the course of the game you will come up with unique ideas and open up new usage patterns for your applications.
Source: https://habr.com/ru/post/151742/
All Articles