Development for Microsoft PixelSense # 0
With this article, I want to start a series of articles on development for Microsoft PixelSense. I'm not sure that the cycle will turn out to be big, or that apart from this article I will write something at all, but I still have to start with something.
I'll tell you the general things that will give an idea of what PixelSense is, where to read about it and how to start writing under it. First things first.
What is PixelSense
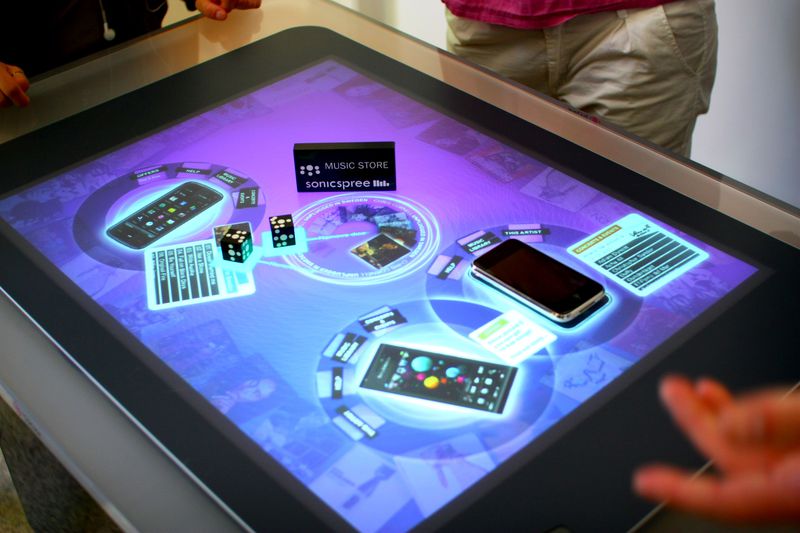
PixelSense is a 42-inch touch-screen table from Microsoft, which recognizes 42 touch points, as well as 256 special tags in the second version that allow the implementation of augmented reality scenarios. For the recognition of contacts and labels is a special infrared camera. From external influences, the screen is protected by Gorilla Glass.
Inside, at the table, there is an AMD processor and a graphics card from the same manufacturer, all running Embedded Windows 7 Professional 64-bit.
You can write under the table using 2 technologies: XNA and WPF. Visual Studio 2010 development environment.
Initially, the project was called Surface, so this name will be found in many places.
Resources on the development and not only
All links to the main resources about the table can be found at www.pixelsense.com . For us as developers, the most important link is msdn.microsoft.com/en-US/windows/desktop/hh241326.aspx - this is the PixelSense development page where you can find everything you need about development: SDK links, Hands on labs and in general, it is the center of the whole world =).
Sdk
PixelSense SDK includes runtime, project templates for VS2010, sample applications, and, perhaps, the most important thing is the InputSimulator, which allows you to write under PixelSense on a computer without a touch screen (there is one thing - the simulator does not work through the RDP session).
Where what lies:
• InputSimulator - in the launch of Microsoft Surface 2.0 SDK-> Tools-> InputSimulator
• Samples - Microsoft Surface 2.0 SDK-> Surface Samples
')
Standard set of controls
Looking at the picture of the table, as if coming from the future, and reading that you can develop for it even without the table itself and even without the touch screen - you, of course, have already installed the SDK on your Windows and are trying to understand what you have already written developers? The best answer to this question is provided by one of the examples of applications distributed with the SDK.
According to the instructions, the examples first need to be assembled by running the InstallSamples.bat script with admin rights, which will do everything well. After everything is ready for launching the WPF / ControlsBox compilation project. In this project there are all controls, you can look at them, touch and play with them with the help of a simulator.
How to use the simulator
The simulator is very simple and we need only a couple of buttons for initial development. It is important to restart the computer before using it, if you have not done so after installing the SDK, otherwise there will be trouble and nothing will work.

Above you can see the inscription on which monitor the touch input will work and on the left - the window itself, where you can select the current input method.
Creation of the first project
If the determination is still in full swing, then go to VS2010 and create a new project.
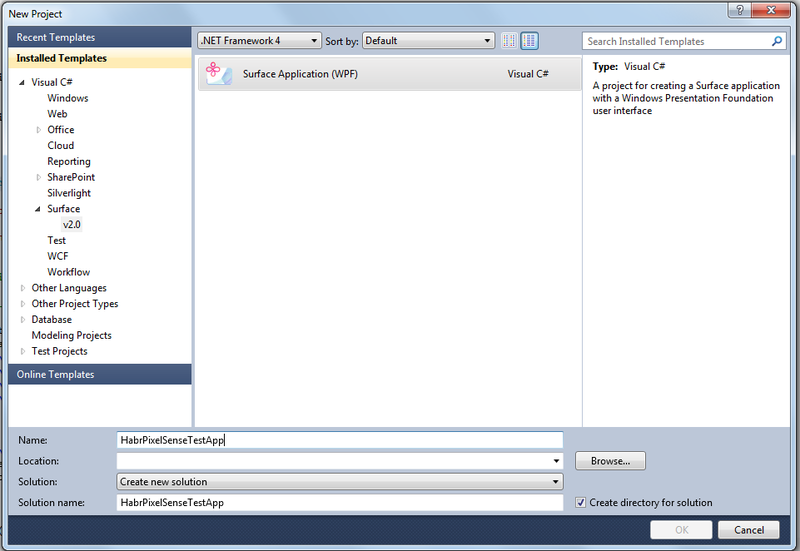
As you can see from the screenshot - in the C # project templates a new item “Surface” has been added, where you can find the “Surface Application (WPF)” template itself. Create!
And we see the XAML code of the first window
The main differences from simple WPF windows are that the window is now called SurfaceWindow and a new space has been added with the prefix s, in which all PixelSense controls are located.
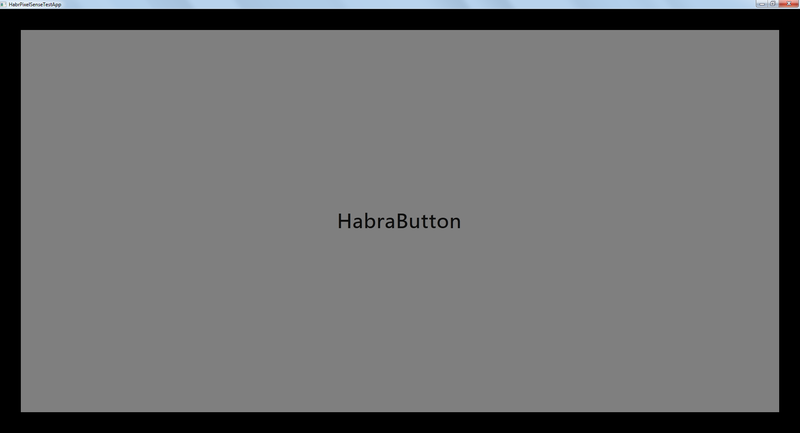
For a small demonstration, add a button
and get as expected
Next, we are developing on WPF, using all the knowledge about this technology.
Everything! The article turned out quite simple, for an easy start with a minimum search. Next, I will try to talk about some places in the development, more about controls and more.
I'll tell you the general things that will give an idea of what PixelSense is, where to read about it and how to start writing under it. First things first.
What is PixelSense
PixelSense is a 42-inch touch-screen table from Microsoft, which recognizes 42 touch points, as well as 256 special tags in the second version that allow the implementation of augmented reality scenarios. For the recognition of contacts and labels is a special infrared camera. From external influences, the screen is protected by Gorilla Glass.
Inside, at the table, there is an AMD processor and a graphics card from the same manufacturer, all running Embedded Windows 7 Professional 64-bit.
You can write under the table using 2 technologies: XNA and WPF. Visual Studio 2010 development environment.
Initially, the project was called Surface, so this name will be found in many places.
Resources on the development and not only
All links to the main resources about the table can be found at www.pixelsense.com . For us as developers, the most important link is msdn.microsoft.com/en-US/windows/desktop/hh241326.aspx - this is the PixelSense development page where you can find everything you need about development: SDK links, Hands on labs and in general, it is the center of the whole world =).
Sdk
PixelSense SDK includes runtime, project templates for VS2010, sample applications, and, perhaps, the most important thing is the InputSimulator, which allows you to write under PixelSense on a computer without a touch screen (there is one thing - the simulator does not work through the RDP session).
Where what lies:
• InputSimulator - in the launch of Microsoft Surface 2.0 SDK-> Tools-> InputSimulator
• Samples - Microsoft Surface 2.0 SDK-> Surface Samples
')
Standard set of controls
Looking at the picture of the table, as if coming from the future, and reading that you can develop for it even without the table itself and even without the touch screen - you, of course, have already installed the SDK on your Windows and are trying to understand what you have already written developers? The best answer to this question is provided by one of the examples of applications distributed with the SDK.
According to the instructions, the examples first need to be assembled by running the InstallSamples.bat script with admin rights, which will do everything well. After everything is ready for launching the WPF / ControlsBox compilation project. In this project there are all controls, you can look at them, touch and play with them with the help of a simulator.
How to use the simulator
The simulator is very simple and we need only a couple of buttons for initial development. It is important to restart the computer before using it, if you have not done so after installing the SDK, otherwise there will be trouble and nothing will work.
Above you can see the inscription on which monitor the touch input will work and on the left - the window itself, where you can select the current input method.
Creation of the first project
If the determination is still in full swing, then go to VS2010 and create a new project.
As you can see from the screenshot - in the C # project templates a new item “Surface” has been added, where you can find the “Surface Application (WPF)” template itself. Create!
And we see the XAML code of the first window
<s:SurfaceWindow x:Class="HabrPixelSenseTestApp.SurfaceWindow1" xmlns="http://schemas.microsoft.com/winfx/2006/xaml/presentation" xmlns:x="http://schemas.microsoft.com/winfx/2006/xaml" xmlns:s="http://schemas.microsoft.com/surface/2008" Title="HabrPixelSenseTestApp" > <Grid> </Grid> </s:SurfaceWindow> The main differences from simple WPF windows are that the window is now called SurfaceWindow and a new space has been added with the prefix s, in which all PixelSense controls are located.
For a small demonstration, add a button
<s:SurfaceButton HorizontalAlignment="Stretch" VerticalAlignment="Stretch" HorizontalContentAlignment="Center" VerticalContentAlignment="Center" TextBlock.FontSize="50" Margin="50" Content="HabraButton"/> and get as expected
Next, we are developing on WPF, using all the knowledge about this technology.
Everything! The article turned out quite simple, for an easy start with a minimum search. Next, I will try to talk about some places in the development, more about controls and more.
Source: https://habr.com/ru/post/151021/
All Articles