Continuous deployment of projects in Windows Azure using the Team Foundation Service

Microsoft Team Foundation Service is the cloud version of the popular Microsoft Team Foundation Server (TFS) application, which contains convenient tools for creating source code, building, agile development, team workflow, tracking tasks and errors, and other actions. Team Foundation Service team projects can be automatically built and deployed to Windows Azure websites or cloud services. For information on how to configure continuous build and deployment of the system from the local version of Team Foundation Server, see "Continuous Deployment of Cloud Applications in Windows Azure . "
The following assumes that Visual Studio 2012 and Windows Azure SDK are installed on your computer. If Visual Studio 2012 is not installed, download it from here . You can also use Visual Studio 2010, but then you must install SP1 and the GDR compatibility package . The Windows Azure SDK is available at this link .
')
To configure the automatic build and deployment of a cloud service in Windows Azure using the Team Foundation Service Preview, follow these steps:
- Stage 1. Subscribe to the TFS Preview service
- Step 2. Synchronize the project with TFS
- Stage 3. Connect the project to Windows Azure
- Step 4. Make changes and run reassembly and deployment
- Step 5. Redeploy the previous build (optional)
- Step 6: Change the operational deployment (only for cloud services)
Stage 1. Subscribe to the TFS Preview service
Create a TFS account at https://tfspreview.com .
Create a team project on the TFS account page. The account has the following format: <username> .tfspreview.com . Sign in with your Microsoft Live ID account.
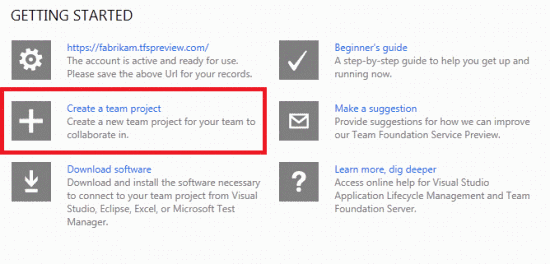
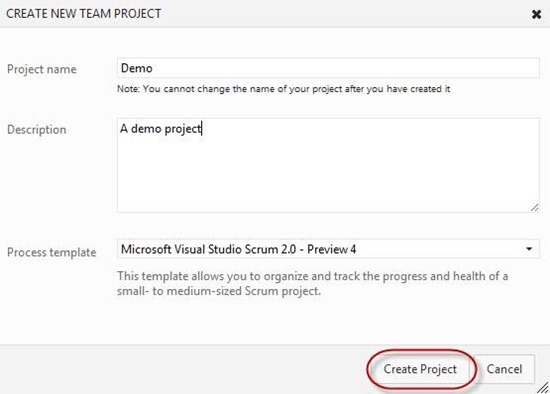
Select Create a Team Project. Enter a name and description for the project, and then click the Create Project button.
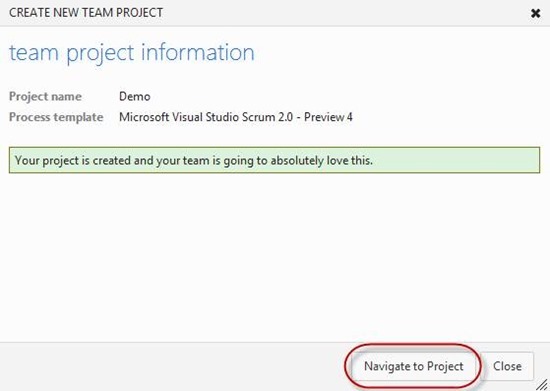
When the project is created, click the Navigate to Project button.
Stage 2. Synchronize the project in TFS
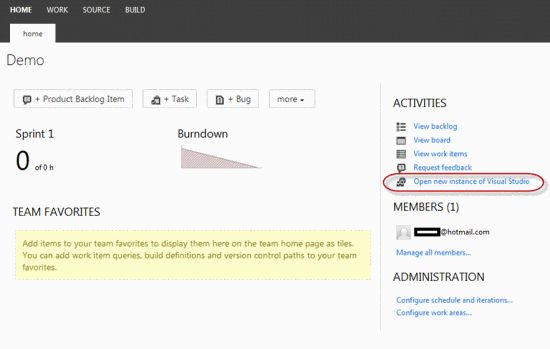
Click the Open new instance in Visual Studio link to automatically launch the Visual Studio environment connected to the team project. If security warnings appear, select Allow. Visual Studio 2012 is required to complete this step.
In Visual Studio, open or create the solution you want to deploy. Using the instructions in this tutorial, you can deploy a website or a cloud service (Windows Azure application). To create a solution, create a Windows Azure cloud service project or an ASP.NET MVC4 project. Make sure the project uses .NET Framework 4, and then add the web role and the ASP.NET MVC 4 worker role. If prompted, select Internet Application . To create a website, select an ASP.NET MVC4 Application project template.
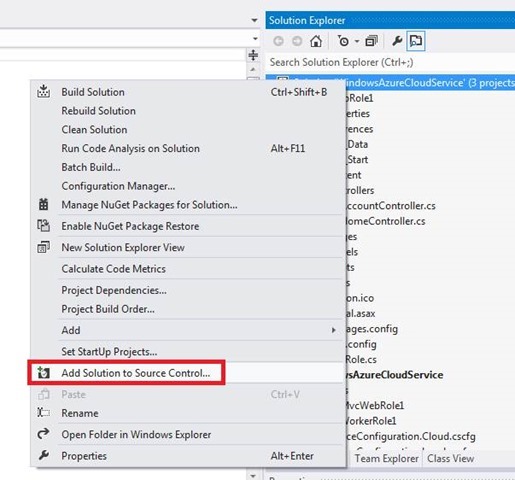
Open the context menu of the solution and select Add Solution to Source Control .
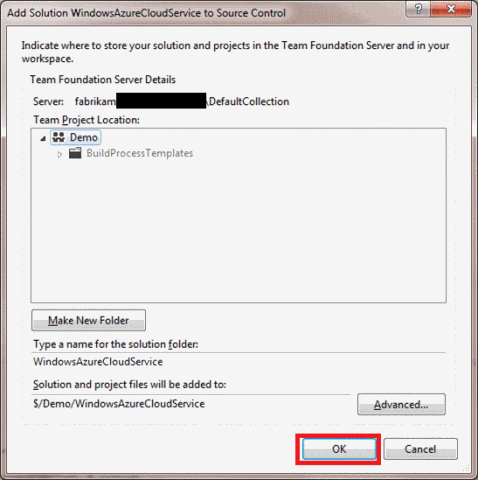
Accept or change the defaults, and then click OK . When the process is complete, the source control icons will appear in Solution Explorer.
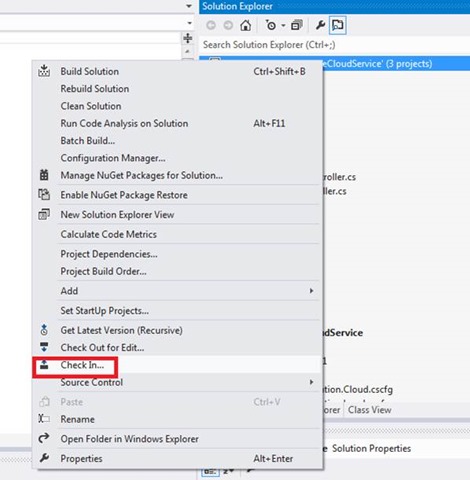
Open the context menu of the solution and select Check In .
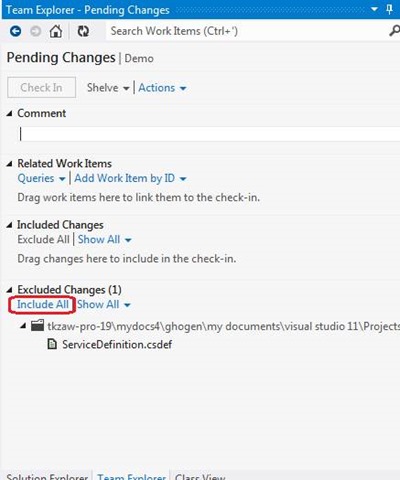
In the team browser's Pending Changes section, enter a comment and click the Check In button.
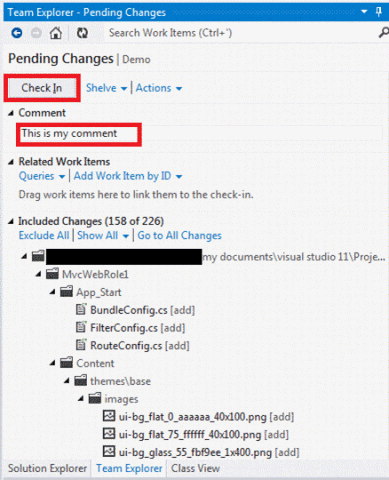
When synchronizing, check the included and excluded parameters. If the desired parameters are excluded, click the Include All link.
Stage 3. Connect the project to Windows Azure
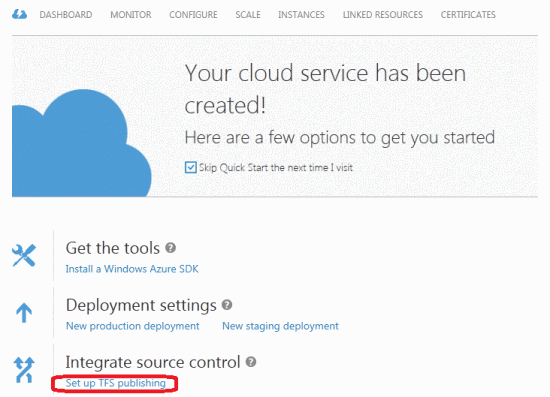
Now a TFS team project with source code files can be connected to Windows Azure. In the Windows Azure Preview portal, select a cloud service or website, or create them. To do this, click the “+” icon in the bottom left and select Cloud Service or Web Site , and then Quick Create . Click the Set up TFS publishing link.
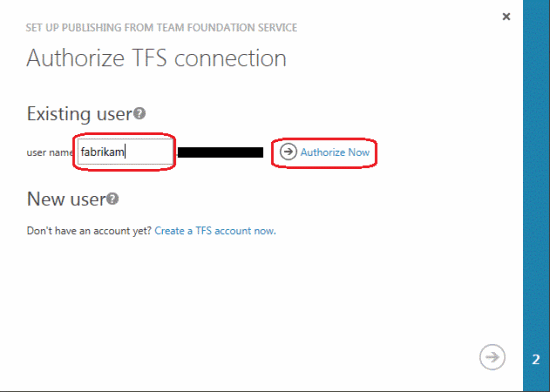
In the wizard that opens, enter the name of the TFS account in the text field and click the Authorize Now link. The system may ask you to login.
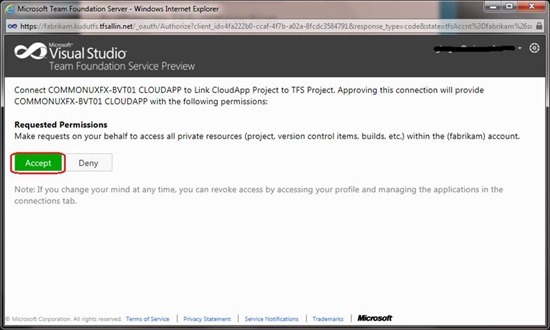
In the OAuth pop-up dialog, click Accept to allow Windows Azure to set up a team project in TFS.
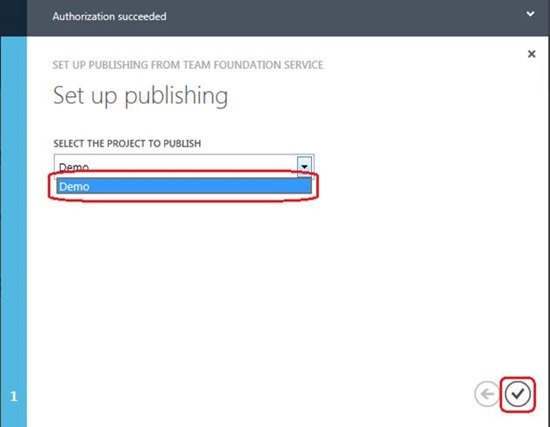
Then a drop-down list will appear containing the names of your TFS team projects. Select the project created in the previous steps and click the check box in the wizard window.
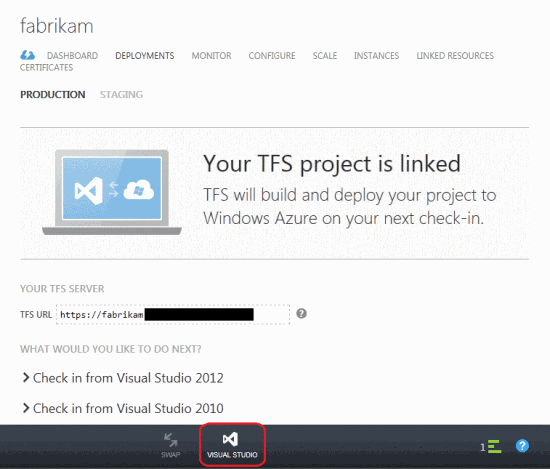
After connecting the project, the system will display several instructions for synchronizing changes in the TFS team project. At the next sync, TFS will build and deploy the project in Windows Azure. To test this feature, click the Check In from Visual Studio 2012 link, and then Launch Visual Studio 2012 (or a similar button on the Visual Studio command bar).
Step 4. Make changes and run reassembly and deployment
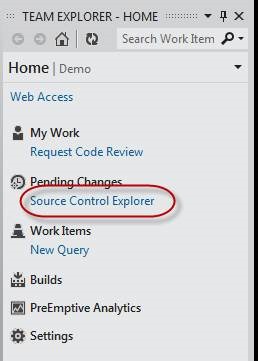
In the Visual Studio Command Browser, click the Source Control Explorer link.
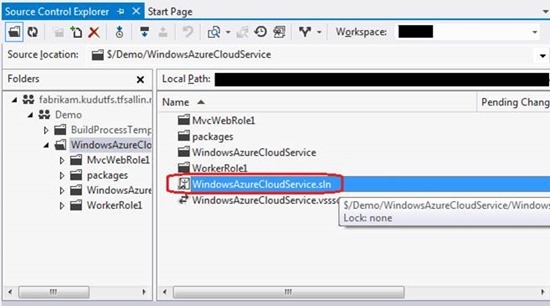
Navigate to the solution file and open it.
Open and edit the file in Solution Explorer. For example, edit the _Layout.cshtml file in the Views \ Shared folder of the MVC4 web role.
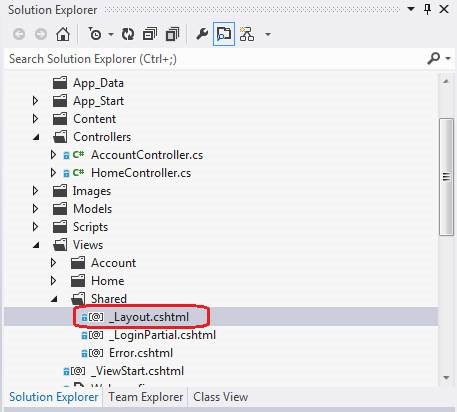
Change the site logo and press Ctrl + S to save.

In the command browser, click the Pending Changes link.

Enter a comment and click the Check In button.
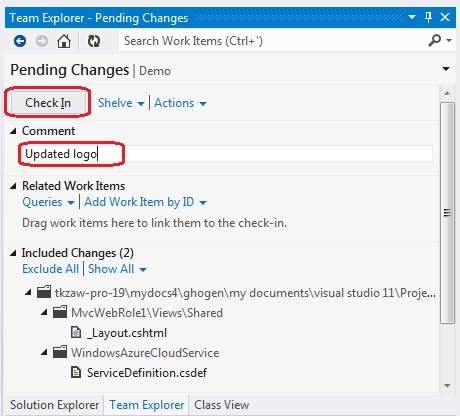
To return to the team browser home page, click the Home button.
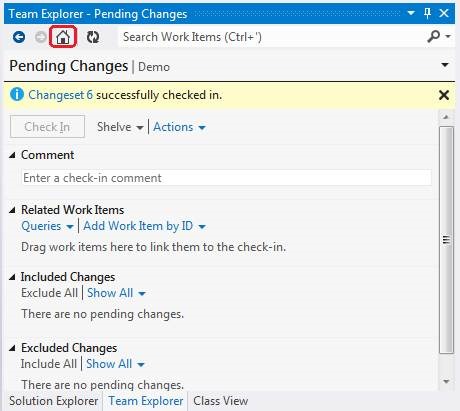
Click the Builds link to view build progress.
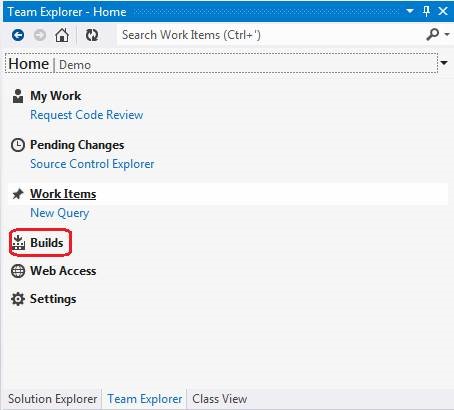
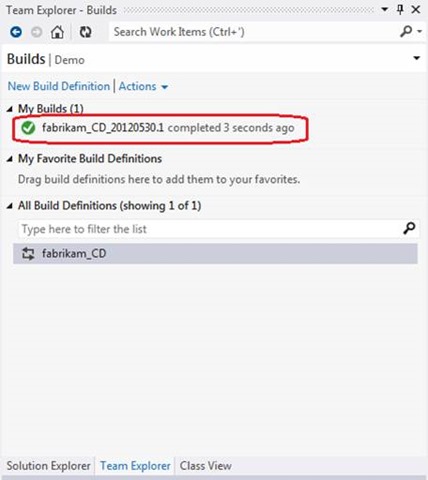
The command browser shows that the build process is running for your sync.

Double-click the name of the assembly to be executed to view detailed information.
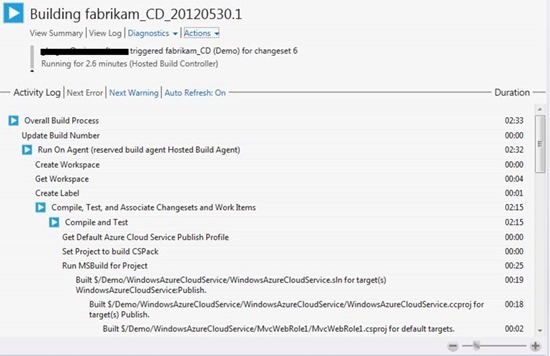
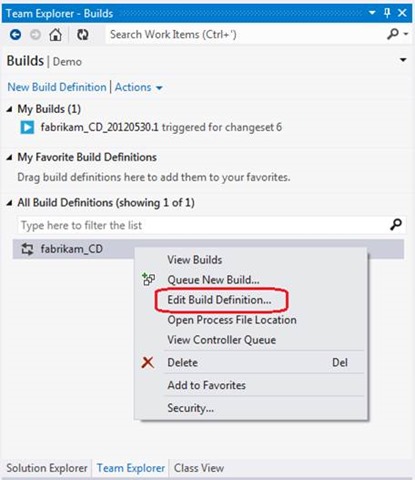
During the process, you can view the build definition that was created when linking TFS to Windows Azure using a wizard. Open the context menu of the build definition and select Edit Build Definition .
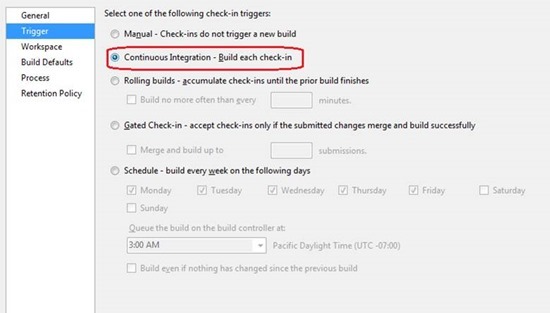
The Trigger tab shows that the default build definition is used for all syncs.
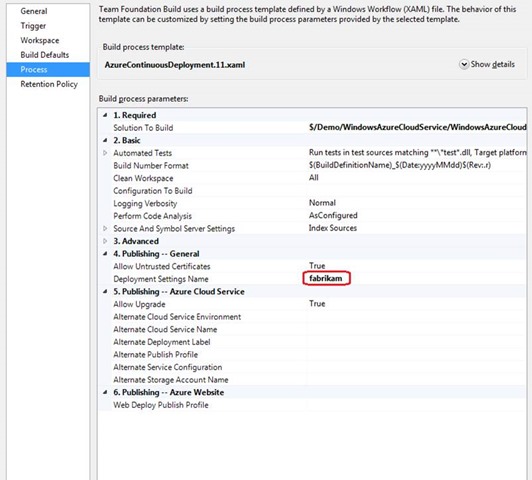
The Process tab shows that the deployment environment is associated with the name of your cloud service or website.
At this point, the build should complete.
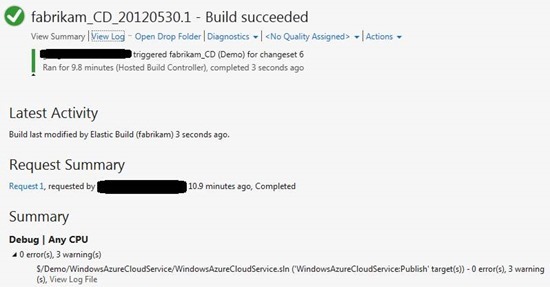
If you double-click the name of the assembly, Visual Studio displays the Build Summary , including all test results from the corresponding unit test projects.
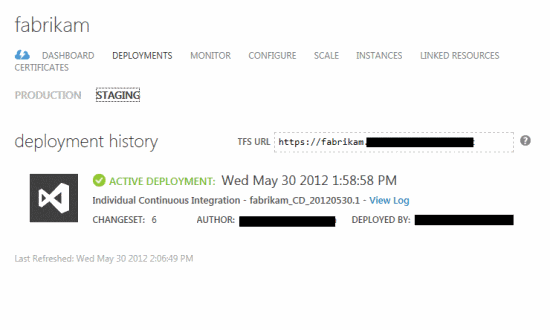
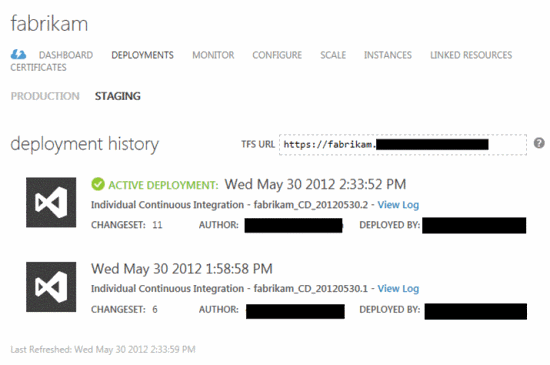
In the Windows Azure Preview portal, you can view the associated deployment in the Deployments tab by selecting a test environment.
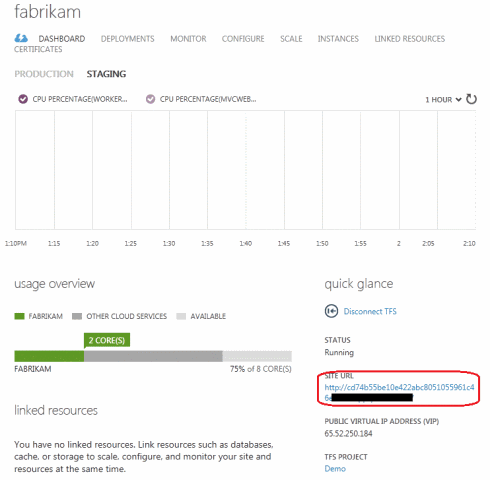
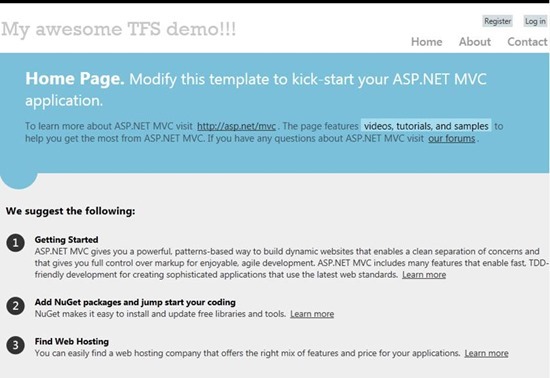
Select the URL in the Quick Glance section of the Dashboard page, which shows the cloud service test environment. To select a website, simply click the Browse button on the command bar. By default, continuous integration deployments for cloud services are hosted in a test environment. This setting can be changed by setting the Alternate Cloud Service Environment property to Production. There is no test or work environment for websites.
A browser tab will open, where you can check the operation of the site.
If you have repeatedly made changes to the project, the number of assemblies and deployments will be quite large. The most recent of them have the status of Active.
Step 5. Redeploy the previous build (optional)
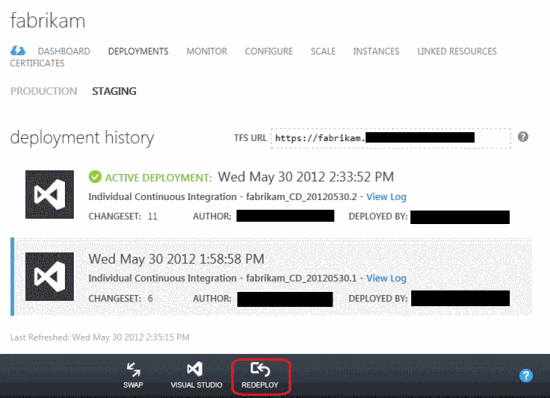
This step is optional. Locate the previous deployment and click the Redeploy button to return the site to its previous state. In this case, TFS will be reassembled, and a new entry will appear in the deployment history.
Step 6: Change the operational deployment (only for cloud services)
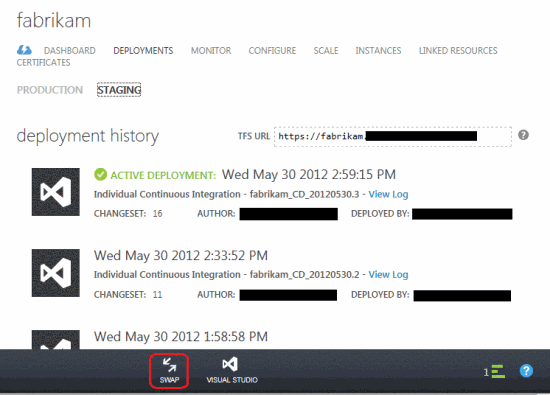
This step applies only to cloud services and does not apply to websites. When everything is ready, you can move the deployed application from the test environment to the working one by pressing the Swap button. In this case, the new deployment from the test environment will be transferred to the production one, and the old deployment from the production environment (if any) to the test one. Active deployments in test and production environments may vary, but deployment histories are the same for everyone, regardless of the environment.
For more information, see Team Foundation Service .
Source: https://habr.com/ru/post/150848/
All Articles