Two giants in one program - Nvidia CUDA and MPI
Hello habrovchane, in this article I want to talk about the interaction of the two technologies MPI (mpich2) and NVIDIA CUDA. I want to focus on the very structure of the program and the configuration of the above-described technologies for working in one program. And so it went ...
For convenience, I wrote a small plan for which we will move:
1) Preparing the system for work.
2) Install the mpich2 library.
3) Installing NVIDIA CUDA.
4) Writing program code (program structure)
5) Setting the compiler.
6) Compiling and running the executable file.
Or, if you wish, you can put everything directly from the terminal.
Or Alt + f2:
')
and register in the search:
Select the found package and install it. Also, if you wish, you can install other useful packages related to mpi or mpich2 from your point of view. It is advisable to install the documentation. Next, we check that we succeeded, create a file test.cpp and add the following code to it:
Compile it:
Run:
It should end up with something like this:

main.cu
head.h // here will be header files.
GPU.cu // code intended for gpu.
CPU.cpp // code intended for the processor.
main.cu - here we will write the simplest mpi code that will serve to run the program on several cores. In the functions of gpu and cpu, the usual multiplication occurs, with the only difference that in the function gpu multiplication occurs on the video map.
head.h - here we will describe the necessary inclusions.
GPU.cu - directly a code that multiplies two numbers on a video card.
CPU.cpp - this code is more likely to check the multiplication of what is happening by the GPU and, in principle, it does not carry any more utility.
The created files are put in the ../src folder. The result should be something like this:

And so now you just need to go to the folder with the project and collect it.
We collect:

Run, it turns out something like this:

Well, actually this is the end of the work, in the end we got a program that involved both a video card and several processor cores. Of course, the example of multiplying two numbers presented in this context is completely irrelevant for these technologies, but I repeat - I set myself the task of showing that mpi and cuda can coexist in one program (I think that the code is elementary except for the cuda and mpi directives therefore, I didn’t explain it much). Naturally, if you take a more complex program, then there are many nuances at once, ranging from cluster structure, etc., you can continue for a long time, each such program requires individual consideration. But in the end it's worth it.
ps In the next post, most likely, I will try to tell you about the basics of nvidia cuda.
For convenience, I wrote a small plan for which we will move:
1) Preparing the system for work.
2) Install the mpich2 library.
3) Installing NVIDIA CUDA.
4) Writing program code (program structure)
5) Setting the compiler.
6) Compiling and running the executable file.
Paragraph 1
Perhaps it was worth calling him something different, but nonetheless. I use the Ubuntu 12.04 operating system and theoretically enough package manager is enough for the whole setup - synapticsudo apt-get install synapticOr, if you wish, you can put everything directly from the terminal.
Point 2
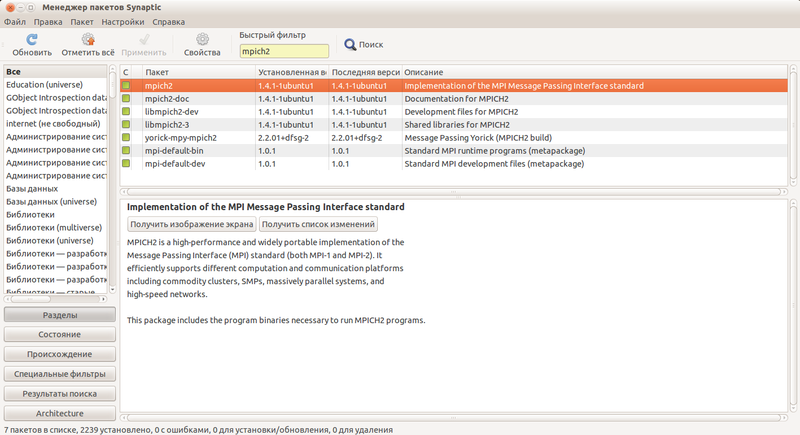
And so begin. What is MPI? I paraphrase Wikipedia a bit - it is a kind of API that allows you to exchange data between processes that perform one task. Simply put, this is one of several parallel programming technologies. More details can be read on Wikipedia. We will use MPICH2 - the library in which the MPI standard is implemented, since this library is the most common. To install it, you need to register in the terminal:sudo apt-get install mpi-default-devsudo apt-get install mpich2sudo apt-get install libmpich2-devOr Alt + f2:
gksu synaptic
')
and register in the search:
mpi-default-devmpich2libmpich2-devSelect the found package and install it. Also, if you wish, you can install other useful packages related to mpi or mpich2 from your point of view. It is advisable to install the documentation. Next, we check that we succeeded, create a file test.cpp and add the following code to it:
#include <mpi.h> #include <iostream> int main (int argc, char* argv[]) { int rank, size; MPI_Init (&argc, &argv); MPI_Comm_rank (MPI_COMM_WORLD, &rank); MPI_Comm_size (MPI_COMM_WORLD, &size); std::cout<<"\nHello Habrahabr!!"<<std::endl; MPI_Finalize(); return 0; } Compile it:
mpic++ test.cpp -o testRun:
mpirun.mpich2 -l -n 8 ./test
It should end up with something like this:
Point 3
I described this process in my last post .Point 4
Suppose we have a habr folder, create the following files in it:main.cu
head.h // here will be header files.
GPU.cu // code intended for gpu.
CPU.cpp // code intended for the processor.
main.cu - here we will write the simplest mpi code that will serve to run the program on several cores. In the functions of gpu and cpu, the usual multiplication occurs, with the only difference that in the function gpu multiplication occurs on the video map.
#include "head.h" int main(int argc, char* argv[]){ int rank, size; int x = 9999; int y = 9999; MPI_Init (&argc, &argv); MPI_Comm_rank (MPI_COMM_WORLD, &rank);// MPI_Comm_size (MPI_COMM_WORLD, &size);// int res_gpu = gpu(x, y); int res_cpu = cpu(x, y); std::cout<<"res_gpu = "<<res_gpu<<std::endl; std::cout<<"res_cpu = "<<res_cpu<<std::endl; MPI_Finalize(); return 0; } head.h - here we will describe the necessary inclusions.
#include <iostream> #include <mpi.h> #include <cuda.h> #include "CPU.cpp" #include "GPU.cu" GPU.cu - directly a code that multiplies two numbers on a video card.
#include <cuda.h> #include <iostream> #include <stdio.h> __global__ void mult(int x, int y, int *res) { *res = x * y; } int gpu(int x, int y){ int *dev_res; int res = 0; cudaMalloc((void**)&dev_res, sizeof(int)); mult<<<1,1>>>(x, y, dev_res); cudaMemcpy(&res, dev_res, sizeof(int), cudaMemcpyDeviceToHost); cudaFree(dev_res); return res; } CPU.cpp - this code is more likely to check the multiplication of what is happening by the GPU and, in principle, it does not carry any more utility.
int cpu(int x, int y){ int res; res = x * y; return res; } The created files are put in the ../src folder. The result should be something like this:
Point 5
The most interesting thing here is that you need to configure the nvcc compiler to compile not only CUDA code, but also MPI code, for this we will write a small make file: CXX = nvcc LD = $(CXX) LIBS_PATH = -L/usr/lib LIBS = -lmpi -lopa -lmpl -lrt -lcr -lpthread INCLUDE_PATH = -I/usr/lib/mpich2/include/ FLAGS = -g TARGET = "/home/relaps/habr/src/main.cu" OBIN = "/home/relaps/habr/bin/cuda&mpi" all: $(TARGET) $(TARGET): $(LD) $(INCLUDE_PATH) $(FLAGS) $(TARGET) -o $(OBIN) $(LIBS_PATH) $(LIBS) And so now you just need to go to the folder with the project and collect it.
Item 6
Here I think the comments are superfluous in the screenshot.We collect:
Run, it turns out something like this:
Well, actually this is the end of the work, in the end we got a program that involved both a video card and several processor cores. Of course, the example of multiplying two numbers presented in this context is completely irrelevant for these technologies, but I repeat - I set myself the task of showing that mpi and cuda can coexist in one program (I think that the code is elementary except for the cuda and mpi directives therefore, I didn’t explain it much). Naturally, if you take a more complex program, then there are many nuances at once, ranging from cluster structure, etc., you can continue for a long time, each such program requires individual consideration. But in the end it's worth it.
ps In the next post, most likely, I will try to tell you about the basics of nvidia cuda.
Source: https://habr.com/ru/post/150701/
All Articles