Imax B6 - Universal charging harvester
On Habré there was already an article about this people's charger, but somehow it was met without much enthusiasm. I will try to fix it, and tell you about those opportunities about which it was not written in that article. The charger is really popular, any model maker or one who participates in it at first glance will recognize it.
So what the manufacturers promise?
Appearance
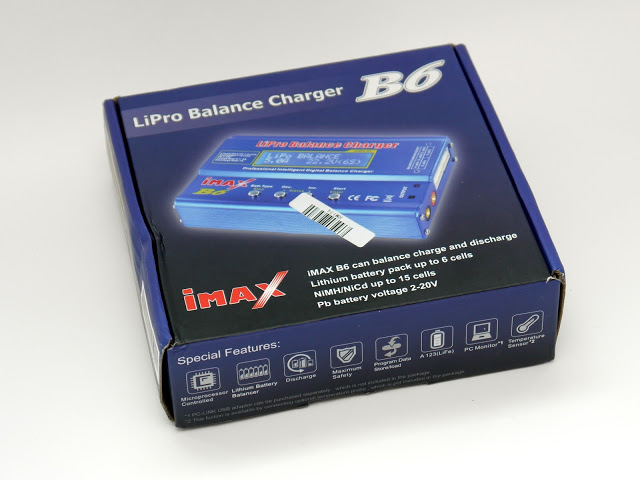
When opening the package, we see the following box:
Inside which we find the charging itself, the wires (to power the charging itself and to connect to the batteries), instructions ... And that's it. Power supply not included
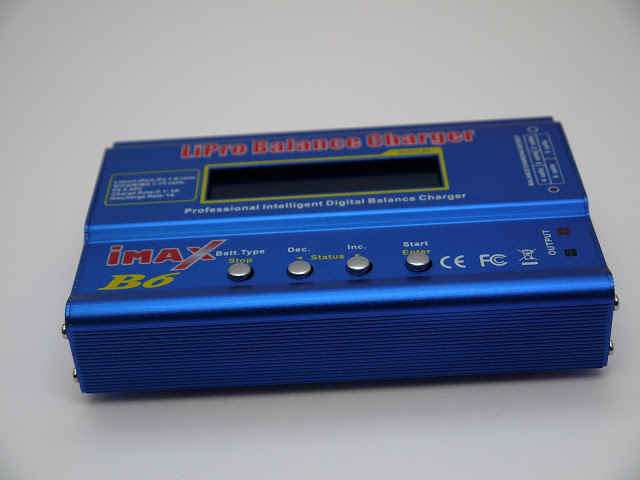
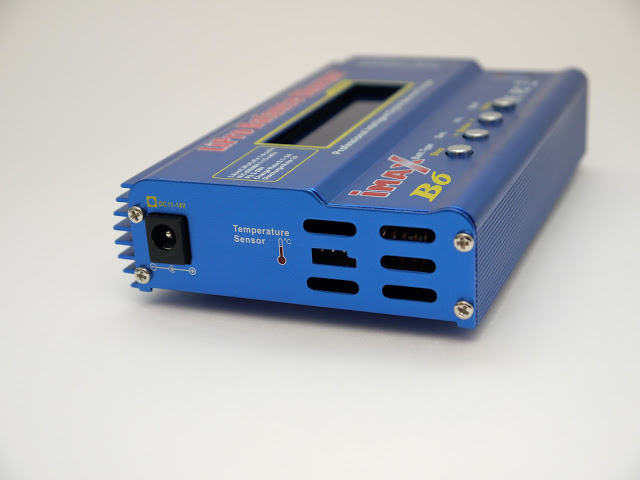
Charging:
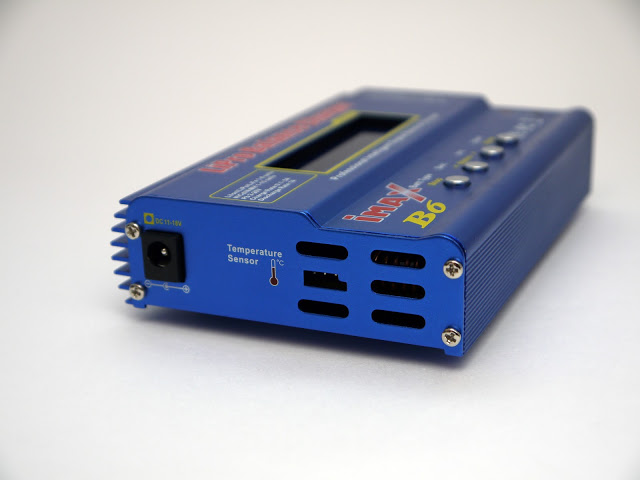
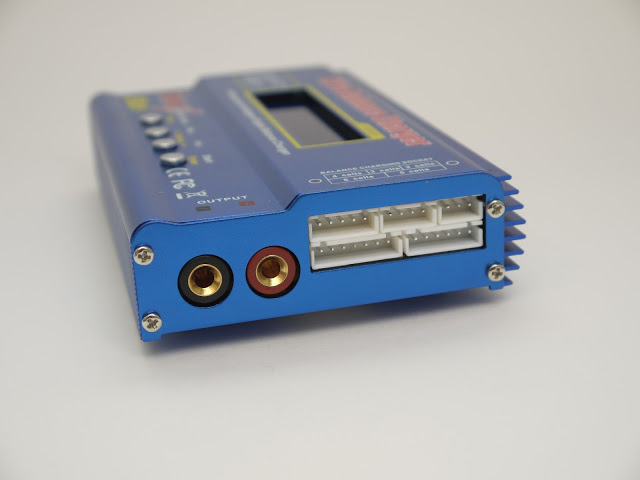
Power and thermal connector (also known as computer output):
± terminals and balancing sockets:
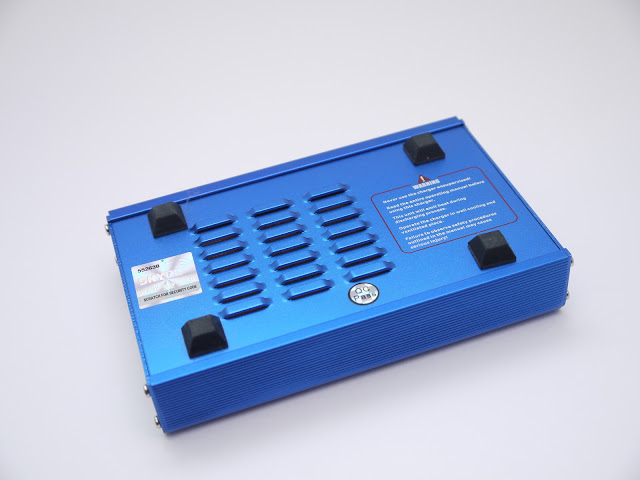
Designer refinement pretending to be a radiator:

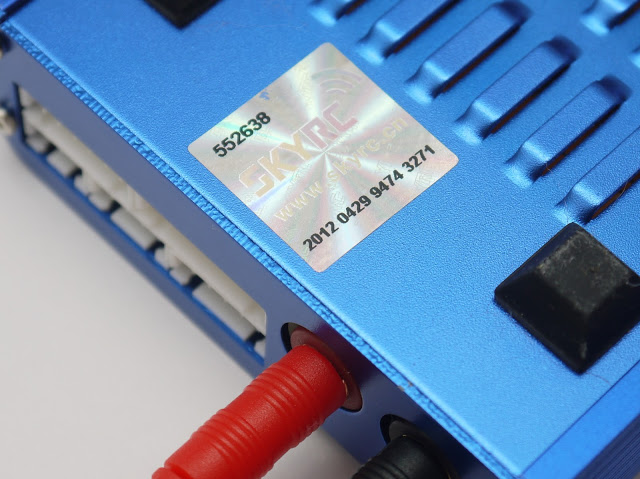
Authenticity of this radiator and hologram:
Here it is, closer:

The fact is that due to the easy repeatability of the circuit, every self-respecting plant copies this charge, at least 4 variants of non-original charges are known. At the price they differ not so much, but in quality - as it will. Here is a good link to a review of the original and a copy.
The mechanism of checking for originality is interesting - we erase the coating, we drive in the serial number and code on
manufacturer's website .
I was lucky (it's a joke, if that. I specifically spent $ 10 more)

What is interesting, the second time the number will not work:
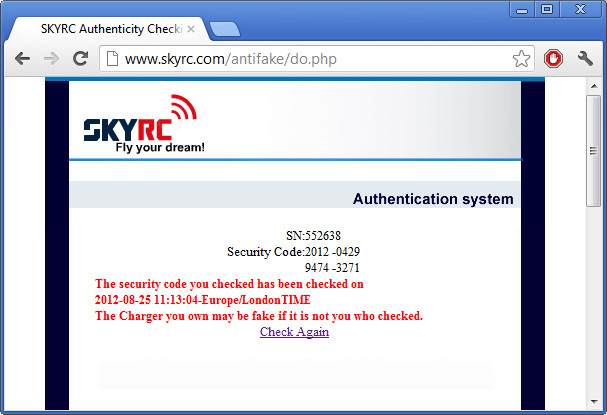
As I understand it, it will not work to buy the original charging and copy its number from the copy manufacturers.
On the left - a wire with two " bananas " to connect to the device itself.
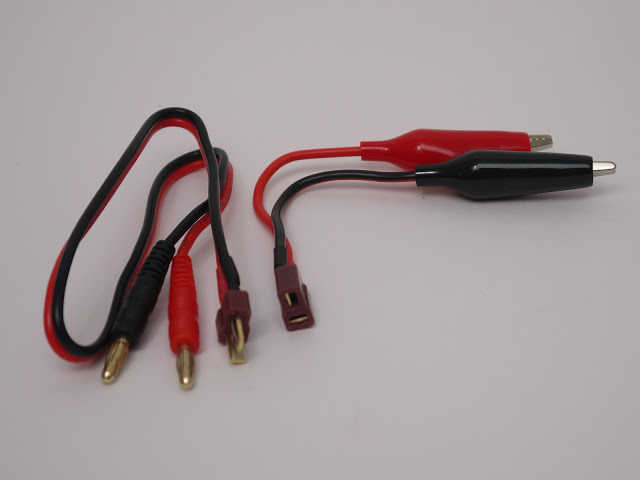
And to the T-Connectors connectors connect either a wire with crocodiles (right), or here they are:
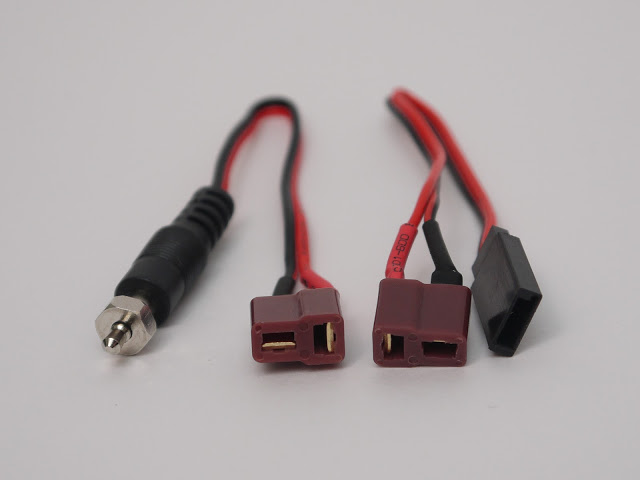
By the way, no one knows where all such a connector is used:
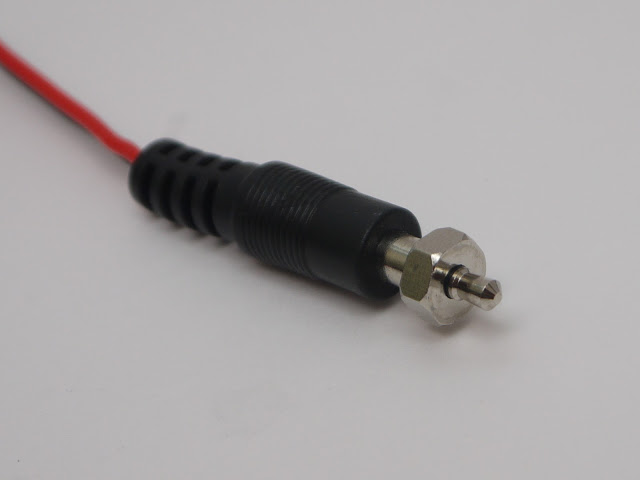
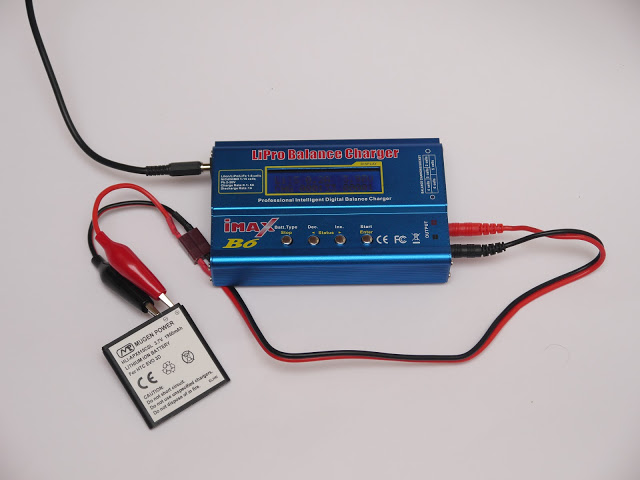
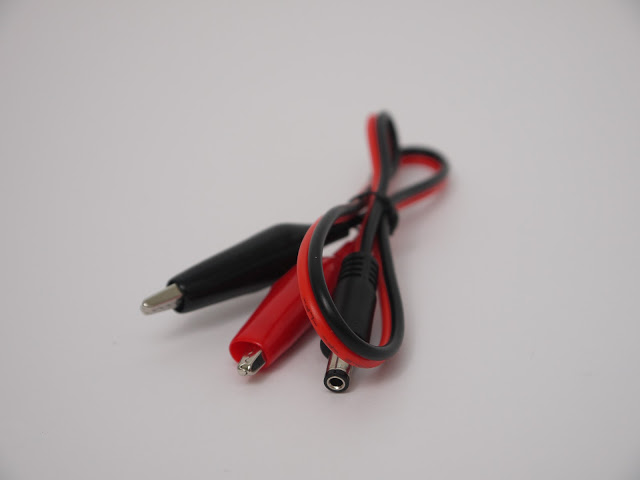
Also included is a power cord with two crocodiles - the device is omnivorous and can eat any voltage from 10V to 18V. Although charging for a laptop, at least a car battery:
There is also a manual in English (but with errors):

In which on the last page there is a catalog of accessories:
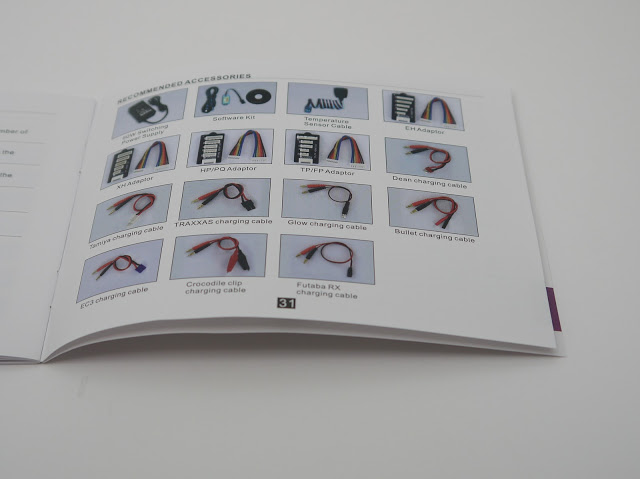
90% of which in the presence of a soldering iron can not buy.
Insides
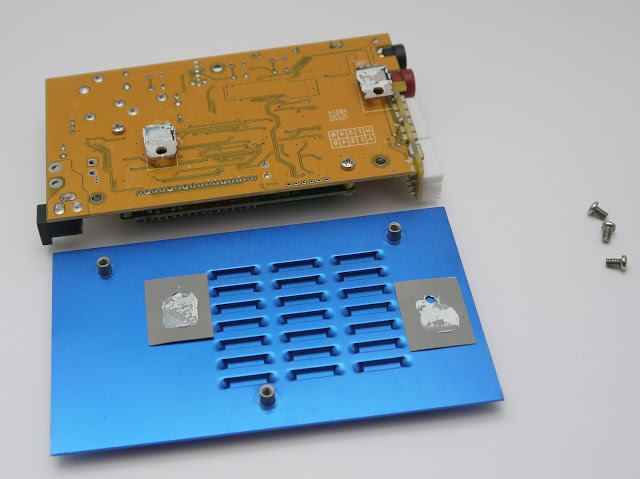
Unscrew the 4 screws on the left, and 4 on the right.
After that, you need to push the upper part of the case to the sides, and pull out the bottom plate with the board attached to it:
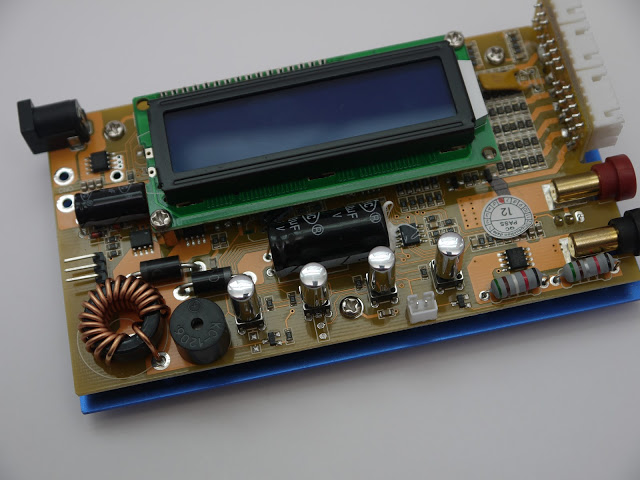
The board is fastened with three screws:
The key transistors are smeared with thermal grease and pressed against the bottom plate.
The charger is built on the usual Atmega:

On some devices, it is not even blocked from reading, which allows you to play a little with the firmware.
Collected neatly, flux washed away.
')
Using
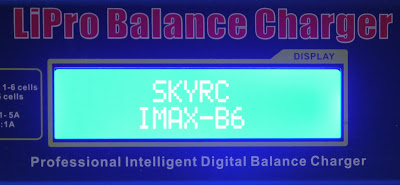
We connect the power, the screen with the inscription SkyRc Imax-B6 immediately lights up. On / off button is not provided.
After that we get to the main menu.
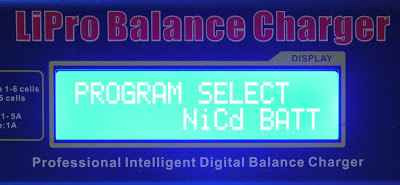
You can navigate through it using the "Stop" and "<" buttons. The main menu contains: selection of the charging program depending on the type of battery, settings menu:
As well as the points of saving and loading user settings.
You can select an item by pressing “Enter”. Here, for example, is the Li-pol charge menu item:

With another press of “Enter”, we switch to the parameter editing mode. The variable parameter flashes at this time. You can change the maximum current and voltage (more precisely, the number of cans is a voltage multiple of 3.7)
At each stage, works against the fool. Charging will not start if: the polarity of the battery is reversed, the voltage is too low or too high, the voltage does not match the type of battery or the number of cans, and so on.
after setting all the parameters, by long pressing “Enter” you can start charging. The first two minutes the battery will be charged with a current of 0.2 amperes, - another one of the points of protection against a fool, and a method for determining the number of cans:
After two minutes, the current will increase to the maximum:
In the process of charging, it can change, at the end drop to 0.1A.
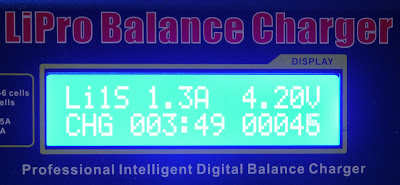
The designations on the screen:
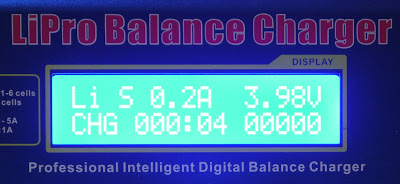
LI1S - Li-pol battery, one can. 1.3A - current, 4.2V - current voltage, CHG - short for Charging, charge. 003: 49 - time in minutes and seconds since the program began, 00046 - "capacity" in milliampere-hours "poured" into the battery during charging, or obtained from the battery during discharge. Naturally, the second digit will be less, and it is necessary to focus on it when measuring the battery capacity.
Connect to computer
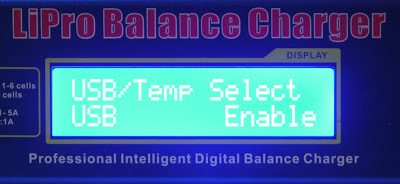
In the charging itself, the menu is activated here: User set program -> USB / Temp select -> USB Enable
Only any USB-UART adapter is needed.
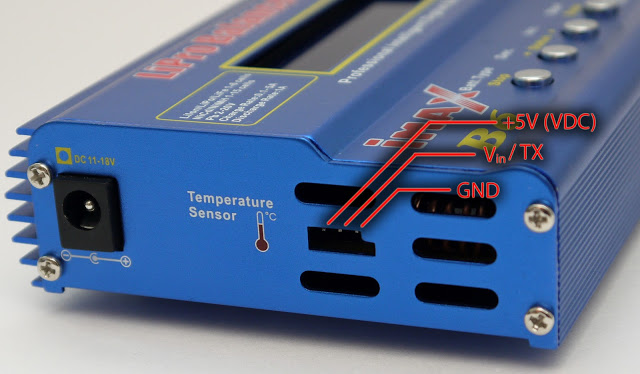
+5 volts can not be connected, they are only needed to power the sensor. TX connect to the RX (reception) adapter, GND, respectively, to the ground. The speed is 9600, but LogView knows it.
The connector can be used like this:
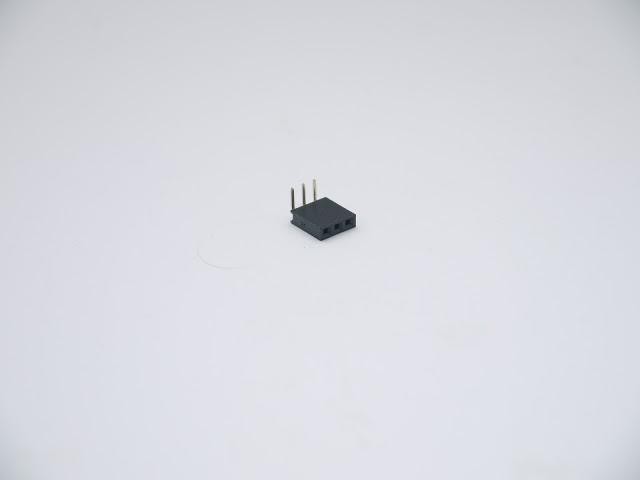
It’s called PBS-3God forgive me for the links to the chipidip, in which it costs 20 rubles, I bought from us for 3 rubles
We build charge-discharge graphics in the Log View
To begin, go to the offsite and download the latest version there (currently 2.7.4.485). Another good thing would be to download update 2.7.4.490, and place it in the program folder.
However, the program with the update already installed can be downloaded from me via a direct link .
No installation is required, just unpack and run LogView.exe. Actually, the basic settings can be viewed in the video:
Here is my customized preset for graphs, open Graphic - Open graphic draft. Graphic - Save graphic draft for default installation on every run.
Any log can be saved File - Save As, and then open and work with it further - to customize the display settings and make a picture of it. The program is not particularly difficult, you can figure it out in an hour by typing. There is a Russian translation (where I didn’t remember, I already have a link to it), but it is not complete. Yes, and English too - in the menus often come across originally German words that have already been learned - Entlaned - discharge, Laden - charge. Zyklus - cycle.
For example:
The charge is almost full lithium-polymer battery:
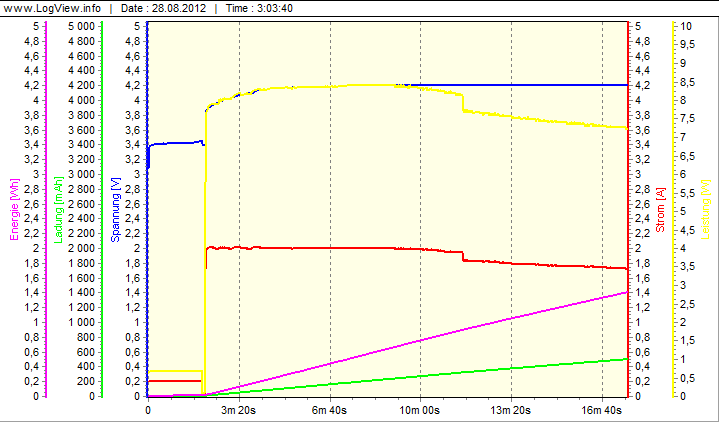
Immediately after the start, the voltage stabilized at 4.2 volts, and the current began to fall.
High current NiMH battery charge:

After a certain period of time the voltage was turned off, to measure the voltage of the battery itself.
Discharge NiMH battery:
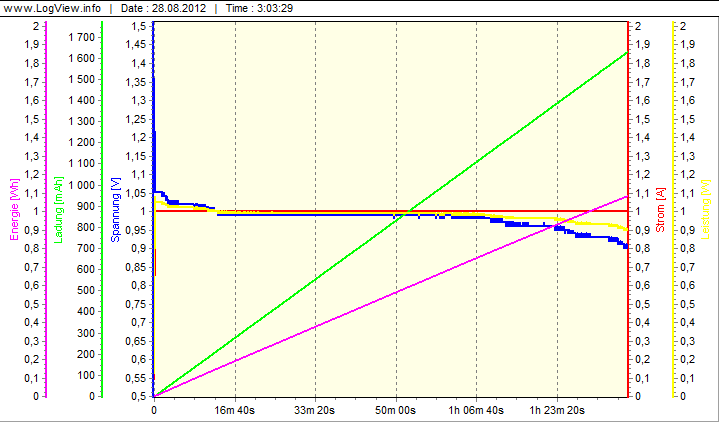
Nothing interesting. The current in 1A throughout the discharge, until the voltage drops to 0.8V.
Thermal sensor connection
Same picture:
The wide-spread LM35 from National Semiconductor is used as a sensor. The connection is the simplest - food to power, earth to earth,dust to dust Vout to Vin.
Well, you need to enable the item in the menu (if you turned it off) - User set program -> USB / Temp select -> Temp Cut off (dec)
Buy anywhere, even in the chip-and-dip , at least in Eleconte .
The point is that at the end of the charging of nickel batteries, all the energy supplied to them will be converted to heat, which causes the battery to heat up. Consequently, once the battery is hot, it means that it is charged.
disadvantages
IMAX guide ( actual for February 2016 ):
References:
Russian manual (for another model, but the menu is the same)
Products webpage
Giant review of 18650 batteries made with this charge
Video review of the original , still a video review of the copy
Photo review
At tomtop.com retails for $ 35.96
And you can subscribe in order not to miss new reviews in my profile (the button “subscribe”)

Our other publications:
Overview of the powerful tablet Chuwi Hi10 on a full Win10 for $ 180
15 little things from heaven about which you would like to know
15 cool little things for the geek from the Middle Kingdom. Part 2
Classes of quadcopters - which are and are used for
Seven current copters up to $ 20, which can be put in your pocket
Our little joy or budget than to please yourself on February 23?
Xiaomi company. Cheaper without damage to quality is no longer
Chuwi Ilife V5 - a $ 99 robot vacuum cleaner or how to turn daily cleaning into entertainment
NEJE engraver laser overview or promising business model
So what the manufacturers promise?
- Battery charge Li-ion , Li-pol , LiFe , NiCd , NiMH , PbAcid (all types of lead)
- Fully automatic charging process, controlled by a microcontroller. Current and voltage cut-off for lithium batteries, temperature and ΔV for nickel. For all types - off by maximum time and capacity.
- NiCd and NiMH training. Balancing charge of Li-pol batteries (for batteries with several banks)
- Charge current up to 5A, discharge up to 1A.
- Screen with indications of current voltage, current, capacity. Uploading all these parameters to a computer and plotting graphs.
Appearance
When opening the package, we see the following box:Inside which we find the charging itself, the wires (to power the charging itself and to connect to the batteries), instructions ... And that's it. Power supply not included
Charging:
Power and thermal connector (also known as computer output):
± terminals and balancing sockets:
Designer refinement pretending to be a radiator:
Authenticity of this radiator and hologram:
Here it is, closer:
The fact is that due to the easy repeatability of the circuit, every self-respecting plant copies this charge, at least 4 variants of non-original charges are known. At the price they differ not so much, but in quality - as it will. Here is a good link to a review of the original and a copy.
The mechanism of checking for originality is interesting - we erase the coating, we drive in the serial number and code on
manufacturer's website .
I was lucky (it's a joke, if that. I specifically spent $ 10 more)
What is interesting, the second time the number will not work:
As I understand it, it will not work to buy the original charging and copy its number from the copy manufacturers.
On the left - a wire with two " bananas " to connect to the device itself.
And to the T-Connectors connectors connect either a wire with crocodiles (right), or here they are:
By the way, no one knows where all such a connector is used:
Also included is a power cord with two crocodiles - the device is omnivorous and can eat any voltage from 10V to 18V. Although charging for a laptop, at least a car battery:
There is also a manual in English (but with errors):
In which on the last page there is a catalog of accessories:
90% of which in the presence of a soldering iron can not buy.
Insides
Unscrew the 4 screws on the left, and 4 on the right.After that, you need to push the upper part of the case to the sides, and pull out the bottom plate with the board attached to it:
The board is fastened with three screws:
The key transistors are smeared with thermal grease and pressed against the bottom plate.
The charger is built on the usual Atmega:
On some devices, it is not even blocked from reading, which allows you to play a little with the firmware.
Collected neatly, flux washed away.
')
Using
We connect the power, the screen with the inscription SkyRc Imax-B6 immediately lights up. On / off button is not provided.After that we get to the main menu.
You can navigate through it using the "Stop" and "<" buttons. The main menu contains: selection of the charging program depending on the type of battery, settings menu:
As well as the points of saving and loading user settings.
You can select an item by pressing “Enter”. Here, for example, is the Li-pol charge menu item:
With another press of “Enter”, we switch to the parameter editing mode. The variable parameter flashes at this time. You can change the maximum current and voltage (more precisely, the number of cans is a voltage multiple of 3.7)
At each stage, works against the fool. Charging will not start if: the polarity of the battery is reversed, the voltage is too low or too high, the voltage does not match the type of battery or the number of cans, and so on.
after setting all the parameters, by long pressing “Enter” you can start charging. The first two minutes the battery will be charged with a current of 0.2 amperes, - another one of the points of protection against a fool, and a method for determining the number of cans:
After two minutes, the current will increase to the maximum:
In the process of charging, it can change, at the end drop to 0.1A.
The designations on the screen:
LI1S - Li-pol battery, one can. 1.3A - current, 4.2V - current voltage, CHG - short for Charging, charge. 003: 49 - time in minutes and seconds since the program began, 00046 - "capacity" in milliampere-hours "poured" into the battery during charging, or obtained from the battery during discharge. Naturally, the second digit will be less, and it is necessary to focus on it when measuring the battery capacity.
Connect to computer
In the charging itself, the menu is activated here: User set program -> USB / Temp select -> USB Enable
Only any USB-UART adapter is needed.
+5 volts can not be connected, they are only needed to power the sensor. TX connect to the RX (reception) adapter, GND, respectively, to the ground. The speed is 9600, but LogView knows it.
The connector can be used like this:
It’s called PBS-3
We build charge-discharge graphics in the Log View
To begin, go to the offsite and download the latest version there (currently 2.7.4.485). Another good thing would be to download update 2.7.4.490, and place it in the program folder.
However, the program with the update already installed can be downloaded from me via a direct link .
No installation is required, just unpack and run LogView.exe. Actually, the basic settings can be viewed in the video:
Here is my customized preset for graphs, open Graphic - Open graphic draft. Graphic - Save graphic draft for default installation on every run.
Any log can be saved File - Save As, and then open and work with it further - to customize the display settings and make a picture of it. The program is not particularly difficult, you can figure it out in an hour by typing. There is a Russian translation (where I didn’t remember, I already have a link to it), but it is not complete. Yes, and English too - in the menus often come across originally German words that have already been learned - Entlaned - discharge, Laden - charge. Zyklus - cycle.
For example:
The charge is almost full lithium-polymer battery:
Immediately after the start, the voltage stabilized at 4.2 volts, and the current began to fall.
High current NiMH battery charge:
After a certain period of time the voltage was turned off, to measure the voltage of the battery itself.
Discharge NiMH battery:
Nothing interesting. The current in 1A throughout the discharge, until the voltage drops to 0.8V.
Thermal sensor connection
Same picture:The wide-spread LM35 from National Semiconductor is used as a sensor. The connection is the simplest - food to power, earth to earth,
Well, you need to enable the item in the menu (if you turned it off) - User set program -> USB / Temp select -> Temp Cut off (dec)
Buy anywhere, even in the chip-and-dip , at least in Eleconte .
The point is that at the end of the charging of nickel batteries, all the energy supplied to them will be converted to heat, which causes the battery to heat up. Consequently, once the battery is hot, it means that it is charged.
disadvantages
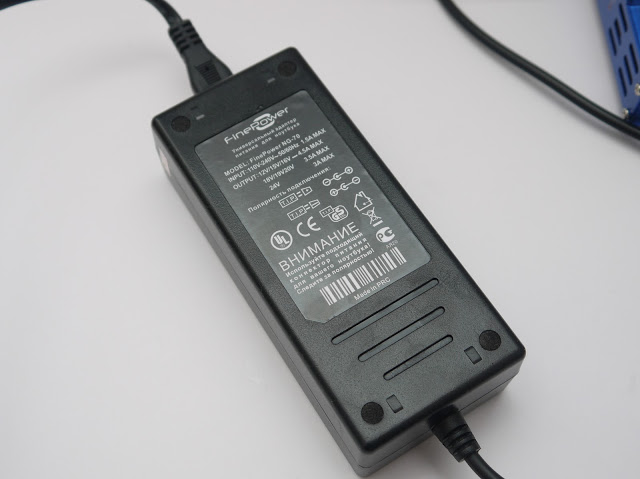
- No power supply. On the copy of b6ac constantly swear that the internal bp dies in a couple of days. I solved the issue of buying for 500 rubles of such a universal power supply:
- Cannot charge NiMH balanced batteries. As a replacement, LaCrosse does not roll, although the functions are the same, you can charge / discharge / train only one battery at a time. No, it is possible to charge a national bank of several batteries by adding voltage to the user profile equal to (voltage on the bank) * (number of cans), but balancing only works on Li-pol
- Low discharge current. For high-capacity batteries, for example, at 5Amper-hours 1A, this will be only 0.2C, and they can operate at currents of 2-3C or more. Under load, it will not work.
IMAX guide ( actual for February 2016 ):
| Model | Specifications | Price | A photo |
|---|---|---|---|
| Imax B6 | 5A Charge, 1A discharge, without power supply | $ 20.69 | 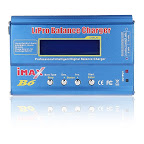 |
| Imax B6 (copy) | 5A Charge, 1A discharge, without power supply | $ 15.99 | 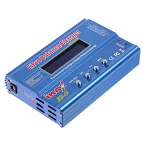 |
| Imax B6AC (copy) | 5A Charge, 1A discharge, internal mains power supply | $ 28.49 | 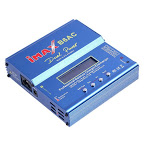 |
| Imax B6AC (copy) | 8A Charge, 2A discharge, internal mains power supply | Out of sale | 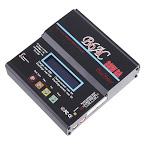 |
| Imax B6AC + (copy) | 5A Charge, 1A discharge, internal mains power supply | $ 39.10 | 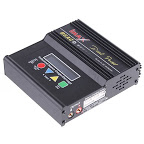 |
| Imax B8 + | 7A charge, 5A discharge, without power supply | $ 75.00 | 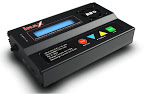 |
| Imax B6 Duo | 10A charge, 5A discharge, without power supply, two independent channels | Out of sale |  |
| Imax B6 QUATTRO | 10A Charge, 5A discharge, without power supply, cheaters independent channel | $ 159.90 | 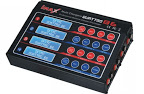 |
References:
Russian manual (for another model, but the menu is the same)
Products webpage
Giant review of 18650 batteries made with this charge
Video review of the original , still a video review of the copy
Photo review
At tomtop.com retails for $ 35.96
And you can subscribe in order not to miss new reviews in my profile (the button “subscribe”)
Our other publications:
Overview of the powerful tablet Chuwi Hi10 on a full Win10 for $ 180
15 little things from heaven about which you would like to know
15 cool little things for the geek from the Middle Kingdom. Part 2
Classes of quadcopters - which are and are used for
Seven current copters up to $ 20, which can be put in your pocket
Our little joy or budget than to please yourself on February 23?
Xiaomi company. Cheaper without damage to quality is no longer
Chuwi Ilife V5 - a $ 99 robot vacuum cleaner or how to turn daily cleaning into entertainment
NEJE engraver laser overview or promising business model
Source: https://habr.com/ru/post/150213/
All Articles