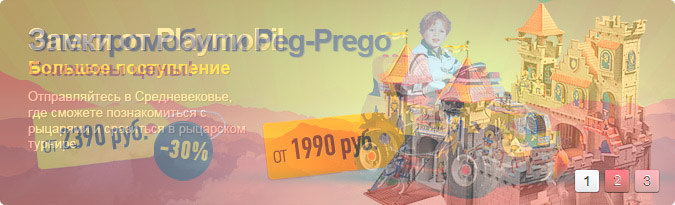
CSS slider
With the development of CSS3, layout capabilities grow exponentially. More and more functionality can be implemented on "pure" CSS. This post shows the process of developing an interactive looping slider without a single line of JavaScript. Automatic rotation, the choice of any slide with a smooth transition - on the "pure" CSS . Example in action

The transition, animation, and transform properties have long been, in one form or another, implemented in all popular browsers. On June 6, 2012, the W3C announced that this part of the developed CSS 3.0 standard would not change dramatically, and recommended that all browsers implement it today.
')
For front-end developers, this means the emergence of a standard on which to rely. Now you don’t need to fear that in the future any browser will abandon its prefix non-standard property - because it will be duplicated by the standard property and will replace it if necessary.
Outdated versions of Internet Explorer, to which it will soon be possible to even include version 9, do not support transition, animation and transform in any way. But their share still exceeds 10%. For IE7-9, js- “plug” is offered, but the effect of smooth switching between slides is nothing.
 There are many tasks that can be solved using CSS: interactive galleries, multi-level drop-down menus, building and animating three-dimensional diagrams ... Why use CSS when you can do everything on JS, especially considering the mass of ready-made developments? The main arguments may be:
So, for the CSS class names, the Block Element Modifier ( BEM ) methodology was used. The bottom line is that the layout is based on the layout of the page from independent blocks. According to BEM, a block can have elements, but only inside a block.
Slider Classes:
The animation sequence of key frames for three slides is as follows:
A feature of the slider implementation is that the same animation is assigned to all slides and all buttons:
This approach can significantly reduce the amount of code, because all the animations still have to duplicate them with prefix versions (@ -webkit-keyframes, @ -moz-keyframes and @ -o-keyframes), and each such “stack” of rules should be separately described for each required by the customer number of slides. If you separately describe the animation for each slide, then the amount of code can be tens of kilobytes.
To avoid this, but to sequentially animate all the slides and buttons with one animation, it is enough to set the offset of the beginning of the animation in time for each pair of slide + button:
For the first pair, the default value is zero offset.
It is also important that the offset does not depend on the number of slides, and can be described once for their maximum number.
As a result, a smooth animated transition between slides looks like this:

For the case when the user wants to hold the slide on the screen, but does not want to turn off the rotation, you can use the pause mode to hover over the slide:
There are a number of CSS “events” that switch the state of the html element. If we talk about a mouse click, then this is the appearance of pseudo-classes: focus,: target, or: checked in one of the page elements. The pseudo-class: focus can be no more than one element per page at a time; pseudo-class: target litters the history of the browser and requires the presence of the “a” tag; The pseudo-class: checked remembers the state before leaving the page, plus, in the case of radio buttons, is a discrete switch, when only one element of a particular group can be selected - what you need.
In selectors below level 4, you can switch the state of an arbitrary element (for example, the opacity of a slide) only in conjunction with a radio button, using the selectors of neighbors + and ~. It is possible to switch both the neighbor's styles and the styles of the descendants of the neighbor, but in any case, the neighbor must be after the radio button.
It was used to switch the opacity of the slide - the container that contains the image. This is a more versatile way than switching picture properties, because you can put any additional information in a div container, unlike an empty img element (for example, the title of a slide, or a related description, including links).
For slides, transition properties are shown that allow you to switch between them smoothly.
When a user selects any slide, it is necessary to stop the animation of all slides and buttons. This is due to the fact that the priority of the values of the properties of the running animation is always higher than all the other values of the same properties (you can interrupt even inline properties with the important!).
Since the animation, albeit the same in structure, each slide has, and you need to turn off the animation of all slides (otherwise three slides will participate in a smooth transition), all radio buttons must be placed before the first slide.
Moreover, all buttons (labels of radio buttons) should be grouped in a separate block and placed after radio buttons, otherwise there may be problems with universal positioning of labels for an arbitrary number of slides.
Stop animation of all slides and buttons when you select any slide is set as follows:
It is impossible to make a universal slider for any number of slides, because each number requires its own “stack” of CSS animation rules. Each such “stack” (if it is described) can be connected via the modifier of the slider block:
where X is the number of slides.
To support some older browsers, the first slide is not animated. For this reason, the container of the first image has an opacity always equal to 1.0. There is a problem: when the two other slides are smoothly switched between each other, the first one shines through (this could be the background of the parent of the slider block). To remove the scanning effect, set the transition-delay for all slides, except for the selected one; z-index is set for the selected one more than all others:
So that the slides do not conflict with other elements of the site (for example, do not overlap the drop-down menu with z-index less than or equal to 6), we create our own context (stacking context) for the block by setting the minimum required for visibility, z-index ʻa:
Today, without programming skills and specialized libraries, until its final standardization, CSS 3.0 allows you to implement complex and interesting tasks. The described interactive slider, at the moment, is fully functional in 80% of runet users. For most of the remaining users, namely for users of IE7-9 browsers, you can use the js- “stub”, which implements the basic functionality of the slider.
A working example can be seen here .
General information.
Standards and prefixes
The transition, animation, and transform properties have long been, in one form or another, implemented in all popular browsers. On June 6, 2012, the W3C announced that this part of the developed CSS 3.0 standard would not change dramatically, and recommended that all browsers implement it today.
')
For front-end developers, this means the emergence of a standard on which to rely. Now you don’t need to fear that in the future any browser will abandon its prefix non-standard property - because it will be duplicated by the standard property and will replace it if necessary.
Outdated versions of Internet Explorer, to which it will soon be possible to even include version 9, do not support transition, animation and transform in any way. But their share still exceeds 10%. For IE7-9, js- “plug” is offered, but the effect of smooth switching between slides is nothing.
Why CSS, not JS?
There are many tasks that can be solved using CSS: interactive galleries, multi-level drop-down menus, building and animating three-dimensional diagrams ... Why use CSS when you can do everything on JS, especially considering the mass of ready-made developments? The main arguments may be:- In most cases, CSS effects work faster, because only browser engines control the execution of these effects. This is especially noticeable on mobile devices.
- For the implementation of the task does not require knowledge of JS and in general any programming languages. Editing the same CSS, as a rule, is available even to an ordinary user. Moreover, “breaking firewood” in CSS is much more complicated than in JS.
Implementation
BEM
So, for the CSS class names, the Block Element Modifier ( BEM ) methodology was used. The bottom line is that the layout is based on the layout of the page from independent blocks. According to BEM, a block can have elements, but only inside a block.
Slider Classes:
.slider /* , */ .slider__radio /* */ .slider__item /* */ .slider__img /* */ .slider__number-list /* */ .slider__number /* */ .slider__number-after /* IE7 IE8, :after ::after */ .slider_count_X /* , X */ Animation
The animation sequence of key frames for three slides is as follows:
@keyframes slider__item-autoplay_count_3 { 0%{opacity:0;} 10%{opacity:1;} 33% {opacity:1;} 43% {opacity:0;} 100%{opacity:0;} } A feature of the slider implementation is that the same animation is assigned to all slides and all buttons:
slider_count_3 .slider__item, slider_count_3 .slider__number-after { -moz-animation: slider__item-autoplay_count_3 15s infinite; -webkit-animation: slider__item-autoplay_count_3 15s infinite; -o-animation: slider__item-autoplay_count_3 15s infinite; animation: slider__item-autoplay_count_3 15s infinite; } This approach can significantly reduce the amount of code, because all the animations still have to duplicate them with prefix versions (@ -webkit-keyframes, @ -moz-keyframes and @ -o-keyframes), and each such “stack” of rules should be separately described for each required by the customer number of slides. If you separately describe the animation for each slide, then the amount of code can be tens of kilobytes.
To avoid this, but to sequentially animate all the slides and buttons with one animation, it is enough to set the offset of the beginning of the animation in time for each pair of slide + button:
.slider__item:nth-of-type(2), .slider__number:nth-of-type(2) > .slider__number-after { -moz-animation-delay:5s; -webkit-animation-delay:5s; -o-animation-delay:5s; animation-delay:5s; } .slider__item:nth-of-type(3), .slider__number:nth-of-type(3) > .slider__number-after { -moz-animation-delay:10s; -webkit-animation-delay:10s; -o-animation-delay:10s; animation-delay:10s; } ... For the first pair, the default value is zero offset.
It is also important that the offset does not depend on the number of slides, and can be described once for their maximum number.
As a result, a smooth animated transition between slides looks like this:
Pause when hovering
For the case when the user wants to hold the slide on the screen, but does not want to turn off the rotation, you can use the pause mode to hover over the slide:
.slider:hover .slider__item, .slider:hover .slider__number-after { -moz-animation-play-state: paused; -webkit-animation-play-state: paused; -o-animation-play-state: paused; animation-play-state: paused; } Click Switch
There are a number of CSS “events” that switch the state of the html element. If we talk about a mouse click, then this is the appearance of pseudo-classes: focus,: target, or: checked in one of the page elements. The pseudo-class: focus can be no more than one element per page at a time; pseudo-class: target litters the history of the browser and requires the presence of the “a” tag; The pseudo-class: checked remembers the state before leaving the page, plus, in the case of radio buttons, is a discrete switch, when only one element of a particular group can be selected - what you need.
.slider__radio { } .slider__radio:checked { } In selectors below level 4, you can switch the state of an arbitrary element (for example, the opacity of a slide) only in conjunction with a radio button, using the selectors of neighbors + and ~. It is possible to switch both the neighbor's styles and the styles of the descendants of the neighbor, but in any case, the neighbor must be after the radio button.
/* « » */ .slider__radio:nth-of-type(1) ~ .slider__item:nth-of-type(1) { opacity: 0.0; } /* «» */ .slider__radio:nth-of-type(1):checked ~ .slider__item:nth-of-type(1) { opacity: 1.0; } It was used to switch the opacity of the slide - the container that contains the image. This is a more versatile way than switching picture properties, because you can put any additional information in a div container, unlike an empty img element (for example, the title of a slide, or a related description, including links).
For slides, transition properties are shown that allow you to switch between them smoothly.
.slider__item { -moz-transition: opacity 0.2s linear; -webkit-transition: opacity 0.2s linear; -o-transition: opacity 0.2s linear; transition: opacity 0.2s linear; } Rotation stop when selecting a slide
When a user selects any slide, it is necessary to stop the animation of all slides and buttons. This is due to the fact that the priority of the values of the properties of the running animation is always higher than all the other values of the same properties (you can interrupt even inline properties with the important!).
Since the animation, albeit the same in structure, each slide has, and you need to turn off the animation of all slides (otherwise three slides will participate in a smooth transition), all radio buttons must be placed before the first slide.
<input class="slider__radio" id="1" type="radio"> <input class="slider__radio" id="2" type="radio"> <input class="slider__radio" id="3" type="radio"> ... <div class="slider__item">...</div> Moreover, all buttons (labels of radio buttons) should be grouped in a separate block and placed after radio buttons, otherwise there may be problems with universal positioning of labels for an arbitrary number of slides.
Stop animation of all slides and buttons when you select any slide is set as follows:
.slider__radio:checked ~ .slider__item, .slider__radio:checked ~ .slider__number-list > .slider__number-after { opacity: 0.0; -moz-animation: none; -webkit-animation: none; -o-animation: none; animation: none; } Arbitrary number of slides
It is impossible to make a universal slider for any number of slides, because each number requires its own “stack” of CSS animation rules. Each such “stack” (if it is described) can be connected via the modifier of the slider block:
.slider_count_X where X is the number of slides.
To support some older browsers, the first slide is not animated. For this reason, the container of the first image has an opacity always equal to 1.0. There is a problem: when the two other slides are smoothly switched between each other, the first one shines through (this could be the background of the parent of the slider block). To remove the scanning effect, set the transition-delay for all slides, except for the selected one; z-index is set for the selected one more than all others:
.slider__item { opacity: 1.0; position: relative; -moz-transition: opacity 0.0s linear 0.2s; -webkit-transition: opacity 0.0s linear 0.2s; -o-transition: opacity 0.0s linear 0.2s; transition: opacity 0.0s linear 0.2s; } .slider__radio:nth-of-type(1):checked ~ .slider__item:nth-of-type(1), .slider__radio:nth-of-type(2):checked ~ .slider__item:nth-of-type(2), .slider__radio:nth-of-type(3):checked ~ .slider__item:nth-of-type(3), .slider__radio:nth-of-type(4):checked ~ .slider__item:nth-of-type(4), .slider__radio:nth-of-type(5):checked ~ .slider__item:nth-of-type(5){ -moz-transition: opacity 0.2s linear; -webkit-transition: opacity 0.2s linear; -o-transition: opacity 0.2s linear; transition: opacity 0.2s linear; z-index: 6; } So that the slides do not conflict with other elements of the site (for example, do not overlap the drop-down menu with z-index less than or equal to 6), we create our own context (stacking context) for the block by setting the minimum required for visibility, z-index ʻa:
.slider { z-index: 0; } so
Today, without programming skills and specialized libraries, until its final standardization, CSS 3.0 allows you to implement complex and interesting tasks. The described interactive slider, at the moment, is fully functional in 80% of runet users. For most of the remaining users, namely for users of IE7-9 browsers, you can use the js- “stub”, which implements the basic functionality of the slider.
A working example can be seen here .
Source: https://habr.com/ru/post/150030/
All Articles