Development of a particle system on the DirectX 9 platform. Part I
This post will be about how to develop your own, and quite productive (on my computer, 1,000,000 particles in real time are quietly drawn and animated), a system of particles. We will write in C ++, DirectX 9 will be used as a platform.
The second part is available here .
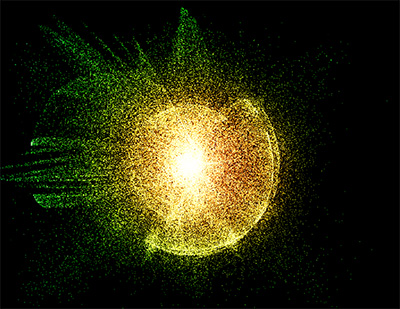
An example of one of the frames of visualization (clickable):
')
To begin with, it is worth saying why C ++ and DirectX9, and not, say, XNA, or GDI in general. Before you decide, I looked at \ tried many options: HTML + JS (when developing the concept), C # and GDI, C ++ and GDI, C # and XNA. All of these options did not allow us to achieve the required performance (real-time rendering of more than 50,000 particles), so I began to consider more serious options. The first thing that came to mind was DirectDraw, but no one has been developing it for a long time, so the choice fell on Direct3D. I could use OpenGL, but D3D is somehow closer to me.
The system will draw and animate the particles. Animation will produce a certain formula (as an example, I used the law of the world). You can interact with the system from the outside by transmitting some kind of data in real time.
We want our particle system to be productive enough so that it can be used for real-time rendering, needs to be flexible in customization, allows sprites, various effects and post effects to be applied.
Let's go in order:
1. Performance. Perhaps, something faster than C \ C ++ will be difficult to find, and Direct3D is widely used in the development of computer games. We have enough opportunities for him.
2. Rendering in real time. Actually Direct3D (OpenGL) for this and use. The selected candidate is suitable.
3. Flexibility in customization. In DirectX there is such a wonderful thing as shaders. You can do anything without rewriting anything else except them.
4. Sprites. DirectX is fairly easy to use. Fit
5. Effects, post effects. To implement this, we will help the shaders.
Now about the subtleties that need to be considered in order to achieve sufficient performance. Because Since the number of particles is very large, it’s better to render them in one piece, so as not to lose in performance due to the huge number of calls to the functions of rendering. Well, you also need to take care of the memory, so the best option would be to store the data as an array of points.
We have solved all theoretical questions, now we will move on to implementation.
To work, we need our own development environment \ compiler and DirectX SDK
The first thing you need to do is create a Direct3D9 object, after the device for the output and a window where everything will be displayed.
In the code above, we create a regular window in which drawing will take place. Next is the Direct3D object. Finally, the device object that we will use for drawing.
A few words about hardware acceleration. Many calculations can be performed using a processor, emulating a video card, but since a regular processor is not very suitable for these purposes (it has, at best, 4 cores, and there are dozens or even hundreds in a video card), then this will have an effect on speed. In some cases, very much. Therefore, it is better to use hardware acceleration whenever possible.
You should also not forget about the installation of the projection matrix and the camera. In short, the projection matrix is used to convert 3D data to 2D, and the camera describes what we see and where we look.
But here I will introduce one simplification, orthogonal to the projection matrix, since in fact, our particles are flat points, and they do not need special calculations of perspective; we can do without a camera. In the orthogonal projection, Z is actually not taken into account, and objects do not change size depending on their position in space.
All the preparations we made, it remains only to create particles and start drawing.
VertexData is used to store data about a particle in a GPU (vertex buffer), and contains the coordinates of our particle in space. This structure has a special format, and in fact, the graphics processor will take from it information what and where to draw.
Particle will represent our particle, and contains coordinates and speed.
In the same particles will be stored information about all of our particles. We will use this information to calculate the motion of particles.
I will comment on some points.
When creating the buffer, we pass the D3DUSAGE_WRITEONLY parameter, telling the GPU that we will not read the data from the buffer. This will allow the graphics processor to perform the necessary optimizations, and increase the rendering speed.
VertexDeclaration is usually used to work with shaders. If shaders are not required, then you can do without creating this object.
Now the particles need to be drawn. This is done very simply:
One important note: BeginScene () must be called each time before drawing, and EndScene () after it is finished.
And of course without animation, otherwise what a particle system is. As an example, I used the Law of the World.
When locking the buffer, I specified the D3DLOCK_DISCARD flag, it allows the graphics processor to continue drawing particles from the old buffer. We at the same time return a new one. This little trick reduces downtime.
This concludes the first part of the article. The next part will describe the texturing of particles, vertex and pixel shaders, as well as effects and post effects. Also at the end of the 2nd part you will see links to the demo and its full source code.
The second part is available here .
An example of one of the frames of visualization (clickable):
')
To begin with, it is worth saying why C ++ and DirectX9, and not, say, XNA, or GDI in general. Before you decide, I looked at \ tried many options: HTML + JS (when developing the concept), C # and GDI, C ++ and GDI, C # and XNA. All of these options did not allow us to achieve the required performance (real-time rendering of more than 50,000 particles), so I began to consider more serious options. The first thing that came to mind was DirectDraw, but no one has been developing it for a long time, so the choice fell on Direct3D. I could use OpenGL, but D3D is somehow closer to me.
0. Concept and requirements
The system will draw and animate the particles. Animation will produce a certain formula (as an example, I used the law of the world). You can interact with the system from the outside by transmitting some kind of data in real time.
Requirements.
We want our particle system to be productive enough so that it can be used for real-time rendering, needs to be flexible in customization, allows sprites, various effects and post effects to be applied.
Let's go in order:
1. Performance. Perhaps, something faster than C \ C ++ will be difficult to find, and Direct3D is widely used in the development of computer games. We have enough opportunities for him.
2. Rendering in real time. Actually Direct3D (OpenGL) for this and use. The selected candidate is suitable.
3. Flexibility in customization. In DirectX there is such a wonderful thing as shaders. You can do anything without rewriting anything else except them.
4. Sprites. DirectX is fairly easy to use. Fit
5. Effects, post effects. To implement this, we will help the shaders.
Now about the subtleties that need to be considered in order to achieve sufficient performance. Because Since the number of particles is very large, it’s better to render them in one piece, so as not to lose in performance due to the huge number of calls to the functions of rendering. Well, you also need to take care of the memory, so the best option would be to store the data as an array of points.
We have solved all theoretical questions, now we will move on to implementation.
1. Initialize Direct3D and create camera
To work, we need our own development environment \ compiler and DirectX SDK
The first thing you need to do is create a Direct3D9 object, after the device for the output and a window where everything will be displayed.
Hidden text
// WNDCLASSEX wc = {sizeof(WNDCLASSEX), CS_VREDRAW|CS_HREDRAW|CS_OWNDC, WndProc, 0, 0, hInstance, NULL, NULL, (HBRUSH)(COLOR_WINDOW+1), NULL, L"RenderToTextureClass", NULL}; RegisterClassEx(&wc); // HWND hMainWnd = CreateWindowW(L"RenderToTextureClass", L"Render to texture", WS_POPUP, 0, 0, Width, Height, NULL, NULL, hInstance, NULL); // Direct3D LPDIRECT3D9 d3d = Direct3DCreate9(D3D_SDK_VERSION); // D3DPRESENT_PARAMETERS PresentParams; memset(&PresentParams, 0, sizeof(D3DPRESENT_PARAMETERS)); PresentParams.Windowed = TRUE; // // . // D3DSWAPEFFECT_DISCARD. PresentParams.SwapEffect = D3DSWAPEFFECT_DISCARD; LPDIRECT3DDEVICE9 device = NULL; // d3d->CreateDevice(D3DADAPTER_DEFAULT, // D3DDEVTYPE_HAL, // hMainWnd, // D3DCREATE_HARDWARE_VERTEXPROCESSING, // &PresentParams, // , &device); // , , // . device->SetRenderState(D3DRS_LIGHTING,FALSE); // device->SetRenderState(D3DRS_ZENABLE, FALSE); // In the code above, we create a regular window in which drawing will take place. Next is the Direct3D object. Finally, the device object that we will use for drawing.
A few words about hardware acceleration. Many calculations can be performed using a processor, emulating a video card, but since a regular processor is not very suitable for these purposes (it has, at best, 4 cores, and there are dozens or even hundreds in a video card), then this will have an effect on speed. In some cases, very much. Therefore, it is better to use hardware acceleration whenever possible.
You should also not forget about the installation of the projection matrix and the camera. In short, the projection matrix is used to convert 3D data to 2D, and the camera describes what we see and where we look.
But here I will introduce one simplification, orthogonal to the projection matrix, since in fact, our particles are flat points, and they do not need special calculations of perspective; we can do without a camera. In the orthogonal projection, Z is actually not taken into account, and objects do not change size depending on their position in space.
// D3DXMATRIX matrixView; D3DXMATRIX matrixProjection; // D3DXMatrixLookAtLH( &matrixView, &D3DXVECTOR3(0,0,0), &D3DXVECTOR3(0,0,1), &D3DXVECTOR3(0,1,0)); // D3DXMatrixOrthoOffCenterLH(&matrixProjection, 0, Width, Height, 0, 0, 255); // device->SetTransform(D3DTS_VIEW,&matrixView); device->SetTransform(D3DTS_PROJECTION,&matrixProjection); 2. Creation of particles and buffer for them
All the preparations we made, it remains only to create particles and start drawing.
struct VertexData { float x,y,z; }; struct Particle { float x, y, vx, vy; }; std::deque<Particle> particles; VertexData is used to store data about a particle in a GPU (vertex buffer), and contains the coordinates of our particle in space. This structure has a special format, and in fact, the graphics processor will take from it information what and where to draw.
Particle will represent our particle, and contains coordinates and speed.
In the same particles will be stored information about all of our particles. We will use this information to calculate the motion of particles.
Hidden text
// srand(clock()); Particle tmp; for( int i = 0; i<particleCount; ++i ) { tmp.x = rand()%Width; tmp.y = rand()%Height; particles.push_back( tmp ); } LPDIRECT3DVERTEXBUFFER9 pVertexObject = NULL; LPDIRECT3DVERTEXDECLARATION9 vertexDecl = NULL; size_t count = particles.size(); VertexData *vertexData = new VertexData[count]; for(size_t i=0; i<count; ++i) { vertexData[i].x = particles[i].x; vertexData[i].y = particles[i].y; vertexData[i].z = 0.f; vertexData[i].u = 0; vertexData[i].v = 0; } void *pVertexBuffer = NULL; // device->CreateVertexBuffer( count*sizeof(VertexData), // D3DUSAGE_WRITEONLY, // GPU, D3DFVF_XYZ, // XYZ D3DPOOL_DEFAULT, // &pVertexObject, // , NULL); // . NULL // , pVertexObject->Lock(0, count*sizeof(VertexData), &pVertexBuffer, 0); // memcpy(pVertexBuffer, vertexData, count*sizeof(VertexData)); pVertexObject->Unlock(); delete[] vertexData; vertexData = nullptr; // // 3 float, 0- , D3DVERTEXELEMENT9 decl[] = { { 0, 0, D3DDECLTYPE_FLOAT3, D3DDECLMETHOD_DEFAULT, D3DDECLUSAGE_POSITION, 0 }, D3DDECL_END() }; // device->CreateVertexDeclaration(decl, &vertexDecl); I will comment on some points.
When creating the buffer, we pass the D3DUSAGE_WRITEONLY parameter, telling the GPU that we will not read the data from the buffer. This will allow the graphics processor to perform the necessary optimizations, and increase the rendering speed.
VertexDeclaration is usually used to work with shaders. If shaders are not required, then you can do without creating this object.
3. particle rendering
Now the particles need to be drawn. This is done very simply:
// device->Clear( 0, NULL, D3DCLEAR_TARGET, D3DCOLOR_XRGB(0,0,0), 1.0f, 0 ); // device->SetStreamSource(0, pVertexObject, 0, sizeof(VertexData)); // , device->SetVertexDeclaration(vertexDecl); device->BeginScene(); // device->DrawPrimitive(D3DPRIMITIVETYPE::D3DPT_POINTLIST, // - 0, // 0- particles.size()); // , device->EndScene(); One important note: BeginScene () must be called each time before drawing, and EndScene () after it is finished.
Animation
And of course without animation, otherwise what a particle system is. As an example, I used the Law of the World.
Hidden text
// POINT pos; GetCursorPos(&pos); RECT rc; GetClientRect(hMainWnd, &rc); ScreenToClient(hMainWnd, &pos); const int mx = pos.x; const int my = pos.y; const auto size = particles.size(); float force; float distSquare; VertexData *pVertexBuffer; // , pVertexObject->Lock(0, 0, (void**)&pVertexBuffer, D3DLOCK_DISCARD); for(int i = 0; i < size; ++i ) { auto &x = particles[i].x; auto &y = particles[i].y; distSquare= pow( x - mx, 2 ) + pow( y - my, 2 ); if( dist < 20 ) { force = 0; } else { force = G / distSquare; } const float xForce = (mx - x) * force; const float yForce = (my - y) * force; particles[i].vx *= Resistance; particles[i].vy *= Resistance; particles[i].vx += xForce; particles[i].vy += yForce; x+= particles[i].vx; y+= particles[i].vy; if( x > Width ) x -= Width; else if( x < 0 ) x += Width; if( y > Height ) y -= Height; else if( y < 0 ) y += Height; pVertexBuffer[i].x = particles[i].x; pVertexBuffer[i].y = particles[i].y; } pVertexObject->Unlock(); When locking the buffer, I specified the D3DLOCK_DISCARD flag, it allows the graphics processor to continue drawing particles from the old buffer. We at the same time return a new one. This little trick reduces downtime.
This concludes the first part of the article. The next part will describe the texturing of particles, vertex and pixel shaders, as well as effects and post effects. Also at the end of the 2nd part you will see links to the demo and its full source code.
Source: https://habr.com/ru/post/149932/
All Articles