Raspberry Pi: detailed setup from scratch to TorrentBox
Prelude
I followed HabraHabr for a long time the Raspberry Pi project and firmly decided to get the mini-computer. When the pre-order started, I used it almost immediately, but only on June 17, 2012 I received an email from RSComponents.Com about the possibility of ordering my copy of Raspberry Pi. In total, about a month has passed since the pre-order.
On the same day, I created an order (by the way, at that time it was already possible to order “officially” to the Russian Federation) and waited for my “raspberry”. The information letter promised shipment for a maximum of 6 weeks, but in that time I never received my payment. During the call to the RS RS representative office, the manager of the company made it clear that deliveries will be soon, but when it is not known.
On August 17, I received a message from an employee of the Moscow RS that my payment was delivered to the office and can be taken away (because it cannot be ordered from RS with home delivery, because DHL does not deliver packages to individuals). As a matter of fact, on the same day I received my Raspberry Pi computer!
')
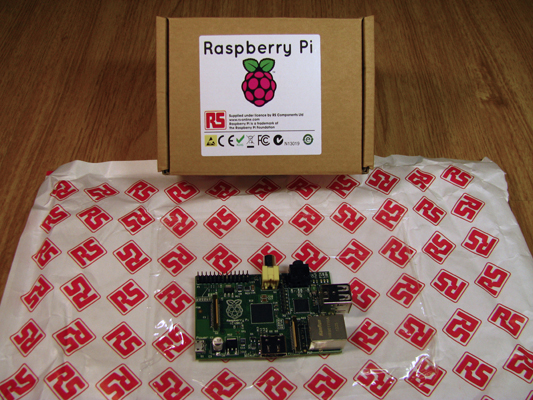
All the necessary set of components was purchased by me in advance (in fact, I borrowed everything from other devices). I used:
- 4Gb Class6 SD card from Transcend
- NoName 1A USB Charger with MicroUSB Cable
- Hama HDMI cable
- Ethernet cable
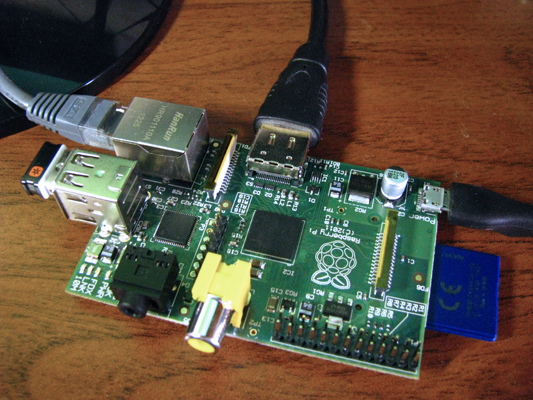
I used my Logitech USB Reciever Unifying as a keyboard and mouse. I connected the Raspberry to the monitor using an HDMI-DVI cable.
The first action. Install the OS.
Raspbian was chosen as the OS for Raspberry (as I understood from the forums, almost all the builds are made based on Debian, so the choice, in my inexperienced opinion, is not very rich). This OS is widely described on the Internet, as well as optimized specifically for RPi.
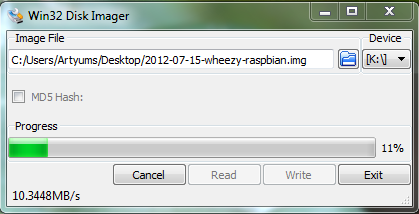
OS image can be downloaded from the official site: 2012-07-15-wheezy-raspbian.zip . The image is archived in ZIP, itself has the extension IMG. It must be unzipped.
Also, you will need the Win32DiskImager utility, which you need to run as an administrator.
We install your SD card in the card reader, look in Explorer, what letter it received in the system (so as not to accidentally wipe the data on another medium).
In the Win32DiskImager program, select the previously downloaded Raspbian image, select the required carrier letter and click Write. The suggested warning is answered with “Yes”.
The process of filling the OS on the card and splitting it into sections will:
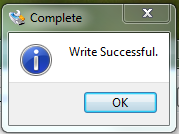
The process will end with a success message:
Now you need to slightly edit the file config.txt in the root of the memory card - this is the system configuration file for the Raspberry Pi. Please note that the settings I mentioned are relevant for LCD monitors with a screen resolution of 1920 * 1080.
You should uncomment the parameter disable_overscan = 1 (if you do not plan to use the RCA output).
I also advise you to set a fixed resolution. To do this, uncomment the hdmi_group and hdmi_mode lines . The value of the hdmi_mode parameter should be changed in accordance with the table that is shown here (also, this link contains other parameters that may be useful to you). For example, for a monitor with a resolution of 1920 * 1080 should write hdmi_mode = 16 .
Do not forget to save the changes, disconnect the SD card and insert it into the Raspberry Pi.
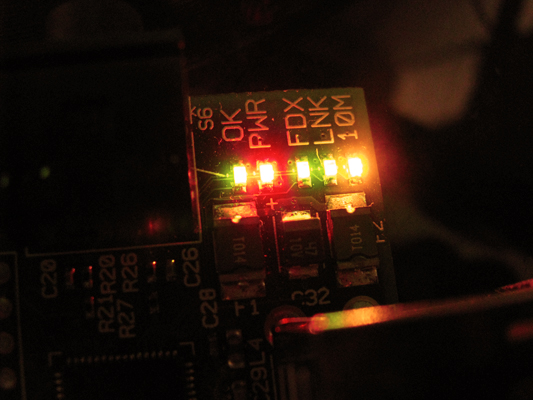
We connect the power to the board and see on the monitor the loading process, which interests us (at least for now) a little. Observe the joyful blinking of Raspberry Pi light bulbs:
When first loaded, the raspi_config system setup program will be automatically launched:
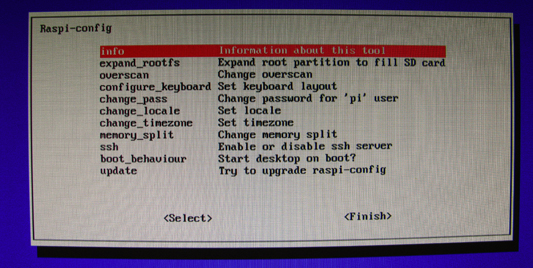
- Execute the expand_rootfs command, which expands the root partition to the entire SD card.
- Enter the section configure_keyboard and install the most suitable type of keyboard. I chose Logitech Cordless Desktop
- Then, we enter the change_pass section and set a new password for user pi (note that the characters you enter do not appear at all, even as asterisks!).
- Install additional locales using the change_locale item (I didn’t do that and left the only default locale, en_GB UTF8).
- Set the time zone ( set_timezone ). For example, if you live in Moscow, you need to find the item Europe, and in it - Moscow
- Memory_split is installed in accordance with its own desire, I recommend to allocate a video - 32Mb, if you plan to use the graphical interface.
- Be sure to activate ssh !
- If you want the graphical environment to start automatically when Raspbian is loaded, we activate the boot_behaviour option.
At the end, press [CTRL] + [F] and select Finish , agreeing to reboot the device.
When the reboot is complete, you will be prompted to enter a username and password. The username is pi , the password you set during setup of the Raspbian system.
This completes the installation and initial setup of the system!
The next part will be interesting to those who are not particularly familiar with Linux (as I was).
The action of the second. Installing a web server and configuring Samba.
Do not forget that if your Raspberry is connected to the network, you can use SSH access, which is many times more convenient.
Before you begin, update apt-get :
sudo apt-get update Web server installation:
Install MySQL:
sudo apt-get install mysql-server mysql-client When prompted to set a password for root - specify any password that you remember.
Install Lighttpd:
sudo apt-get install lighttpd From now on, Rpi will respond with a test page if you type its IP address in the browser of any computer on the network!
Install PHP5:
sudo apt-get install php5-cgi Now you need to activate PHP in the server settings. Open the file in the nano editor:
sudo nano /etc/lighttpd/lighttpd.conf Server_modules should look like this:
server.modules = ( "mod_access", "mod_fastcgi", "mod_alias", "mod_compress", "mod_redirect", "mod_rewrite", ) And at the very end of the file add this:
fastcgi.server = ( ".php" => (( "bin-path" => "/usr/bin/php5-cgi", "socket" => "/tmp/php.socket" ))) Save by pressing [CTRL] + [X], [Y] and [Enter].
It remains to edit the PHP5 configuration file:
sudo nano /etc/php5/cgi/php.ini We find and uncomment (delete the character ";") the string cgi.fix_pathinfo = 1 . Save the file.
After all done, restart Lighttpd by running the command:
sudo /etc/init.d/lighttpd restart Install and configure Samba
Install Samba:
sudo apt-get install samba samba-common-bin Since my Rpi is in the home network, I decided not to set a password for access to folders, but simply set up a public sharing for the entire network.
To do this, open the smb.conf file:
sudo nano /etc/samba/smb.conf Instead of all the existing content we write:
[global] workgroup = WORKGROUP guest ok = yes netbios name = Raspberry security = share browseable = yes [www] path = /var/www writeable = yes browseable = yes We save. Restart Samba:
sudo /etc/init.d/samba restart From this point on, a new RASPBERRY device has appeared on your network, which has the www folder.
In it, you can create any files that can be viewed on the entire network using a browser.
By the way! It is much more convenient to manage the sharing of files and folders using the SWAT program, which provides a web interface.
It is very easy to install:
sudo apt-get install swat The SWAT control panel will be located at http: // [IP devices]: 901
Login and password match your account (the one you use for SSH)
Action is the third. Mount media files.
As a carrier, I decided to use a regular flash drive, which I plugged into one of the USB ports of the Raspberry Pi. If you wish, you can also connect an external hard drive to the Rpi, however, it will be necessary to arrange for it a separate power supply, since the USB ports of the board are not designed for such loads and, at best, the hard drive simply does not start. To me, the volume of the flash drive (16GB) should be quite enough.
We connect the media and execute the command:
sudo fdisk -l The command will show all devices that are connected to our device. We are looking for in the list the desired device for its volume. For example, my required line looks like this:
Disk /dev/sda: 16.0 GB, 16013852672 bytes The desired path to the device is / dev / sda , remember it!
Run fdisk to format the media:
sudo fdisk /dev/sda First, we delete the existing partitions with the d command (we select the necessary partitions with numbers), then we create a new one using the n command (we accept all values by default), save the work done using the w command.
Create an ext2 file system on the media:
sudo mkfs -t ext2 /dev/sda1 We mount:
sudo mount -t ext2 /dev/sda1 Now you need to automatically mount the media each time you boot Raspbian. To do this, create a folder:
sudo mkdir /mnt/flash Open the settings file:
sudo nano /etc/fstab and add the line to it:
/dev/sda1 /mnt/flash ext2 defaults 0 0 Save and reboot the device. When loading, the media should be automatically mounted, which can be checked with the command:
df It will display a list of mounted devices with their mount points.
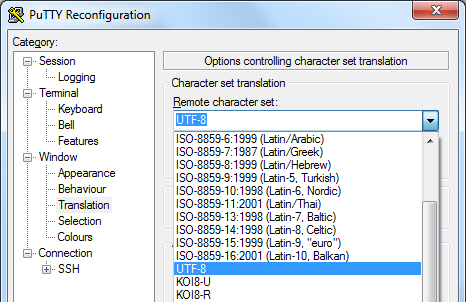
By the way! I also recommend installing the Midnight Commander file manager to work with files through the console:
sudo apt-get install mc If you use Putty to work with SSH, then for the MC to work correctly, you need to configure it. In the Putty settings, set the Remote character set value in the Translation section to “UTF-8”:
Fourth action. Installing Transmission and setting downloads
We got to the goal of this topic - installing and configuring a Torrent-client on our device. I opted for Transmission.
Install Transmission:
sudo apt-get install transmission-daemon Create a directory for downloads, for incomplete downloads and for torrents on a connected media and give write permissions:
sudo mkdir /mnt/flash/torrent sudo mkdir /mnt/flash/torrentfiles sudo mkdir /mnt/flash/incomplete sudo chmod 777 /mnt/flash/torrent sudo chmod 777 /mnt/flash/torrentfiles sudo chmod 777 /mnt/flash/incomplete Edit the settings:
sudo nano /etc/transmission-daemon/settings.json Here it is necessary to change the following parameters for the specified values:
"cache-size-mb": 2; "download-dir": "/mnt/flash/torrent", "incomplete-dir": "/mnt/flash/incomplete", "preallocation": 2, "rpc-password": " ( )", "rpc-username": "pi", "rpc-whitelist-enabled": false, "speed-limit-down": 3000, "speed-limit-up": 1000, Unfortunately, at high speeds of downloading and uploading, Raspberry starts to slow down very much, therefore, experimentally, the limitations that you see in the settings above were revealed.
Restart Transmission with the command:
sudo /etc/init.d/transmission-daemon restart From this point on, you have a working Torrent client installed, the web control panel of which is available at: http: // [ip-devices]: 9091, login pi, password you set in the configuration file.
Do not forget to also add the / mnt / flash / torrent folder to the network share via Samba, so that the downloaded files can be viewed on other devices, for example, on your media player:

Movie title intentionally changed
It is worth noting that, in my opinion, coping with files on the Raspberry Pi network is excellent - when copying a file from the Raspberry Pi to a computer, the maximum speed reached 7 MB / s, which almost corresponds to the maximum read speed for the used flash drive.
Epilogue
This ends my article. Raspberry Pi has provided a tremendous impetus to my study of many aspects of working with Linux OS. There are many more plans in the plans concerning the Raspberry Pi, which I will try to implement and describe in my future articles.
I will be glad to comment on errors from more experienced users!
Source: https://habr.com/ru/post/149890/
All Articles