Unity3d Lessons from Unity 3D Student (B13-B16)
You can find previous lessons through the following links:
Lessons B01-B03
Lessons B04-B08
Lessons B09-B12
PS: Some errors in previous lessons have also been corrected, thanks a lot to habravchanin ufomesh and MikhailS .
')
The lesson describes how to identify collisions between invisible objects for a player using intangible “trigger colliders” (trigger colliders).
If you want to detect collisions, but do not go so that the colliding object stops, you need to use a trigger
Triggers allow you to determine exactly where the object is located on the scene (during the application launch).
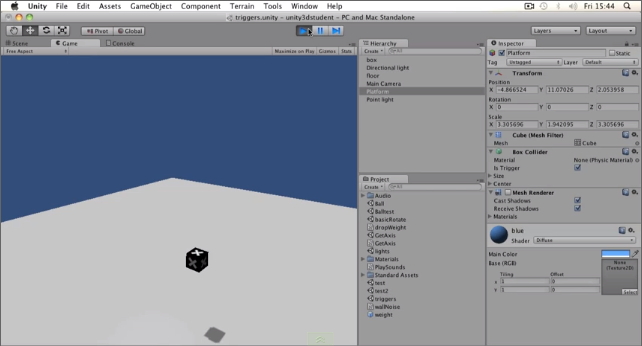
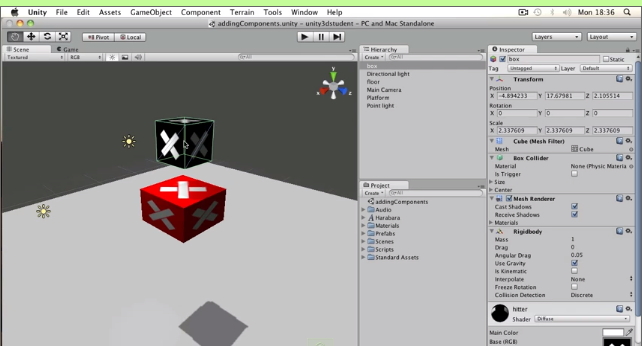
On our stage there is a cube (“box” with a rigidbody) that falls on the blue platform (“platform”).
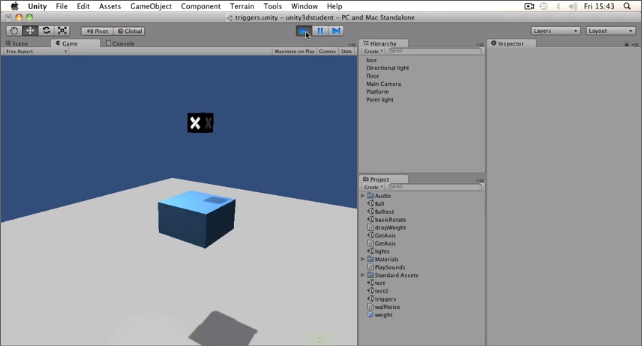
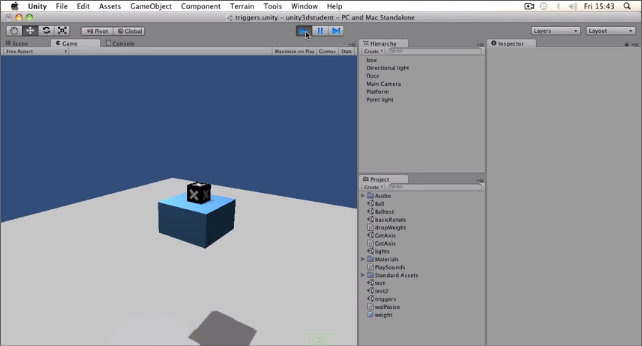
Naturally, the platform stops the cube, since among its components is a box collider.

The box collider component has an Is Trigger checkbox . If you enable
him and run the scene again, then the cube fall through the platform.
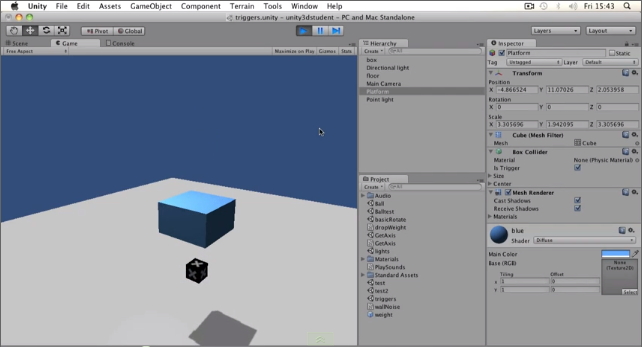
In this way, we can create collisions that should not be visible to the user. For example, disable the Mesh Renderer component from our platform. We still see the green outline of the object if we select it in the Hierarchy View.
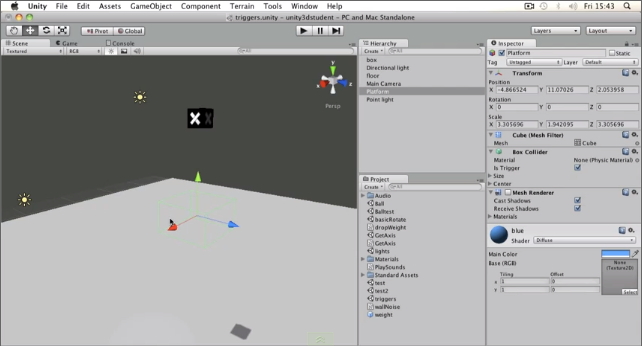
If we press play, then the cube will fall through the platform, but for the time being we cannot know anything about what happened.
Create a script, call it Trigger and add the following code to the class body
Add a script to the platform. Now, as soon as the cube passes through the platform, you will see the message “Box went through!” In the console.
Link to the original lesson
The lesson tells how to display information about the counter on the screen using the GUI Text component.
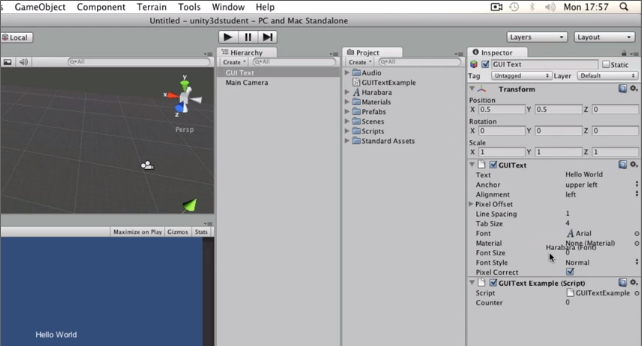
To display textual information on the screen, use the GUI Text element .
Add it to the scene - Game Object-> Create Other-> GUI Text.

Also note that the GUILayer component is enabled on the camera.
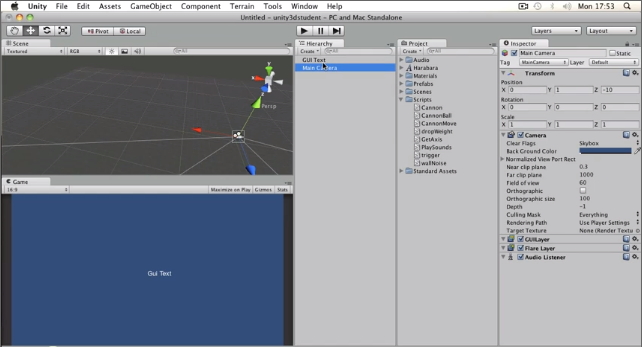
Text can be edited directly through the editor ( Text field).

But we will use the script for this. Add a script (GUITextExample). We will write the code in the Update () method:
If you enter the guiText.text parameter, you will see the following:
var text : String
Description
The text to display.
That is, when passing a parameter, we must be sure that we are passing a string.
Now if you start the game, the text will change.
Let's try to display the counter. Add a counter variable to the class (Counter) and slightly correct the code in the Update () method .
As a result, Unity will generate an error:
We need to cast a variable of type int to type string.
This can be done in many ways. Here are some of them:
We will use the last method, but instead of the empty line we will write the text:
We press play and observe how the value of the counter variable increases.
We can also change the font of the text, if you have an additional font in the project.
To change the font, just drag it to the corresponding field of the GUIText (Font) component .
Here you can change other parameters, such as size (font size) , alignment (alignment) and some others.
Link to the original lesson
The tutorial describes how to add a component to an object using scripts and be sure that we added them only once.
In order to add a component at run-time let's use scripts.
In our example, we again have a platform (“platform”) and a box (“box” with a rigidbody) that falls on it.
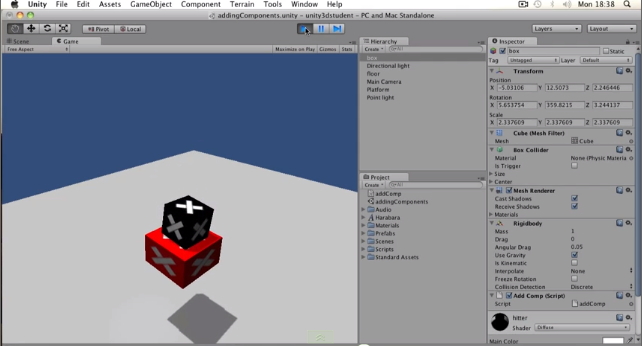
Let's try to finish the component to the platform as soon as the box falls on it.
Add the addComp script . In the class we finish the following code:
The script will add to the box. We press play and see - as soon as the box falls on the platform, it also begins to fall.
But in the console you will see a warning:
We received this message because we are trying to add a Rigidbody component every time the box encounters a platform, that is, we add it more than once. To prevent this from happening, we need to add a check and add a component only in case of its absence. Add another condition to OnCollisionEnter ():
Now run the application and make sure that there is no warning in the console.
Link to the original lesson
The tutorial describes how to write a script to switch between scenes in a Unity project.
To fully work with Unity, you need to be able to switch between different scenes, to download different levels, menus, and other content. To do this, we use the LoadLevel () method of the Application class .
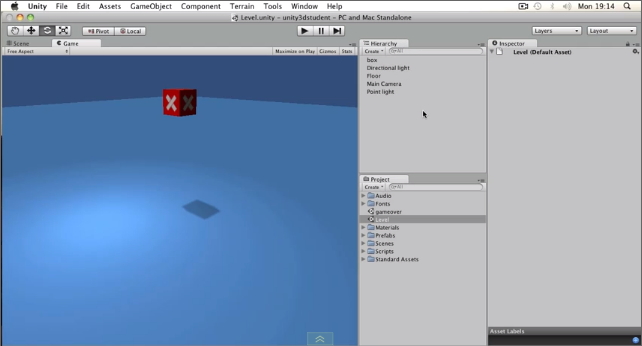
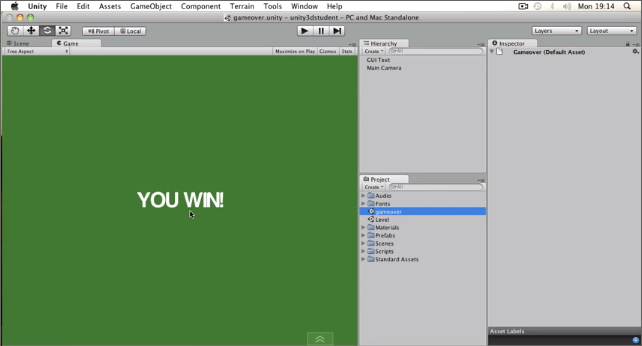
In our example, there are 2 scenes. The first (“Level”) - with a cube and a plane (“floor”), on which the cube falls. The second (“gameover”) - with a green photon and GUI Text - “YOU WIN!”
Add a script (LoadLevel) with the following code:
Click play. As a result, an error appeared in the console:
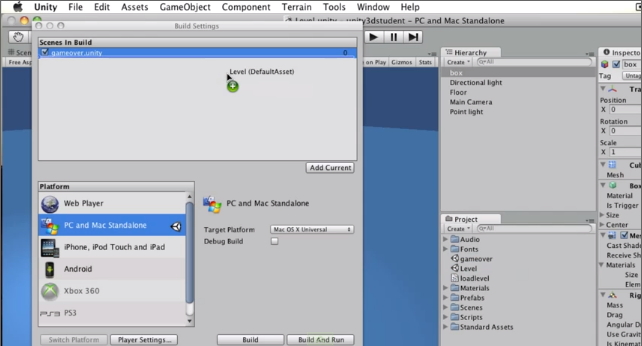
The fact is that when we work with the Application class, we have to specify in the Build Settings all the scenes that we want to load in the final application. Let's go to the File-> Build Settings build settings and drag the Level and gameover scenes from the Project View to the top Buil Settings field .
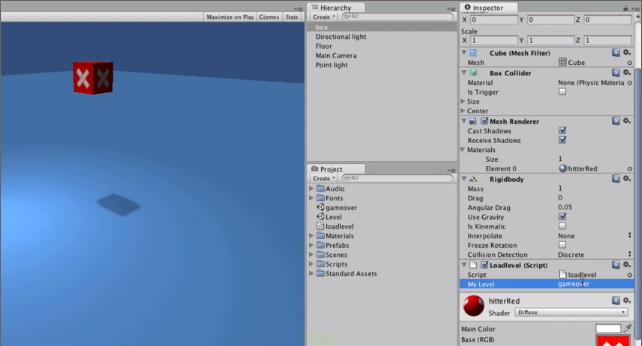
We will slightly edit our script so that we can specify the name of the level from the editor window, so we make our script more “flexible”.
In the editor window, on against the corresponding component field, write the name of the scene that we want to load.
Link to the original lesson
Lessons B01-B03
Lessons B04-B08
Lessons B09-B12
PS: Some errors in previous lessons have also been corrected, thanks a lot to habravchanin ufomesh and MikhailS .
')
Basic Lesson 13 - Determination of collisions with a trigger
The lesson describes how to identify collisions between invisible objects for a player using intangible “trigger colliders” (trigger colliders).
If you want to detect collisions, but do not go so that the colliding object stops, you need to use a trigger
Triggers allow you to determine exactly where the object is located on the scene (during the application launch).
On our stage there is a cube (“box” with a rigidbody) that falls on the blue platform (“platform”).
Naturally, the platform stops the cube, since among its components is a box collider.
The box collider component has an Is Trigger checkbox . If you enable
him and run the scene again, then the cube fall through the platform.
In this way, we can create collisions that should not be visible to the user. For example, disable the Mesh Renderer component from our platform. We still see the green outline of the object if we select it in the Hierarchy View.
If we press play, then the cube will fall through the platform, but for the time being we cannot know anything about what happened.
Create a script, call it Trigger and add the following code to the class body
// // myTrigger - , void OnTriggerEnter(Collider myTrigger) { if (myTrigger.gameObject.name == "box") { Debug.Log("Box went through!"); } } Add a script to the platform. Now, as soon as the cube passes through the platform, you will see the message “Box went through!” In the console.
Link to the original lesson
Additional materials
Basic Lesson 14 - GUI text and counters
The lesson tells how to display information about the counter on the screen using the GUI Text component.
To display textual information on the screen, use the GUI Text element .
Add it to the scene - Game Object-> Create Other-> GUI Text.
Also note that the GUILayer component is enabled on the camera.
Text can be edited directly through the editor ( Text field).
But we will use the script for this. Add a script (GUITextExample). We will write the code in the Update () method:
A bit about GUI Text
GUI Text is a gameObject component , so you can treat the object itself as you would a normal gameObject. The component is located in Component-> Rendering-> GUIText. Those. By creating a GameObject-> Create Other-> GUI Text, you create an Empty GameObject with the corresponding component.
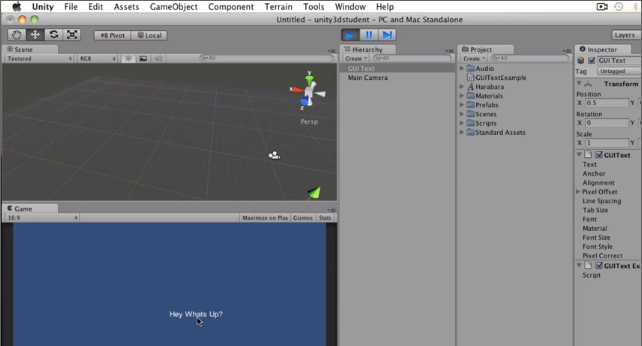
guiText.text = "Hey What's Up?"; If you enter the guiText.text parameter, you will see the following:
var text : String
Description
The text to display.
That is, when passing a parameter, we must be sure that we are passing a string.
Now if you start the game, the text will change.
Let's try to display the counter. Add a counter variable to the class (Counter) and slightly correct the code in the Update () method .
private int Counter = 0; void Update () { ++Counter; guiText.text = Counter; } As a result, Unity will generate an error:
Cannot implicitly convert type `int' to `string' We need to cast a variable of type int to type string.
This can be done in many ways. Here are some of them:
... // ToString() - , guiText.text = Counter.ToString(); ... // Convert.ToString(value) - value String.Empty, value null. guiText.text = Convert.ToString(Counter) ... // '+' . guiText.text = "" + Counter; ... //etc Note with MSDN
Strings are immutable : the contents of a string object cannot be changed after the object is created, although changes seem possible due to the syntax. For example, when writing this code (meaning the '+' operator), the compiler actually creates a new string object for the new character string.
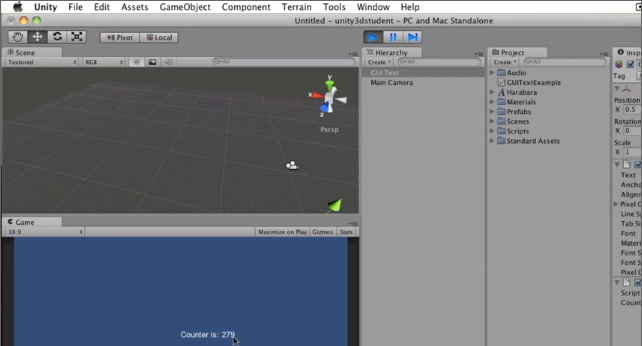
We will use the last method, but instead of the empty line we will write the text:
guiText.text = "Counter is:" + Counter; We press play and observe how the value of the counter variable increases.
We can also change the font of the text, if you have an additional font in the project.
To change the font, just drag it to the corresponding field of the GUIText (Font) component .
Here you can change other parameters, such as size (font size) , alignment (alignment) and some others.
Link to the original lesson
Additional materials
Basic Lesson 15 - Adding Components Using Scripts
The tutorial describes how to add a component to an object using scripts and be sure that we added them only once.
In order to add a component at run-time let's use scripts.
In our example, we again have a platform (“platform”) and a box (“box” with a rigidbody) that falls on it.
Let's try to finish the component to the platform as soon as the box falls on it.
Add the addComp script . In the class we finish the following code:
void OnCollisionEnter(Collision myCollision) { if (myCollision.gameObject.name == "Platform") { myCollision.gameObject.AddComponent(Rigidbody); } } The script will add to the box. We press play and see - as soon as the box falls on the platform, it also begins to fall.
But in the console you will see a warning:
Can't add component 'Rigidbody' to Platform because such a component is already added to the game object! We received this message because we are trying to add a Rigidbody component every time the box encounters a platform, that is, we add it more than once. To prevent this from happening, we need to add a check and add a component only in case of its absence. Add another condition to OnCollisionEnter ():
void OnCollisionEnter(Collision myCollision) { if (myCollision.gameObject.name == "Platform") { if(!myCollision.gameObject.rigidbody) { myCollision.gameObject.AddComponent("Rigidbody"); } } } Now run the application and make sure that there is no warning in the console.
Link to the original lesson
Additional materials
Basic Lesson 16 - Switching Between Scenes
The tutorial describes how to write a script to switch between scenes in a Unity project.
To fully work with Unity, you need to be able to switch between different scenes, to download different levels, menus, and other content. To do this, we use the LoadLevel () method of the Application class .
In our example, there are 2 scenes. The first (“Level”) - with a cube and a plane (“floor”), on which the cube falls. The second (“gameover”) - with a green photon and GUI Text - “YOU WIN!”
Add a script (LoadLevel) with the following code:
void OnCollisionEnter (Collision myCollision) { if (myCollision.gameObject.name == "floor") { Application.LoadLevel("gameover"); } } Click play. As a result, an error appeared in the console:
Level 'gameover' (-1) couldn't be loaded because it has not been added to the build settings. To add a level to the build settings use the menu File->Build Settings... The fact is that when we work with the Application class, we have to specify in the Build Settings all the scenes that we want to load in the final application. Let's go to the File-> Build Settings build settings and drag the Level and gameover scenes from the Project View to the top Buil Settings field .
We will slightly edit our script so that we can specify the name of the level from the editor window, so we make our script more “flexible”.
public string myLevel; void OnCollisionEnter (Collision myCollision) { if (myCollision.gameObject.name == "floor") { Application.LoadLevel(myLevel); } } In the editor window, on against the corresponding component field, write the name of the scene that we want to load.
Link to the original lesson
Source: https://habr.com/ru/post/149721/
All Articles