C # and AutoCAD. Some work practices

The purpose of this article.
The purpose of this article is to review some of the techniques of working in conjunction with Autocad + C #.
I will mainly rely on the article “Getting Started with Autocad with C #” . In the framework of this article, we will consider some comments on the features of working with Autocad using the SDK - ObjectARX.
At once I will make a reservation that I am NOT a qualified programmer and I only enjoy programming as a hobby. So in the comments, please indicate inaccuracies and errors in the presentation of the material.
0. A few words about the .net API and ObjectARX in particular.
Here is what the .Net Developer Guide tells us (translated by bushman, see literature):
The AutoCAD .NET API allows you to manage an AutoCAD application and drawing files at the program level using available assemblies or libraries. These objects may be available for a variety of different programming languages and various software development environments.
To work with Autocad, you can use libraries directly from Autocad (as is done in “Getting Started with Autocad using C #” ), or use ObjectARX.
')
ObjectARX is a large set of libraries designed to develop applications for AutoCAD in the Microsoft Visual C ++ programming environment. AutoCAD itself is designed using ObjectARX.
The “clean” ObjectARX is designed to work with Autocad using C ++, however, some of the libraries represent nothing more than wrappers for the ObjectARX classes to work through .net.
ObjectARX is publicly available and can be downloaded from the Autodesk site.
In addition, extensive SDK documentation can be downloaded at the same address.
Attention! You must use the same version of ObjectARX and Autocad! The compatibility of the work of the library of one version with another version of Autocad is not guaranteed. So when changing the version of Autocad used, you need to recompile your program with new libraries! In addition, I advise you to pay attention to the compatibility of different versions of ObjectARX and MS VS! All the examples described below are written for Autocad 2009, respectively, using ObjectARX 2009, MS Visual Studio 2008.
1. Ways of interaction between Autocad and C # via the .Net API.
There are two main ways to interact between Autocad and C #:
- 1. The program is implemented as a separate executable file with work with Autocad files through the COM interfaces of the Autocad.Interpop.Common library. This technique allows you to get a regular executable exe-file that will work with dwg-files through COM. This method has its right to exist, however, it is very limited functionally due to the small number of available methods of "influencing" the drawing and is not recommended in most cases.
- 2. In the form of an extension (plugin) autocad. The result of the work will be a dll file, which is loaded into Autocad with the command “netload” and defines new commands (operations) and / or new behavior of standard operations.
This article will use the second method.
2. ObjectARX features
The ObjectARX library set provides the developer with a huge set of tools for working with drawings and with Autocad windows.
Main features provided by ObjectARX:
- create a new drawing file;
- editing existing drawings, which includes: editing primitives, blocks, drawing dictionaries (see “Getting Started with Autocad with C #” ),
- adding new commands;
- changing the interface of Autocad (adding new buttons, panels, bookmarks);
etc.
You can read more about ObjectArx in the documentation (in the ObjectARX \ docs \ folder), as well as in the documentation on ObjectARX there are examples (folder \ ObjectARX \ samples \).
3. Examples
Below in this article several examples of working with Autocad will be considered and small examples will be given for each example.
The programs use 2 libraries: AcDbMgd.dll and AcMgd.dll from the folder \ ObjectARX \ inc-win32 \. They need to be added to the C # project reference.
To view the result, you need to call the “netload” command (without quotes) in Autocad, load the resulting DLL compilation and call the name of the new command (addEntity and addBlock, respectively, the register does not play a role).
3.1. Adding new primitives to an existing drawing
Code of Example 1
using Autodesk.AutoCAD.ApplicationServices; using Autodesk.AutoCAD.DatabaseServices; using Autodesk.AutoCAD.Geometry; using Autodesk.AutoCAD.Runtime; using Autodesk.AutoCAD.EditorInput; namespace clExample { public class clExample { [CommandMethod("addEntity")] // , Autocad public void addEntity() { // Database dbCurrent = Application.DocumentManager.MdiActiveDocument.Database; // , : using (Transaction trAdding = dbCurrent.TransactionManager.StartTransaction()) { // Circle cNewCircle = new Circle(); cNewCircle.Center = new Point3d(0, 0, 0); cNewCircle.Radius = 100; cNewCircle.ColorIndex = 5; // ( ) BlockTableRecord btrCurrSpace = trAdding.GetObject (dbCurrent.CurrentSpaceId, OpenMode.ForWrite) as BlockTableRecord; // ObjectId oidCircle = btrCurrSpace.AppendEntity(cNewCircle); trAdding.AddNewlyCreatedDBObject(cNewCircle, true); // trAdding.Commit(); } } } } This example illustrates the basics of adding primitives to a drawing, working with their properties, working with a drawing database, adding a new primitive to a drawing. After launching the command, we will get a nice blue circle at the point 0.0.
Result of example 1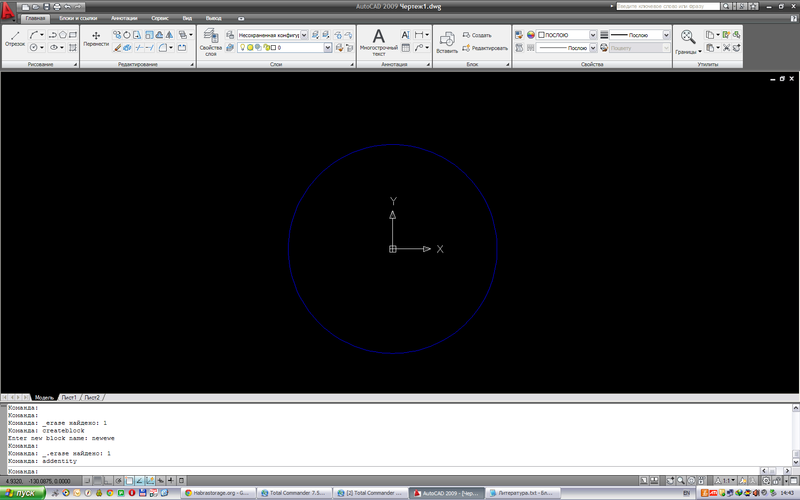
2. Creating a block and changing its properties
An example is a bit more complicated: create a new block and place it in the drawing. To do this, add a new function:
Example code 2
[CommandMethod("createBlock")] // , Autocad public void createBlock() { // Database dbCurrent = Application.DocumentManager.MdiActiveDocument.Database; // Editor edCurrent = Application.DocumentManager.MdiActiveDocument.Editor; // , : using (Transaction trAdding = dbCurrent.TransactionManager.StartTransaction()) { // BlockTable btTable = (BlockTable)trAdding.GetObject(dbCurrent.BlockTableId, OpenMode.ForRead); // PromptStringOptions psoOpt = new PromptStringOptions("\n : "); psoOpt.AllowSpaces = true; string strBlockName = ""; // do { // PromptResult prRes = edCurrent.GetString(psoOpt); // . if (prRes.Status != PromptStatus.OK) return; try { // SymbolUtilityServices.ValidateSymbolName( prRes.StringResult, false ); // if (btTable.Has(prRes.StringResult)) edCurrent.WriteMessage("\nA block with this name already exists."); else // , :) strBlockName = prRes.StringResult; } catch { edCurrent.WriteMessage("\nInvalid block name."); } } while (strBlockName == ""); // // , Line lNewLine = new Line(); lNewLine.StartPoint = new Point3d(0, 0, 0); lNewLine.EndPoint = new Point3d(50, 50, 0); lNewLine.ColorIndex = 3; Circle cNewCircle = new Circle(); cNewCircle.Center = new Point3d(0, 0, 0); cNewCircle.Radius = 100; cNewCircle.ColorIndex = 5; // AttributeDefinition adAttr = new AttributeDefinition(); adAttr.Position = new Point3d(0, 0, 0); adAttr.Tag = "ATTRDEF"; // BlockTableRecord btrRecord = new BlockTableRecord(); btrRecord.Name = strBlockName; btTable.UpgradeOpen(); // ObjectId btrId = btTable.Add(btrRecord); trAdding.AddNewlyCreatedDBObject(btrRecord, true); // btrRecord.AppendEntity(lNewLine); trAdding.AddNewlyCreatedDBObject(lNewLine, true); btrRecord.AppendEntity(cNewCircle); trAdding.AddNewlyCreatedDBObject(cNewCircle, true); // btrRecord.AppendEntity(adAttr); trAdding.AddNewlyCreatedDBObject(adAttr, true); // // BlockTableRecord btrModelSpace = (BlockTableRecord)trAdding.GetObject( btTable[BlockTableRecord.ModelSpace], OpenMode.ForWrite ); // BlockReference brRefBlock = new BlockReference(Point3d.Origin, btrId); // btrModelSpace.AppendEntity(brRefBlock); trAdding.AddNewlyCreatedDBObject(brRefBlock, true); // AttributeReference arAttr = new AttributeReference(); arAttr.SetAttributeFromBlock(adAttr, brRefBlock.BlockTransform); arAttr.TextString = "!"; brRefBlock.AttributeCollection.AppendAttribute(arAttr); trAdding.AddNewlyCreatedDBObject(arAttr, true); // trAdding.Commit(); } } This example illustrates the process of creating more complex objects - blocks. The process of creating blocks is as follows:
1) create a block definition (as an element of the BlockTable table) and add it to the block table (do not forget to check the correctness of the block name);
2) we create and add primitives and definitions of block attributes to the block definition;
3) create an instance of the block (BlockReference) and add it to the database of the space that interests us (in the example - the model space);
4) set the attribute values.
That's it, the block is ready.
Result of example 2
Misadventure
At this haste to round out. Thank you all for reading the article, and I remind you: I’ll be happy to review all comments, pointing out errors and just making critical comments!
I also ask in the comments to indicate whether it makes sense to write further about this topic and whether this topic interests anyone.
Literature
through-the-interface.typepad.com - Kean Walsmley's blog, a collection of excellent examples;
spiderinnet1.typepad.com - spiderinnet1 blog, another blog with examples;
sites.google.com/site/bushmansnetlaboratory - partial Russian translation of the Autocad Net developer Guide
www.theswamp.org is the Autocad .net English-speaking forum. Considered many examples.
www.caduser.ru - Russian-language forum. Often, real gurus of programming on .net suggest and prompt. Extremely useful resource.
forums.autodesk.com is the official Autocad forum, an English-language forum
Autocad Net Developer Giude - the main literature when creating an application for Autocad.
forum.dwg.ru is another Russian-language forum dedicated to Autocad (thanks to BoxaShu )
Source: https://habr.com/ru/post/149546/
All Articles