Direct PCB printing on PCB
Here sometimes I need to make printed circuit boards for my crafts. LUT for me is an extremely capricious method - then the toner will be melted and spread, the quality of the paper will not work, then another kind of hemorrhoids - the nerves need steel-iron ones. For photoresist specific reagents and laminator.
“And if for this machine special build? To print at once with paint? ”- I thought. "Printer redo!", - reasonably noticed laziness. An Internet search revealed that people successfully rework the inkjet for printing on PCB, but this is quite a laborious process (you need to finish and raise the frame with the print head, etc.), and besides, I value my inkjet printer, like Madame Gritsatsueva with a strainer (MFP, after all). But the unnecessary laser HP lj 6L I was lying around idle - in general, I finished. Got to look at the characteristics and accidentally stumbled upon an article ( article cache , for every fireman) to customize this particular printer for textolite. But the topic in the article did not open up to the end - in particular, it does not tell how to make the toner stick to the textolite foil, than bake this toner and, most importantly, there is no video demonstration of the working sample, so I brought this matter to crazy on your own. I strongly recommend that you read the above article, because I will not repeat what has been described there in all details - there is nothing to produce copy-paste. Under the cut a lot of photos.
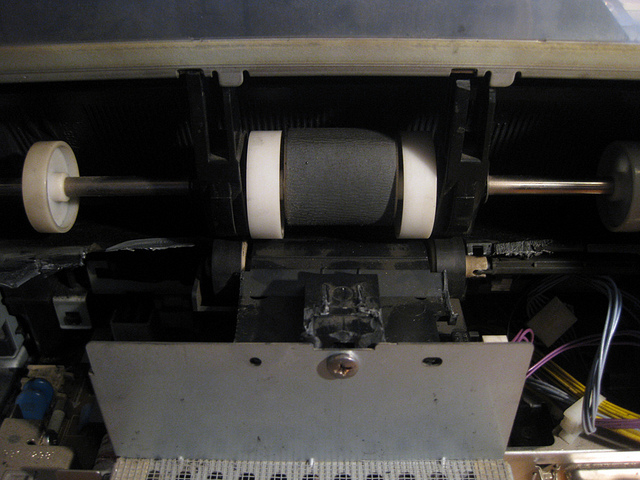
So, the alteration itself is in the details - to make a cut in the back wall, to remove the repeater platform and the stove (so that the printed image is not smeared). Thermal sensor stove must be replaced by a resistor with a resistance of 8.2 kΩ. I recommend to do it this way (just short-circuit the thermal sensor with a resistor so as not to bother with its fixation):
')
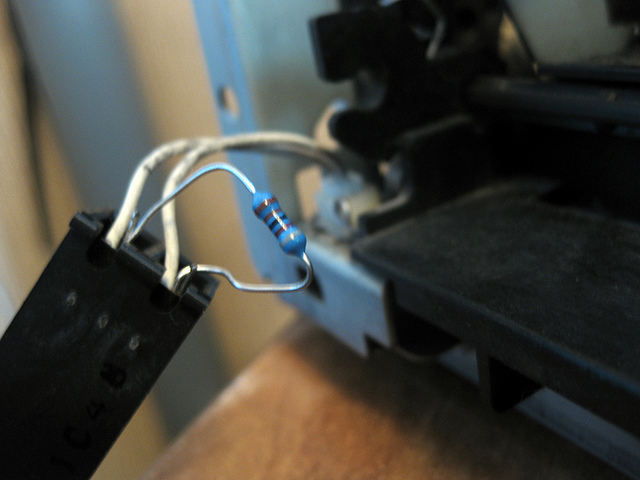
With the connector that supplies the heating voltage, do not need to do anything. Unplug the stove from it and that's it.
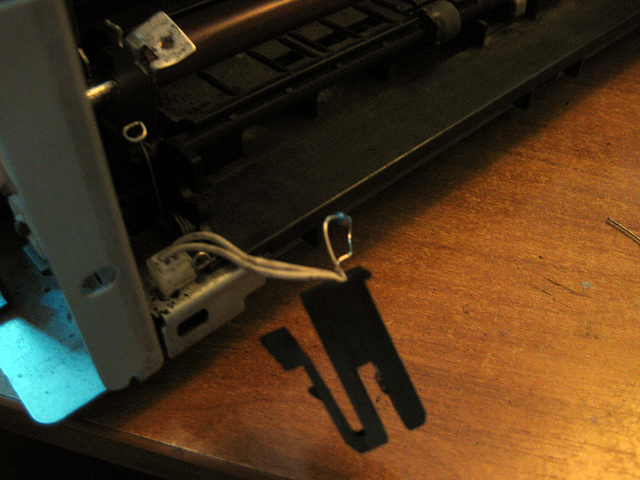
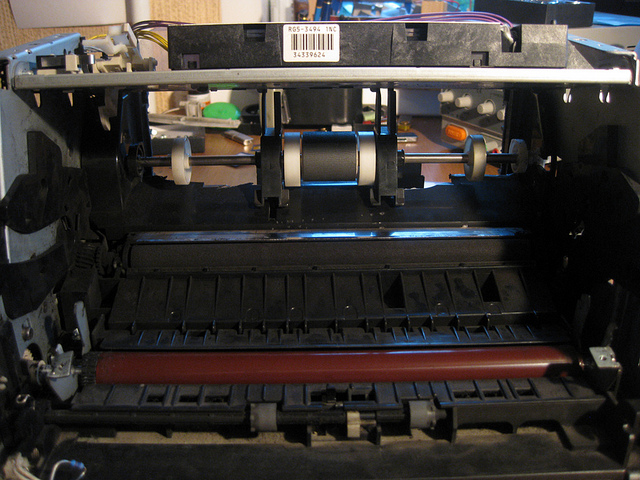
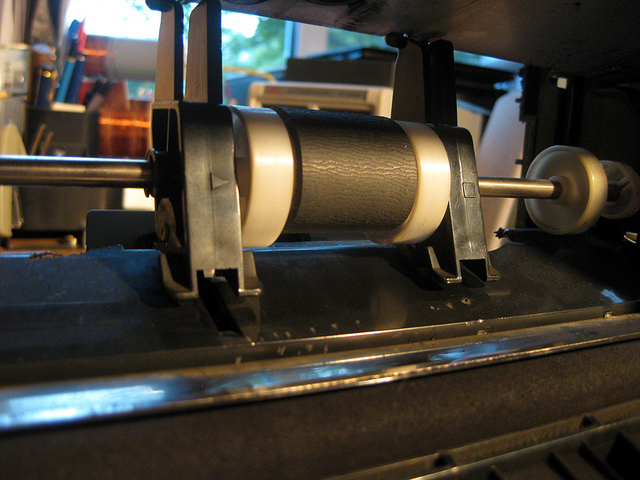
Next you need to work with the ramp-off platform - this is what was behind the paper pickup roller - it needs to be cut, leaving only the sides. I will forgive forgiveness, but there are no photos with an unpolished rear part - I forgot to take a picture, and when I came to my senses and came to my senses, everything was already sawed off. I do not know how it happened. Nightmare.
This is how it should look like:
Yes, I almost forgot: be careful with the paper passing sensor (he, or rather, the upper shoulder of his flap, is in the slot to the left of the paper pickup roller) - do not accidentally cut its fasteners, otherwise the printer will not be able to control the end of the sheet in the input path.
But on the contrary, with the paper availability sensor, remove the flap, and the printer will feel that there is always “paper”.

Back view:
That's all I wanted to clarify about the rework. And now not less important points - sticking of a toner to a foil and its fixing by means of heating.
And, of course, the reason why we all gathered here is a video demonstration of the device’s work:
That's all. This “machine” made my life much easier for me. Not one board has already successfully printed it, pah-pah. If someone needs it all, I will be very happy. Thanks for attention.
UPD: The site for the link is small. Therefore, here is a guglokash .
“And if for this machine special build? To print at once with paint? ”- I thought. "Printer redo!", - reasonably noticed laziness. An Internet search revealed that people successfully rework the inkjet for printing on PCB, but this is quite a laborious process (you need to finish and raise the frame with the print head, etc.), and besides, I value my inkjet printer, like Madame Gritsatsueva with a strainer (MFP, after all). But the unnecessary laser HP lj 6L I was lying around idle - in general, I finished. Got to look at the characteristics and accidentally stumbled upon an article ( article cache , for every fireman) to customize this particular printer for textolite. But the topic in the article did not open up to the end - in particular, it does not tell how to make the toner stick to the textolite foil, than bake this toner and, most importantly, there is no video demonstration of the working sample, so I brought this matter to crazy on your own. I strongly recommend that you read the above article, because I will not repeat what has been described there in all details - there is nothing to produce copy-paste. Under the cut a lot of photos.
So, the alteration itself is in the details - to make a cut in the back wall, to remove the repeater platform and the stove (so that the printed image is not smeared). Thermal sensor stove must be replaced by a resistor with a resistance of 8.2 kΩ. I recommend to do it this way (just short-circuit the thermal sensor with a resistor so as not to bother with its fixation):
')
With the connector that supplies the heating voltage, do not need to do anything. Unplug the stove from it and that's it.
Next you need to work with the ramp-off platform - this is what was behind the paper pickup roller - it needs to be cut, leaving only the sides. I will forgive forgiveness, but there are no photos with an unpolished rear part - I forgot to take a picture, and when I came to my senses and came to my senses, everything was already sawed off. I do not know how it happened. Nightmare.
This is how it should look like:
Yes, I almost forgot: be careful with the paper passing sensor (he, or rather, the upper shoulder of his flap, is in the slot to the left of the paper pickup roller) - do not accidentally cut its fasteners, otherwise the printer will not be able to control the end of the sheet in the input path.
But on the contrary, with the paper availability sensor, remove the flap, and the printer will feel that there is always “paper”.
Back view:
That's all I wanted to clarify about the rework. And now not less important points - sticking of a toner to a foil and its fixing by means of heating.
- We clean the surface of the board
- Wipe with acetone
- Take LTI-120 flux (it is him, it provides adhesion due to rosin being a part) and gently, in just a few movements, apply it to the board with a gauze pad (no need for a cotton pad - leave “mohra”) and let it dry a little minutes The surface of the foil should take something like this:

- Charge the PCB in the printer and print the board. After it is printed, bake the toner at a temperature of ~ 300-350 ° C with a hairdryer of the soldering station. He bakes instantly. Direct the flow of hot air directly to the board tracks. The tracks should take the following form:

- Then, with a small amount of acetone, gently flush the entire flux from the board, otherwise the board will not get through. If you have baked toner at the recommended temperature, then the tracks should not be washed off with acetone a jot now.
- Now you can poison the board. That's what happened with me:
I did not bake the toner very neatly and accidentally pokaryabal tracks - defects can be seen in the photo. The inscriptions, as we see, were printed quite well.
And, of course, the reason why we all gathered here is a video demonstration of the device’s work:
That's all. This “machine” made my life much easier for me. Not one board has already successfully printed it, pah-pah. If someone needs it all, I will be very happy. Thanks for attention.
Source: https://habr.com/ru/post/148045/
All Articles