InterSystems Database Mirroring. Creating and testing mirrors. Part 1
About technology
Caché Database Mirroring appeared in InterSystems Caché and Ensemble products in 2010.
The technology allows you to provide information systems (ICs) built on Caché and Ensemble with the FAILOVER option - the ability to overcome some of the faulty states of a DBMS, operating system, or hardware.
What an information system needs is a failover - a question that has been studied for a long time, but in a nutshell, failover minimizes the downtime of users in the event of faults that lead to a server service failure with the information system.
InterSystems Database Mirroring is synchronous and asynchronous. Synchronous allows you to create highr availability solutions for Caché and Ensemble systems. Asynchronous solves the problem of building catastrophically sustainable solutions using data backup to geographically dispersed servers.
Details on the characteristics of the InterSystems Database Mirroring solution can be found in this document . This article focuses on setting up a synchronous mirror from scratch, reproducing failure scenarios and “experienced hints” on operating systems with Mirroring.
Synchronous Mirroring. How it works?
To use a synchronous mirror (Mirroring), you must create a bundle of two separate Caché servers. One of the servers is Primary, and the users of the information system work with it. The second is the Backup-server, which has an up-to-date copy of the Primary-server data and waits for it to fail, ready to become a Primary-server and continue to serve the users of the IC.
To ensure that the servers, the participants of the mirror always know about the status of each other, the ISC Agent service is used, which constantly runs on each of the servers.
')
For a mirror, it is convenient to assign a virtual IP (VIP) with which the clients of the information system work: ECP-clients, application servers, JDBC / ODBC connections, terminals, and so on.
During normal operation of the mirror, clients work through a VIP with a Primary-server, changes on the Primary are collected in a log, which is reproduced online by the Backup-server.
Failover
Consider a failover scenario.
1. Primary-server stops due to failure or according to plan.
2. The backup server through the ISC Agent “understands” that the Primary server is no longer working.
3. Backup server becomes Primary.
4. IP and ECP clients connect via the same VIP to the new Primary server with minimal delay.
5. The former Primary-server is transferred to the Backup-server state.
Synchronous Mirroring. Benefit?
Synchronous Mirroring allows you to eliminate or reduce information system downtime in case of failures.
In addition, this solution will allow administrators to carry out planned work on the maintenance of the information system without interrupting the work of users. All scheduled work can be performed on the Backup server while Primary serves clients. Work examples:
- OS update
- Caché / Ensemble update,
- performing backup procedures
- iron fix / upgrade.
After this, the Backup-server is doing the primary, and for the former primary, which has become a new backup, we perform the same list of scheduled works.
Creating a mirror from scratch
Configuration
The mirror is two cars with Caché / Ensemble. In our case, we created two virtual machines Failover1 and Failover2 with Windows 8 and Caché 2012.2.RC on board.
To create a mirror, servers also must have the Multi-server option in the license parameters.
Enable ISC Agent
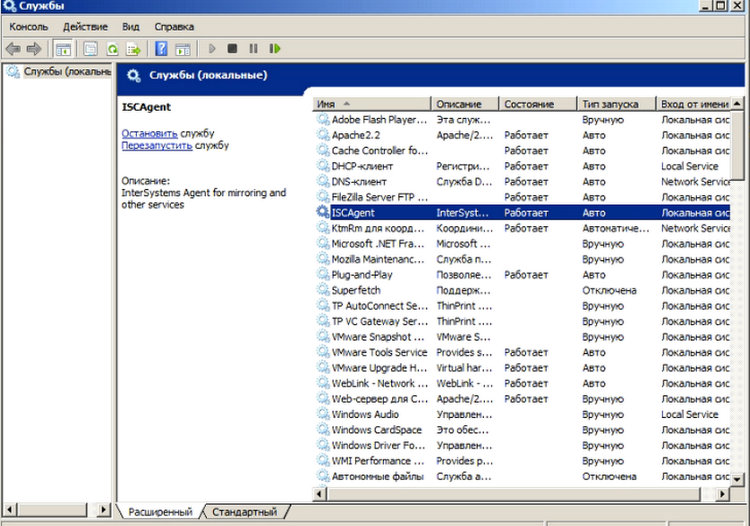
First of all, on both servers you need to enable the ISC Agent service. The service should work in the “auto” mode, and also have the option of automatic restart. On a Windows machine, the ISC Agent service is configured in Administration / Services. In Linux, to start / stop the script
/etc/init.d/ISCAgent start // /etc/init.d/ISCAgent stop // Configure Primary Server

On the Failover1 machine, go to the Caché / Ensemble Management Portal in the Administration / Configuration / Mirror Settings section, select Create Mirror.
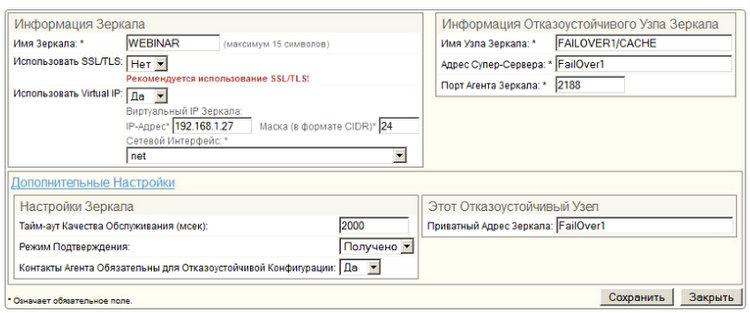
For a mirror, we determine the name, virtual IP (VIP) address. Communication between servers is recommended to be established via SSL / TLS connection, since through it the data of the information system will be transmitted in unencrypted form. If the addresses in the server subnet are distributed via DHCP, we exclude VIPs from the addresses being distributed.
We set the name of the Primary-server in the format of the Name / configuration name of the Caché (here FAILOVER1 / CACHE) and the port for the agent (by default 2188).
Additional settings
The QoS timeout is a timeout after which the Primary-server considers that the Backup-server is “down”, and the Backup-server begins to find out whether the Primary-server really does not work.
Acknowledgment Mode (Acknowledgment mode) - received / commited. Affects the logic of data log synchronization: write immediately, as soon as data is received, or consider transactions. received (write immediately) - by default.
Agent contacts are required for a fault-tolerant configuration (Agent Contact Required for Failover) - yes / no. A parameter that determines whether a functioning ISC Agent is required for an automatic FAILOVER operation. Next, we discuss the scenarios separately for different values of this important parameter. The default is yes.
Backup Server Setup

Go to the virtual machine Failover2, launch the control panel / Administration - select the item “Connect as Failover”.
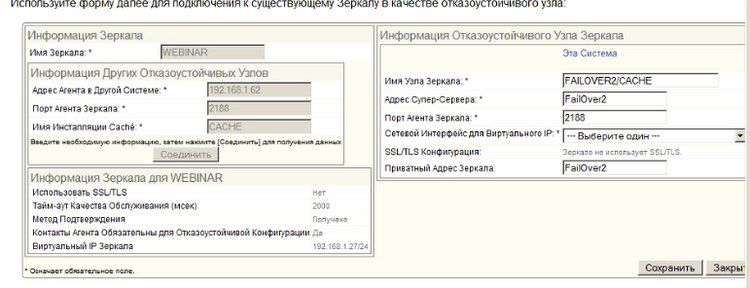
We specify the Primary-server, port ISC Agent and the name of the configuration Cache on the Primary-server. We connect servers.
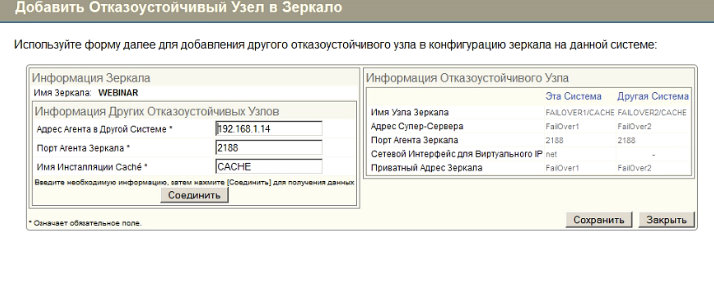
After that we go again to the first server, and add the Backup-server to the mirror settings.
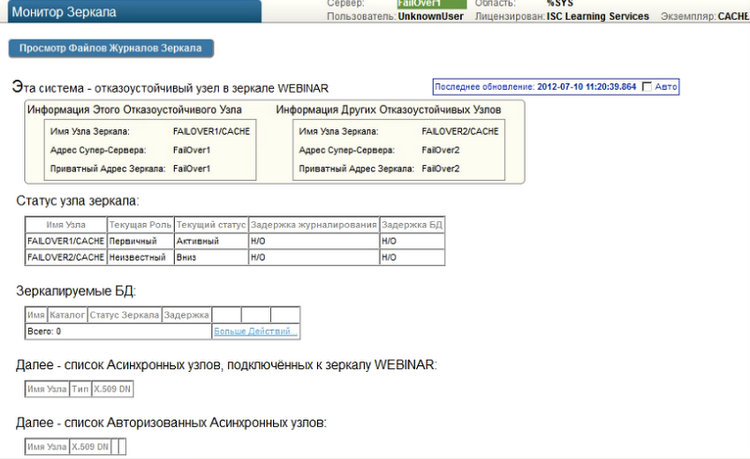
Connect - and check that the mirror works. The status of the mirror can be viewed in the System Operation / Mirror Monitor tab.
Inclusion database in the mirror

The next configuration step is to enable the database with which the information system works, in a mirror. This is what a mirror actually serves for - to synchronize databases between two servers. We have an ASU database created in the Caché system, which we will mirror. You can select any local database, for example, the pre-installed USER database or also create a database with the name ASU.
We bring a database in a mirror on the Primary-server.
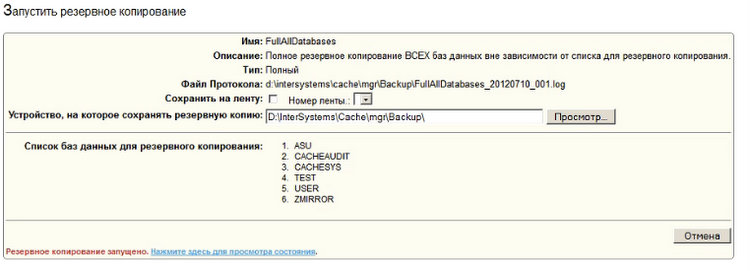
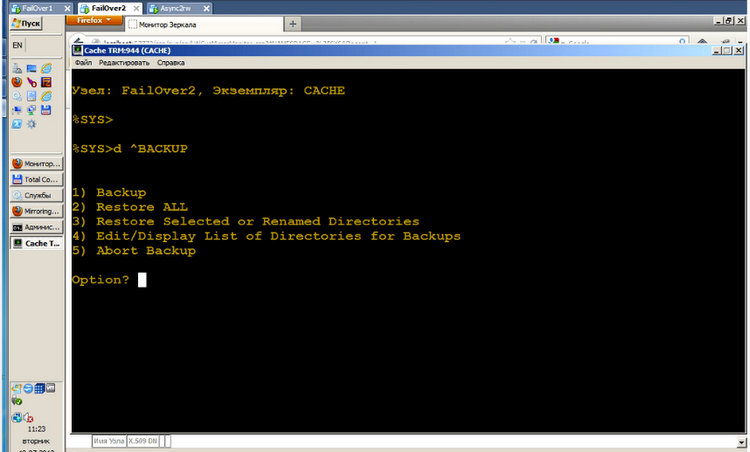
Next, perform a full backup of the database. On the Backup server, we restore data from the terminal in the% SYS area using the ^ BACKUP program or any other database recovery utility .
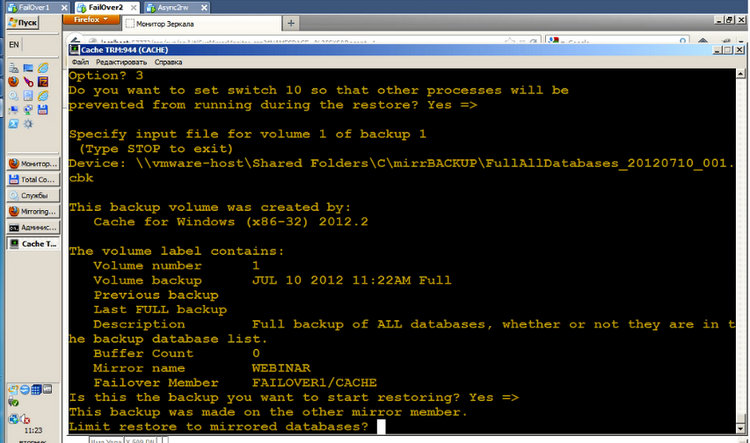
At the same time, the database will be immediately included in the mirror on the Backup server, since information about the accessories of the mirror is already contained in the backup.
After restoring the backup, the database must be activated (Activate) and brought up to date with the primary server (catch-up). Go to the Backup Mirror Monitor and execute for the Activate and Catch-up database.
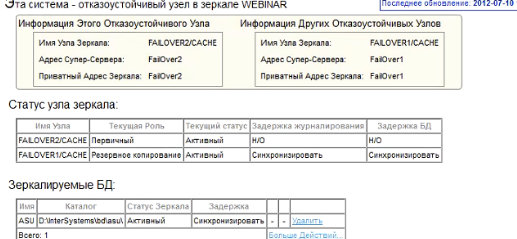
The database is included in the mirroring and is ready to work - this can be seen on the mirror monitor.
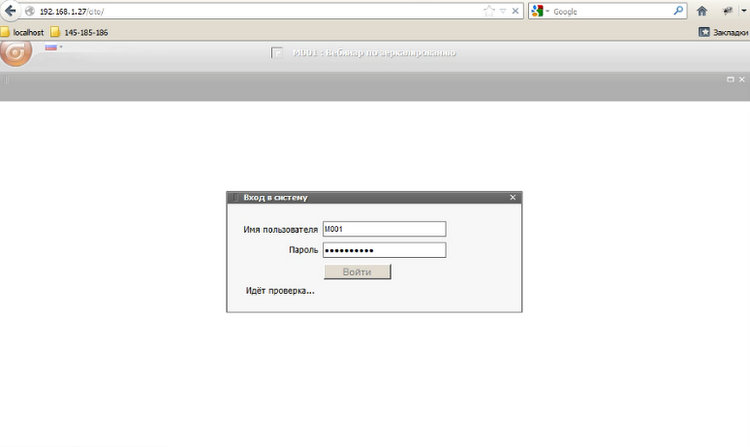
Connect by the virtual IP address of the mirror to the web application that is installed in the ASU database. Make sure the application works.
Total
Now everything is ready, you can
Source: https://habr.com/ru/post/147932/
All Articles