GUI, not GUI - or how to enable and disable the GUI in Windows Server 2012
When the very first Server Core version appeared, many administrators avoided it for the reason that they could use the command line features exclusively, and this is not always convenient. However, the situation has changed in Windows Server 2012 , it is now possible to use the hybrid mode, i.e. It is possible to disable or enable the graphical interface.
Disable GUI
')
In Windows Server 2012, the GUI followed the example of a common architecture for managing the operating system and operating system and became a feature. This in its own makes the process of deleting a graphical interface to the point of impossibility. First you need to start the “Server Manager”.

Click “Manage” and then select “Remove Roles or Features” from the menu.

Next, click “Next” to skip the preliminary items of the setup wizard, then select the server you need from the available pool (in our case, this is the DC1 server) and click “Next”.

Since the GUI is not a role, click “Next” to skip the master roles and go to the next section.

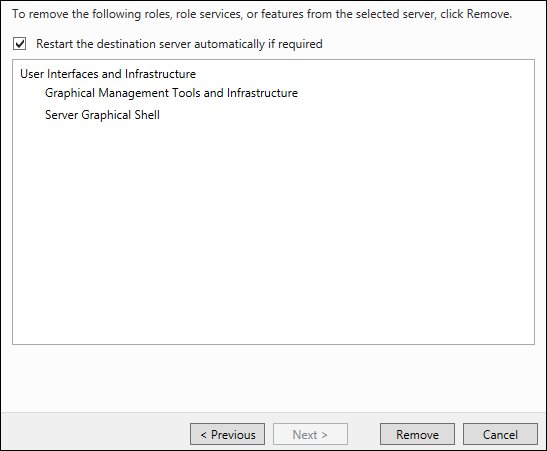
When you get to the feature wizard, you will need to uncheck the “User Interfaces and Infrastructure” checkbox, and then click “Next”.

Check the “Restart Destination Server” and click “Remove”.
After this action the GUI will be deleted.
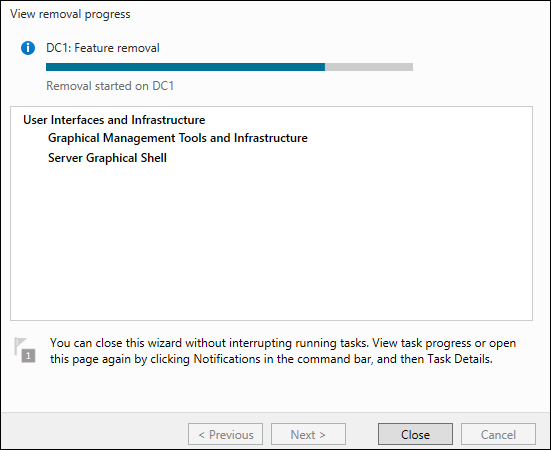
After deleting all the necessary data, the server will automatically restart.

After the server is restarted and you are logged in - from now on you can only use the command line to interact with the server.
Enable GUI
After we successfully deleted the GUI, it would be very nice to know how to get it back after all. To do this, we use the “SConfig” utility - so just type “sconfig” on the command line and press Enter.
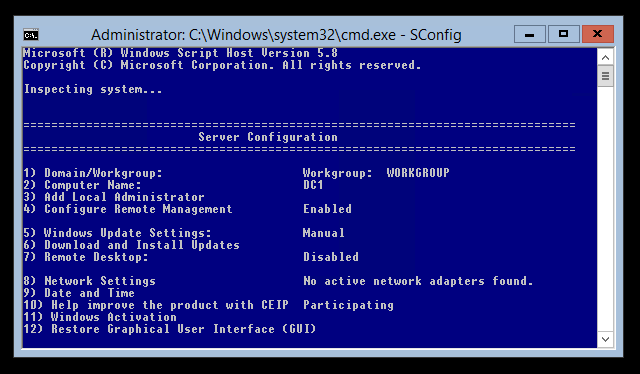
At the very bottom of the screen you can see menu item 12, which is just responsible for restoring the graphical interface - all we have to do is type 12 and press "Enter".

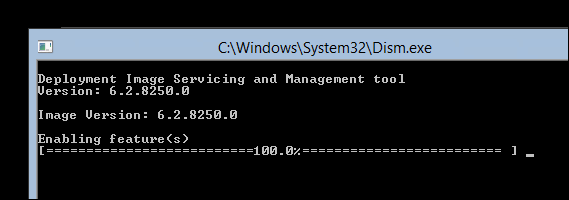
A notification will appear on the screen that if the GUI is enabled, a server restart will be required - feel free to click “Yes” to complete the restore operation of the graphical interface.

After that, run DISM, which will add the necessary files to activate the graphical shell.
After completing the above process, you will be prompted to restart the server, type "y" and click to restart.
Disable GUI with PowerShell
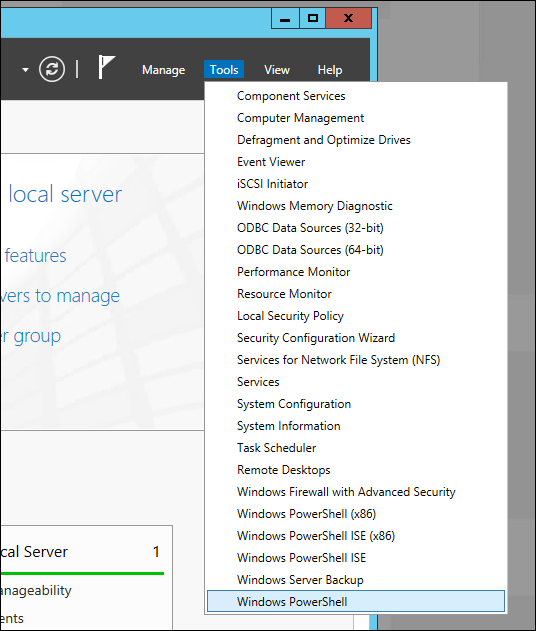
We can also carry out all of the above operations, both for deleting and returning the GUI, much faster if we use PowerShell commands. To do this, open the “Server Manager”, click on “Tools” and start PowerShell.
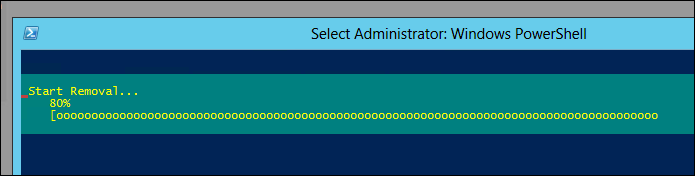
To remove a GUI, we use the Remove-WindowsFeature cmdlet:
Remove-Windows Server-Gui-Shell, Server-Gui-Mgmt-Infra
In turn, Remove-WindowsFeature is just an alias of a command, which means we can also use the following commands:
Uninstall-WindowsFeature Server-Gui-Shell, Server-Gui-Mgmt-Infra

After entering the command and pressing the “Enter” key, the procedure of deleting the graphic interface will begin.
After the operation of deleting binaries is completed, it will be necessary to reboot in order for the changes to take effect. Type the following command and press "Enter":
Shutdown –r -t 0
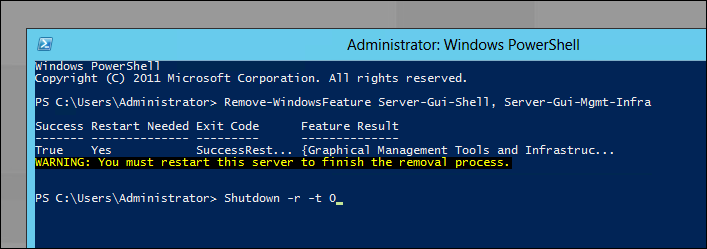
After a reboot, only the command line will be available for operation.

Enabling GUI with PowerShell
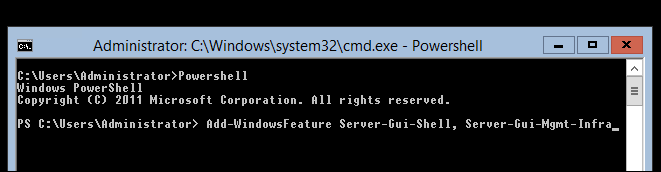
The first thing we need to do is get into PowerShell, type in PowerShell from the command line, and press "Enter."

Now we need the Add-WindowsFeature cmdlet to get the GUI back:
Add-WindowsFeature Server-Gui-Shell, Server-Gui-Mgmt-Infra
This is also an alias for the following commands:
Install-Windows Server-Gui-Shell, Server-Gui-Mgmt-Infra
After completing the procedure for adding components, you must restart the server using the shutdown command:
Shutdown –r -t 0
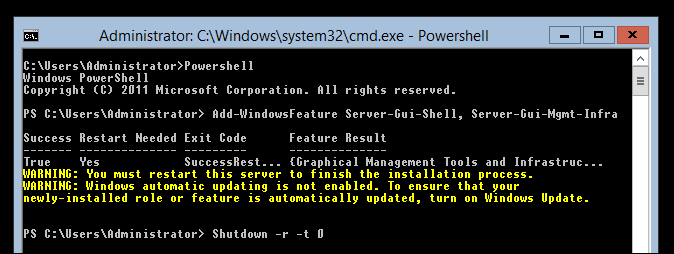
After the server restarts, the graphical interface will be available again.
PS> Download Windows Server 2012 RC here .
Respectfully,
George A. Gadzhiev
Information Infrastructure Expert,
Microsoft
Source: https://habr.com/ru/post/147930/
All Articles