Five ways to improve the Raspberry Pi
 The single-board computer Raspberri Pi is rapidly gaining popularity. In an effort to make it as cheap as possible, the developers threw away all the "extra" and maximally simplified the design where it was possible. On the one hand, this forces the user to endure some inconvenience when working with the system. But on the other hand, leaves room for creativity and improvement.
So, to your attention is offered the review of five useful modifications for Raspberry Pi.
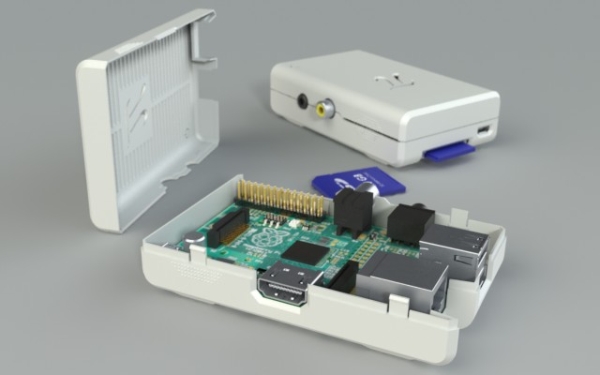
1. Housing
The board with plugs sticking out in all directions looks very defenseless, and I want to hide it in some kind of case. There are a lot of different cases for Raspberry Pi, for every taste.You can order a standard plastic case . Stylish and simple, several colors to choose from.
')
You can print yourself, model help.
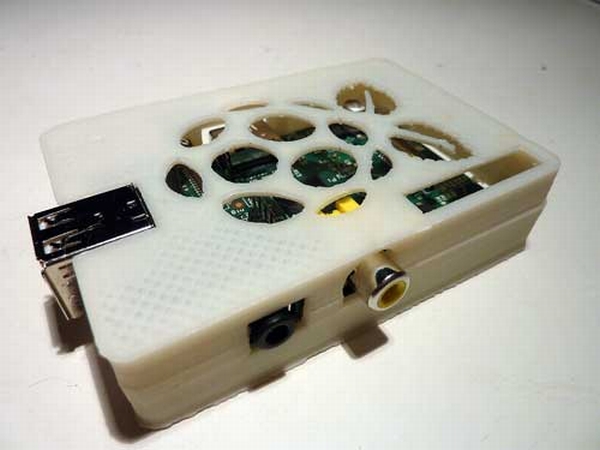
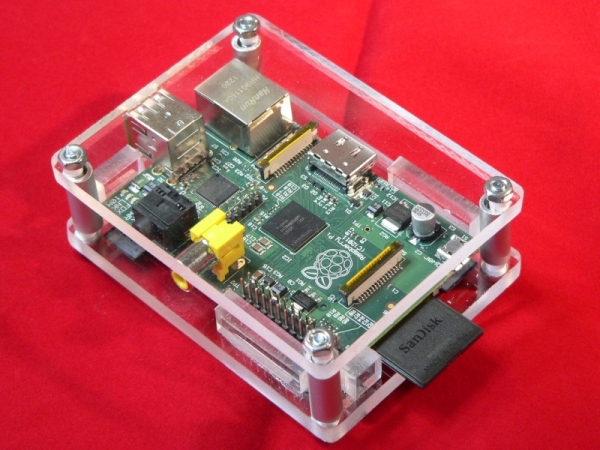
Not at hand a 3D printer? The case can be cut out with a plexiglass fret saw. Instructions attached.
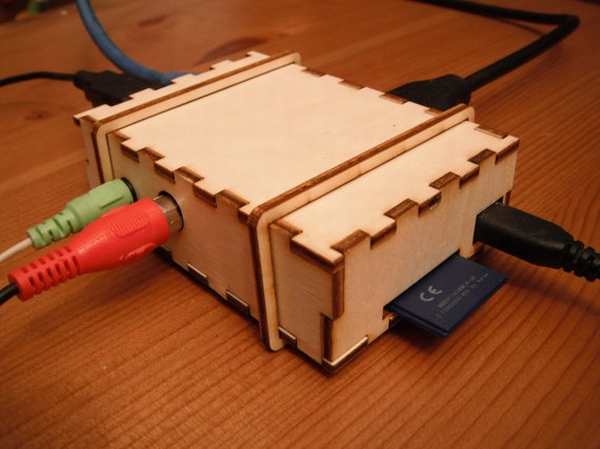
You are a radical "green", and do not allow yourself to litter the planet with an extra piece of plastic? Please for you a stylish eco - friendly wooden case .
Do you live in a cardboard box under the bridge? :) Then you can glue together the cardboard case for your Raspberry. Pattern in PDF .

Finally, you can assemble the body from the Lego designer. Here are the detailed instructions .

2. Radiators
Many complain that the Raspberry is very hot at work. The hottest nodes are the processor, Ethernet controller and a voltage regulator of 3.3 V. The solution to the problem of overheating is to install radiators on these chips.
To do this, you need a radiator from an old motherboard, a metal saw to cut it into pieces of the right size, sanding paper and thermally conductive glue. Here is a detailed description of the operation.
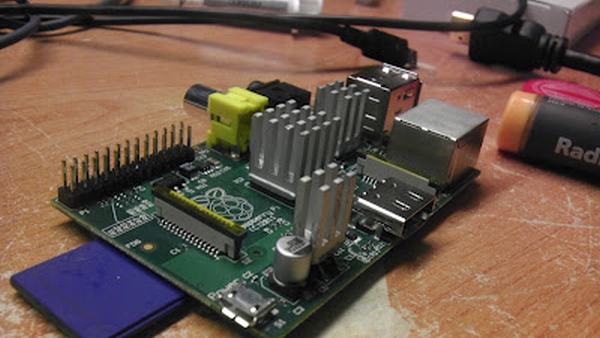
According to the author, the processor temperature has dropped from 56.1 ° C to 38.8 ° C. If this is not enough, you can put a fan on top and power it from one of the GPIO ports so that you can adjust the fan speed depending on the temperature.
3. MicroSD
The SD card slot on the Raspberry Pi is quite uncomfortable: the card sticks out strongly beyond the board. There is an easy way to overcome this inconvenience: put another card holder on the bottom of the board. Description of refinement .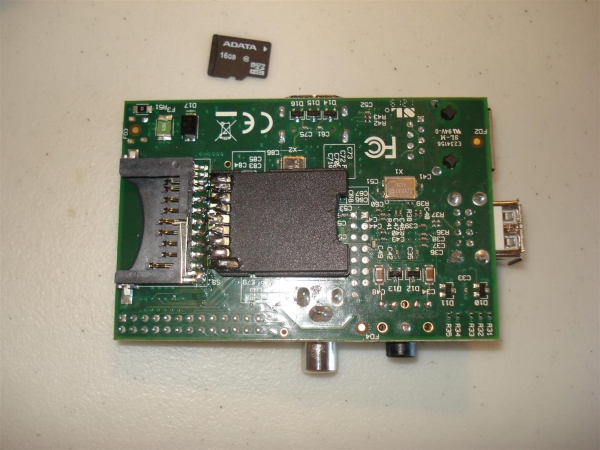
As an additional connector, an SD-microSD adapter is taken, which is soldered directly to the pads of the native connector. We insert a microSD card - and that's it! Nothing bulges, neither beyond the board nor the thickness.
The standard connector continues to work normally. True miracle does not happen, and use both cards simultaneously will not work.
4. Pulse voltage stabilizer
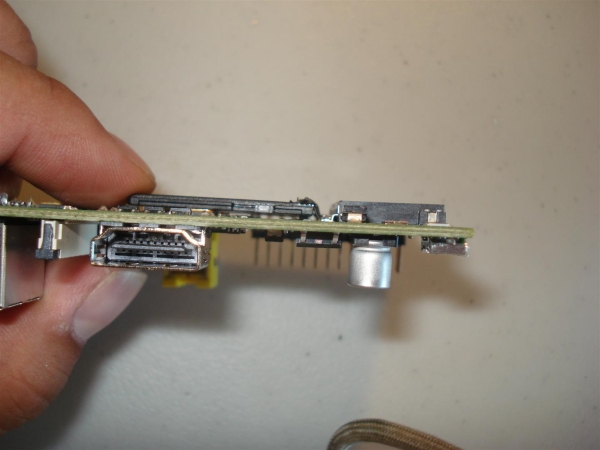
A 5V linear regulator is installed in the Raspberry -> 3.3 V. On the board, it is designated as RG2:
Since the system consumes significant current, a fair amount of power is dissipated at the stabilizer. To increase efficiency and reduce heat, you can replace the linear stabilizer on the pulse. How to do this is described here and here . A new stabilizer can be connected to the pads left over from the old:
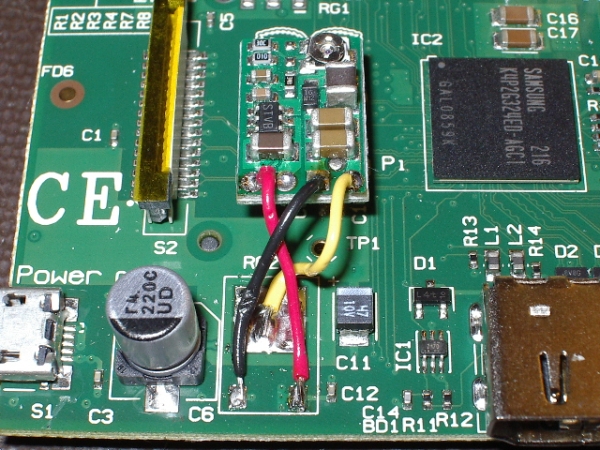
or to the GPIO connector, which also has 5 V and 3.3 V circuits:

The rework described by the first link reduces the current consumption from 410 to 360 mA, that is, by 12%. The second article reports a reduction in power consumption by as much as 25%.
5. Model field
Raspberry Pi is often used to control various devices, in automation systems, smart homes, etc. The big plus here is the availability of low-level GPIO I / O ports. But it’s not very convenient to use these ports: they almost always need external interface circuits, interchanges, and this means either making an additional board or mounting it on snot.You can make the design tidy and finished look using a special prototype board .
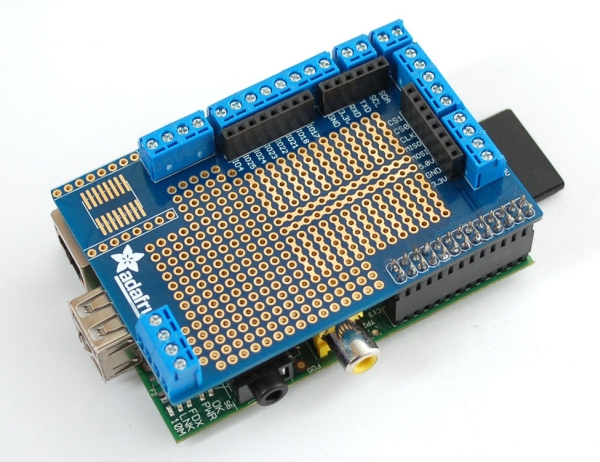
The board is the same size as the Raspberry and is worn on top of the GPIO block. It has sockets and clamps for easy connection to I / O ports, UART, I 2 C and power. All free space is occupied by a model field on which you can place the components you need.
Once again all the links in one list.
- Shells:
http://freakyshape.com/portfolio/raspberry-pi-standard-case/
http://www.thingiverse.com/thing:24945
http://www.waitingforfriday.com/index.php/Raspberry_Pi_Plexiglass_Case
http://www.etsy.com/listing/93162730/bramble-pi-raspberry-pi-laser-cut-finger
http://squareitround.co.uk/Resources/Punnet_net_Mk1.pdf
http://www.raspberrypi.org/archives/1354 - Installation of radiators:
http://michaeldornisch.blogspot.co.uk/2012/06/diy-raspberry-pi-heat-sink.html - MicroSD card:
http://www.raspberrypi.org/phpBB3/viewtopic.php?f=45&t=9936&p=116375 - Replacement voltage regulator:
http://www.seanet.com/~karllunt/RasPiRegulatorReplacement.html
http://www.bitwizard.nl/wiki/index.php?title=Reducing_power_consumption_of_a_raspberry_Pi - Bread board:
http://www.adafruit.com/products/801
Source: https://habr.com/ru/post/147650/
All Articles