Quick start of the first project in Windows Azure. Web sites
This five-part article shows how to: create a website for Windows Azure from an image gallery, create a website and deploy your own ASP.NET MVC 4 project, scale the website. Web sites are a new functionality of the platform and are in the Preview stage - accordingly, registration is required to access this functionality.
Prerequisites :
1) Windows 7 or Windows 8.
2) Visual Studio 2012 RC .
')
3) Subscription Windows Azure. Register a 90-day test subscription .
1.1 Installing the Windows Azure SDK for .NET using the Web Platform Installer
1. Go to the .NET Development Center website on Windows Azure (Figure 1). Click on the Install button.
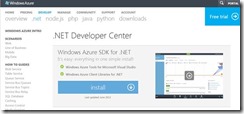
Fig. 1. Development Center on .NET for Windows Azure
2. In the dialog box that appears, select the required version of Visual Studio - 2010 or 2012 RC (Fig. 2). Select Visual Studio 2012 RC.
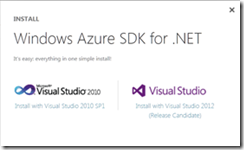
Fig. 2. Package Version Dialog Box
3. As soon as the package is downloaded, the Web Platform Installer 4.0 shell will start up with a customized list of software required for development using the Windows Azure SDK 1.7. After the installation is completed, click Finish in the dialog box that appears (Fig. 3).
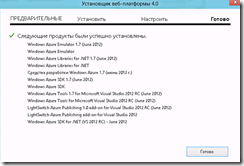
Fig. 3. Component Installation Dialog
1.2 Installing the Windows Azure SDK for .NET manually
To manually install the Windows Azure SDK for .NET and other components required for developing for Windows Azure , go to the download page and download and install all the necessary components one by one.
Windows Azure Web Sites is in the “Preview” stage. You can get access by submitting an application for a free three-month period of using Windows Azure and adding the necessary functionality on the management portal or by requesting access to the Preview functionality on the Windows Azure website.
Adding an application for access to the Preview functionality in the administration portal
1. Log in to the Windows Azure Management Portal using your Windows Live ID credentials (Figure 4).
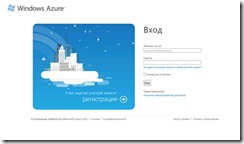 Fig. 4. Login page
2. Upon entering the management portal (Fig. 5), click the New button located in the lower left corner of the page to open the New form dialog box (Fig. 6).

Fig. 5. Windows Azure Management Portal

Fig. 6. New form dialog box
3. In the New form dialog box, select the Web Site option. Click on the preview program link.
4. On the page that opens, click Preview features (fig. 7) to go to the page for adding a request for Preview functionality.
 Fig. 7
5. On the preview features page, click try it now next to Web Sites (Fig. 8).

Fig. 8. Page preview features
6. On the Add Preview Feature form that appears, select your subscription (if you have several subscriptions) and click the button (Fig. 9) to request access to the Preview functionality. After clicking next to the name of the functionality, You Are Queued appears (Fig.10).
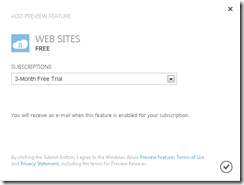
Fig. 9. Sending a request for access to the preview functionality

Fig. 10. Updated page preview features
6. To find out the status of your request, click on the Status link.
Adding an application for access to the Preview functionality on the Windows Azure website
In order to add an application for access to the Preview functionality on the Windows Azure website, go to the Preview Features page (Figure 11) and repeat the sequence of steps from the previous paragraph.
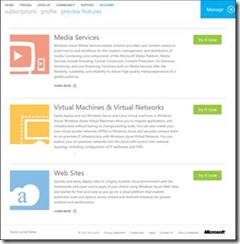
Fig.11. Preview Features Page
Detailed pricing information is available on the Windows Azure website.
After your request is accepted, you will receive an e-mail to your account's mailbox (Fig. 12).

Fig. 12. Sample Access Email
If you received an email, you got access to the Preview functionality that you needed.
1. Log in to the Windows Azure Management Portal using your Windows Live ID credentials (Figure 13).
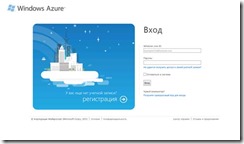
Fig. 13. Login page
2. Upon entering the management portal (Fig. 14), click the New button in the lower left corner of the page to open the New form dialog box.
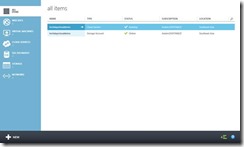 Fig. 14. Windows Azure Management Portal
3. Select Web Site to create a new website. Select From Gallery (fig. 15).
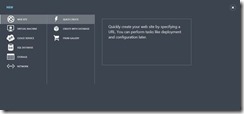
Fig. 15. Choosing a website creation option
4. In the Find Apps For Azure dialog box, you are prompted to select one of the pre-configured images (Figure 16). Choose a WordPress image.
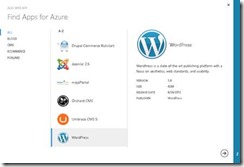
Fig. 16. Selecting preconfigured website images from the gallery
5. In the Configure Your App dialog box, in the URL box, type the name of your future WordPress -based website. Leave the rest unchanged (Fig. 17).

Fig. 17. Website Initial Setup Page
6. In the New MySQL Database dialog box, you can choose a name for the MySQL database or continue working with a randomly generated one (Fig. 18). Note that you agree with the rules of ClearDB . Click Next .
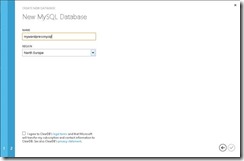
Fig. 18. The page to create a new MySQL database
In a short time, your new website will be deployed, after which the Status field value will take the Running value (Fig. 19).

Fig. 19. Website Information Panel
7. Click the link in the Url field of your website to go to the admin panel of the blog (Fig. 20). Enter the required information and click Install WordPress .

Fig. 20. WordPress Blog Initial Setup Page
8. Your blog is set (Fig. 21). Click Log In to login.

Fig. 21.
9. Go back to the Windows Azure Management Portal on the Web Sites tab. Click on the name of your website to go to the admin panel of the website and view the download in real time (Fig. 22).

Fig. 22. Website admin panel
You created your first website with a gallery of pre-configured images.
The following deployment options are supported for Windows Azure Web Sites : Visual Studio Web Deploy, GitHub, FTP, Team Foundation Services (TFS), Microsoft WebMatrix. This article describes the algorithm for deploying a website using FTP from Visual Studio.
1. Log in to the Windows Azure Management Portal using your Windows Live ID credentials (Figure 23).
![clip_image006 [1] clip_image006[1]](https://habrastorage.org/getpro/habr/post_images/93b/259/edf/93b259edf94563f3e59915a2dd58f466.jpg)
Fig. 23. Login page
2. Upon entering the management portal (Figure 24), click the New button in the lower left corner of the page to open the New form dialog box.

Fig. 24. Windows Azure Management Portal
3. Select Web Site to create a new website. Select Quick Create (fig. 25).
![clip_image023 [1] clip_image023[1]](https://habrastorage.org/getpro/habr/post_images/d47/6ab/a7b/d476aba7b27eb4b7c222d9e81e8c83c8.jpg)
Fig.25. Choosing a website creation option
4. Enter the URL for your future website (Fig. 26).

Fig. 26. Initial Website Setup
5. In a short time, your new website will be deployed, after which the value of the Status field will take the Running value (Fig. 27).

Fig. 27. Website information bar
6. Click the link in the URL box of your website to make sure that the site has been created and is working (Fig. 28).

Fig.28. The first page of the created site
7. In order to obtain credentials for further deployment via FTP, go to the admin panel of the website by clicking on its name. On the Dashboard page, click Reset deployment credentials (fig.29). Enter the credentials to be used to deploy the website in the dialog box that appears.

Fig.29. Website Action Menu
8. To download a deployment profile that will be used later in Visual Studio, click Download publish profile (Figure 29).
9. Start Visual Studio 2012 RC.
10. Click New Project . Select the ASP.NET MVC 4 Web Application template (Figure 30). Select Internet Application (Fig. 31).

Fig. 30. List of web project templates in Visual Studio 2012 RC
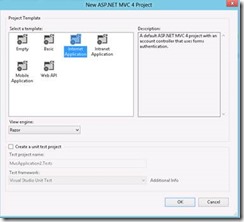
Fig. 31. Basic ASP.NET MVC 4 project settings
11. Right-click on the project. Select Publish . In the dialog that opens, click Import ... and select the deployment profile downloaded from the Windows Azure Management Portal for your website. Select the FTP deployment option and enter the required data (Fig. 32), which can be obtained from the administration panel of your website (Fig. 33). To validate the entered values, click Validate Connection . If the verification is successful, click Publish . Next, in the Output view, the deployment log of your website will be located via FTP (Fig. 34).

Fig. 32. Setting up project publication
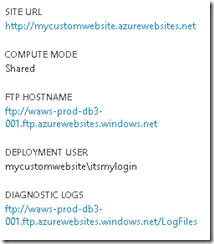
Fig. 33. Website Basic Data Panel in the Website Administration Panel

Fig. 34. Output View in Visual Studio 2012 RC
12. After the download is complete, click on the address in the URL field to go to the website (Fig. 35).
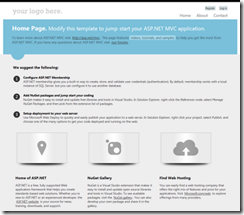
Fig. 35. Standard ASP.NET MVC 4 Project Page
You have created a website and deployed a standard ASP.NET MVC 4 project to it.
Each website in Windows Azure has a Dashboard administration panel in which you can get various information about the website: metrics, download, URL, location in the datacenter, and also perform various actions: stop or start the website, delete, go to website and so on (fig. 36).
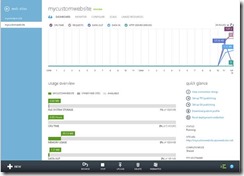
Fig. 36. Website Administration Panel, Dashboard Page
If you need to scale your website, you can do it in the administration panel.
1. Go to the administration panel of your website.
2. Click Scale to go to the scaling details page (Figure 37).
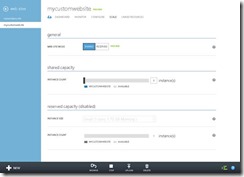
Fig.37. Website Scaling Details Page
You can scale your website by adjusting the number of instances it will use. To do this, the scaling page has a special slider. By default, after creating your website is in shared mode, that is, its instances are executed in one large space along with instances of other websites (isolated from them). You can initiate the transition of your website to the reserved mode with the receipt of separate virtual machines for the website. The 10 shared websites are free .
1. Using the slider, specify the number of copies in 2 (Fig. 38). Click Save .

Fig. 38. Slider control the number of instances in shared mode
2. Specify the website mode in reserved (Fig. 39).

Fig. 39. Mode switching
3. Check “I have removed the spending limit on myaccount” so that you can switch to the reserved mode.
4. Three sizes are available to you - Small , Medium and Large . Select the Medium mode and, using the slider, specify 2 instances (Fig. 40). Click Save .

Fig. 41. Select the size of instances and slider control the number of instances in shared mode
5. Roll back the changes by going to Shared mode and clicking Save .
Prerequisites :
1) Windows 7 or Windows 8.
2) Visual Studio 2012 RC .
')
3) Subscription Windows Azure. Register a 90-day test subscription .
Part I. Run the first application in Windows Azure. Preparing the working environment
1. Install Windows Azure SDK for .NET.
1.1 Installing the Windows Azure SDK for .NET using the Web Platform Installer
1. Go to the .NET Development Center website on Windows Azure (Figure 1). Click on the Install button.

Fig. 1. Development Center on .NET for Windows Azure
2. In the dialog box that appears, select the required version of Visual Studio - 2010 or 2012 RC (Fig. 2). Select Visual Studio 2012 RC.

Fig. 2. Package Version Dialog Box
3. As soon as the package is downloaded, the Web Platform Installer 4.0 shell will start up with a customized list of software required for development using the Windows Azure SDK 1.7. After the installation is completed, click Finish in the dialog box that appears (Fig. 3).

Fig. 3. Component Installation Dialog
1.2 Installing the Windows Azure SDK for .NET manually
To manually install the Windows Azure SDK for .NET and other components required for developing for Windows Azure , go to the download page and download and install all the necessary components one by one.
Part II. Run the first application in Windows Azure. Register on the portal and get an account
Windows Azure Web Sites is in the “Preview” stage. You can get access by submitting an application for a free three-month period of using Windows Azure and adding the necessary functionality on the management portal or by requesting access to the Preview functionality on the Windows Azure website.
Adding an application for access to the Preview functionality in the administration portal
1. Log in to the Windows Azure Management Portal using your Windows Live ID credentials (Figure 4).
 Fig. 4. Login page
2. Upon entering the management portal (Fig. 5), click the New button located in the lower left corner of the page to open the New form dialog box (Fig. 6).

Fig. 5. Windows Azure Management Portal

Fig. 6. New form dialog box
3. In the New form dialog box, select the Web Site option. Click on the preview program link.
4. On the page that opens, click Preview features (fig. 7) to go to the page for adding a request for Preview functionality.
5. On the preview features page, click try it now next to Web Sites (Fig. 8).

Fig. 8. Page preview features
6. On the Add Preview Feature form that appears, select your subscription (if you have several subscriptions) and click the button (Fig. 9) to request access to the Preview functionality. After clicking next to the name of the functionality, You Are Queued appears (Fig.10).

Fig. 9. Sending a request for access to the preview functionality

Fig. 10. Updated page preview features
6. To find out the status of your request, click on the Status link.
Adding an application for access to the Preview functionality on the Windows Azure website
In order to add an application for access to the Preview functionality on the Windows Azure website, go to the Preview Features page (Figure 11) and repeat the sequence of steps from the previous paragraph.

Fig.11. Preview Features Page
Detailed pricing information is available on the Windows Azure website.
After your request is accepted, you will receive an e-mail to your account's mailbox (Fig. 12).

Fig. 12. Sample Access Email
If you received an email, you got access to the Preview functionality that you needed.
Part III. Run the first application in Windows Azure. Creating the first site in Web Sites based on a template from the gallery
1. Log in to the Windows Azure Management Portal using your Windows Live ID credentials (Figure 13).

Fig. 13. Login page
2. Upon entering the management portal (Fig. 14), click the New button in the lower left corner of the page to open the New form dialog box.
 Fig. 14. Windows Azure Management Portal
3. Select Web Site to create a new website. Select From Gallery (fig. 15).

Fig. 15. Choosing a website creation option
4. In the Find Apps For Azure dialog box, you are prompted to select one of the pre-configured images (Figure 16). Choose a WordPress image.

Fig. 16. Selecting preconfigured website images from the gallery
5. In the Configure Your App dialog box, in the URL box, type the name of your future WordPress -based website. Leave the rest unchanged (Fig. 17).

Fig. 17. Website Initial Setup Page
6. In the New MySQL Database dialog box, you can choose a name for the MySQL database or continue working with a randomly generated one (Fig. 18). Note that you agree with the rules of ClearDB . Click Next .

Fig. 18. The page to create a new MySQL database
In a short time, your new website will be deployed, after which the Status field value will take the Running value (Fig. 19).
Fig. 19. Website Information Panel
7. Click the link in the Url field of your website to go to the admin panel of the blog (Fig. 20). Enter the required information and click Install WordPress .

Fig. 20. WordPress Blog Initial Setup Page
8. Your blog is set (Fig. 21). Click Log In to login.

Fig. 21.
9. Go back to the Windows Azure Management Portal on the Web Sites tab. Click on the name of your website to go to the admin panel of the website and view the download in real time (Fig. 22).

Fig. 22. Website admin panel
You created your first website with a gallery of pre-configured images.
Part IV. Run the first application in Windows Azure. Modifying a project and publishing code from Visual Studio
The following deployment options are supported for Windows Azure Web Sites : Visual Studio Web Deploy, GitHub, FTP, Team Foundation Services (TFS), Microsoft WebMatrix. This article describes the algorithm for deploying a website using FTP from Visual Studio.
1. Log in to the Windows Azure Management Portal using your Windows Live ID credentials (Figure 23).
![clip_image006 [1] clip_image006[1]](https://habrastorage.org/getpro/habr/post_images/93b/259/edf/93b259edf94563f3e59915a2dd58f466.jpg)
Fig. 23. Login page
2. Upon entering the management portal (Figure 24), click the New button in the lower left corner of the page to open the New form dialog box.

Fig. 24. Windows Azure Management Portal
3. Select Web Site to create a new website. Select Quick Create (fig. 25).
![clip_image023 [1] clip_image023[1]](https://habrastorage.org/getpro/habr/post_images/d47/6ab/a7b/d476aba7b27eb4b7c222d9e81e8c83c8.jpg)
Fig.25. Choosing a website creation option
4. Enter the URL for your future website (Fig. 26).

Fig. 26. Initial Website Setup
5. In a short time, your new website will be deployed, after which the value of the Status field will take the Running value (Fig. 27).
Fig. 27. Website information bar
6. Click the link in the URL box of your website to make sure that the site has been created and is working (Fig. 28).

Fig.28. The first page of the created site
7. In order to obtain credentials for further deployment via FTP, go to the admin panel of the website by clicking on its name. On the Dashboard page, click Reset deployment credentials (fig.29). Enter the credentials to be used to deploy the website in the dialog box that appears.

Fig.29. Website Action Menu
8. To download a deployment profile that will be used later in Visual Studio, click Download publish profile (Figure 29).
9. Start Visual Studio 2012 RC.
10. Click New Project . Select the ASP.NET MVC 4 Web Application template (Figure 30). Select Internet Application (Fig. 31).

Fig. 30. List of web project templates in Visual Studio 2012 RC

Fig. 31. Basic ASP.NET MVC 4 project settings
11. Right-click on the project. Select Publish . In the dialog that opens, click Import ... and select the deployment profile downloaded from the Windows Azure Management Portal for your website. Select the FTP deployment option and enter the required data (Fig. 32), which can be obtained from the administration panel of your website (Fig. 33). To validate the entered values, click Validate Connection . If the verification is successful, click Publish . Next, in the Output view, the deployment log of your website will be located via FTP (Fig. 34).

Fig. 32. Setting up project publication

Fig. 33. Website Basic Data Panel in the Website Administration Panel
Fig. 34. Output View in Visual Studio 2012 RC
12. After the download is complete, click on the address in the URL field to go to the website (Fig. 35).

Fig. 35. Standard ASP.NET MVC 4 Project Page
You have created a website and deployed a standard ASP.NET MVC 4 project to it.
Part V. Run the first application in Windows Azure. Scaling a project on Web Sites
Each website in Windows Azure has a Dashboard administration panel in which you can get various information about the website: metrics, download, URL, location in the datacenter, and also perform various actions: stop or start the website, delete, go to website and so on (fig. 36).

Fig. 36. Website Administration Panel, Dashboard Page
If you need to scale your website, you can do it in the administration panel.
1. Go to the administration panel of your website.
2. Click Scale to go to the scaling details page (Figure 37).

Fig.37. Website Scaling Details Page
You can scale your website by adjusting the number of instances it will use. To do this, the scaling page has a special slider. By default, after creating your website is in shared mode, that is, its instances are executed in one large space along with instances of other websites (isolated from them). You can initiate the transition of your website to the reserved mode with the receipt of separate virtual machines for the website. The 10 shared websites are free .
1. Using the slider, specify the number of copies in 2 (Fig. 38). Click Save .

Fig. 38. Slider control the number of instances in shared mode
2. Specify the website mode in reserved (Fig. 39).

Fig. 39. Mode switching
3. Check “I have removed the spending limit on myaccount” so that you can switch to the reserved mode.
4. Three sizes are available to you - Small , Medium and Large . Select the Medium mode and, using the slider, specify 2 instances (Fig. 40). Click Save .

Fig. 41. Select the size of instances and slider control the number of instances in shared mode
5. Roll back the changes by going to Shared mode and clicking Save .
Source: https://habr.com/ru/post/147204/
All Articles