We put Google Play Store on a virtual device with Jelly Bean (API 16)
I was always confused by the ways of installing the market circulating on the Internet: download something from somewhere, run some scripts. Everything can be done much easier and safer.
Immediately I will warn you that the described method does not work on API 15, the application market does not download it, although it is installed.
First, a brief description of the procedure:
')
Everything happens in Linux, but in other operating systems everything is absolutely the same.
First you need to update the SDK Tools and Platform Tools to the latest version, so that images with API 16 appear in the list of available platforms.
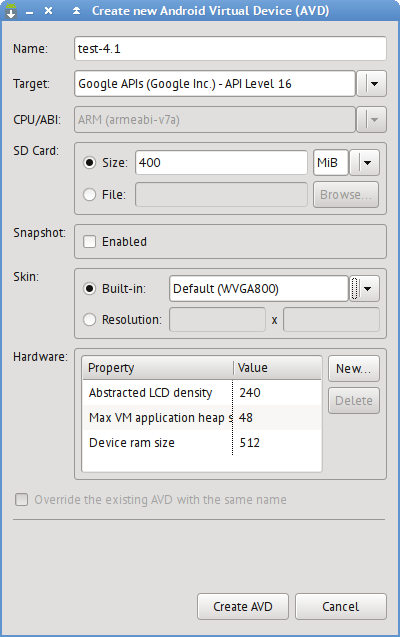
Select in the Target field the value of Google APIs (Google Inc.) - API Level 16 . In the Hardware section we type the necessary elements.
Why based on google api? And everything is simple - in this image there are already necessary packages for the work of the Play Store (google services framework, for example) and they do not need to be searched somewhere and installed by shamans.
Run the resulting image (shamanism is already beginning here; we assume here and hereafter that the SDK is installed in the
This command starts a virtual device, whose system partition size is increased to 250 MB, if this is not done, there will be no empty space on the partition at all.
Now we will remount the system partition for writing and at the same time make sure that we have remounted:
I always use the
By default, on a virtual device there are several several harmful packets that interfere with normal operation, in this case it is
Now you need to get a package with the market, for this will fit any android-phone, where this market is installed. We turn on USB debugging on the phone, connect the phone with a cable to the computer and start shamanism. First you need to find where the package with the market is, it's simple:
Here it is, my
This method should work on any, even non-ruled phone. And yes, this way you can extract any packages from your phone.
Download the apk-package on the phone:
The package on the virtual device is flooded, it remains to be done now so that the next time it starts it will not fly off. This is also simple: the emulator creates a copy of the system partition in the directory with temporary files each time it starts:
Here it is, in the
Now the device is nailed and launched in the usual way:
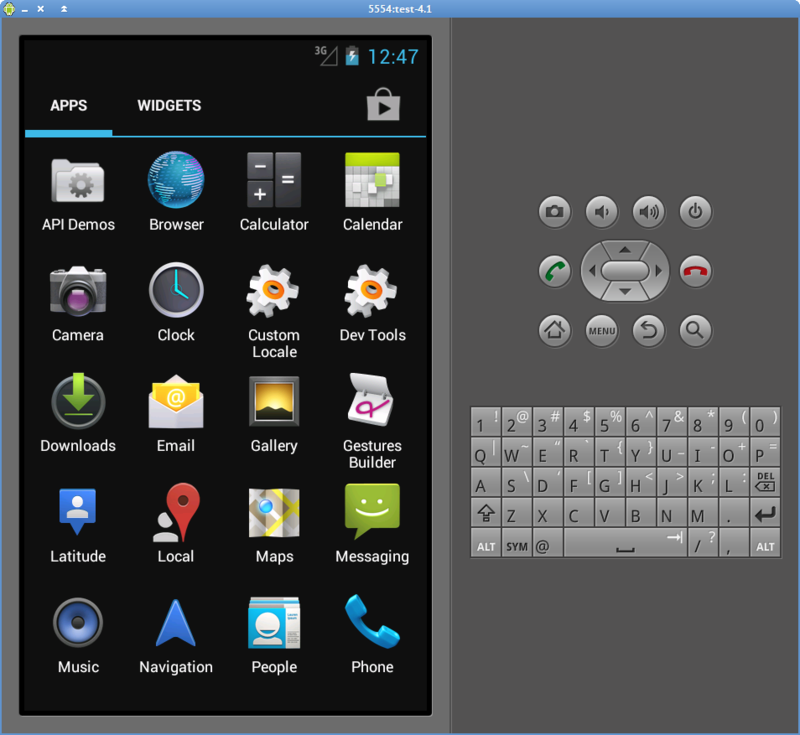
Market icon top right. Enjoy
Immediately I will warn you that the described method does not work on API 15, the application market does not download it, although it is installed.
First, a brief description of the procedure:
')
- create a virtual device based on the Google API image;
- we start the device emulator in a shaman way;
- remove the "extra" packages;
- we get a package with a market from an existing phone via a USB cable;
- we download the package with the market;
- final shamanism.
Everything happens in Linux, but in other operating systems everything is absolutely the same.
First you need to update the SDK Tools and Platform Tools to the latest version, so that images with API 16 appear in the list of available platforms.
Create a virtual device based on the Google API
Select in the Target field the value of Google APIs (Google Inc.) - API Level 16 . In the Hardware section we type the necessary elements.
Why based on google api? And everything is simple - in this image there are already necessary packages for the work of the Play Store (google services framework, for example) and they do not need to be searched somewhere and installed by shamans.
Run the device emulator in a shamanic way
Run the resulting image (shamanism is already beginning here; we assume here and hereafter that the SDK is installed in the
~/android/android-sdk-linux directory; the virtual is called test-4.1 ) % ~/android/android-sdk-linux/tools/emulator -avd test-4.1 -partition-size 250 -no-snapstorage This command starts a virtual device, whose system partition size is increased to 250 MB, if this is not done, there will be no empty space on the partition at all.
Now we will remount the system partition for writing and at the same time make sure that we have remounted:
% ~/android/android-sdk-linux/platform-tools/adb -e remount remount succeeded % adb -e shell mount|grep /system /dev/block/mtdblock0 /system yaffs2 rw 0 0 I always use the
-e argument when calling adb so that the requests go immediately to the emulated device.Remove the "extra" packages
By default, on a virtual device there are several several harmful packets that interfere with normal operation, in this case it is
LicenseChecker.apk and SdkSetup.apk , we will remove them: % adb -e shell rm /system/app/SdkSetup.apk /system/app/LicenseChecker.apk We get a package with a market from an existing phone via a USB cable
Now you need to get a package with the market, for this will fit any android-phone, where this market is installed. We turn on USB debugging on the phone, connect the phone with a cable to the computer and start shamanism. First you need to find where the package with the market is, it's simple:
% adb -d shell pm list packages -f | grep vending package:/data/app/com.android.vending-1.apk=com.android.vending Here it is, my
/data/app/com.android.vending-1.apk : /data/app/com.android.vending-1.apk . We download it into the current directory (the -d key is used to designate a real device, not an emulator, this is convenient, you do not need to specify the id-device with each call): % adb -d pull /data/app/com.android.vending-1.apk . 7563 KB/s (4000309 bytes in 0.516s) This method should work on any, even non-ruled phone. And yes, this way you can extract any packages from your phone.
We download the package with the market
Download the apk-package on the phone:
% adb -e push com.android.vending-1.apk /system/app 3353 KB/s (4000309 bytes in 1.164s) Final shamanism
The package on the virtual device is flooded, it remains to be done now so that the next time it starts it will not fly off. This is also simple: the emulator creates a copy of the system partition in the directory with temporary files each time it starts:
% ls -l /tmp/android-$USER total 191072 -rw------- 1 cancel cancel 195680988 28 12:35 emulator-dHRHv0 srwxr-xr-x 1 cancel cancel 0 28 12:21 qemu-gles-22468 Here it is, in the
emulator-dHRHv0 (you’ll have it called differently, but it will be in the same directory), just copy it to the virtual device directory under the name system.img : % cp /tmp/android-$USER/emulator-dHRHv0 ~/.android/avd/test-4.1.avd/system.img Now the device is nailed and launched in the usual way:
Market icon top right. Enjoy
Source: https://habr.com/ru/post/146667/
All Articles