Remove \ change the anti-reflective coating of the monitor
I love matte monitors. No, really love. But sometimes such a monitor comes across that in the literal sense of the word “you cannot see without tears.” And the culprit "crystal" effect.
The crystal effect, to one degree or another, is present on all matte monitors. Its strength depends primarily on the quality of the coating itself and differs from model to model. It manifests itself in the haze of the image and fuzzy, blurry edges, making the user very difficult to focus on any part. This is especially inconvenient when reading.
')
If you are the owner of a matte monitor, in which this feature is manifested in all its glory - welcome under cat. I apologize in advance for the quality of the photographs.
Briefing
Before we begin, we need to decide whether we want to change the coverage, or we can afford to leave the monitor completely uncovered.
The fact is that on any monitor there are two coatings: a polarizer and a transparent \ anti-reflective \ another glass, the main function of which is to protect the polarizer from damage. After removing the protective coating there is a risk of accidentally damaging the polarizer in everyday life.
There are two more points in dealing with the bare polarizer, which they write about in Western forums:
- Do not wash on the "hot." That is, it is necessary that the matrix is cooled for some time after work, otherwise the water will penetrate under the polarizer. I personally did not check.
- It is necessary to wash strictly by movements left-right-up-down, but not circular. Checked. I am fine.
Therefore, if you live alone and are pretty neat, then you can not bother with the coating. But if you, for example, have children, I would have attended to this issue and bought something to replace.
To business
The patient is a shitty 60 cm. Acer V243HQ.

We need:
- A tool, including a plastic spatula / mediator, to disassemble the monitor.
- Spray with water (I used the tap).
- Viscose and microfiber wipes.
- Rubber gloves (can be household).
Using the tool, carefully disassemble the monitor and release the matrix from the metal frame. You do not need to get all the glass completely, you just need to be available the entire surface of the anti-reflective coating. I will not describe the process in detail, since each model has its own parsing scheme. Just to mention that you need to memorize, and even better - to photograph all the stages, especially the attachment of cables \ wires.
We put the whole thing on a horizontal surface and cover the matrix with dry viscose napkins. Then, using a spray bottle, spray the napkins with water evenly, pressing them against the glass.
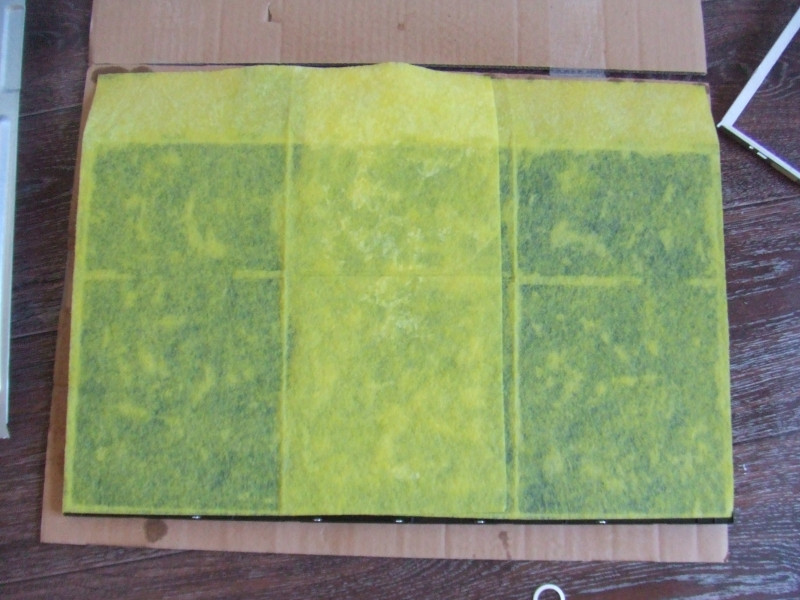
The trick is that the anti-reflective coating is glued with water-soluble glue, and in itself is soaked with water. Water at the same time should be enough. Not much and not enough, namely enough. Excessive amount will flow under the matrix, and insufficient will not sufficiently saturate the coating and it will go off in pieces. After laying the napkins should pass about 4 hours before the glue will soften.
After the necessary time, you can begin to remove the coating. We transfer all of our design to the bathroom or other place where there is a constant access of water.
Gently hook on the corner cover and slowly pull over. If it is very tight, then it is better to leave it to soak for a while. It is very important that everything comes off in one piece, since it is very problematic to tear off small pieces.
The main thing at this moment is not to remove the polarizer with the coating. To distinguish them is not difficult.
After removal, you need to check whether the adhesive remains on the surface of the polarizer. To do this, hold a wet microfiber on the surface of the matrix and wipe dry. If the glue is left, then the rhinestone will be visible by divorce and adherent tissue particles.
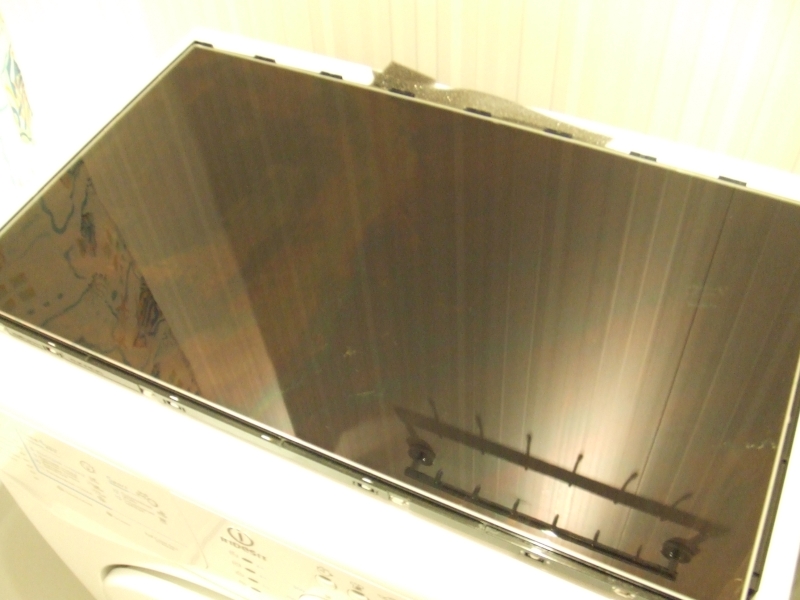
So it's time to start the monotonous procedure for removing glue. This is where the gloves come in handy. The procedure looks like this: in one hand a wet cloth, in the other - a dry cloth. Moisturize - we rub, we moisten - we rub, and so on until the stains disappear and the surface becomes an ideal black mirror. We collect the monitor.

Source: https://habr.com/ru/post/146644/
All Articles