Joint deployment of System Center 2012 (method and problems)
Apparently, to reduce implementation time and simplify the test deployment of Microsoft System Center 2012, a Unified Installer tool was created for a unified installation. Briefly, its essence is the deployment of all system components from a single window.
Below we will analyze in detail the process of preparation and installation, as well as tell you about those rakes, which as always await us somewhere nearby. In general, the tool is really useful, with proper skill you can manage to do everything in one working day.
Just in case, we remind you of the components included in System Center 2012 and their main functions:
- Virtual Machine Manager - virtual environment and cloud management (along with App Controller);
- Operation Manager - monitoring status and performance;
- Configuration Manager - OS and application deployment, data collection, and inventory;
- Data Protection Manager - backup;
- Service Manager - IT service management;
- Orchestrator is an automation system connecting all components.
In the previous version, some components were missing, and some were separate products. Accordingly, the implementation process for each of them was different. In the new version, the distribution kit includes the Unified Installer installer image (hereinafter UI), official information on which can be found here - http://technet.microsoft.com/library/hh751266.aspx . Since we in DEPO Computers often have to deploy SC products on test and combat stands, we decided to consider it in more detail.
Training
Our goal was to install Orchestrator, VMM, AppController, SCOM and SCSM. SCCM and the backup system were installed earlier in the standard way.
Deployment was intended in a virtual environment. A virtual machine template was created (2 cpu, 4gb memory, virtual disk 60gb), installed Windows 2008R2 EE with all updates, configured WinRM and Remote Access Shell (local policy settings can be viewed at the link above, you can also configure them in the domain via group policies), based on the template 7 virtual machines were created:
- Srv1.test1.local - domain controller and DNS, configured first;
- Srv6.test1.local - Orchestrator, Unified Installer System;
- Tscvmm.test1.local - Virtual Machine Manager;
- Tscapp.test1.local - App Controller;
- Tscom.test1.local - Operation Manager;
- Tscsm.test1.local - Service Manager;
- Tscdw.test1.local (datawarehouse) - Service Manager.
You also need to download and unpack the entire System Center and a dozen different distributions (links to them will be given in the 'Prerequisite Media Location' step, but note that they can lead you to a distribution with the wrong language).
A network folder \\ srv6 \ files was created on the Srv6 server, where all distributions were placed.
Before installation we recommend to take snapshots on all virtual machines just in case. Naturally, except the domain controller. The fact is that during the installation process an error may occur, and snapshot will allow you not to create virtual machines again.
')
Customization
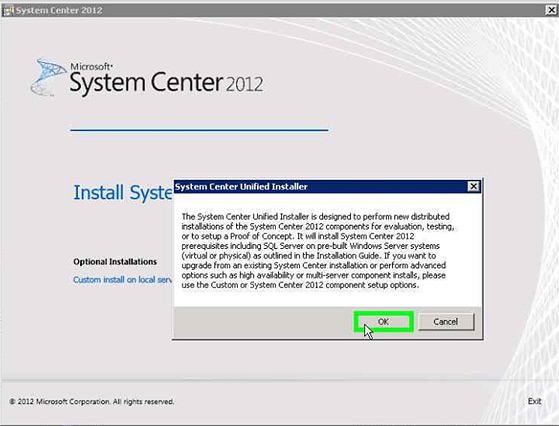
After running setup.exe from the UI distribution, the SC installation window will appear.

Please note that the installation can also be done manually - to do this, click 'Custom install on local server'.
After starting the installation process, a warning appears, the essence of which is to ensure that if you have already deployed a component and you want to upgrade or reconfigure it, you should use Custom Install. Click OK.
Make installation without keys.

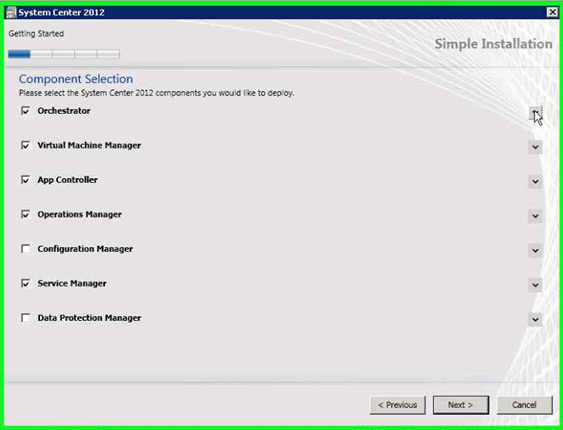
We select the necessary components. As mentioned above, we already had Configuration Manager deployed, and we do not need a backup system for the test bench.
Specify the paths to the System Center 2012 distributions, located on Srv6.

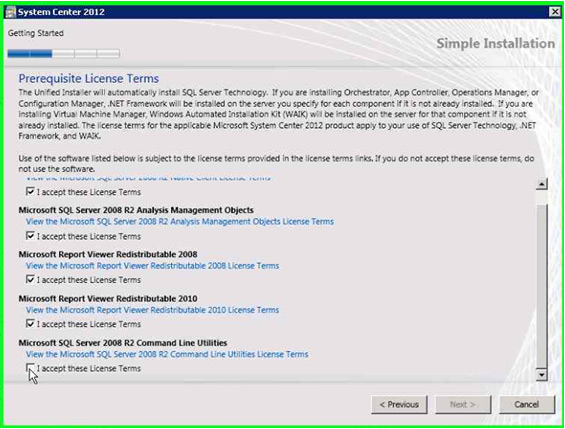
We confirm license agreements.
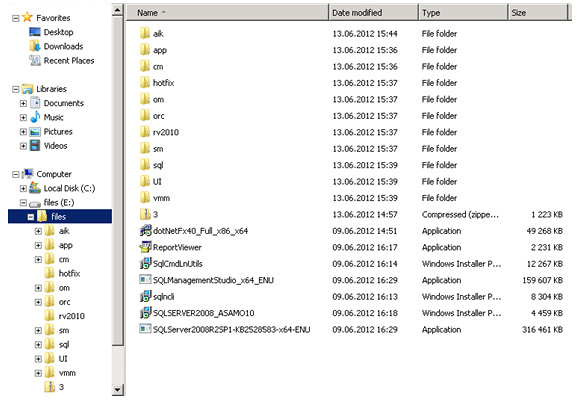
We specify all the paths to the distributions of the accompanying software. Pay attention to this step - here you can download the software from the links provided, decompose it into the necessary folders and continue.

Here is how it looks on the file server.
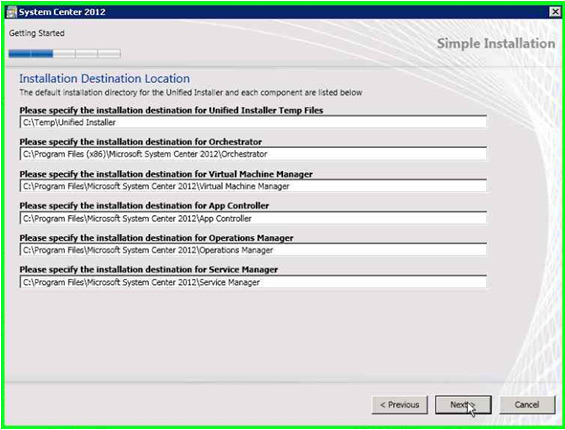
These settings can be left unchanged.
We specify server names for each component. The UI does not allow to install two components on one server, but nothing interferes with the use of Srv6, including installing one of the components. Service Manager requires two servers.

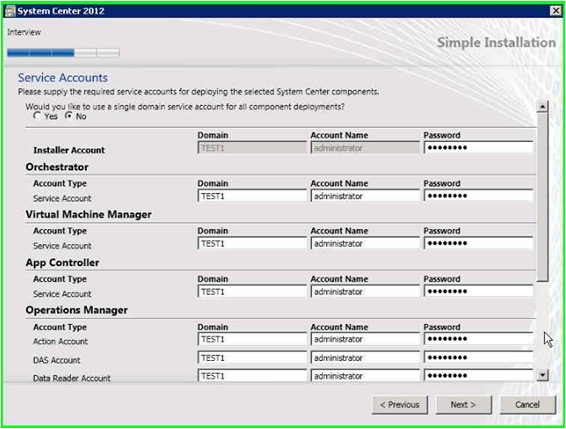
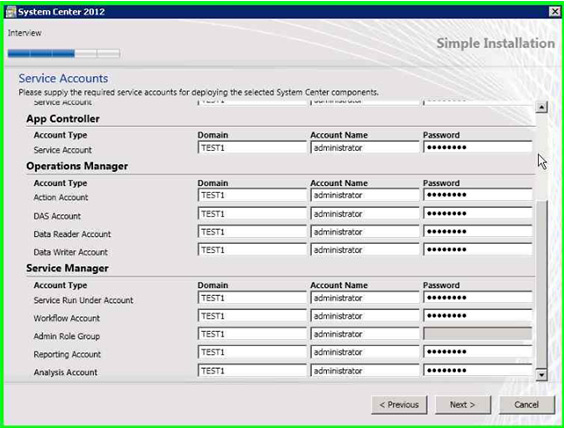
At this step, you must specify an account to deploy. It can also be used to start services, which is convenient for test benches.
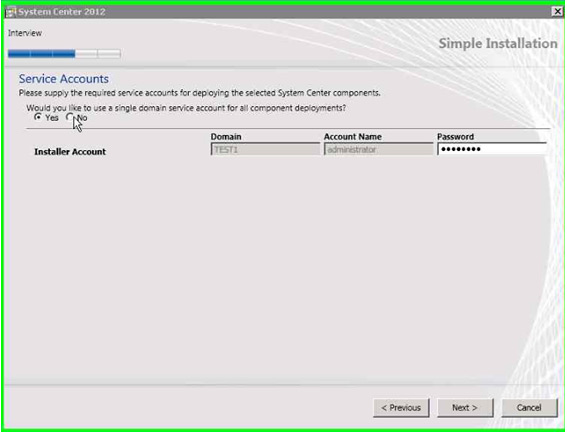
But when deploying in a production environment, it is still worth using separate accounts.
Setting up additional information.

Installation
The installation process is completely autonomous. Depending on the selected components, it may take several hours, so think in advance how to pass the time.
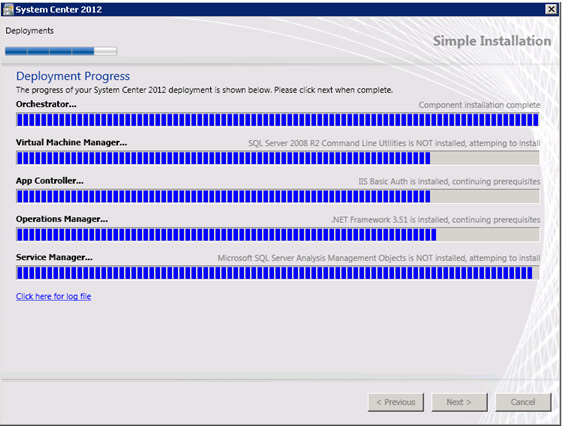
As a result, on each server, the MSSQL 2008R2 server, its own component and component bases are installed.
Management Consoles
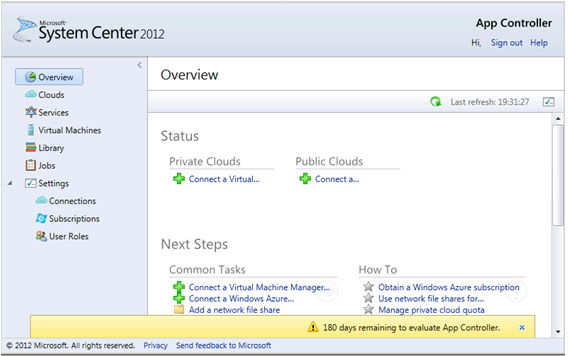
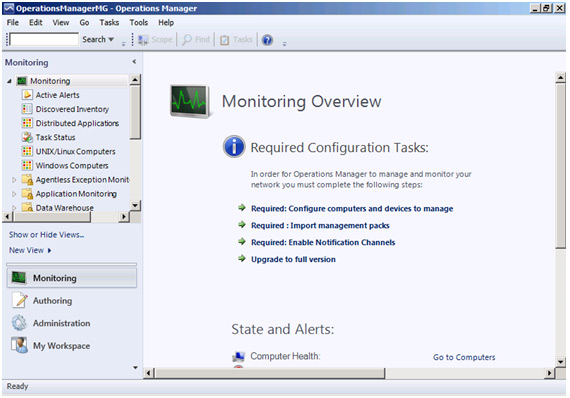
After installation, make sure that everything works.
App Controller:
Operation Manager:
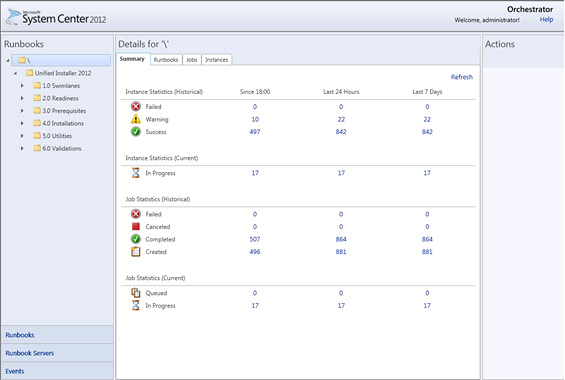
Orchestrator:
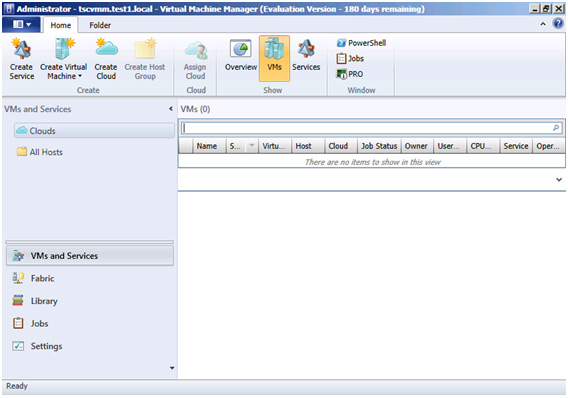
Virtual Machine Manager:
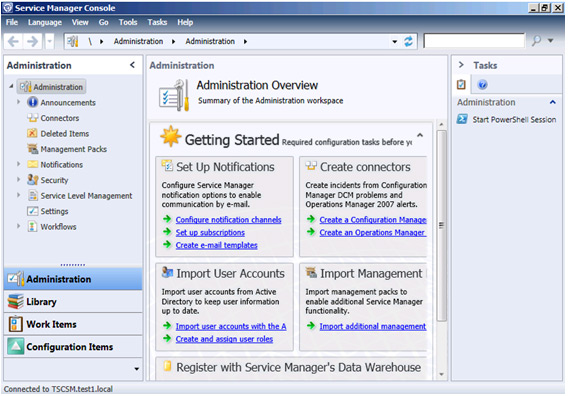
Service Manager:
Location of databases by servers:

At this deployment can be considered complete. Further steps to configure each component can be found here: http://technet.microsoft.com/library/hh769199.aspx .
Remarks
Please note that although distributions are located in a network folder, they are copied to all servers on which components are installed during the installation process. That is why the volume of the system partition should be at least 60 GB.
The UI is designed in such a way that it creates an MSSQL server on each virtual machine where the components of SC 2012 are installed. For some, this will seem inconvenient, in which case nothing remains of how to use Custom Install with all the consequences.
The UI does not allow SC 2012 to be deployed on clusters. That, however, is not a significant problem if you are already using a virtual environment with a Hyper-V or vSphere cluster. A virtual environment already provides high availability if there are at least two servers with shared storage, on which your virtual machines will be located.
If we compare the UI for SC 2012 with the Topology Builder for MS Lync, then it clearly falls short of a full-fledged deployment tool. For large distributed infrastructures with branches, a Custom Install is required, and in fact it is not much different from the simple installation of a particular component.
It may take a lot of time to download the numerous distributions required to install SC2012. It would be much easier if they were already included in the SC 2012 distribution, but alas.
PS SC 2012 is a large and complex product, and if someone else is interested in its other components, say - we will definitely write about them.
Vinchi ,
DEPO Computers
Source: https://habr.com/ru/post/146237/
All Articles