How to read the signal from the analog inputs of Teensy ++ and display them on the screen

Recently got this thing here and wanted to try to play with it. The standard examples with the LED did not last long, so I decided to try to read the values from the analog inputs of Teensy (which, by the way, 8 pieces) and somehow visualize them.
The creators offer two alternatives for programming Teensy - C with AVR-GCC or Arduino IDE with an installed plug-in for Teensy. Perhaps programming through AVR-GCC provides great opportunities - but I still stopped at the Arduino IDE, since for a beginner it is noticeably simpler.
')
So, first you need to download Arduino from here .
If you work under Linux - in udev you need to add a rule for Teensy - you can find it here . It looks like this:
sudo cp 49-teensy.rules /etc/udev/rules.d/Then you need to download the Teensyduino plug-in installer from here . When installing, you can choose which modules to install (I installed everything - it will be useful in the household :).
After that, Teensy support will appear in the Arduino IDE.
Now you need to write a code that will read the values from the analog inputs and send them to the USB serial.
void setup() { Serial.begin(9600); } int pins[] = {0, 1, 2, 3, 4, 5, 6, 7}; int val; int i; void loop() { for (i = 0 ; i < 8 ; i++) { val = analogRead(pins[i]); Serial.print("p"); Serial.print(i); Serial.print(":"); Serial.print(val); Serial.print("\n"); } delay(100); } The code is quite trivial - in the setup method we initialize our serial port, in the loop we check the values at the inputs and write them to the port.
Before scanning the program for your board in the Tools menu, you must select your board model (in my case, this is Teensy ++ 2.0) and the serial port (I had it / dev / ttyACM0). In order for the program to use the serial port correctly, I had to run the IDE from sudo .
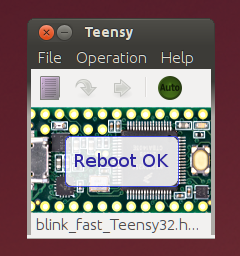
Compilation and launch of the program are carried out by pressing the Verify button (a check mark in the upper left corner). After that, the Teensy Loader dialog will pop up, showing that you need to press a button on the board. Click it - Reboot appears in the window, and the firmware will be deployed.
After rebooting, the device will start spamming you directly to the serial port :)
The conclusion can be seen quite banal:
sudo cat /dev/ttyACM0There must be something like
p0:294 p1:290 p2:286 p3:275 p4:272 p5:274 p6:273 p7:270 Now you can begin to visualize the data being sent.
As a visualizer, I used a bunch of Python + PyQt + pySerial.
import serial as Serial import re import random import thread import time import sys from PyQt4.QtCore import * from PyQt4.QtGui import * class Fetcher(QThread): def __init__(self, parent = None): QThread.__init__(self, parent) def run(self): pinRe = re.compile("\d+") pinValues = [0, 0, 0, 0, 0, 0, 0, 0] serial = Serial.Serial('/dev/ttyACM0', 9600, timeout = 0.1) while True: pinString = serial.readline() pinParseResult = pinRe.findall(pinString) if (len(pinParseResult) == 2): pinValues[int(pinParseResult[0])] = int(pinParseResult[1]) self.emit(SIGNAL("pinupdate"), pinValues) serial.close() class Form(QDialog): MAX_VALUE = 1200 pins = [0, 0, 0, 0, 0, 0, 0, 0] pinInfos = [0, 0, 0, 0, 0, 0, 0, 0] def __init__(self, parent=None): super(Form, self).__init__(parent) for key in range(8): self.pins[key] = QProgressBar() self.pins[key].setOrientation(Qt.Vertical) self.pins[key].setValue(35) self.pinInfos[key] = QLabel() mainLayout = QVBoxLayout() topLayout = QHBoxLayout() bottomLayout = QHBoxLayout() for key in range(len(self.pins)): if key % 4 == 0 and key / 4 == 1: topLayout.addItem(QSpacerItem(100, 10)) if key % 4 == 2 and key / 4 == 1: bottomLayout.addItem(QSpacerItem(100, 10)) if key % 4 == 0 or key % 4 == 1: topLayout.addWidget(self.pinInfos[key]) topLayout.addWidget(self.pins[key]) topLayout.addItem(QSpacerItem(40, 10)) else: bottomLayout.addWidget(self.pinInfos[key]) bottomLayout.addWidget(self.pins[key]) bottomLayout.addItem(QSpacerItem(40, 10)) mainLayout.addLayout(topLayout) mainLayout.addLayout(bottomLayout) self.setLayout(mainLayout) self.setWindowTitle("Pin display") def connectSlots(self, fetcher): self.connect(fetcher, SIGNAL('pinupdate'), self.updateBars) def updateBars(self, values): valuesNormalised = map(lambda x: (float(x) / self.MAX_VALUE) * 100, values) for key in range(len(values)): self.pins[key].setValue(valuesNormalised[key]) self.pinInfos[key].setText("Pin %i, Value: %4i" % (key, values[key])) app = QApplication(sys.argv) form = Form() form.show() fetcher = Fetcher() fetcher.start() form.connectSlots(fetcher) app.exec_() In short, a form with eight progress bars is created, a slot is indicated for updating the value on the pins, a stream is started that continuously receives data from the serial port and notifies the form about it.
What came out of this can be seen at the very beginning of the article.
Source: https://habr.com/ru/post/146164/
All Articles