The driver is just
Many people think that creating a driver for Windows itself is something on the verge of science fiction. But actually it is not. Of course, developing a driver for some sophisticated device is not an easy task. But the same can be said about the creation of complex programs or games. There is nothing difficult in the development of a simple driver and I will try to show it with examples.
First we need to decide what we are going to create our first driver for. Since the material is focused on beginners, the programming language was chosen as one of the simplest, and this is not C or assembler, but BASIC. We will use one of the BASIC dialects - PureBasic. Out of the box, he is not trained to create drivers, but he has a good set of files used for compilation and a little shamanism allows you to add this feature. The compilation process consists of several stages. In short, it happens as follows: First, the translator “overtakes” the basic code into an assembler, which is given to FASM (the assembler compiler), which creates an object file. Next comes the polink linker, which creates the executable file. Both the assembler compiler and the linker can create drivers, and if you slightly change the compilation options, you get not an executable file, such as an EXE or DLL, but a kernel-mode driver (SYS).
You can download a slightly modified free demo version of PureBasic 4.61 x86 at the file sink , mirror.
If you need to create a driver for the x64 system, download this version , mirror.
Distributions are small, about 3 MB each. With this version you can only create drivers.
Download, unpack and run by clicking on the file "PureBasic Portable". This will launch the IDE and pop up a window with the message that this is a demo version and a list of restrictions. Of these, the most significant is the limit of the number of lines of code equal to 800, and for creating simple drivers this may be enough. The remaining restrictions in our case are not significant.
')
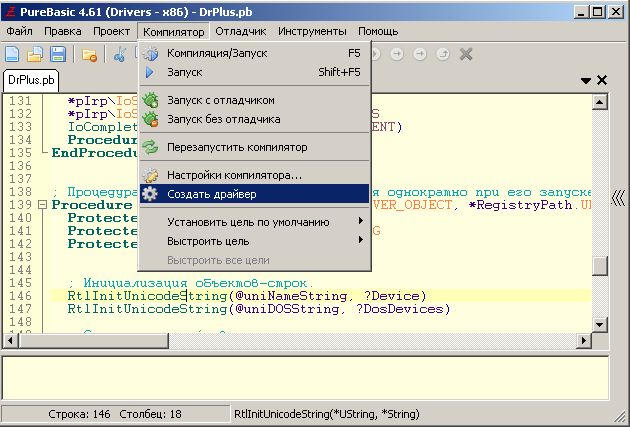
The IDE window with the loaded driver code is shown in the screenshot.

The driver is compiled through the “Compiler” menu (this is if someone did not understand).
Now we decide what our first driver will do. Usually, when learning programming, one starts with simple things, say, performing mathematical operations and displaying the result. So let our driver do the same, because the banal math produced in kernel mode is very cool!
Driver Code:
It may seem like a bunch of meaningless code, but it’s not.
Each driver must have an entry point, usually it has the name DriverEntry () and it is executed as a procedure or function. As you can see, there is such a procedure in this driver. If you look at the beginning of the code, then in the first lines you will see how control is transferred to it. In this procedure, the driver is initialized. The procedure for terminating the driver is also assigned there, which in our case is named UnloadDriver (). The procedures CreateDispatch () and CloseDispatch () are assigned as handlers for connecting and disconnecting the program from the user code.
The DeviceIoControl () procedure will process the WinAPI requests of the DeviceIoControl () function, which in this driver is associated with the user interface. At the end of the code is the so-called DataSection (DataSection), in which the driver names are saved in Unicode format (one of the assembler FASM chips was used for this).
Now consider how the driver will interact with the outside world. This happens in the DeviceIoControl () procedure. It tracks one message, namely - #IOCTL_MyPlus, which the user mode program sends when it needs to add two numbers in kernel mode (sounds cool, right?). When such a message is received, we read from the system buffer, the address of the pointer to the structure with the terms, we add and the result is placed in the system buffer. Actually this is the main task of our first driver.
See how much code was needed to perform the simplest mathematical operation - the addition of two numbers?
And now we will consider the program working with this driver. It is written on the same PureBasic.
When the program starts, the OpenDriver () function is called, which loads the driver. For simplicity, the driver name, service name, and service description are the same — pbDrPlus. If the download is unsuccessful, the corresponding message is displayed and the program ends its work.
The Plus () procedure communicates with the driver. The handle is passed to it, the driver access and the addend numbers that are placed in the structure and the pointer to which pointer is passed to the driver. The result of the addition of numbers will be in the variable "Result".
The following is the code of the simplest GUI calculator, copied from Wikipedia.
When the window is closed, before the program terminates, the connection with the driver is closed and it is uninstalled from the system.
The result of the addition of the numbers 8 and 2 in the screenshot.

Source codes of the driver and the program can be found in the folder “Examples”, PureBasic on the file sink, the link to which was given at the beginning of the article. There you will also find examples of direct access to the pores of the computer and an example of working with kernel memory.
Ps.
Remember, work in the kernel is fraught with minor surprises ala, BSOD (blue screen of death), so experiment carefully and be sure to save everything before running the driver.
For the possible loss of data, I am not responsible!
First we need to decide what we are going to create our first driver for. Since the material is focused on beginners, the programming language was chosen as one of the simplest, and this is not C or assembler, but BASIC. We will use one of the BASIC dialects - PureBasic. Out of the box, he is not trained to create drivers, but he has a good set of files used for compilation and a little shamanism allows you to add this feature. The compilation process consists of several stages. In short, it happens as follows: First, the translator “overtakes” the basic code into an assembler, which is given to FASM (the assembler compiler), which creates an object file. Next comes the polink linker, which creates the executable file. Both the assembler compiler and the linker can create drivers, and if you slightly change the compilation options, you get not an executable file, such as an EXE or DLL, but a kernel-mode driver (SYS).
You can download a slightly modified free demo version of PureBasic 4.61 x86 at the file sink , mirror.
If you need to create a driver for the x64 system, download this version , mirror.
Distributions are small, about 3 MB each. With this version you can only create drivers.
Download, unpack and run by clicking on the file "PureBasic Portable". This will launch the IDE and pop up a window with the message that this is a demo version and a list of restrictions. Of these, the most significant is the limit of the number of lines of code equal to 800, and for creating simple drivers this may be enough. The remaining restrictions in our case are not significant.
')
The IDE window with the loaded driver code is shown in the screenshot.
The driver is compiled through the “Compiler” menu (this is if someone did not understand).
Now we decide what our first driver will do. Usually, when learning programming, one starts with simple things, say, performing mathematical operations and displaying the result. So let our driver do the same, because the banal math produced in kernel mode is very cool!
Driver Code:
Declare DriverEntry(*DriverObject, *RegistryPath) !public PureBasicStart !section '.code' code readable executable align 8 !PureBasicStart: *A=@DriverEntry() !jmp [p_A] ; DriverEntry(). #IOCTL_MyPlus = $200 !extrn PB_PokeL CompilerSelect #PB_Compiler_Processor CompilerCase #PB_Processor_x86 !extrn _IoCompleteRequest@8 ; . !extrn _RtlInitUnicodeString@8 !extrn _IoCreateDevice@28 !extrn _IoDeleteDevice@4 !extrn _IoCreateSymbolicLink@8 !extrn _IoDeleteSymbolicLink@4 !extrn _PB_PeekI@4 Import "ntoskrnl.lib" CompilerCase #PB_Processor_x64 !extrn IoCompleteRequest; . !extrn RtlInitUnicodeString !extrn IoCreateDevice !extrn IoDeleteDevice !extrn IoCreateSymbolicLink !extrn IoDeleteSymbolicLink !extrn PB_PeekI ImportC "ntoskrnl.lib" CompilerEndSelect ; . IoCompleteRequest(*IRP, PriorityBoost) RtlInitUnicodeString(*UString, *String) IoCreateDevice(*DriverObject, DeviceExtensionSize, *UDeviceName, DeviceType, DeviceCharacteristics, Exclusive, *DeviceObject) IoDeleteDevice(*DeviceObject) IoCreateSymbolicLink(*SymbolicLinkName, *DeviceName) IoDeleteSymbolicLink(*SymbolicLinkName) EndImport Structure MyData ; , . Plus_1.l Plus_2.l EndStructure ; . Procedure DeviceIoControl(*DeviceObject.DEVICE_OBJECT, *pIrp.IRP) Protected *Stack.IO_STACK_LOCATION Protected *InpBuff, *OutBuff Protected InBuffSize, OutBuffSize Protected ntStatus, *MyData.MyData ntStatus = #STATUS_SUCCESS ; . *Stack = *pIrp\Tail\Overlay\CurrentStackLocation ; (. WinAPI DeviceIoControl()) InBuffSize = *Stack\Parameters\DeviceIoControl\InputBufferLength OutBuffSize = *Stack\Parameters\DeviceIoControl\OutputBufferLength If InBuffSize >= SizeOf(Integer) And OutBuffSize >= 4 Select *Stack\Parameters\DeviceIoControl\IoControlCode Case #IOCTL_MyPlus *Point = *pIrp\SystemBuffer If *Point *MyData = PeekI(*Point) If *MyData Result.l = *MyData\Plus_1 + *MyData\Plus_2 PokeL(*pIrp\SystemBuffer, Result) *pIrp\IoStatus\Information = 4 Else ntStatus = #STATUS_BUFFER_TOO_SMALL *pIrp\IoStatus\Information = 0 EndIf EndIf Default ntStatus = #STATUS_UNSUCCESSFUL *pIrp\IoStatus\Information = 0 EndSelect Else ntStatus = #STATUS_BUFFER_TOO_SMALL ; . *pIrp\IoStatus\Information = 0 EndIf *pIrp\IoStatus\Status = ntStatus IoCompleteRequest(*pIrp, #IO_NO_INCREMENT) ProcedureReturn ntStatus EndProcedure ; . . Procedure UnloadDriver(*DriverObject.DRIVER_OBJECT) Protected uniDOSString.UNICODE_STRING ; -. RtlInitUnicodeString(@uniDOSString, ?DosDevices) ; . IoDeleteSymbolicLink (@uniDOSString) ; . IoDeleteDevice(*DriverObject\DeviceObject) EndProcedure ; CreateFile(). Procedure CreateDispatch(*DeviceObject.DEVICE_OBJECT, *pIrp.IRP) *pIrp\IoStatus\Information = 0 *pIrp\IoStatus\Status = #STATUS_SUCCESS IoCompleteRequest(*pIrp, #IO_NO_INCREMENT) ProcedureReturn #STATUS_SUCCESS EndProcedure ; CloseHandle(). Procedure CloseDispatch(*DeviceObject.DEVICE_OBJECT, *pIrp.IRP) *pIrp\IoStatus\Information = 0 *pIrp\IoStatus\Status = #STATUS_SUCCESS IoCompleteRequest(*pIrp, #IO_NO_INCREMENT) ProcedureReturn #STATUS_SUCCESS EndProcedure ; . . Procedure DriverEntry(*DriverObject.DRIVER_OBJECT, *RegistryPath.UNICODE_STRING) Protected deviceObject.DEVICE_OBJECT Protected uniNameString.UNICODE_STRING Protected uniDOSString.UNICODE_STRING ; -. RtlInitUnicodeString(@uniNameString, ?Device) RtlInitUnicodeString(@uniDOSString, ?DosDevices) ; . status = IoCreateDevice(*DriverObject, 0, @uniNameString, #FILE_DEVICE_UNKNOWN, 0, #False, @deviceObject) If status <> #STATUS_SUCCESS ProcedureReturn status EndIf ; , ; user-mode, , ; . status = IoCreateSymbolicLink(@uniDOSString, @uniNameString) If status <> #STATUS_SUCCESS IoDeleteDevice(@deviceObject) ProcedureReturn status EndIf ; . *DriverObject\DriverUnload = @UnloadDriver() *DriverObject\MajorFunction[#IRP_MJ_CREATE] = @CreateDispatch() *DriverObject\MajorFunction[#IRP_MJ_CLOSE] = @CloseDispatch() ; WinAPI DeviceIoControl(). *DriverObject\MajorFunction[#IRP_MJ_DEVICE_CONTROL] = @DeviceIoControl() ProcedureReturn #STATUS_SUCCESS EndProcedure ; (). DataSection Device: !du '\Device\pbDrPlus', 0, 0 DosDevices: !du '\DosDevices\pbDrPlus', 0, 0 EndDataSection It may seem like a bunch of meaningless code, but it’s not.
Each driver must have an entry point, usually it has the name DriverEntry () and it is executed as a procedure or function. As you can see, there is such a procedure in this driver. If you look at the beginning of the code, then in the first lines you will see how control is transferred to it. In this procedure, the driver is initialized. The procedure for terminating the driver is also assigned there, which in our case is named UnloadDriver (). The procedures CreateDispatch () and CloseDispatch () are assigned as handlers for connecting and disconnecting the program from the user code.
The DeviceIoControl () procedure will process the WinAPI requests of the DeviceIoControl () function, which in this driver is associated with the user interface. At the end of the code is the so-called DataSection (DataSection), in which the driver names are saved in Unicode format (one of the assembler FASM chips was used for this).
Now consider how the driver will interact with the outside world. This happens in the DeviceIoControl () procedure. It tracks one message, namely - #IOCTL_MyPlus, which the user mode program sends when it needs to add two numbers in kernel mode (sounds cool, right?). When such a message is received, we read from the system buffer, the address of the pointer to the structure with the terms, we add and the result is placed in the system buffer. Actually this is the main task of our first driver.
See how much code was needed to perform the simplest mathematical operation - the addition of two numbers?
And now we will consider the program working with this driver. It is written on the same PureBasic.
#DriverName = "pbDrPlus" #IOCTL_MyPlus = $200 XIncludeFile "..\DrUserModeFramework.pbi" Structure MyData ; , . Plus_1.l Plus_2.l EndStructure ; -. DrFile.s = GetPathPart(ProgramFilename())+#DriverName+".sys" ; , . hDrv=OpenDriver(DrFile, #DriverName, #DriverName, #DriverName) If hDrv=0 ; . Driver_UnInstall(#DriverName) MessageRequester("", " ") End EndIf ; . Procedure.q Plus(hDrv, x1, x2) Protected MyData.MyData, Result, *Point MyData\Plus_1=x1 MyData\Plus_2=x2 *Point = @MyData DeviceIoControl_(hDrv, #IOCTL_MyPlus, @*Point, SizeOf(MyData), @Result, 4, @BytesReturned, 0) ProcedureReturn Result EndProcedure OpenWindow(1,300,300,140,90,"Title",#PB_Window_SystemMenu|#PB_Window_ScreenCentered) StringGadget(1,10,10,50,20,"") StringGadget(2,10,40,50,20,"") TextGadget(3,70,30,70,20,"") Repeat ev=WaitWindowEvent() If ev=#PB_Event_Gadget op1=Val(GetGadgetText(1)) op2=Val(GetGadgetText(2)) Result = Plus(hDrv, op1, op2) SetGadgetText(3,Str(Result)) EndIf Until ev=#PB_Event_CloseWindow ; , . If hDrv CloseHandle_(hDrv) hDrv=0 EndIf ; . Driver_UnInstall(#DriverName) When the program starts, the OpenDriver () function is called, which loads the driver. For simplicity, the driver name, service name, and service description are the same — pbDrPlus. If the download is unsuccessful, the corresponding message is displayed and the program ends its work.
The Plus () procedure communicates with the driver. The handle is passed to it, the driver access and the addend numbers that are placed in the structure and the pointer to which pointer is passed to the driver. The result of the addition of numbers will be in the variable "Result".
The following is the code of the simplest GUI calculator, copied from Wikipedia.
When the window is closed, before the program terminates, the connection with the driver is closed and it is uninstalled from the system.
The result of the addition of the numbers 8 and 2 in the screenshot.
Source codes of the driver and the program can be found in the folder “Examples”, PureBasic on the file sink, the link to which was given at the beginning of the article. There you will also find examples of direct access to the pores of the computer and an example of working with kernel memory.
Ps.
Remember, work in the kernel is fraught with minor surprises ala, BSOD (blue screen of death), so experiment carefully and be sure to save everything before running the driver.
For the possible loss of data, I am not responsible!
Source: https://habr.com/ru/post/145926/
All Articles