Home media server based on Ubuntu Server 12.04 LTS
 Hi, Habr! During the discussion of one article about the "ideal" home network, a dispute arose about what is better, a hardware NAS or a mini-computer with a Linux distribution. The author suggested using NAS hardware, since it is supposed to be easier to administer, does not require knowledge of Linux, and generally NAS is quiet. But at the same time, to watch a video on DLNA-TV, which he does not support, he proposed to include a laptop with DLNA transcoding. I was surprised, to put it mildly, because this should not be the case in an ideal network. Therefore, I want to present my vision of one of the key components of the home network - a centralized data storage, and it will be based on a mini-PC running Ubuntu Server.
What do we need?
First of all, the NAS is required, of course, reliable data storage and convenient access to it. First of all, RAID is required for reliability, because losing the entire home media archive due to a failed hard drive is at least silly. To access data, you need to configure FTP and Samba access. Of course, everyone has his own needs, so if you are using MacOS or Linux, then you will probably need other protocols more (NFS, AFP), but I will describe the configuration as I did for myself.To access media data from smart TVs, we need a DLNA server. And for the convenience of downloading, we need a torrent-client. Well, it is desirable to administer all this through a web interface.
Why not a hardware NAS?
It would seem that manufacturers have long taken care of users, and have long been producing ready-made boxes specifically for home use. But they have flaws:1) They are expensive. You are unlikely to find cheaper than 20,000 rubles. NAS with the ability to connect 4 hard drives with an Atom processor. Those that are inexpensive, they usually use a weak processor, which is no longer enough for the same torrent while simultaneously downloading two data streams (watching a movie on DLNA and copying, for example, photos). I managed to assemble a full-fledged mini-PC based on a mini-ITX motherboard with an Atom and 4 GB of memory for only 6000 rubles!
2) They are limited. That is, it provides only those functions that laid the manufacturer. To expand its capabilities, it usually requires “dancing with a tambourine,” since the core in the firmware can be greatly reduced. Using the same Ubuntu, you are virtually unlimited - a huge repository of all kinds of software will allow you to make anything from your server, up to the rise of virtual machines.
Why not FreeNAS or OpenFiler?
You ask. First, see item 2 of the NAS hardware flaws, that is, increasing the functionality of these distributions is very problematic, whereas Ubuntu has a huge repository of already configured software. Secondly, these are huge system requirements, in particular, FreeNAS 8 requires at least 2 GB of RAM, and new versions of OpenFiler are no longer available for x86 architecture. In addition, FreeNAS somehow does not develop smoothly - version 0.7, which has a torrent client and a DLNA server, has long been outdated; in the eighth, commercial version, I was unable to configure DLNA, and with the proposed ZFS file system, it is difficult in case of system failure, how would you like to recover data? Complicated.')
Why choose Server 12.04 LTS distribution?
LTS (Long Term Support) is a distribution kit with a long period of support and release of updates. Since we need a server that, if possible, once configured, could work quietly in the future for years, then it is better to choose this version of the distribution kit.Server version is chosen obviously, because ideally we absolutely do not need to waste resources on the graphical shell. Although if you, while only getting acquainted with linux, or have already worked with the desktop version of ubuntu, then in principle you can choose the regular version of the distribution, it doesn’t matter.
Let's start
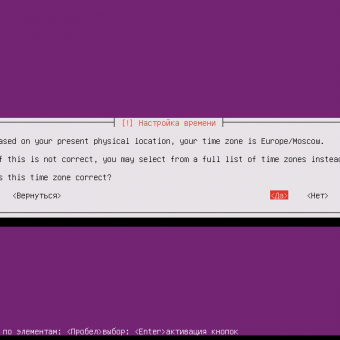
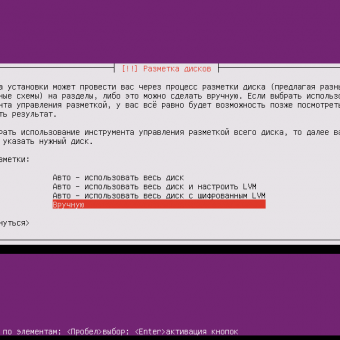
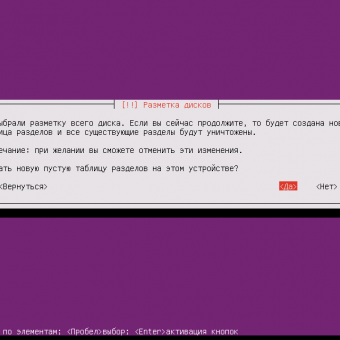
The installation is completely transparent, so I will not describe it in detail. More just dwell on the breakdown of hard drives.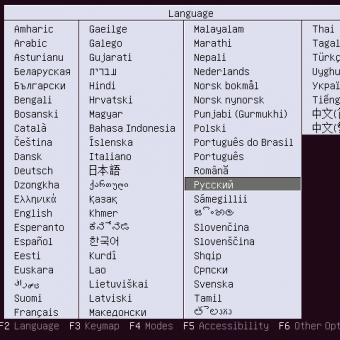


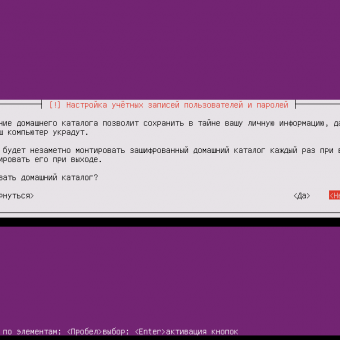

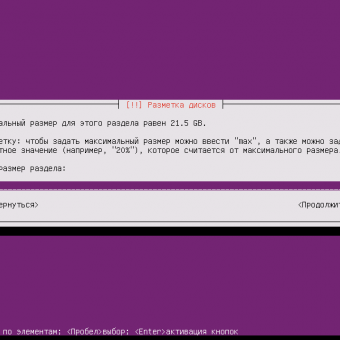
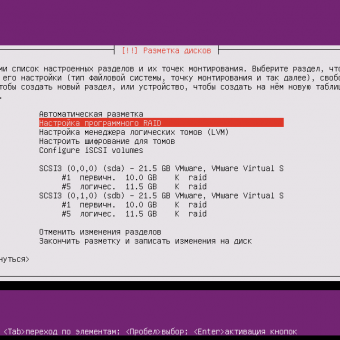
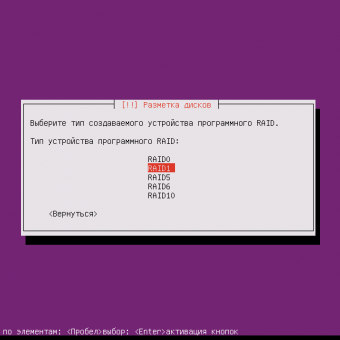
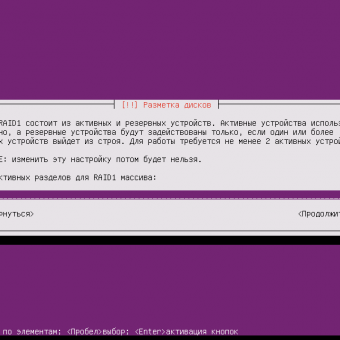
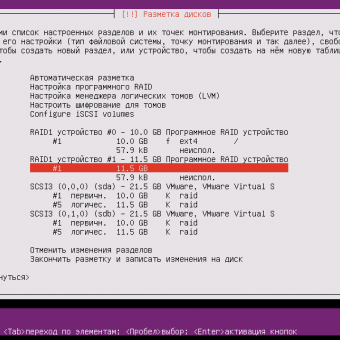
I took a budget motherboard without hardware RAID support, and in my practice, hardware RAID built into the motherboard often shows itself not at its best, so we will organize the so-called “software” RAID. Two new hard drives will be used to store the data. I didn’t have any extra storage media, so I’d split the disk into two partitions, one of which will be system, and the second one for data. Both partitions on two hard drives will be merged into RAID 1 (for convenience, I perform all the operations on the virtual machine, so do not pay attention to the small size of the partitions).
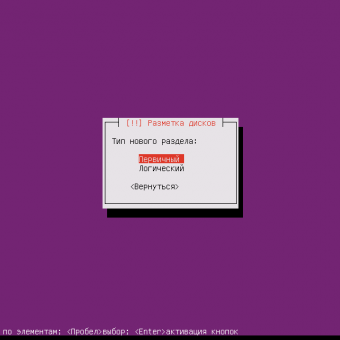
First, create a partition table on the first disk and divide it into two parts. We mark them as “partition for RAID”, although this is not necessary.
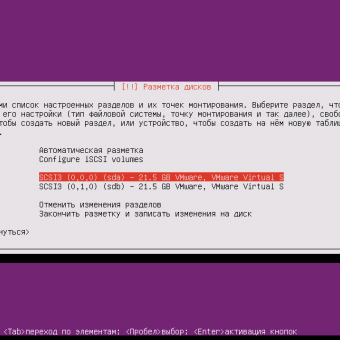
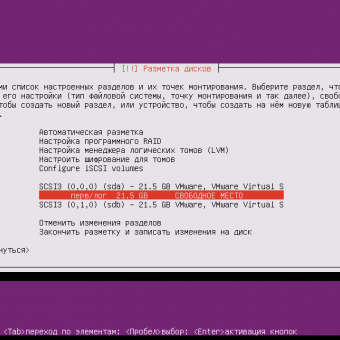

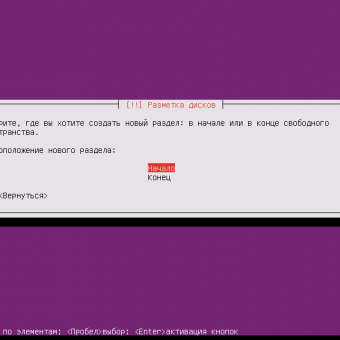

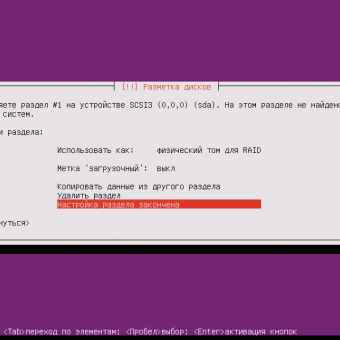
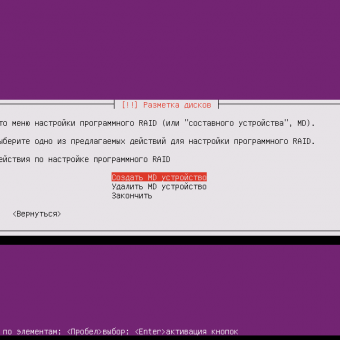
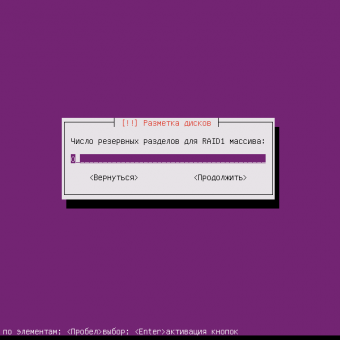
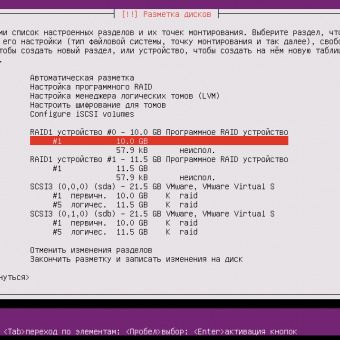
Similarly, the second disk is broken. Then select the item “Software RAID setup”. We say "Create MD-device", select the first partitions on two disks. Similarly with sections for data. By the way, RAID can be dynamically changed and expanded, so if you have only one hard one yet, but plan on purchasing the second one, feel free to set it up, after purchase you can easily pick it up.

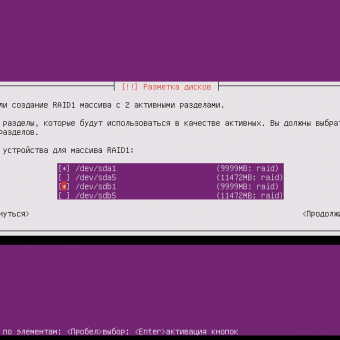
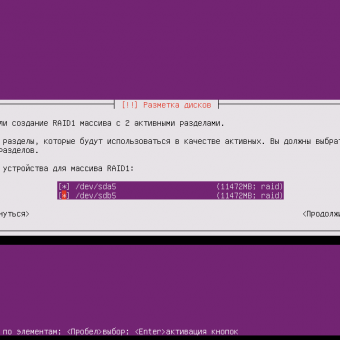

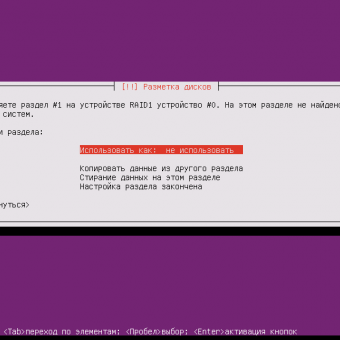
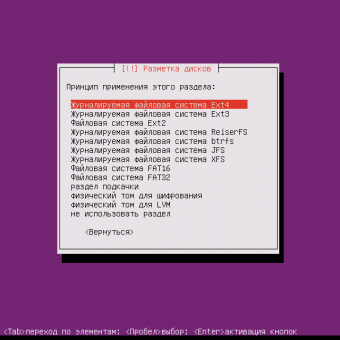
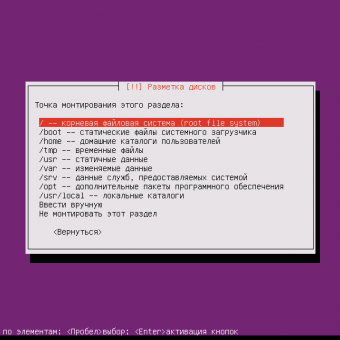
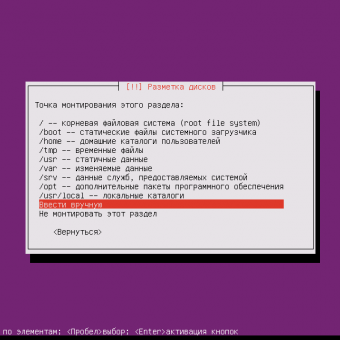
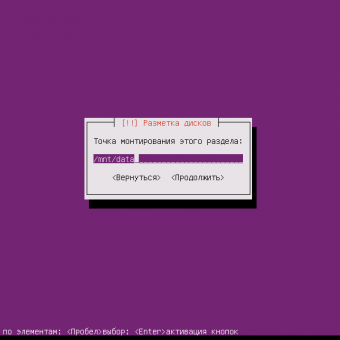
After creating the RAID, mark them for use. Select the ext4 file system, and assign the mount points: the system partition as the root (/), and the data partition to an arbitrary location (I prefer to mount to the / mnt folder).


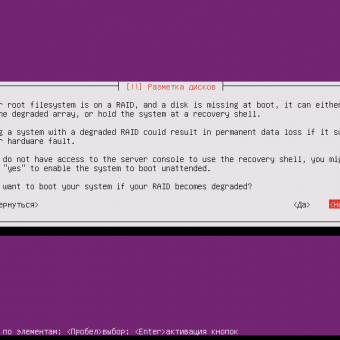
Next, the system will notify you if we want to boot the system if the RAID array fails. I advise you to say no, because if the hard disk fails, you will not even notice it - the system will continue to work with one disk, but if the second disk fails, then you will have to carry them to the data recovery company.
I will not create a swap partition, because firstly it can be made a file, and secondly I don’t need it personally - I have 4 GB installed on my mini PC, and the memory usage never exceeded more than 10% (400 MB ), and in the normal state it is even less (right now only 130 MB is used). Although if you plan to raise virtual machines, you may need it, so after installation I will describe how to create a swap file, now we’ll answer the proposal to create a swap-section negatively.

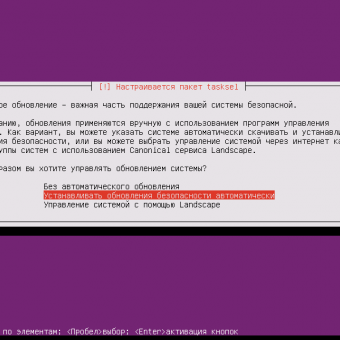
After a short process of copying files, the system will start updating data from the repositories, and then it will ask how the updates will be installed. Since our system administration is minimized, we select automatic update. The system will then ask which packages need to be installed immediately. I chose OpenSSH (we need a remote command line), LAMP (needed for the web interface), Print server (in this article I will not describe the connection of the printer), and of course Samba file server for access from windows-machines.


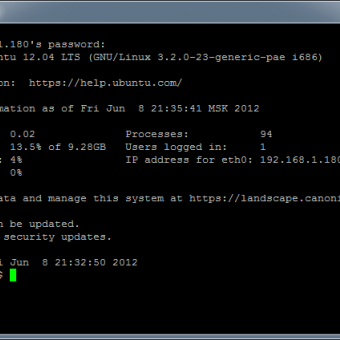
Well, in the final stage, the system will request a password for MySQL and a request to install GRUB. Reboot - the system is installed! We log in to see what ip-address was assigned to us by DHCP (this can also be done with the ifconfig command), in my case the address was given 192.168.1.180.

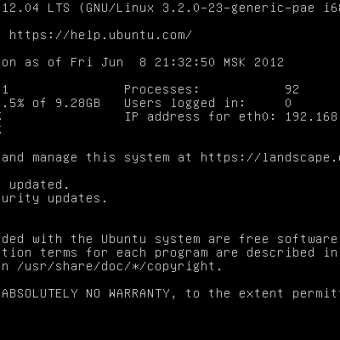
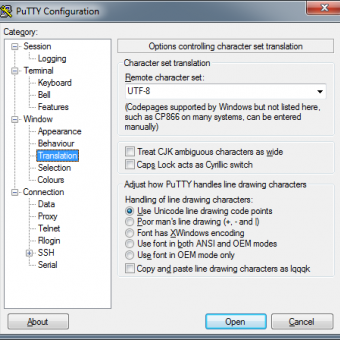
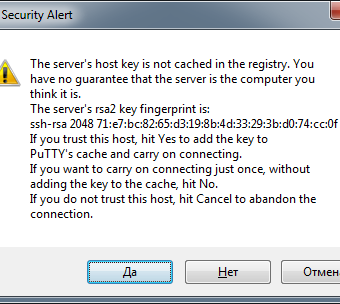
Everything, you can turn off the monitor and clean the system unit in a convenient place, we will continue to work with it through SSH. I use PUTTY for this.

Configuration
1) paging file
First of all, I will describe how to set up the paging file, if you really need it, everything is done literally in a few lines of commands.Create a file filled with zeros:
> sudo dd if=/dev/zero of=/swap bs=1M count=2048 Prepare it for use as swap:
> sudo mkswap /swap We add our created file to the fstab file for use as a paging file:
> sudo nano /etc/fstab /swap none swap sw 0 0 Reboot:
> sudo shutdown -r now 2) software update
Immediately update all the packages, this is done by two teams: > sudo apt-get update > sudo apt-get upgrade 3) Web interface
There is a webim package for managing the system through the web interface, but unfortunately it is not in the repository, so we will download the prepared package manually: > wget http://prdownloads.sourceforge.net/webadmin/webmin_1.580_all.deb To install webim, you need some dependent packages, in my case this is such a list, you may need to include something else.
> sudo apt-get install libnet-ssleay-perl libauthen-pam-perl libio-pty-perl apt-show-versions Well, actually installation:
> sudo dpkg --install webmin_1.580_all.deb Everything, you can go to the web interface:
https://192.168.1.180:10000 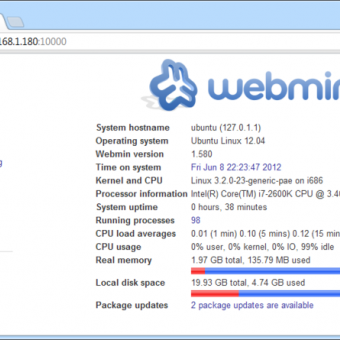
4) Configure ftp access
For ftp, I use pure-ftpd (although you can choose to your taste - proftpd and vsftpd)Create a public folder:
> sudo mkdir /mnt/data/public Install pure-ftpd from the repository:
> sudo apt-get install pure-ftpd In principle, you can already go under the system account, but it is not quite good for everyday use. Let's create a virtual account with access only to the public folder:
> sudo pure-pw useradd public -u local -g nogroup -d /mnt/data/public Update the database:
> sudo pure-pw mkdb Enable the use of virtual users:
> sudo ln -s /etc/pure-ftpd/conf/PureDB /etc/pure-ftpd/auth/50pure Restart service:
> sudo service pure-ftpd restart 5) Samba
We will set up access to the server from windows-machines; moreover, I personally have a large family at home and it requires sharing of rights between several users. And for easy editing of rights to folders directly from Windows (through the “security” tab in the properties), we will use ACL.We don’t have a domain, so we’ll have to create users the same as on windows machines:
> sudo useradd -d /home/PaulZi -s /bin/true -g users PaulZi We set the password, the same as on windows:
> sudo passwd PaulZi Add the created user to Samba:
> sudo smbpasswd -a PaulZi To manage extended permissions, you can install utilities (optional):
> sudo apt-get install acl > sudo apt-get install attr In order for samba to work with ACL, a file system with POSIX ACL support is needed, ext4 is quite suitable, but by default it is mounted without this support. To enable this feature, add the “acl” option to the / etc / fstab file. But moreover, in Windows support for inheritance of rights is implemented, in order to implement this in linux, it is necessary that samba somewhere stored additional data. To do this, you must enable extended file attributes, the option "user_xattr". At the same time, we prohibit the execution of files on the entire data section using the “noexec” option (for security):
> sudo nano /etc/fstab /dev/md0 /mnt/data ext4 defaults,noexec,acl,user_xattr 0 2 Reboot:
> sudo shutdown -r now We edit the samba settings (for brevity, I bring only changes and additions):
> sudo nano /etc/samba/smb.conf [global] workgroup = Home netbios name = Server security = user # add settings admin users = PaulZi # root map acl inherit = yes # acl store dos attributes = yes # dos # windows : map archive = no map system = no map hidden = no map readonly = no # public share [public] comment = Public path = /mnt/data/public browseable = yes # read only = no # guest ok = yes # inherit permissions = yes # inherit acls = yes # windows- inherit owner = yes # hide unreadable = yes # Restart service:
> sudo service smbd restart 6) DLNA / UPnP - server
As a DLNA server, I chose minidlna. I chose it for one simple reason, that it doesn’t pull a bunch of unnecessary dependencies like MediaTomb and Serviio (they pull Java or graphic libraries). However, if you need transcoding, I advise you to install one of them, instead of minidlna.Install from repository:
> sudo apt-get install minidlna Customize:
> sudo nano /etc/minidlna.conf media_dir=/mnt/data/public friendly_name=Ubuntu Restart:
> sudo service minidlna restart 7) torrent
Well, the last service covered in this article is a torrent client. I use Transmission as a successful client with a web interface.Install:
> sudo apt-get install transmission-daemon Stop the service, otherwise all changes will be lost after the process is completed:
> sudo service transmission-daemon stop Customize:
> sudo nano /etc/transmission-daemon/settings.json "download-dir": "/mnt/data/public/torrents" "rpc-password": "local" "rpc-username": "local" "rpc-whitelist-enabled": false Here we change four settings - we set the path to download, the username and password for the web interface, and also disable the "white" list of access to the interface - allow for all. We specify the password in open form, after the subsequent launch it will be encrypted.
We start the service:
> sudo service transmission-daemon start Go to the web interface, make sure that everything is fine:
http://192.168.1.180:9091/ 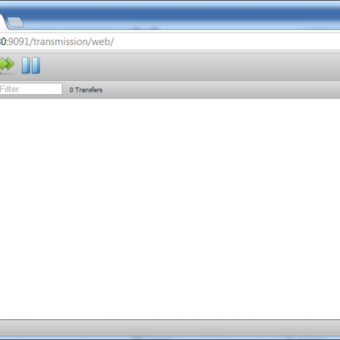
Afterword
As a result, we got quite a full-fledged home server. Of course, the article indicates only the basic settings of services, and most likely you will need to customize something for yourself. Yes, and you may need some additional services, but as you can see from the article, all this is done quite simply, without any special tambourine tricks, you just need to turn to Google - there is a lot of information on setting up services in Ubuntu.Source: https://habr.com/ru/post/145585/
All Articles