Unity3d Lessons from Unity 3D Student (B09-B12)
Good day.
You can find previous lessons through the following links:
Lessons B01-B03
Lessons B04-B08
')
The lesson tells how to add texture to an object using the material.
When you work with game objects in Unity3d, you will also need to use materials. For example, we want to add material with a texture to a cube.
Download texture (* .png, 256px x 256px, 98.4KB).
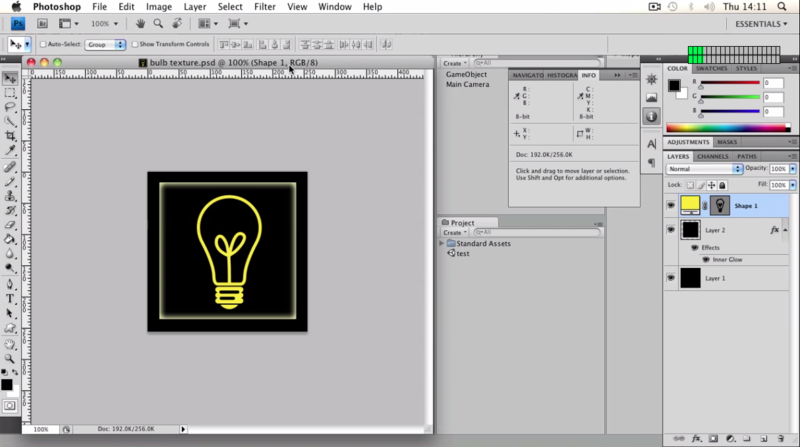
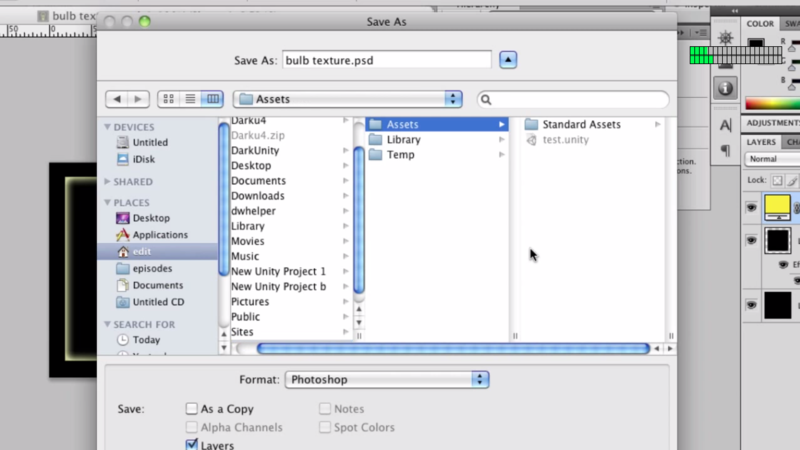
To begin, save our texture in the Assets folder (in the project root folder).
Add the Materials directory (we remember that it is always convenient to maintain “hierarchical order” in the project) and name our file bulb texture (extension * .png (in the original lesson * .psd), see note).
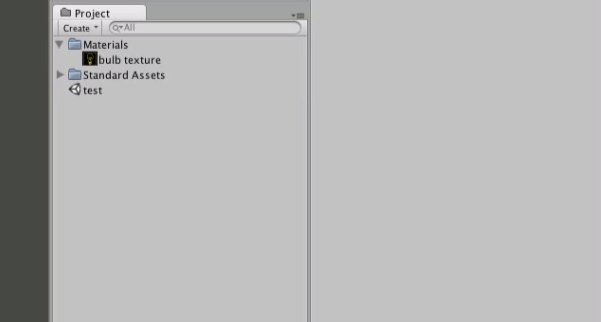
Switch back to Unity3d, make sure that the Project View has a Materials folder with our texture.
Create a cube. You can add our texture to the cube by simply dragging it from the Project View onto the cube (the material will be created automatically). But maybe you want to customize it in advance, then choose Create-> Material.

Let's call it bulb and put it in the Materials folder .
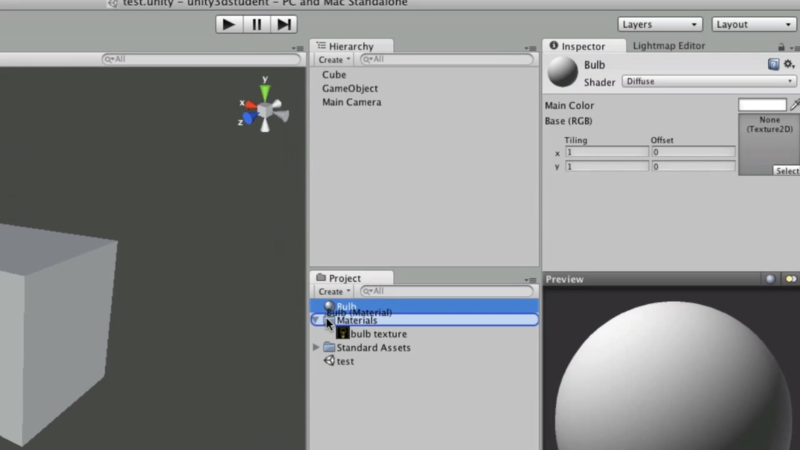
Select buld and transfer our texture from the Project View to an empty gray square in the Inspector View (with the inscription none (Texture 2D) ), or by clicking on Select in the same square and selecting it from the list that appears.
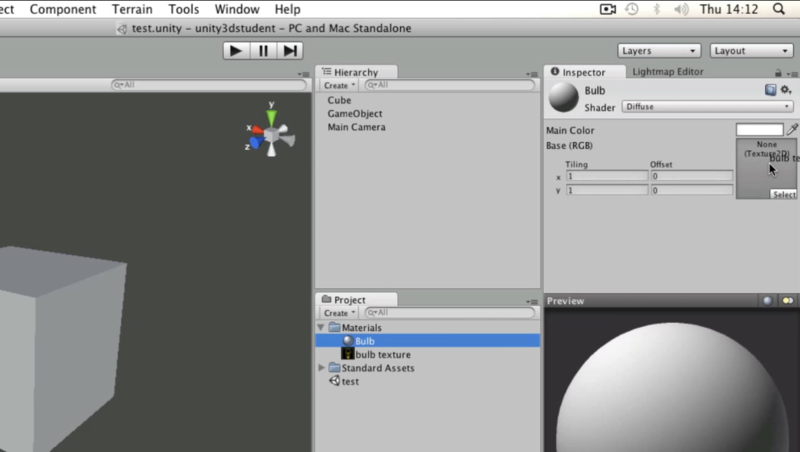
Instead of a gray square, a textured icon will appear.
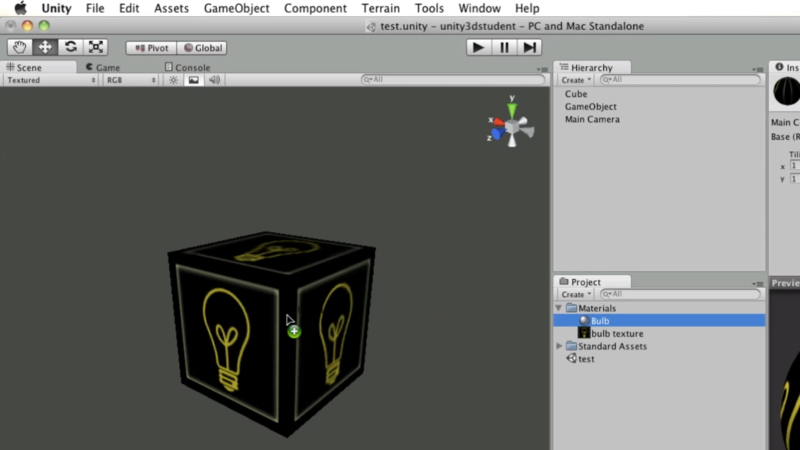
Let's drag our material on a cube. The cube will immediately become textured.
When choosing a material in the Inspector View, you can also choose a shader for which its final view will be calculated.
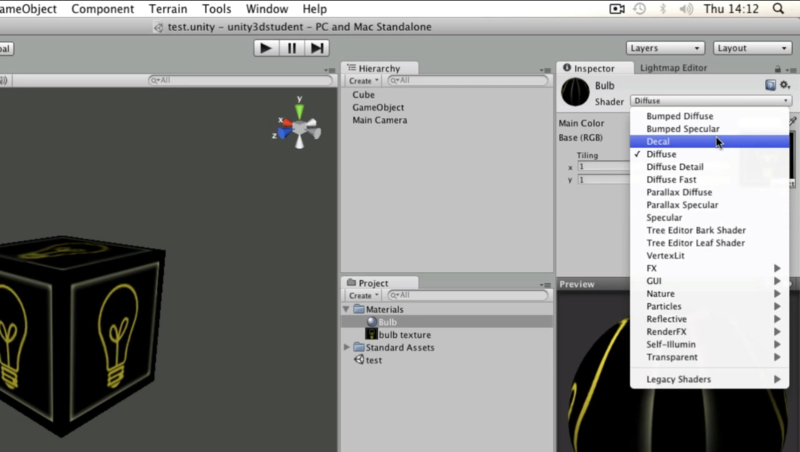
PS: We will definitely talk about shaders separately, but much later.
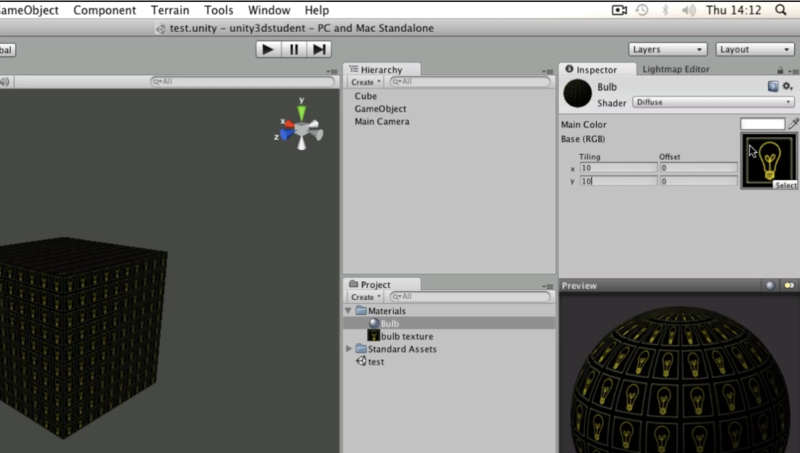
Also, the material can be configured tiling (mosaic placement of the texture) . The greater the tiling value along the xth or yth coordinate, the more times it repeats along the corresponding side. To understand how this works, set the values for x and y to 10 (as the value changes, the texture on the cube will be updated in real-time).
The offset parameter (offset) is responsible for the texture shift "in a circle." To better understand how it works, experiment with it.
The tutorial describes how to play the Audio Source component (audio resource) and trigger sound clips using scripting.
To work with sound in Unity3d you need two components:
AudioListener is usually a component of a camera. Choose a camera and see this by looking in the Inspector View.
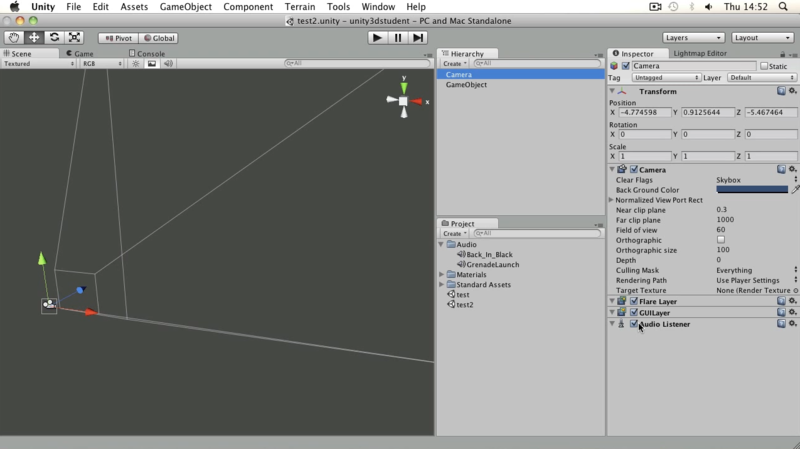
In order to listen to sounds, you must have at least one AudioListener in each scene.
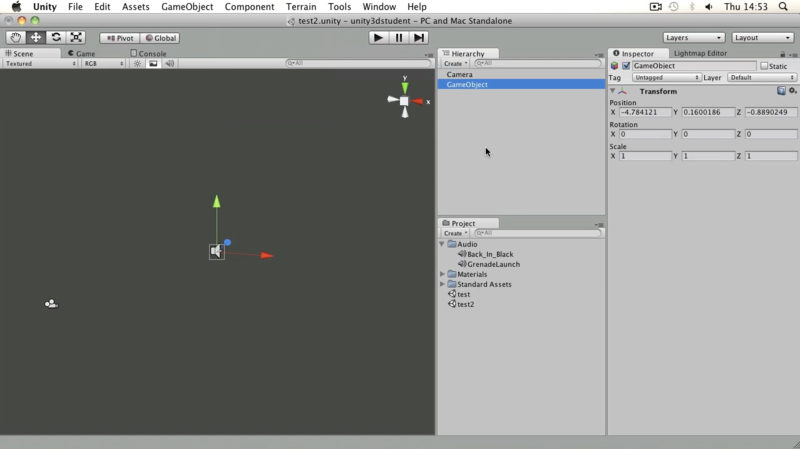
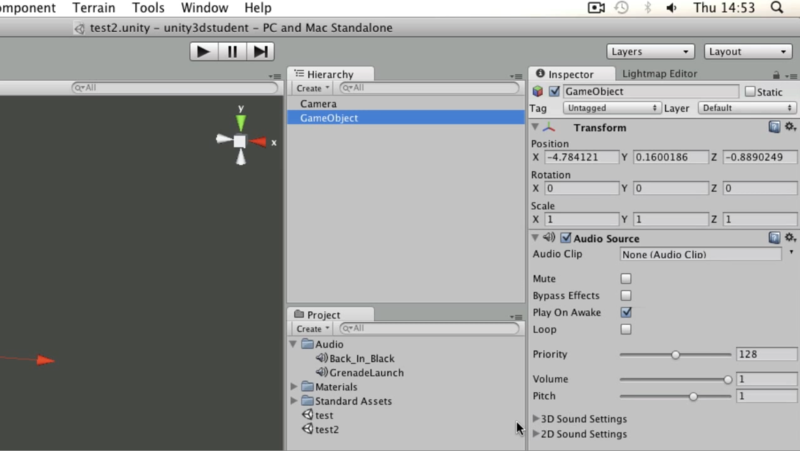
Add an empty GameObject and add the Audio Source component to it .
You can add an audio clip either through the Inspector View or using a script.
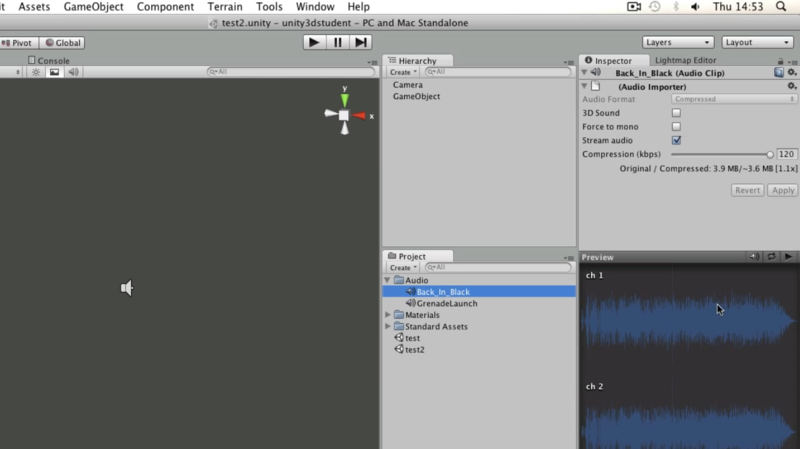
In our project there are two audio files - mono and stereo.
Mono is usually used for sound effects. Only for it you can use fading or other 3d effects.
Stereo, respectively, for music, because stereo sound progiruyvaetsya as is.
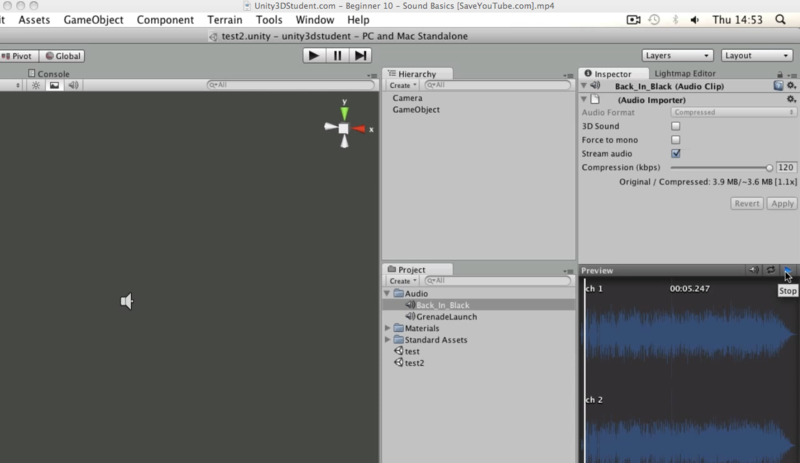
In the Preview window, you can play the selected file.
Add our clip ( GreenadeLaunch ) in the Audio Clip field . If the Play On Awake option is enabled , the sound will play immediately after the scene is started.
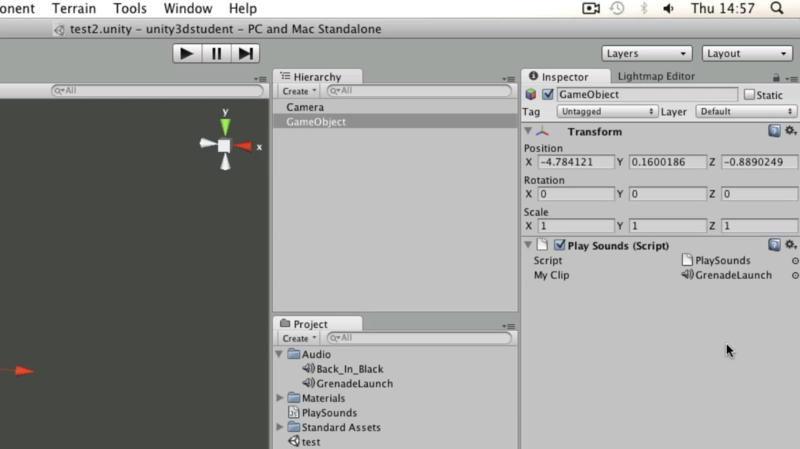
If we want the audio clip to sound at the right moment, we need to write a script. Leave the Audio Clip field at Audio Source empty and add a c # script, naming it PlaySounds. Add the following code to the script:
Add a script to an empty GameObject, and initialize the value of the myClip variable at the script with a sound file ( GreenadeLaunch ). Now by clicking on the play you will again sound the sound.
You can play audio without using Audio Source . Remove the Audio Source component from our GameObject, and replace the code in the body of the Start () method with the following:
Here, PlayClipAtPoint is a static function of the AudioSource class that creates a new GameObject, with the corresponding Audio Source (in our case, myClip ) and deletes this GameObject after playing an audio clip .
Save the script and make sure that our GameObject has it, and the value of myClip is GreenadeLaunch.
Click Play and immediately after loading the scene click on Pause to make sure that a new game object has appeared on the scene with the name One Shot Audio.

The tutorial describes how to use Fixed joint (fixed joint) and Hinge joint (swivel joint) to create a chain at the “ball for breaking buildings”
To create interesting physics in Unity3d, we use "joints". And to illustrate this, we will create a ball model for the destruction of buildings.
The source scene contains a flatness (Floor) , a camera (Main Camera) and a point light source (Point light).
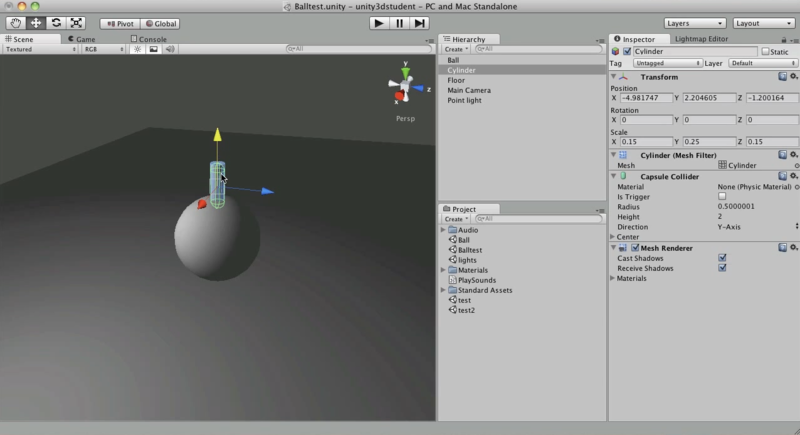
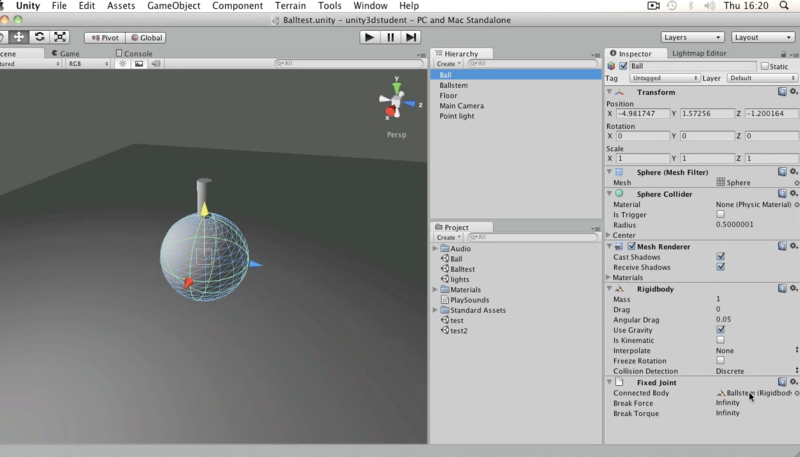
First, create a sphere, add the Rigidbody component to it and call it Ball .
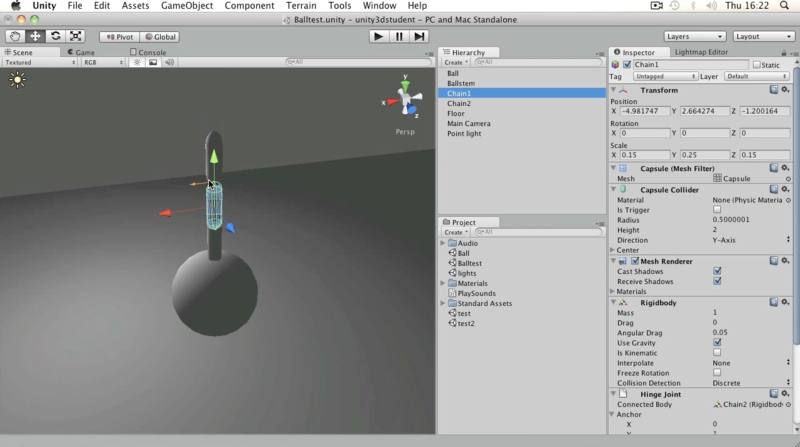
Add a cylinder to the stage, just adding a Rigidbody to it. The size and positions of the cylinder and sphere are shown in the figure below. For a cylinder, the scale is equal to 0.15, 0.25, and 0.15, for x, y, and z, respectively, the cylinder is pinched “upwards” to the “edge” of the ball (the faces intersect).
To link the sphere and the cylinder, select the sphere (Ball) and add the Fixed Joint component to it . The variable Connected Body is initialized by the value of Cylinder.rigidbody. Let me remind you that for this it is enough to drag Cylinder from the Hierarchy view to the Inspector View, on the field opposite the Connected Body .
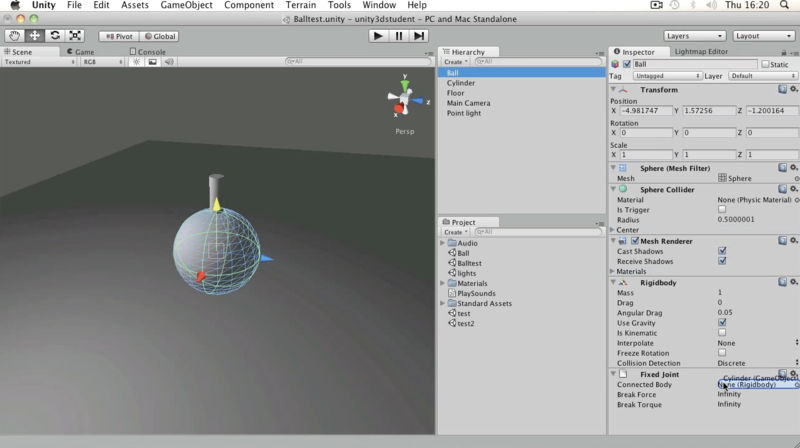
Rename Cylinder to a more appropriate name for the ball fastener, for example, Ballstem . The value of the variable Connected Body will change automatically.
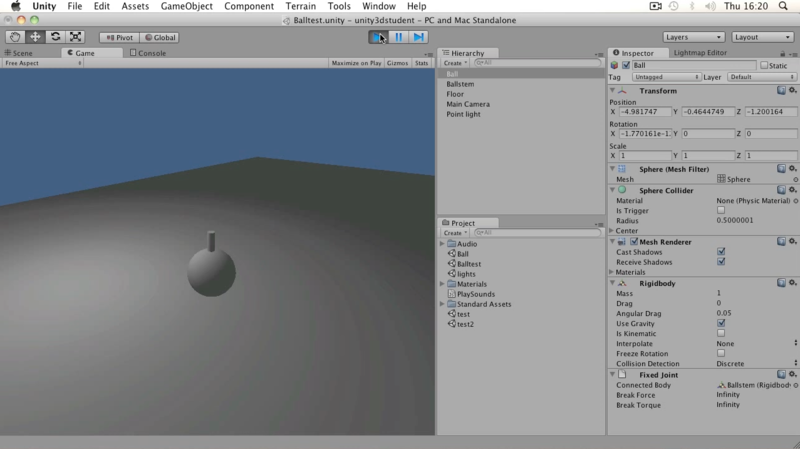
Press play and see how the ball falls along with the cylinder attached to it.
Now let's start creating moving parts of the chain.
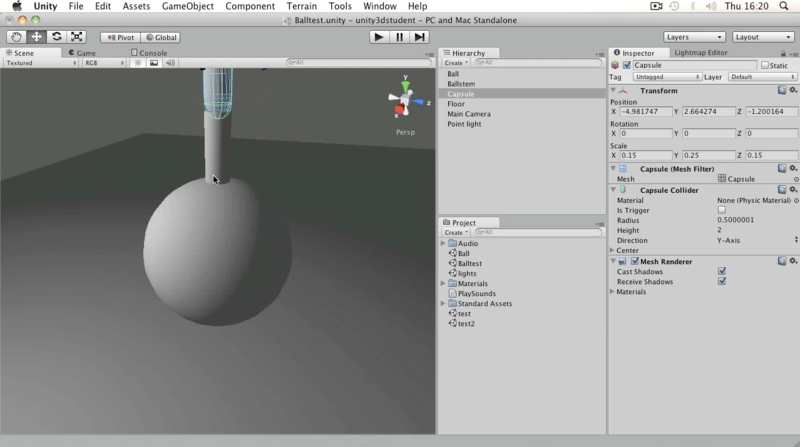
Create a capsule (let's call it Chain1 ), while its dimensions will be similar to those of a Ballstem, and it will be located just above it so that the extreme edges of the objects intersect. Chain1 will also be with the rigidbody component .
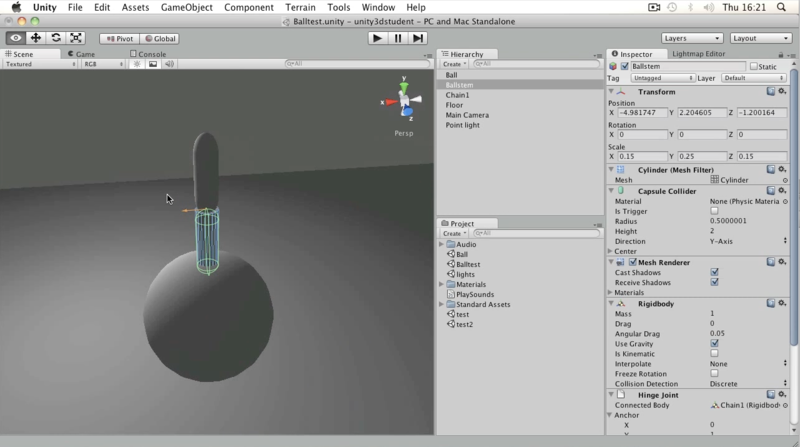
And to Ballstem, add the Hinge Joint component, which
Connected Body we initialize Chain1.rigidbody .
The place of attachment is indicated by an orange arrow.
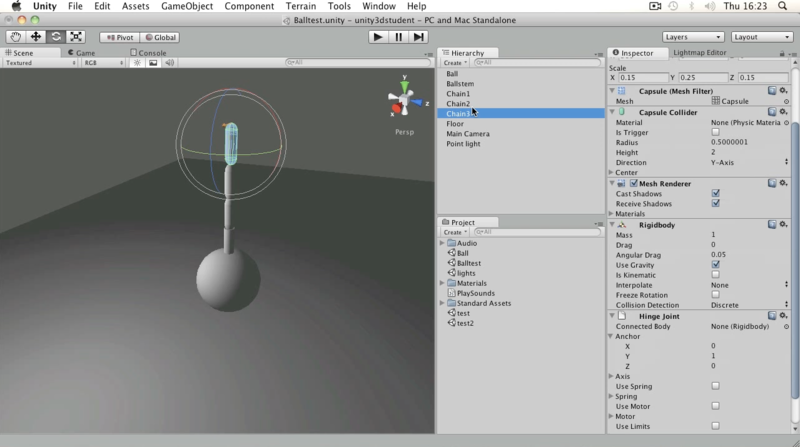
We will need another section of the chain. Select Chain1 and duplicate it ( ctrl + D or cmd + D ). Rename it to Chain2, just moving it to the top of Chain1 . To Chain1 add Hinge Joint , with
Connected Body equals Chain2.rigidbody.
Similarly, add Chain3.
At the end, we will add HingeJoint to Chain3 , and we will not set the value of the Connected Body. In this case, the object will be attached “to itself” (more precisely, to an empty space in the scene).
Select Ball, Ballstem, Chain1, Chain2, Chain3 and tilt them.

We press play and see how our ball moves with the chain.
The lesson tells how to use the arrows (arrow keys) to move left and right, using the "axes" (axes)
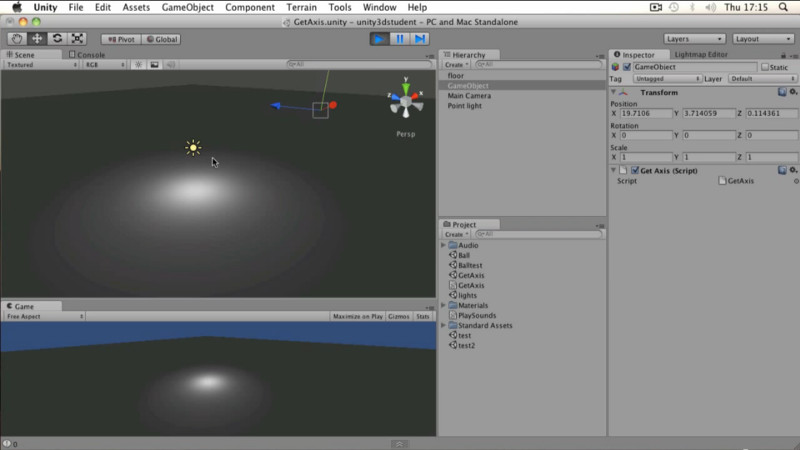
This time on the stage we have a plane (floor) , a camera (Main Camera) , a light source (Point light) and an empty gameObject.
Another input option is to use Axes.
Open the Input Manager (Edit-> Project settings-> Input) . Deploy Axis and then Horizontal.

Let's look at some default parameters:
In order to use this displacement (Horizontal), we need the Input method GetAxis () .
Add a C # script, let's call it GetAxis.cs, and write:
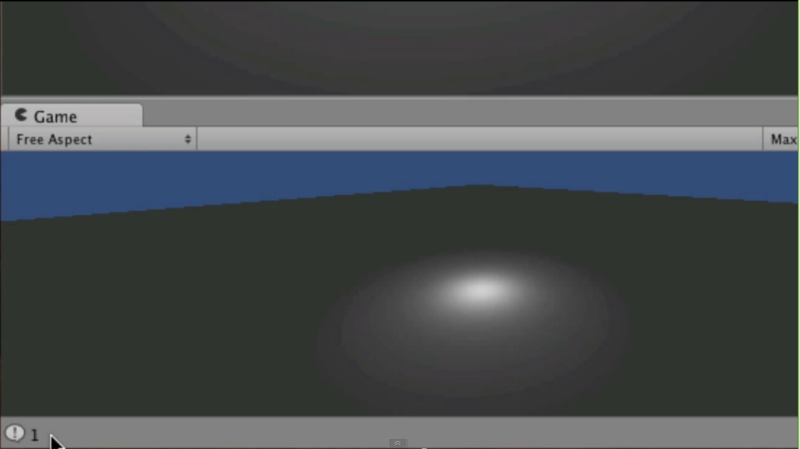
Add a script to an empty gameObject, and click play. If you hold down the left / right arrow (or a / d), in the status bar you will see how the value of the horiz variable changes :
The value of this variable can vary from -1 to 1 (depending on the key pressed). As soon as you release the key, horiz will become 0 again.
Add another line of code to Update (), immediately after Debug.Log ():
Run the scene and click on the arrow - you will see how our gameObject starts moving along the X axis.
You can find previous lessons through the following links:
Lessons B01-B03
Lessons B04-B08
')
Basic Lesson 09 - Adding Materials
The lesson tells how to add texture to an object using the material.
When you work with game objects in Unity3d, you will also need to use materials. For example, we want to add material with a texture to a cube.
Download texture (* .png, 256px x 256px, 98.4KB).
To begin, save our texture in the Assets folder (in the project root folder).
Add the Materials directory (we remember that it is always convenient to maintain “hierarchical order” in the project) and name our file bulb texture (extension * .png (in the original lesson * .psd), see note).
Switch back to Unity3d, make sure that the Project View has a Materials folder with our texture.
Create a cube. You can add our texture to the cube by simply dragging it from the Project View onto the cube (the material will be created automatically). But maybe you want to customize it in advance, then choose Create-> Material.
Let's call it bulb and put it in the Materials folder .
Select buld and transfer our texture from the Project View to an empty gray square in the Inspector View (with the inscription none (Texture 2D) ), or by clicking on Select in the same square and selecting it from the list that appears.
Instead of a gray square, a textured icon will appear.
Let's drag our material on a cube. The cube will immediately become textured.
When choosing a material in the Inspector View, you can also choose a shader for which its final view will be calculated.
PS: We will definitely talk about shaders separately, but much later.
Also, the material can be configured tiling (mosaic placement of the texture) . The greater the tiling value along the xth or yth coordinate, the more times it repeats along the corresponding side. To understand how this works, set the values for x and y to 10 (as the value changes, the texture on the cube will be updated in real-time).
The offset parameter (offset) is responsible for the texture shift "in a circle." To better understand how it works, experiment with it.
Additional materials
Note
In addition to PSD, Unity3d also supports the import of the following formats:
TIFF, JPG, TGA, PNG, GIF, BMP, IFF, PICT.
As with any texture mapping, the most effective (for performance) would be if the sides of the texture are a power of two (128, 256, 512, etc.). But it is not necessary that the texture be twentieth (for example, 256x512 permissible texture size).
TIFF, JPG, TGA, PNG, GIF, BMP, IFF, PICT.
As with any texture mapping, the most effective (for performance) would be if the sides of the texture are a power of two (128, 256, 512, etc.). But it is not necessary that the texture be twentieth (for example, 256x512 permissible texture size).
Basic Lesson 10 - Audio Basics
The tutorial describes how to play the Audio Source component (audio resource) and trigger sound clips using scripting.
To work with sound in Unity3d you need two components:
- AudioListener (audio receiver)
- AudioSource (audio resource)
AudioListener is usually a component of a camera. Choose a camera and see this by looking in the Inspector View.
In order to listen to sounds, you must have at least one AudioListener in each scene.
Add an empty GameObject and add the Audio Source component to it .
You can add an audio clip either through the Inspector View or using a script.
In our project there are two audio files - mono and stereo.
Mono is usually used for sound effects. Only for it you can use fading or other 3d effects.
Stereo, respectively, for music, because stereo sound progiruyvaetsya as is.
In the Preview window, you can play the selected file.
Add our clip ( GreenadeLaunch ) in the Audio Clip field . If the Play On Awake option is enabled , the sound will play immediately after the scene is started.
If we want the audio clip to sound at the right moment, we need to write a script. Leave the Audio Clip field at Audio Source empty and add a c # script, naming it PlaySounds. Add the following code to the script:
// public AudioClip myClip; void Start () { // audio.PlayOneShot(myClip); } Add a script to an empty GameObject, and initialize the value of the myClip variable at the script with a sound file ( GreenadeLaunch ). Now by clicking on the play you will again sound the sound.
You can play audio without using Audio Source . Remove the Audio Source component from our GameObject, and replace the code in the body of the Start () method with the following:
AudioSource.PlayClipAtPoint(myClip, transform.position); Here, PlayClipAtPoint is a static function of the AudioSource class that creates a new GameObject, with the corresponding Audio Source (in our case, myClip ) and deletes this GameObject after playing an audio clip .
Save the script and make sure that our GameObject has it, and the value of myClip is GreenadeLaunch.
Click Play and immediately after loading the scene click on Pause to make sure that a new game object has appeared on the scene with the name One Shot Audio.
Additional materials
Basic Lesson 11 - Connection Basics
The tutorial describes how to use Fixed joint (fixed joint) and Hinge joint (swivel joint) to create a chain at the “ball for breaking buildings”
To create interesting physics in Unity3d, we use "joints". And to illustrate this, we will create a ball model for the destruction of buildings.
The source scene contains a flatness (Floor) , a camera (Main Camera) and a point light source (Point light).
First, create a sphere, add the Rigidbody component to it and call it Ball .
Add a cylinder to the stage, just adding a Rigidbody to it. The size and positions of the cylinder and sphere are shown in the figure below. For a cylinder, the scale is equal to 0.15, 0.25, and 0.15, for x, y, and z, respectively, the cylinder is pinched “upwards” to the “edge” of the ball (the faces intersect).
To link the sphere and the cylinder, select the sphere (Ball) and add the Fixed Joint component to it . The variable Connected Body is initialized by the value of Cylinder.rigidbody. Let me remind you that for this it is enough to drag Cylinder from the Hierarchy view to the Inspector View, on the field opposite the Connected Body .
Rename Cylinder to a more appropriate name for the ball fastener, for example, Ballstem . The value of the variable Connected Body will change automatically.
Press play and see how the ball falls along with the cylinder attached to it.
Now let's start creating moving parts of the chain.
Create a capsule (let's call it Chain1 ), while its dimensions will be similar to those of a Ballstem, and it will be located just above it so that the extreme edges of the objects intersect. Chain1 will also be with the rigidbody component .
And to Ballstem, add the Hinge Joint component, which
Connected Body we initialize Chain1.rigidbody .
The place of attachment is indicated by an orange arrow.
We will need another section of the chain. Select Chain1 and duplicate it ( ctrl + D or cmd + D ). Rename it to Chain2, just moving it to the top of Chain1 . To Chain1 add Hinge Joint , with
Connected Body equals Chain2.rigidbody.
Similarly, add Chain3.
At the end, we will add HingeJoint to Chain3 , and we will not set the value of the Connected Body. In this case, the object will be attached “to itself” (more precisely, to an empty space in the scene).
Select Ball, Ballstem, Chain1, Chain2, Chain3 and tilt them.
We press play and see how our ball moves with the chain.
Additional materials
Basic Lesson 12 - Input using virtual axes
The lesson tells how to use the arrows (arrow keys) to move left and right, using the "axes" (axes)
This time on the stage we have a plane (floor) , a camera (Main Camera) , a light source (Point light) and an empty gameObject.
Another input option is to use Axes.
Open the Input Manager (Edit-> Project settings-> Input) . Deploy Axis and then Horizontal.
Let's look at some default parameters:
| Parameter | Value | Comment |
| Negative Button | left | Key to move in a negative direction |
| Positive Button | right | Key to move in the positive direction |
| Alt negative button | a | Alternative key to move in the negative direction |
| Alt Possitive Button | d | Alternative key to move in the positive direction |
| Type | Key or Mouse Button | Input type, to move along a given axis (in our case X) |
| Axis | X axis | The axis of the object along which we will move |
In order to use this displacement (Horizontal), we need the Input method GetAxis () .
Small comment
Further, in order not to indicate each time that the method is static, the following conventions are introduced:
- if the “class method” is written, then it is assumed to be static.
- if the “object method” is written, then the method belongs to a specific object.
Add a C # script, let's call it GetAxis.cs, and write:
private float horiz; void Update () { horiz = Input.GetAxis("Horizontal"); Debug.Log(horiz); } Add a script to an empty gameObject, and click play. If you hold down the left / right arrow (or a / d), in the status bar you will see how the value of the horiz variable changes :
The value of this variable can vary from -1 to 1 (depending on the key pressed). As soon as you release the key, horiz will become 0 again.
Add another line of code to Update (), immediately after Debug.Log ():
transform.Translate(new Vector3(horiz, 0.0f, 0.0f)); Run the scene and click on the arrow - you will see how our gameObject starts moving along the X axis.
Source: https://habr.com/ru/post/145565/
All Articles