Beamer - make up presentations
LaTeX is suitable not only for compiling all sorts of documentation, but also for layout of high-quality presentations. With the beamer package, you can create presentations that are in no way inferior to PowerPoint or Impress presentations.
')
The standard aspect ratio of a beamer slide is 4: 3, so if you want to make a presentation for a projector with other proportions (for example, 16: 9), you should specify the aspectratio = 169 in the optional argument of the \ documentclass command.
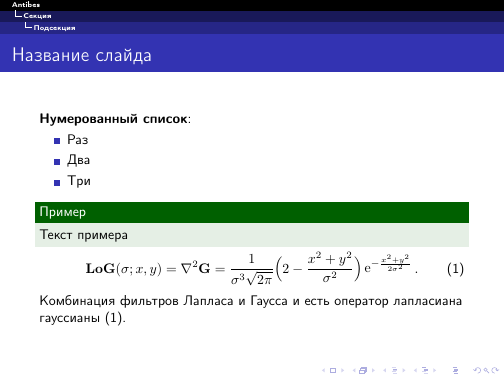
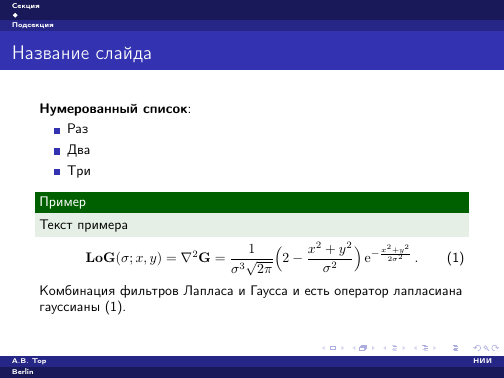
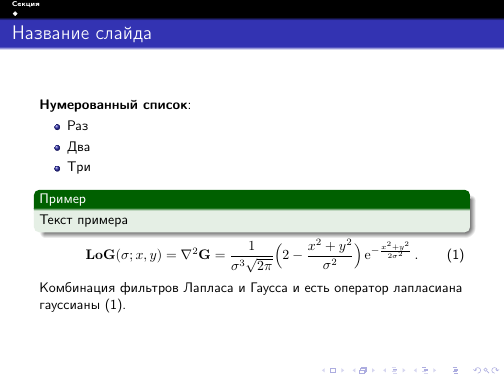
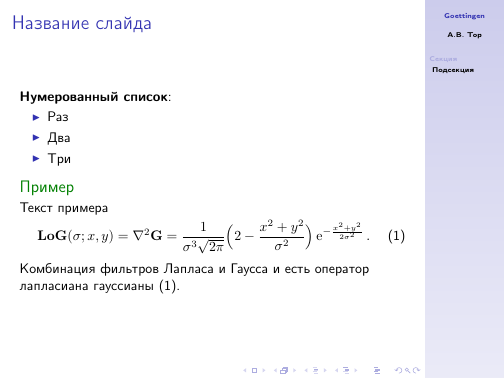
Next, we should choose some topic of the document. There are a lot of these themes (you can see the list in your beamer in the themes / theme directory, I have this in / usr / share / texmf-dist / tex / latex / beamer / themes / theme /). This is done with the \ usetheme {theme} command. As an example, I reviewed several topics:
Antibes
Berlin
Boadilla

Darmstadt

Dresden

Frankfurt
Goettingen
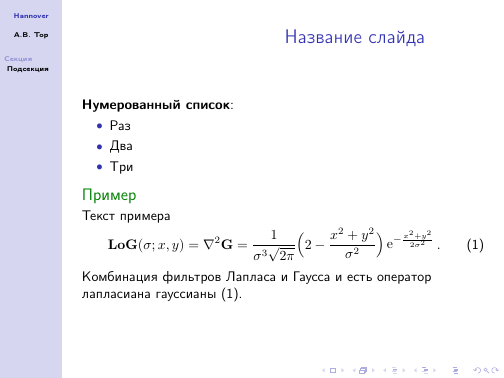
Hannover
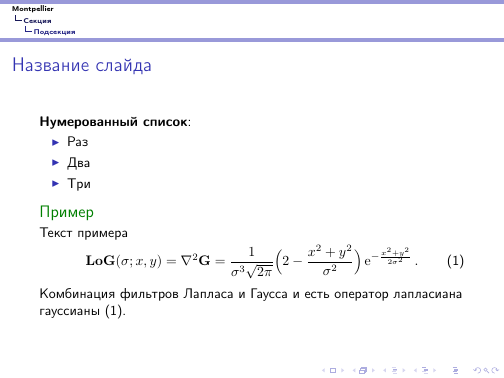
Montpellier
Pittsburgh

Singapore

I generated the images from the blank file using a simple function:
There are a lot of proposed topics (but if anything happens, you can create your own - more on that later). If you do not like the color scheme of a particular theme, but like the theme itself, you can change the color scheme using the \ usecolortheme {dove} command. The color schemes available in your beamer installation can be viewed in the themes / color directory. For example, if you want to print slides on a printer, you can use the dove color scheme:

In addition to color themes, the beamer allows you to select "internal" and "external" themes. The \ useinnertheme {theme} command allows you to change the appearance of some internal elements (for example, list markers), and the \ useoutertheme {theme} command allows you to design the external elements of the presentation (footer).
If our presentation uses a consistent flashing of elements, it is worth saying: \ setbeamercovered {transparent}, so that inactive elements are at least slightly visible.
An even deeper color adjustment of the beamer can be realized by forcibly specifying the colors of individual elements with the \ setbeamercolor {element} {bg = color1, fg = color2} command. Here “element” is the name of the element whose color we want to change (for example, “normal text” is plain text), “bg” is the background color, “fg” is the text color.
After we set up the color schemes, you can still "conjure" a little over the footers. Using the content of the beamer / themes / outer directory as an example, one can understand what needs to be done to give the desired appearance to the header or footer. If we want to put in the first page the full name of the author and the short name of the organization in quotes, the second field is the full name of the presentation (if it’s not too long), and the third is the date and number of the slide / number of slides, we need to add to the preamble The document is as follows:
Similarly, we can change the footer and the field with the title of the slide. For example, to place our logo in the upper left corner of the field with the name, and then the name of the slide, override the frametitle template:
As a result, we get:

If necessary, you can select a block that has the color specified by us:
The “color” parameter can be either already defined (by analogy with the color boxes above) or specified by the user (including as a mixture of several colors). In order to take some color with N transparency (N - in percent), we write: “N! Colour". Record of the form "color1! N! color2 ”mixes (100-N) parts of color1 with N parts of color2. The \ averagebackgroundcolor command returns the current background color.
In addition to color, you can also change the font. The themes / font / directory contains “font themes” that can be used in the presentation. You can change the “font theme” using the \ usefonttheme {font} command. For example, if we want to use the default font (without serifs), but with serifs in formulas, we give the command:
If you want to change the background of the slide, use the \ usebackgroundtemplate command, inside of which there can be any Latech instructions (including the placement of the image). For example, we can put a background image of the whole frame:

Now we are going to fill in the general presentation fields. This can also be done in the preamble of the document. Most commands for specifying field values have optional arguments — the short designation of the same field (this short designation is usually placed in the header and footer, so it makes sense to fill it as well). Some fields are standard Latek: \ title (title of the presentation), \ author - author, \ date - date; and some are specific: \ institute - organization, \ subtitle - subtitle, \ logo - organization logo (some styles of presentations place the logo on their own, but in some it isn’t - this should be borne in mind).
In addition, in the preamble, you can specify the \ AtBeginSection command, which allows you to display additional information at the beginning of each section of the presentation. For example, to display content with highlighting of the current section, we write:
Similarly, the code that executes at the beginning of each subsection is determined by the \ AtBeginSubsection command. Both teams have an optional argument - its contents will be placed before the section / subsection defined by the command with an asterisk (that is, not in the table of contents and not numbered).
Further, in the body of the document, we begin to make out the frames of the presentation. Each frame is enclosed in a frame environment. If we want to place the title and content at the beginning of the presentation, you can arrange the standard \ maketitle and \ tableofcontents commands in separate frames.
To select logical blocks within each frame, you can use the block environment with a required parameter — the block name (since the environment theorem, lemma and example have English names by default, you can use the block environment instead, or you can override the names of these blocks). The exampleblock environment is also highlighted in a separate color, which also has the required parameter block name. If you want to draw particular attention of the reader to some text, you can put it inside the \ alert or \ color {color} command.
If your frame contains the verbatim environment or the \ verb command, you must add the optional parameter containsverbatim to the frame environment
In addition to the containsverbatim parameter, the frame environment has the following optional options:
By default, the slide is made up in one column, however, using the columns environment, you can split the slide into several columns. Each column inside this environment is specified by the \ column {width} command. For example, to split a slide into two columns, do this:
Often, the information on the frame you want to give gradually - line by line, as the narration. That is, the content of one frame is divided into several slides following one another. Overlays are used for this - different types of transitions to a new piece of information within the same frame. Immediately, I note: in reality, each slide requires the layout of a new pdf file page, however, when using a “competent” pdf viewer that draws attention to meta-information, these transitions are invisible (and you can even insert animated overlays into your presentation).
To control the visibility of blocks on different slides within the same frame, the following commands are used (I’ll note right away: the numbering of slides starts from 1):
All these commands are valid only for sentences containing one paragraph. If we need to select a block of several paragraphs in this way, they need to be enclosed within the environment of the same name: onlyenv, altenv, visibleenv, uncoverenv, invisibleenv.
In addition to these blocks, we can divide the itemize and enumerate environment points into several slides: to do this, immediately after the \ item command, you need to insert a specification indicating the slide numbers on which this information should appear. On the other slides, it will not be visible, but it will take up space, however, if we want these hidden items to be displayed in the inactive text color, it is necessary to specify in the preamble:
Specifications of slide numbers themselves are enclosed in angle brackets and have the form <ab, cd, e->: the ranges of slide numbers are listed with a hyphen, and the separate numbers are separated by a comma. These specifications can also be specified with selection commands, like \ alert.
Another option to display the blocks in turn is to specify the \ pause command after each block. This command works both at the end of the table lines and even inside plain text. In a word, this command instructs to break the frame into slides: leave everything on the previous slide that is before it, and everything after that - transfer it to the next.
If you will be showing your presentation using Adobe Reader or another program that can play files that contain hyperlinks in the document, you can include a video or sound file in your presentation.
To enable video, you must use the command
You can turn on the sound like this:
Options “options”: loop, repeat, palindrome, borderwidth, showcontrols, externalviewer, inlinesound (their essence is clear from the name).
The parameter "poster" determines what will be displayed on the slide to run the audio or video file. If it is left empty, the file will be played automatically.
Please note that in order to embed media files into presentations, it may be necessary to manually connect the multimedia package (if the beamer doesn’t connect it "by itself").
You can also connect package media9 and embed media files with it.
The beamer itself allows you to animate overlays with pdf tools: for this, the frame is divided into N slides with a change in the value of a user-defined variable (this can be a counter or a length). The \ animate command applies this animation to range slides. The variable is changed using the \ animatevalue {variable} {initial value} {final value} command. Those. a user-defined variable on the range of slide numbers “range” varies uniformly from the value “initial value” to “final value”.
To set the type of animation overlays you need to use the command \ transOVR <slides> [options], where OVR:
When using the \ animate command, you must specify the duration of each slide, you must use the command \ transduration {duration}.
Here is an example of using animation by means of a beamer:
Here, to create an animation, use the counter “ooo”, which sets the opacity of the text, and the size “offset”, which sets the offset of the phrase “and fly away!” Relative to the word “fade”. Over nine out of ten slides, the values of these variables change, resulting in text opacity changing from 0 to 100 in increments of 10, and the offset of the “flying away” phrase - from 0 to 5 centimeters in 5mm increments.
Because Beamer automatically connects the hyperref package; you can insert hyperlinks into the document. For example, at the end of the presentation, we can insert optional slides, and inside - make hyperlinks to them (“suddenly” will be asked - and you will immediately - once, and an ace from the sleeve). In addition, you can make a hyperlink to the object (formula, etc.) inside the slide. The general principle is as follows: an object to which we want to refer is marked with a label (optional argument label = label in the frame environment or the \ label {label} command inside the frame), and the hyperlink is executed with the \ hyperlink {label} {link text} command. In addition to the text, you can insert a "button": \ beamerbutton {text}. If our frame contains several slides, you can refer to a specific slide of the frame: to do this, specify in triangular brackets between the \ label command and its argument number [a] of the desired slide. Similarly, if we need to refer to an element from a specific slide of a given frame, we can specify the slide number specification in the first parameter (“label”) immediately after the label. You can also mark a hyperlink with specific commands: \ beamergotobutton (before the text there will be an arrow icon), \ beamerskipbutton (double arrow), \ beamerreturnbutton (left arrow).
At the end of a decent presentation you may want to post a bibliography. This is also possible: just place it on the slide in thebibliography environment, or use bibtex.
When working with the projector and the screen, you can use the screen to display tips on it. To do this, we write
Here, the optional “location” parameter tells the bimer where the screen is located relative to the projector (top, bottom, left, right; the default is right). The frameset typeset option will tell the beamer that there will be slides inside the frame, the contents of which should be displayed on the second screen. What needs to be displayed there is declared the specification “only: slide number”. For example,
Explanations and translations can also be displayed on two screens: on one side one text, and on the other - the other. We define the \ twoscreen command, whose argument is separated by a vertical bar: all that is on the left is displayed on the left monitor, and on the right, on the right.
Everything else that I did not discuss here can be found in the user manual . And download the latest version - from here .
PS A small example for raising the spirit: after all, the beamer is not so complicated. And here is the result + video .
Presentation Topics
So, in order to start your presentation, we need to specify the document class:\documentclass[10pt,pdf,hyperref={unicode}]{beamer} ')
The standard aspect ratio of a beamer slide is 4: 3, so if you want to make a presentation for a projector with other proportions (for example, 16: 9), you should specify the aspectratio = 169 in the optional argument of the \ documentclass command.
Next, we should choose some topic of the document. There are a lot of these themes (you can see the list in your beamer in the themes / theme directory, I have this in / usr / share / texmf-dist / tex / latex / beamer / themes / theme /). This is done with the \ usetheme {theme} command. As an example, I reviewed several topics:
Antibes
Berlin
Boadilla
Darmstadt
Dresden
Frankfurt
Goettingen
Hannover
Montpellier
Pittsburgh
Singapore
I generated the images from the blank file using a simple function:
function runit(){ sed -e "s/%theme%/$1/" a.tex > b.tex && pdflatex b.tex && pdftoppm -r 100 b.pdf > b.ppm && convert b.ppm $1.png; } There are a lot of proposed topics (but if anything happens, you can create your own - more on that later). If you do not like the color scheme of a particular theme, but like the theme itself, you can change the color scheme using the \ usecolortheme {dove} command. The color schemes available in your beamer installation can be viewed in the themes / color directory. For example, if you want to print slides on a printer, you can use the dove color scheme:
In addition to color themes, the beamer allows you to select "internal" and "external" themes. The \ useinnertheme {theme} command allows you to change the appearance of some internal elements (for example, list markers), and the \ useoutertheme {theme} command allows you to design the external elements of the presentation (footer).
If our presentation uses a consistent flashing of elements, it is worth saying: \ setbeamercovered {transparent}, so that inactive elements are at least slightly visible.
An even deeper color adjustment of the beamer can be realized by forcibly specifying the colors of individual elements with the \ setbeamercolor {element} {bg = color1, fg = color2} command. Here “element” is the name of the element whose color we want to change (for example, “normal text” is plain text), “bg” is the background color, “fg” is the text color.
After we set up the color schemes, you can still "conjure" a little over the footers. Using the content of the beamer / themes / outer directory as an example, one can understand what needs to be done to give the desired appearance to the header or footer. If we want to put in the first page the full name of the author and the short name of the organization in quotes, the second field is the full name of the presentation (if it’s not too long), and the third is the date and number of the slide / number of slides, we need to add to the preamble The document is as follows:
\makeatletter \defbeamertemplate*{footline}{my theme}{ \leavevmode% \hbox{% \begin{beamercolorbox}[wd=.3\paperwidth,ht=2.25ex,dp=1ex,center]{author in head/foot}% \usebeamerfont{author in head/foot}% \insertauthor~~\beamer@ifempty{\insertshortinstitute}{}{(\insertshortinstitute)} \end{beamercolorbox}% \begin{beamercolorbox}[wd=.5\paperwidth,ht=2.25ex,dp=1ex,center]{title in head/foot}% \usebeamerfont{title in head/foot}\inserttitle \end{beamercolorbox}% \begin{beamercolorbox}[wd=.2\paperwidth,ht=2.25ex,dp=1ex,right]{date in head/foot}% \usebeamerfont{date in head/foot}\insertshortdate{}\hspace*{2em} \insertframenumber{} / \inserttotalframenumber\hspace*{2ex} \end{beamercolorbox}}% } \makeatother Similarly, we can change the footer and the field with the title of the slide. For example, to place our logo in the upper left corner of the field with the name, and then the name of the slide, override the frametitle template:
\defbeamertemplate*{frametitle}{shadow theme}{% \vskip-2pt\leavevmode% \hbox to \paperwidth{% \hbox to 1.5em{\hskip -1.6ex\vbox to 0pt{\vskip -1.8ex\includegraphics[width=1.5em]{penguin.jpg}}}% \begin{beamercolorbox}[wd=\paperwidth,ht=2ex,dp=3pt,left]{title in head/foot}% \ \insertframetitle \end{beamercolorbox}} } As a result, we get:
If necessary, you can select a block that has the color specified by us:
\begin{colormixin}{} "" \end{colormixin} The “color” parameter can be either already defined (by analogy with the color boxes above) or specified by the user (including as a mixture of several colors). In order to take some color with N transparency (N - in percent), we write: “N! Colour". Record of the form "color1! N! color2 ”mixes (100-N) parts of color1 with N parts of color2. The \ averagebackgroundcolor command returns the current background color.
In addition to color, you can also change the font. The themes / font / directory contains “font themes” that can be used in the presentation. You can change the “font theme” using the \ usefonttheme {font} command. For example, if we want to use the default font (without serifs), but with serifs in formulas, we give the command:
\usefonttheme[onlymath]{serif} If you want to change the background of the slide, use the \ usebackgroundtemplate command, inside of which there can be any Latech instructions (including the placement of the image). For example, we can put a background image of the whole frame:
\usebackgroundtemplate{\includegraphics[width=\paperwidth,height=\paperheight]{penguin.jpg}} Primary Fields
Now we are going to fill in the general presentation fields. This can also be done in the preamble of the document. Most commands for specifying field values have optional arguments — the short designation of the same field (this short designation is usually placed in the header and footer, so it makes sense to fill it as well). Some fields are standard Latek: \ title (title of the presentation), \ author - author, \ date - date; and some are specific: \ institute - organization, \ subtitle - subtitle, \ logo - organization logo (some styles of presentations place the logo on their own, but in some it isn’t - this should be borne in mind).
In addition, in the preamble, you can specify the \ AtBeginSection command, which allows you to display additional information at the beginning of each section of the presentation. For example, to display content with highlighting of the current section, we write:
\AtBeginSection{ \begin{frame} \frametitle{} \tableofcontents[currentsection] \end{frame} } Similarly, the code that executes at the beginning of each subsection is determined by the \ AtBeginSubsection command. Both teams have an optional argument - its contents will be placed before the section / subsection defined by the command with an asterisk (that is, not in the table of contents and not numbered).
Slides
Further, in the body of the document, we begin to make out the frames of the presentation. Each frame is enclosed in a frame environment. If we want to place the title and content at the beginning of the presentation, you can arrange the standard \ maketitle and \ tableofcontents commands in separate frames.
To select logical blocks within each frame, you can use the block environment with a required parameter — the block name (since the environment theorem, lemma and example have English names by default, you can use the block environment instead, or you can override the names of these blocks). The exampleblock environment is also highlighted in a separate color, which also has the required parameter block name. If you want to draw particular attention of the reader to some text, you can put it inside the \ alert or \ color {color} command.
If your frame contains the verbatim environment or the \ verb command, you must add the optional parameter containsverbatim to the frame environment
In addition to the containsverbatim parameter, the frame environment has the following optional options:
- label = label - slide label (for the \ ref command and hyperlinks);
- b, c, t - vertical alignment (on the top edge, on the center - default, on the bottom edge;
- plain - slide without design;
- shrink = number - if the frame content does not fit into the screen, the beamer will try to scale it at least by the “number” percent;
- squeeze is another way to “squeeze” in a lot of objects on a slide: vertical gaps will be minimized,
- fragile - tells the beamer that a “fragile” text is placed inside the frame (for example, the same verbatim environment.
By default, the slide is made up in one column, however, using the columns environment, you can split the slide into several columns. Each column inside this environment is specified by the \ column {width} command. For example, to split a slide into two columns, do this:
\begin{frame}\frametitle{ } \begin{columns} \column{0.5\textwidth} \column{0.5\textwidth} \end{columns} \end{frame} Overlays
Often, the information on the frame you want to give gradually - line by line, as the narration. That is, the content of one frame is divided into several slides following one another. Overlays are used for this - different types of transitions to a new piece of information within the same frame. Immediately, I note: in reality, each slide requires the layout of a new pdf file page, however, when using a “competent” pdf viewer that draws attention to meta-information, these transitions are invisible (and you can even insert animated overlays into your presentation).
To control the visibility of blocks on different slides within the same frame, the following commands are used (I’ll note right away: the numbering of slides starts from 1):
- \ onslide <N> {text} - the text is visible on slide number N, on the others it is marked with the color of inactive text;
- \ only <N> {text} - the text is visible only on slide N, without taking up space on others;
- \ visible <N> {text} - the text is present only on slide N, but not visible on others, but takes its place;
- \ invisible <N> {text} - on slide N, the text is not visible, but it takes up space, on the rest it is present;
- \ alt <N> {text 1} {text 2} - “text 1” will appear on slide N, “text 2” on the others;
- \ temporal <N> {before} {text} {after} - “text” will appear on slide N, “before” on previous slides, and “after” on subsequent slides;
- \ uncover <N> {text} is the reverse of the \ onslide command;
All these commands are valid only for sentences containing one paragraph. If we need to select a block of several paragraphs in this way, they need to be enclosed within the environment of the same name: onlyenv, altenv, visibleenv, uncoverenv, invisibleenv.
In addition to these blocks, we can divide the itemize and enumerate environment points into several slides: to do this, immediately after the \ item command, you need to insert a specification indicating the slide numbers on which this information should appear. On the other slides, it will not be visible, but it will take up space, however, if we want these hidden items to be displayed in the inactive text color, it is necessary to specify in the preamble:
\setbeamercovered{transparent} Specifications of slide numbers themselves are enclosed in angle brackets and have the form <ab, cd, e->: the ranges of slide numbers are listed with a hyphen, and the separate numbers are separated by a comma. These specifications can also be specified with selection commands, like \ alert.
Another option to display the blocks in turn is to specify the \ pause command after each block. This command works both at the end of the table lines and even inside plain text. In a word, this command instructs to break the frame into slides: leave everything on the previous slide that is before it, and everything after that - transfer it to the next.
Animation and sound
If you will be showing your presentation using Adobe Reader or another program that can play files that contain hyperlinks in the document, you can include a video or sound file in your presentation.
To enable video, you must use the command
\includemovie[poster,mouse=true]{width}{height}{file} You can turn on the sound like this:
\sound[options]{poster}{file} Options “options”: loop, repeat, palindrome, borderwidth, showcontrols, externalviewer, inlinesound (their essence is clear from the name).
The parameter "poster" determines what will be displayed on the slide to run the audio or video file. If it is left empty, the file will be played automatically.
Please note that in order to embed media files into presentations, it may be necessary to manually connect the multimedia package (if the beamer doesn’t connect it "by itself").
You can also connect package media9 and embed media files with it.
The beamer itself allows you to animate overlays with pdf tools: for this, the frame is divided into N slides with a change in the value of a user-defined variable (this can be a counter or a length). The \ animate command applies this animation to range slides. The variable is changed using the \ animatevalue {variable} {initial value} {final value} command. Those. a user-defined variable on the range of slide numbers “range” varies uniformly from the value “initial value” to “final value”.
To set the type of animation overlays you need to use the command \ transOVR <slides> [options], where OVR:
- blindshorizontal - the slide is “cut” by vertical stripes;
- blindsvertical - the slide is “cut” by horizontal stripes;
- boxin - the old slide is “pinched” to a point along the center of the screen;
- boxout - the new slide is “stretched” from a point in the center;
- dissolve - the slide is replaced by a mosaic;
- glitter - blend dissolve with wipe;
- splitverticalin "tightened" at the top and bottom;
- splitverticalout "stretched" at the top and bottom;
- wipe - the next slide “leaves” on the left.
When using the \ animate command, you must specify the duration of each slide, you must use the command \ transduration {duration}.
Here is an example of using animation by means of a beamer:
\newcount\ooo \newdimen\offset \begin{frame} \animate<2-10> \animatevalue<1-10>{\ooo}{100}{0} \animatevalue<1-10>{\offset}{0cm}{5cm} \begin{colormixin}{\the\ooo!averagebackgroundcolor} \frametitle{ } \hskip\offset\alert{ !} \end{colormixin} \transduration{0.1} \end{frame} Here, to create an animation, use the counter “ooo”, which sets the opacity of the text, and the size “offset”, which sets the offset of the phrase “and fly away!” Relative to the word “fade”. Over nine out of ten slides, the values of these variables change, resulting in text opacity changing from 0 to 100 in increments of 10, and the offset of the “flying away” phrase - from 0 to 5 centimeters in 5mm increments.
Other
Because Beamer automatically connects the hyperref package; you can insert hyperlinks into the document. For example, at the end of the presentation, we can insert optional slides, and inside - make hyperlinks to them (“suddenly” will be asked - and you will immediately - once, and an ace from the sleeve). In addition, you can make a hyperlink to the object (formula, etc.) inside the slide. The general principle is as follows: an object to which we want to refer is marked with a label (optional argument label = label in the frame environment or the \ label {label} command inside the frame), and the hyperlink is executed with the \ hyperlink {label} {link text} command. In addition to the text, you can insert a "button": \ beamerbutton {text}. If our frame contains several slides, you can refer to a specific slide of the frame: to do this, specify in triangular brackets between the \ label command and its argument number [a] of the desired slide. Similarly, if we need to refer to an element from a specific slide of a given frame, we can specify the slide number specification in the first parameter (“label”) immediately after the label. You can also mark a hyperlink with specific commands: \ beamergotobutton (before the text there will be an arrow icon), \ beamerskipbutton (double arrow), \ beamerreturnbutton (left arrow).
At the end of a decent presentation you may want to post a bibliography. This is also possible: just place it on the slide in thebibliography environment, or use bibtex.
When working with the projector and the screen, you can use the screen to display tips on it. To do this, we write
\setbeameroption{second mode text on second screen=[]} Here, the optional “location” parameter tells the bimer where the screen is located relative to the projector (top, bottom, left, right; the default is right). The frameset typeset option will tell the beamer that there will be slides inside the frame, the contents of which should be displayed on the second screen. What needs to be displayed there is declared the specification “only: slide number”. For example,
\setbeameroption{second mode text on second screen} \begin{frame}[typeset second] . \only<second>{ - } \only<second:0>{ - } \end{frame} Explanations and translations can also be displayed on two screens: on one side one text, and on the other - the other. We define the \ twoscreen command, whose argument is separated by a vertical bar: all that is on the left is displayed on the left monitor, and on the right, on the right.
\setbeameroption{second mode text on second screen} \makeatletter \def\twoscreen#1{\tw@scr#1\relax} \long\def\tw@scr#1|#2\relax{\alt<second>{#2}{#1}} \makeatother ... \begin{document} \begin{frame}[typeset second] \frametitle{\twoscreen{ | - }} \begin{itemize} \item<1-> \twoscreen{| }. \item<2-> \twoscreen{| }. \item<3-> \twoscreen{| }. \end{itemize} \end{frame} Everything else that I did not discuss here can be found in the user manual . And download the latest version - from here .
PS A small example for raising the spirit: after all, the beamer is not so complicated. And here is the result + video .
Source: https://habr.com/ru/post/145523/
All Articles