AR features in iOS and Android
The article most likely will not tell anything new to those who have long been engaged in the development of applications with the Augmented Reality chip, but perhaps it will be useful to those who are interested in this topic and are close to writing an AR-application.
Prehistory
A little lyrical digression - what AR is and why it has become so popular on mobile devices.
')
Once upon a time, probably as early as the beginning of the 80s of the last century, projectors began to be introduced into military fighters (for example, the Yak-41 - fighter of vertical takeoff), which projected information directly onto the frontal viewer glass. The pilots were very pleased with the innovation, because It was much more convenient to monitor the most important indicators in this way than to take a look at analog, and even digital, sensors.
This topic is not particularly relevant, but we for certain know the fact (the father of one of our employees participated in the development) that already in 1992, 3D aircraft models with illuminated components were spinning around in the Soviet Su-27. The graphics engine was written in assembler, on a 4 MHz processor (8086). It is indicative that the Americans did the same with 80486 with 66 MHz, so our code was always able to write.
Later the same HUD (Windshield Indicators) came to civil aviation, and in 1990 one of the Boeing engineers introduced the very concept of “Augmented Reality”.
Much later, when the accelerometer and the gyroscope came to smartphones, the bright head had the idea to connect them to the camera and OpenGL ES - so many games were born, navigation assistants, but most of the budget in this direction is spent on marketing and promotion applications. For example, by cutting out a paper frame for a watch from a magazine, putting it on hand and looking through the phone’s camera, the user can “try on” any brand of watch that advertises the magazine.
Now the purely technical part, those small problems that the programmer will face on the most popular mobile platforms.
iOS
The iOS versions for iPhone and iPad are very similar, although they differ in several ways. Unfortunately, such parameters include the fact that in iPad OS the window for displaying images from the camera (UIImagePicker) is a normal UIView, and in iPhone OS it is UIViewController. If everything is clear in the case of an iPad, we control it and put it like any other view, then in iPhone it is a bit more complicated - the ImagePicker window must be modal, and adding views over the camera is possible only using the cameraOverlayView parameter. Those. To add some 3D on top of the camera, you need to do the following:
imagePicker .cameraOverlayView = [[ARView new] autorelease]; Most likely, this is an anachronism, remaining from iOS 3 and below. What inconvenience does this cause? To the whole list:
- UIImagePickerController hides the Status Bar. It will be necessary to return it in the transition from the AR mode to, for example, the game menu. Otherwise, in most cases, all views will go by 20 pixels;
- It is impossible to show the image from the camera is not full screen, because The preview was made under the standard UIImagePicker, with controls from below. And we have only two options left: to make our own controls from below, or to use a matrix to transform an image, the main thing is to correctly preserve the proportions of the image;
- If you need to change the camera image, for example, to a static background at the touch of a button, this will lead to a variety of actions - you need to wrap the view with a static background in your view controller, remove the UIImagePickerController, add an overlay to your view, which lived earlier in cameraOverlayView, and do present new view controller. It is also necessary not to lose the view in memory and make a retain / release on time, or always keep it in the retain property. This is all instead of imagePickerView.hidden = YES; as in ipad, plus obviously slower in performance;
- You can still face too smart UIButton. To implement AR / non-AR mode switching, the code had to be executed in the ViewController instance, but the UIButton has its own plans. If the UIButton had a click handler with target - ViewController, then after the view was removed from the ViewController and placed in the imagePicker.cameraOverlayView, this handler stops working. Apparently UIButton is aware that the target ViewController is no longer visible due to the fact that the image picker is on top of everything, and does not send him messages. I had to give the internal view a pointer to the controller view and add an intermediate code that would pull the controller directly.
In general, a bunch of crutches are always better when all the standard classes are views, and only the user controls the view controllers.
Android
With Android, things are a little different.
The camera preview, or rather SurfaceView, can be placed in a view of any size, and there is no need to create some kind of modal activation over everything. But without specific gestures has not done. It turned out that we ourselves have to find the appropriate size of the previews (the list of sizes is sometimes large, and may differ on devices from different manufacturers, even from one manufacturer). In search of the optimal resolution and proportion, you will have to sort through all the sizes from the possible options and compare them with the size and proportion of the twist, where we want to place this preview in runtime. The size of the preview will not always correspond to the size of the SurfaceView, so to maintain the proportions of the picture and get the appropriate size of the preview, you will have to do your ViewGroup, place the SurfaceView there, and do calculations, what and how to place in the onLayout method.
Another interesting thing is that if in iOS you want to draw a 3D model on top of the thumbnail from the camera, then you have a thumbnail (UIImagePicker) from below, and then draw any views from above, including with 3D models. In Android, they decided to do something in their own way - if standard UI elements can be safely drawn over the thumbnail (SurfaceView), then the 3D models in the GLSurfaceView should be placed under the (!) Thumbnail. In this case, you need to perform a series of gestures:
- for SurfaceView, call the getHolder (). setType method (SurfaceHolder.SURFACE_TYPE_PUSH_BUFFERS), even though it is written in the documentation for SURFACE_TYPE_PUSH_BUFFERS “This constant is deprecated. this is ignored, this value is set automatically when needed. ”, but without this call, the preview does not work and the application even crashes;
- In GLSurfaceView, you need to specify that it is transparent - getHolder (). SetFormat (PixelFormat.TRANSLUCENT). Without this call, on some devices everything can work (it worked on HTC Desire S), or it might not work (it did not work on Google GalaxyNexus). Perhaps this is due to differences in the GPU on different devices. So it is better not to neglect this method.
This is enough for AR to work, but problems with the static background for non-AR mode immediately arose. You see, the default GLSurfaceView is not transparent, you cannot display anything under it using the standard UI (neither the ImageVIew widget nor even the background of the GLSurfaceView itself works). But it can be made transparent with the help of the setZOrderOnTop (true) method - the GLSurfaceView becomes transparent, but it starts to appear on top of all the elements in the activation. It makes no difference whether they are below, above, or even in another view. So there is only one way out - if you need to draw something under the 3D model, and this is not a preview from the camera, then we will be helped by OpenGL ES. To do this, load the picture into memory as a texture, resizing it beforehand to get sides that are multiples of a power of two (on some GPUs it works without or with a performance drop; on some it doesn't work at all, so you have to do it). This texture will be displayed on a plane whose dimensions are equal to those of the port. We can only calculate the correct proportion of the texture, because There are many different screen sizes with different proportions.
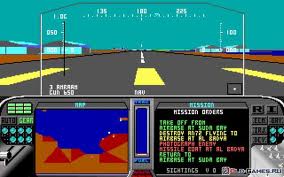
for example
An example of what turns out, you can see in the AppStore and Google Play on the example of our application.
Source: https://habr.com/ru/post/145398/
All Articles