Remote DSLR remote for night photography
The French photographer and radio amateur Pixel_K has published instructions on how to make a compact Arduino device for DSLR remote control.
The MiniCom remote control was made for photographing the night sky, so the author added an LCD display to it. All controls are an encoder (a small button that rotates and presses). This remote can even be used with gloves at –20 ° C.
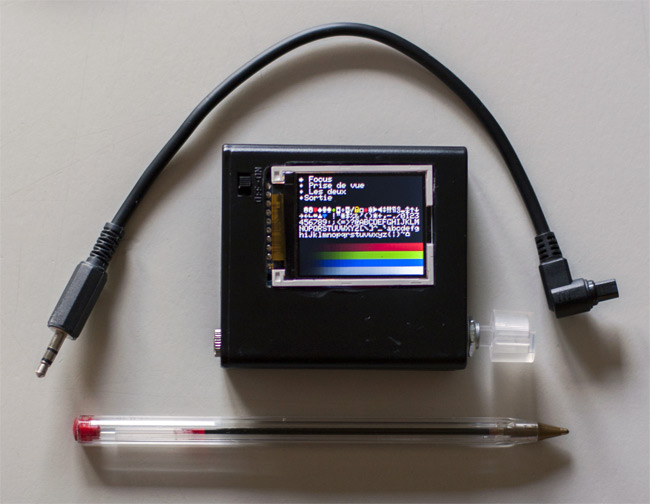
The remote is equipped with batteries, which is enough for the whole night. The shutter speed is set in the range from 1/100 s to several hours, otherwise the remote supports the same standard functions as other similar devices.
')
The output from the console is implemented as a 3.5 mm audio jack, so you can use different cables to connect digital cameras from different manufacturers to the console.
Parts List
The case uses a case for 4 AA batteries, with a switch, with eBay. It is slightly modified drill.

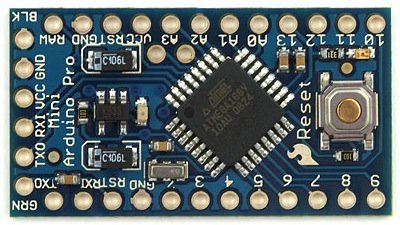
Arduino Mini Pro (3.3V, 8MHz)
Adafruit 1.8 ″ LCD

Sparkfun Encoder

Sparkfun 1000 mAh LiPo Battery

Sparkfun LiPo Micro USB Recharge

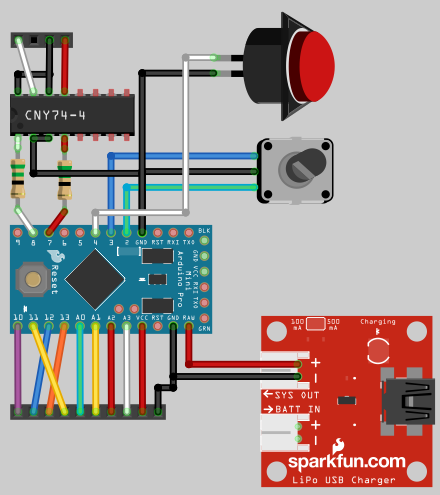
Optocoupler CNY74-4

3.5 mm audio jack

Plus a pair of 47Ω resistors and a bunch of wires.
Approximate assembly scheme:
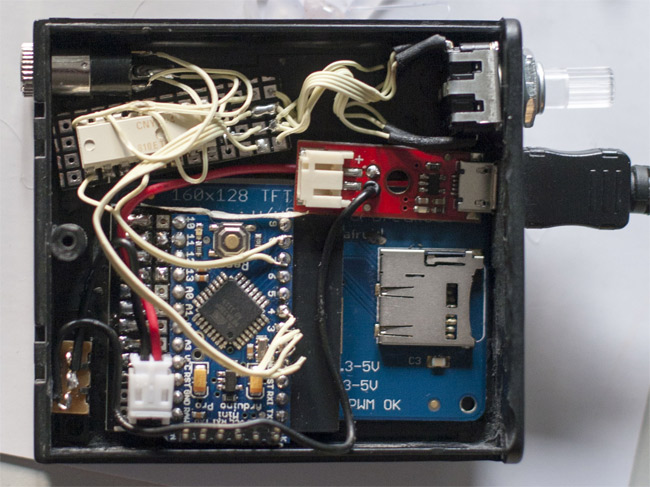
This is the result:
Program code and modified library for LCD display:
MiniComColor_016.zip
The MiniCom remote control was made for photographing the night sky, so the author added an LCD display to it. All controls are an encoder (a small button that rotates and presses). This remote can even be used with gloves at –20 ° C.
The remote is equipped with batteries, which is enough for the whole night. The shutter speed is set in the range from 1/100 s to several hours, otherwise the remote supports the same standard functions as other similar devices.
')
The output from the console is implemented as a 3.5 mm audio jack, so you can use different cables to connect digital cameras from different manufacturers to the console.
Parts List
The case uses a case for 4 AA batteries, with a switch, with eBay. It is slightly modified drill.
Arduino Mini Pro (3.3V, 8MHz)
Adafruit 1.8 ″ LCD
Sparkfun Encoder
Sparkfun 1000 mAh LiPo Battery
Sparkfun LiPo Micro USB Recharge
Optocoupler CNY74-4
3.5 mm audio jack
Plus a pair of 47Ω resistors and a bunch of wires.
Approximate assembly scheme:
This is the result:
Program code and modified library for LCD display:
MiniComColor_016.zip
Source: https://habr.com/ru/post/145001/
All Articles