HP EVA Disk Array - simple!
 In anticipation of the release of the new P6000 EVA disk array models, I want to show how simple and effective these arrays are at work.
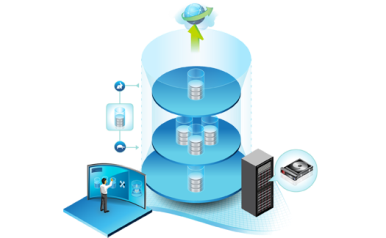
The traditional field of application for HP P6000 arrays has been and remains virtualization, integration with Microsoft, Oracle, SAP and a wide range of business applications. The P6000 line is represented by two models: P6300 EVA and P6500 EVA. These storage systems are based on SAS (Serial Attached SCSI) technology and support small (SFF) and large (LFF) form factor disks of various capacities - from 146 GB to 3 TB.
Unlike previous generations of Enterprise Virtual Array arrays, the P6000 EVA is equipped with both 8 Gb / s Fiber Channel ports and 10 Gb / s or 1 Gb / s Ethernet ports, which additionally allows connecting servers using iSCSI and FCoE protocols.
Why EVA?
According to a study by an independent and widely known Edison Group, the administration of the P6000 array is spent 50% less time and is 30% less complicated compared to similar systems. If you translate it into money, then the average savings will be about $ 13,000 per array per year.
')
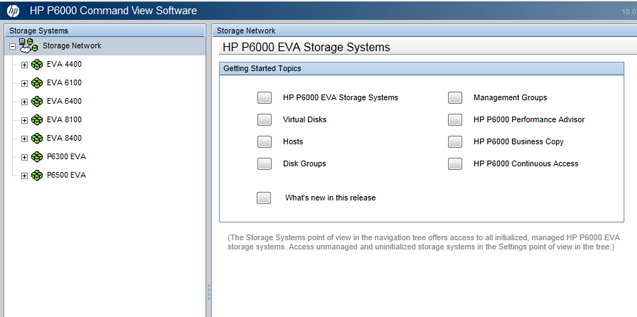
Command View Review
Command View - P6000 array management software. For those who have not had time to get acquainted with EVA arrays, I suggest downloading the CV P6000 simulator from here . All actions in this article were performed in the simulator, and they can be repeated at home.
For the P6000, it is possible to use the command line interface or scripts in array management, but for daily tasks it is more efficient and easier to use the GUI interface.
To download a simulator, you need to register and get HP Passport (if you don’t have one yet).
Next, you need to use the compmgmt.msc command to get to the computer management section and create the “CV” user with the password on the local PC and set the “HP Storage Admins” group on the local PC and make the CV user a member of the HP Storage Admins group.
And finally, start the simulator using the “Start HP P6000 EVA Simulator” shortcut. All screenshots are clickable.

With the release of the P6000 disk arrays, the Command View interface will not change dramatically, so when switching from one generation to another, you do not need to spend time and money on employee training.
Moreover, the inclusion of new technologies in support of the array looks very transparent: for example, new SSD drives are represented by a new icon with reference to additional product information, all this is inside the same navigation window on the disk shelf and the same drop-down list of the navigation tree. Thus, the logic of working with the new array was preserved.
The following indicators were included in the assessment of the Edison Group study: Provisioning , Data Protection , Maintenance , Troubleshooting . Let's take a closer look at this list and what it includes.
Provisioning - all work with an array after installation:
- Create a disk group
- Add host
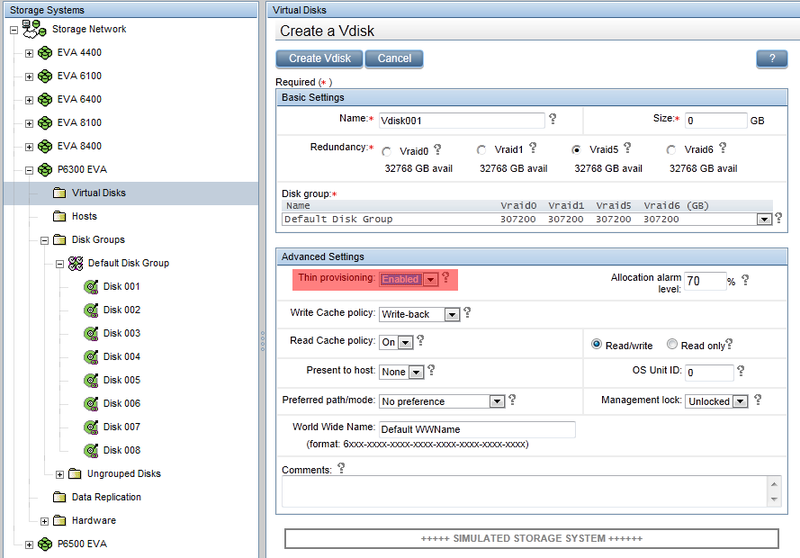
- Create Virtual Disk (LUN)
- Presentation of the virtual disk to the host.
- Container creation
The HP P6000 Command View software includes a free Thin Provisioning option that helps reduce disk space requirements, the number of hard drives and, consequently, reduce server power and air conditioning costs.
Adding this option to the Command View requires pressing only one button of the drop-down list when creating a virtual disk.
Data Protection - all mechanisms to protect the data array. These mechanisms include: several controllers in the array, fault-tolerant I / O paths, remote replication and creating snapshots (read-only copy) and clones (writable copy).
In HP EVA, each virtual disk can have its own snapshot policy. This makes the configuration of the entire storage more flexible.
Maintenance and Configuration Changes
Array maintenance involves a large number of operations. For example: software update, replacement of a failed disk, adding disks and disk shelves, changing the used configuration and removing snapshots.
Software updating occurs centrally, without stopping the operation of the entire array or its components. Disks and shelves of the array are also hot-plug. The controllers operate in active-active mode, duplicated with cache mirroring, the array has no single point of failure.
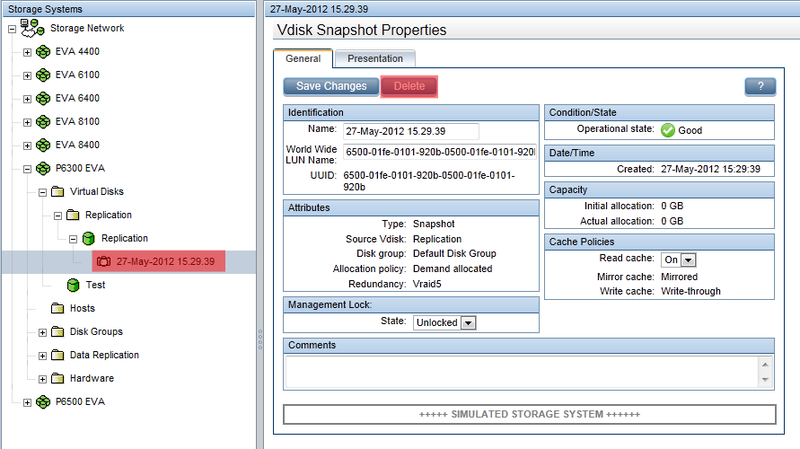
Removing snapshots in the P6000 is quite simple: in the drop-down menu of Vdisk, you can select the necessary snapshot, which must first be untied from the designated host.
Monitoring and Troubleshooting - actions to determine the status and health of the array.
The Command View control software provides monitoring and collection of statistics, access to it is possible from the graphical interface, you can set up an alert via e-mail. This feature (auto support) is enabled by default.
Consider some of the most common tasks for working with disk arrays:
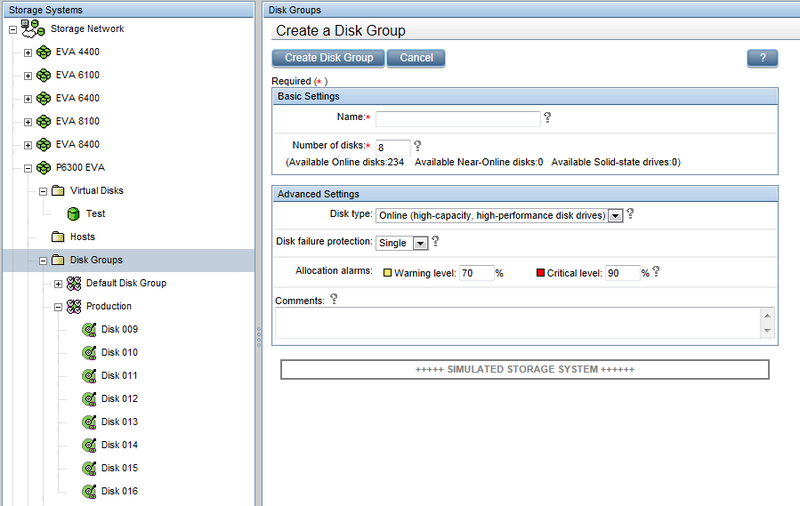
1. Create a disk group and LUN
We select the necessary array, in the drop-down menu we select Disk Groups - Create Disk Group, we select the name for the group, the protection setting and the number of disks (a multiple of 8 is recommended); if the volumes in the array are of the same speed, without “fast” and “slow”, then it is recommended to insert all the disks of the array into one disk group. Thus, the disk space in the array will be virtualized across all disks of the system, and we will get maximum performance - the IOPS for the disk group will be made up of the IOPS of all disks in the group.
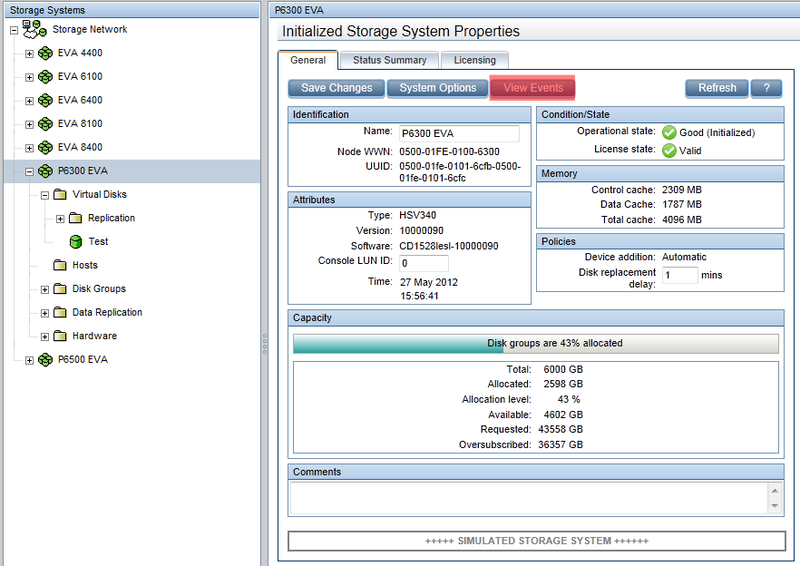
After creating a disk group, we can view information about the disks, their location, and update the firmware.
Next, in the Virtual Disks section, create a LUN (Create Vdisk) with the necessary parameters.
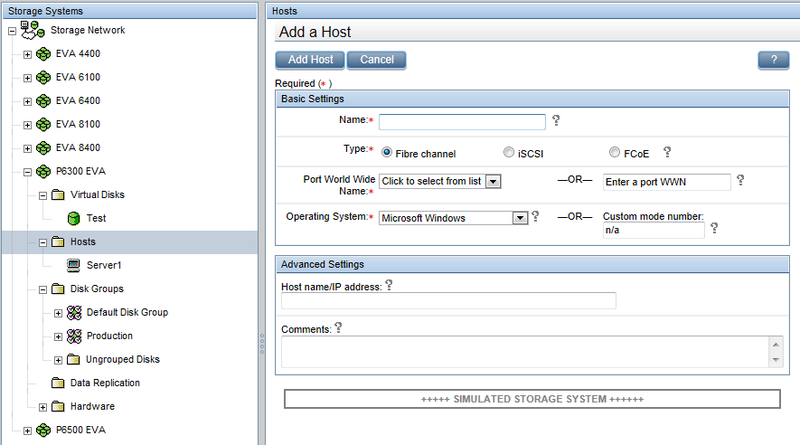
2. LUN Presentation to the Host
Add a host in the Hosts - Add host section. Select the required settings (test WWN prepared by the system was used in the video), system type, enter the IP address.
In the properties of the disk in the Presentation tab, we give the LUN to the host (Present).
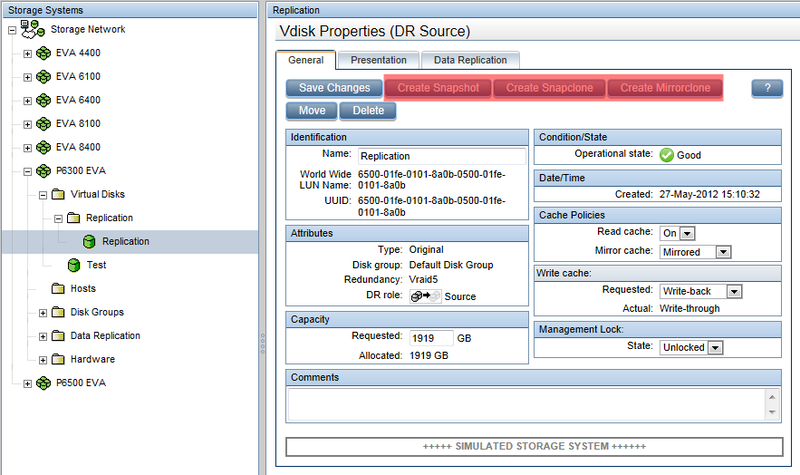
3. We create replication of volumes between arrays
Consider an example of creating replication between arrays, the source will be an array of P6300, the receiver will be P6500.
It is necessary that a LUN (without Thin Provisioning) with the necessary parameters be created on each array.
On the Source array, the disk is added to the Data Replication group, specifies the destination array, source volume, replication type (synchronous, asynchronous basic, asynchronous extended), Target LUN fault tolerance, LUN host access, log size. After creating the replication group, we wait until the complete copy is written from one array to another.
4. Adding disks to a disk group
After some time, it became necessary to add disks to a disk group.
After connecting the disks to the array, go to the Command View interface, select the disk group that needs more disk space and add the “Add disks” disks. The array is being rebuilt and the added disk capacity is available for use.
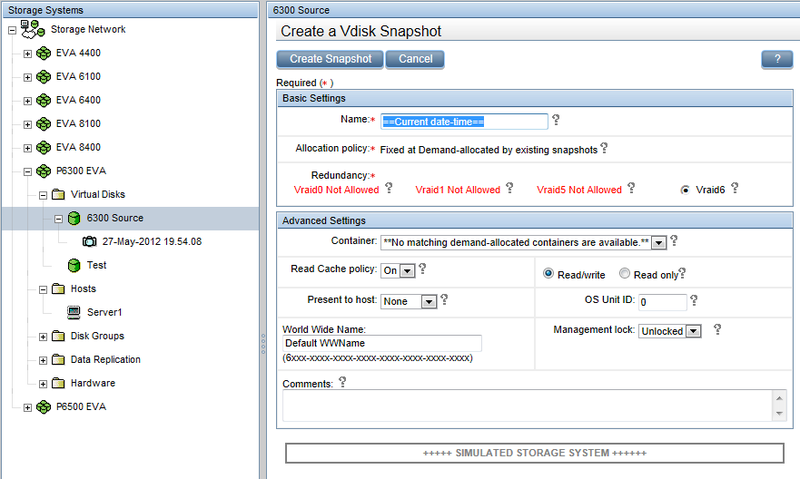
5. Creating snapshots
In the Virtual Disks section, go to the LUN, which needs to create a Snapshot. We select a name (the date of creation is taken by default), a level of fault tolerance, a container that will contain snapshots (if necessary). The disk becomes the parent, and in the directory below there will be a snapshot with the date of creation, later it can be presented to the host.
As part of this post, I tried to show how convenient it is to use the P6000 arrays in everyday work. In the following, I want to demonstrate the integration of an EVA array with VMware and the creation of a cluster of virtual machines.
Thanks for attention!
Literature:
- P6000 Quickspecks ( http://h18000.www1.hp.com/products/quickspecs/13904_div/13904_div.pdf )
- P6000 EVA Simulator ( https://h20392.www2.hp.com/portal/swdepot/displayProductInfo.do?productNumber=P6000EVASimulator )
- Best Practices P6000 ( https://secure.europe.hp.com/h41111/rfg_formprocessor/SWD_Installed_Base/pl/pl/pdf/TWP_4AA3-2641ENW.PDF )
Source: https://habr.com/ru/post/144948/
All Articles