Development and application of the PAM module for authentication in Astra Linux using Rutoken EDS and Rutoken S

In this article, I would like to talk about how applications in Linux can use the Pluggable Authentication Modules system for transparent user authentication. We dig a little in the history of the development of authentication mechanisms in Linux, let's deal with the PAM settings system and analyze the source code of the authentication module pam_p11, which allows user authentication using smart cards.
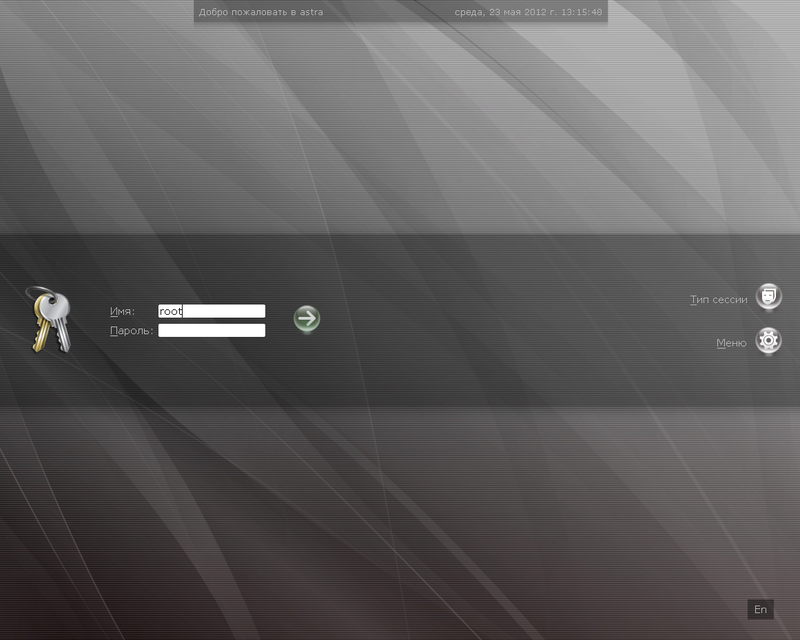
At the end of the article, we will consider in practice the configuration and operation of the authentication module in the certified for security class 3 CBT and Level 2 control of the absence of undeclared capabilities of the Astra Linux distribution for USB authentication tokens Rutoken EDS and Rutoken S. Given that Rutoken S has FSTEC certificates on NDV 3, and Rutoken e-signature on NDV 4, this solution can be used in information systems that process confidential information, up to information marked “C”.
A bit of history
In the good old days, if an application in Linux was required to request user authentication, then it had to access the / etc / passwd and / etc / shadow files. This approach was as simple as a traffic jam, but at the same time, developers had to think not only about working with files, but also about security issues. In this regard, it became necessary to develop a transparent user authentication mechanism, independent of the method of storing information about their accounts.
The solution was the Linux-PAM project. By the way, the PAM architecture itself was first proposed by Sun in October 1995, and in August 1996, the Linux-PAM infrastructure was included in the Red Hat Linux distribution. There are currently three main implementations of PAM:
- Linux-PAM is the main implementation of the PAM architecture, which we consider in this article.
- OpenPAM is an alternative implementation of PAM used in BSD systems and Mac OS X
- Java PAM - Java wrapper over Linux-PAM
PAM structure
First, let's look at what PAM module is. Modules are libraries in which handlers are written for operations that PAM itself can send to them. For example, the standard pam_unix module can do the following:
- Request a password from the user and verify the entered value stored in the system
- Check if the password meets security requirements and has not expired.
The following is a general overview of how PAM works.

A heavily simplified authentication scheme in an application using PAM looks like this:
- The application initializes the PAM library (libpam.so)
- PAM refers to the required modules according to the configuration file for the application.
- Modules perform the actions assigned to them.
- The application returns the result of the operation.
Of course, PAM allows for more than authentication. PAM functions are classified by module type. In parentheses are the designations of the modules in the configuration files:
- Authentication (auth)
- Account Management (account)
- Session Management
- Password Management (passwd)
Now we are only interested in authentication, so we’ll leave the remaining functions to the reader’s curiosity.
PAM configuration
If the application requires authentication, then it should create a file with its own name in the /etc/pam.d directory, in which the modules to be authenticated and other actions should be specified. Let's see what is in the /etc/pam.d directory in Ubuntu 11.10
$ ls /etc/pam.d/ atd common-account common-session-noninteractive lightdm other samba vmtoolsd chfn common-auth cron lightdm-autologin passwd sshd chpasswd common-password cups login polkit-1 su chsh common-session gnome-screensaver newusers ppp sudo For example, look at the abstract configuration file for the login application.
# PAM configuration for login auth requisite pam_securetty.so auth required pam_nologin.so auth required pam_env.so auth required pam_unix.so nullok account required pam_unix.so session required pam_unix.so session optional pam_lastlog.so password required pam_unix.so nullok obscure min=4 max=8 Each line of the config is written as
< > < > < > <> - The type of module corresponds to the designations of the modules themselves (ie, auth / account / session / passwd)
- The control flag indicates the criticality of the module for successful operation. The flag can have the following values: requisite (required), required (required), sufficient (sufficient) and optional (optional).
- The library path sets the path to the module file. By default, they are searched in / lib / security /
- Parameters specify the list of arguments that will be passed to the module. Arguments are passed in a manner similar to the argc / argv principle in the main () function, except that argv [0] contains not a module name, but a specific argument.
Thus, we get a stack of modules, each of which performs its own action. PAM at the same time parses the stack as it should be - from top to bottom. In accordance with the control flag, the following requirements are set for the success of the operation:
- requisite (required): if the stack module returns a negative response, the request is immediately rejected. Other modules will not be executed.
- required (required): if one or more stack modules return a negative response, all other modules will be executed, but the application request will be rejected.
- sufficient (sufficient): if the module is marked as sufficient and in front of it none of the necessary or sufficient modules returned a negative response, then all remaining modules in the stack are ignored, and a positive response is returned.
- optional (optional): if there are no required modules in the stack, and if none of the sufficient modules returned a positive response, then at least one of the additional modules of the application or service should return a positive response
Module configuration files are stored in / usr / share / pam-configs / <module name>. Each file contains the full name of the module, whether it is enabled by default, module priority and authentication parameters.
')
Development of an authentication module for PAM
In this section, we will examine the source code of the pam_p11 module and consider the main points that should be paid attention to when writing your own module.
pam_p11
This module allows two-factor user authentication using smart cards or USB tokens using asymmetric cryptography. Consider the general scheme of his work:
- The user certificate and its private key are stored on the token.
- The certificate is also stored in the user's home directory as trusted.
Authentication is as follows:
- The token is searched for a user certificate.
- A PIN is requested to the token via PAM
- If authentication on the token is successful, then random data is signed using the private key from the token. The signature itself is performed by hardware.
- The received EDS is verified using a user certificate.
If, as a result, the signature verification is carried out successfully, then the module says outside that everything is fine.
In this scheme, the RSA key pair of length 2048 bits is used, generated by hardware on a token.
Actually the development of the module
Depending on the functionality of the module, PAM may require the following functions from it:
- pam_sm_authenticate, pam_sm_setcred - authentication
- pam_sm_acct_mgmt - account management
- pam_sm_chauthtok - password management
- pam_sm_open_session, pam_sm_close_session - session management
In order for the module to perform authentication, we need to implement the functions pam_sm_authenticate and pam_sm_setcred in it. In the remaining functions, it is enough just to add stubs so that our module cannot be used for other operations.
To work with PAM, you need to define special constants, and only then connect the header files:
#define PAM_SM_AUTH #define PAM_SM_ACCOUNT #define PAM_SM_SESSION #define PAM_SM_PASSWORD #include <security/pam_appl.h> #include <security/pam_modules.h> These constants are necessary so that PAM knows that our module can perform all the functions described above. Of course, if we implement only authentication, then the remaining functions can be discarded, but the developers of pam_p11 decided that it would be safer to put stubs instead of unused functions.
Let's start writing the pam_sm_authenticate function. It has the following signature:
PAM_EXTERN int pam_sm_authenticate(pam_handle_t *pamh, int flags, int argc, const char **argv); Of the important parameters here it is worth noting:
- pamh - the handle to PAM received by the application
- argc, argv - the arguments specified in the configuration file. Our module takes one argument - the path to the PKCS # 11 library
The function should return one of the following values:
- PAM_AUTH_ERR - authentication error
- PAM_CRED_INSUFFICIENT - the application does not have sufficient permissions to perform authentication
- PAM_AUTHINFO_UNAVAIL - the module could not get the information to perform authentication. This may happen due to network problems or other equipment failure.
- PAM_SUCCESS - authentication was successful
- PAM_USER_UNKNOWN - the user with the transferred name does not exist
- PAM_MAXTRIES - one or more authentication modules exceeded the allowed retry limit.
Inside our module, we will use the libp11 library to work with the PKCS # 11 API and OpenSSL to work with certificates.
First, we define the variables that we need:
int i, rv; const char *user; // char *password; // char password_prompt[64]; // , // PAM struct pam_conv *conv; // PAM struct pam_message msg; // PAM struct pam_message *(msgp[1]); struct pam_response *resp; // PAM // lib_p11: PKCS11_CTX *ctx; // PKCS#11 PKCS11_SLOT *slot, *slots; // PKCS11_CERT *certs; // unsigned int nslots, ncerts; PKCS11_KEY *authkey; // PKCS11_CERT *authcert; // EVP_PKEY *pubkey; // OpenSSL unsigned char rand_bytes[RANDOM_SIZE]; unsigned char signature[MAX_SIGSIZE]; int fd; unsigned siglen; Then check if the PKCS # 11 library path is passed to us.
if (argc != 1) { pam_syslog(pamh, LOG_ERR, "need pkcs11 module as argument"); return PAM_ABORT; } After that, we initialize OpenSSL and the PKCS # 11 context.
OpenSSL_add_all_algorithms(); ERR_load_crypto_strings(); ctx = PKCS11_CTX_new(); Ask PAM for a username.
rv = pam_get_user(pamh, &user, NULL); if (rv != PAM_SUCCESS) { pam_syslog(pamh, LOG_ERR, "pam_get_user() failed %s", pam_strerror(pamh, rv)); return PAM_USER_UNKNOWN; } Now let's load the PKCS # 11 library, find the first available token and get certificates from it
rv = PKCS11_CTX_load(ctx, argv[0]); if (rv) { pam_syslog(pamh, LOG_ERR, "loading pkcs11 engine failed"); return PAM_AUTHINFO_UNAVAIL; } // PKCS#11 rv = PKCS11_enumerate_slots(ctx, &slots, &nslots); if (rv) { pam_syslog(pamh, LOG_ERR, "listing slots failed"); return PAM_AUTHINFO_UNAVAIL; } // slot = PKCS11_find_token(ctx, slots, nslots); if (!slot || !slot->token) { pam_syslog(pamh, LOG_ERR, "no token available"); rv = PAM_AUTHINFO_UNAVAIL; goto out; } // rv = PKCS11_enumerate_certs(slot->token, &certs, &ncerts); if (rv) { pam_syslog(pamh, LOG_ERR, "PKCS11_enumerate_certs failed"); rv = PAM_AUTHINFO_UNAVAIL; goto out; } if (ncerts <= 0) { pam_syslog(pamh, LOG_ERR, "no certificates found"); rv = PAM_AUTHINFO_UNAVAIL; goto out; } Now, among the certificates on the token, we find the one we have in ~ / .eid / authorized_certificates:
for (i = 0; i < ncerts; i++) { authcert = &certs[i]; if (authcert != NULL) { /* , */ rv = match_user(authcert->x509, user); if (rv < 0) { pam_syslog(pamh, LOG_ERR, "match_user() failed"); rv = PAM_AUTHINFO_UNAVAIL; goto out; } else if (rv == 0) { /* this is not the cert we are looking for */ authcert = NULL; } else { break; } } } if (!authcert) { pam_syslog(pamh, LOG_ERR, "no matching certificates found"); rv = PAM_AUTHINFO_UNAVAIL; goto out; } And now the most interesting thing is that we need to request a user password via PAM (which in our case will be a PIN to the token), and then authenticate to the token
// , PAM rv = pam_get_item(pamh, PAM_AUTHTOK, (void *)&password); if (rv == PAM_SUCCESS && password) { password = strdup(password); } else { // , sprintf(password_prompt, "Password for token %.32s: ", slot->token->label); // PAM: "" msg.msg_style = PAM_PROMPT_ECHO_OFF; msg.msg = password_prompt; // PAM rv = pam_get_item(pamh, PAM_CONV, (const void **)&conv); if (rv != PAM_SUCCESS) { rv = PAM_AUTHINFO_UNAVAIL; goto out; } if ((conv == NULL) || (conv->conv == NULL)) { rv = PAM_AUTHINFO_UNAVAIL; goto out; } // , resp rv = conv->conv(1, (const struct pam_message **)msgp, &resp, conv->appdata_ptr); if (rv != PAM_SUCCESS) { rv = PAM_AUTHINFO_UNAVAIL; goto out; } if ((resp == NULL) || (resp[0].resp == NULL)) { rv = PAM_AUTHINFO_UNAVAIL; goto out; } // password = strdup(resp[0].resp); memset(resp[0].resp, 0, strlen(resp[0].resp)); free(&resp[0]); } Now we can perform authentication on the token:
rv = PKCS11_login(slot, 0, password); // , memset(password, 0, strlen(password)); free(password); if (rv != 0) { pam_syslog(pamh, LOG_ERR, "PKCS11_login failed"); rv = PAM_AUTHINFO_UNAVAIL; goto out; } This concludes the first stage of authentication. Now we need to check if the owner of the token has a private key. To do this, we calculate the EDS for an arbitrary data block and check it with the help of a trusted certificate.
For starters, count 128 bytes from / dev / random
fd = open(RANDOM_SOURCE, O_RDONLY); if (fd < 0) { pam_syslog(pamh, LOG_ERR, "fatal: cannot open RANDOM_SOURCE: "); rv = PAM_AUTHINFO_UNAVAIL; goto out; } rv = read(fd, rand_bytes, RANDOM_SIZE); if (rv < 0) { pam_syslog(pamh, LOG_ERR, "fatal: read from random source failed: "); close(fd); rv = PAM_AUTHINFO_UNAVAIL; goto out; } if (rv < RANDOM_SIZE) { pam_syslog(pamh, LOG_ERR, "fatal: read returned less than %d<%d bytes\n", rv, RANDOM_SIZE); close(fd); rv = PAM_AUTHINFO_UNAVAIL; goto out; } close(fd); Then we will get the private key corresponding to the certificate and sign random data on it.
// authkey = PKCS11_find_key(authcert); if (!authkey) { pam_syslog(pamh, LOG_ERR, "no key matching certificate available"); rv = PAM_AUTHINFO_UNAVAIL; goto out; } // siglen = MAX_SIGSIZE; rv = PKCS11_sign(NID_sha1, rand_bytes, RANDOM_SIZE, signature, &siglen, authkey); if (rv != 1) { pam_syslog(pamh, LOG_ERR, "fatal: pkcs11_sign failed\n"); rv = PAM_AUTHINFO_UNAVAIL; goto out; } Check the signature. To do this, first, using OpenSSL, we will get the public key from the certificate, and then execute the verification of the EDS
pubkey = X509_get_pubkey(authcert->x509); if (pubkey == NULL) { pam_syslog(pamh, LOG_ERR, "could not extract public key"); rv = PAM_AUTHINFO_UNAVAIL; goto out; } // OpenSSL rv = RSA_verify(NID_sha1, rand_bytes, RANDOM_SIZE, signature, siglen, pubkey->pkey.rsa); if (rv != 1) { pam_syslog(pamh, LOG_ERR, "fatal: RSA_verify failed\n"); rv = PAM_AUTHINFO_UNAVAIL; goto out; } If the signature verification is successful, then we can exit the PKCS # 11 library and return PAM_SUCCESS.
rv = PAM_SUCCESS; out: PKCS11_release_all_slots(ctx, slots, nslots); PKCS11_CTX_unload(ctx); PKCS11_CTX_free(ctx); return rv; Instead of the rest of the functions, we leave to no one interesting stubs, assemble a module and proceed to its configuration and use.
Practical use
As an experimental distribution, you could get a fresh Ubuntu, but considering that everything works too well at 12.04, we decided to use authentication for the common cause to authenticate the Astra Linux Special Edition operating system using USB-tokens Rutoken EDS in Smolensk release Rutoken S.
Installing additional packages
To begin with, I had to install some packages. For the work of Rutoken S, the old version of OpenSC is needed: 0.11.13, and for the work of Rutoken EDS, a newer version: 0.12.2. OpenCT version 0.6.20 is used as middleware for both tokens.
As a result, the packages delivered by the developers of the distribution were delivered:
- libopenct1 (0.6.20-1.2): libopenct1_0.6.20-1.2_amd64.deb
- openct (0.6.20-1.2): openct_0.6.20-1.2_amd64.deb
For Rutoken S
- libopensc2_0.11.13-1.1_amd64.deb
- opensc_0.11.13-1.1_amd64.deb
- mozilla-opensc_0.11.13-1.1_amd64.deb
For Rutoken EDS
- opensc (0.12.2-2): opensc_0.12.2-2_amd64.deb
When installing the opensc version, it was necessary to satisfy the dependencies of the packages. To do this, the following packages were taken from the Debian squeeze repository:
- libltdl7 (> = 2.2.6b): libltdl7_2.2.6b-2_amd64.deb
- libssl0.9.8 (> = 0.9.8m-1): libssl0.9.8_0.9.8o-4squeeze11_amd64.deb
PAM module and its dependencies
To implement authentication by token, the following packages were installed:
- libp11-1 (0.2.7-2): libp11-1_0.2.7-2_amd64.deb
- libpam-p11 (0.1.5-1): libpam-p11_0.1.5-1 + b1_amd64.deb
- libengine-pkcs11-openssl (0.1.8-2): libengine-pkcs11-openssl_0.1.8-2_amd64.deb
Configure pam_p11
Fortunately, we almost never have to edit configs with our hands. Just create the file / usr / share / pam-configs / p11 with the following content:
Name: Pam_p11 Default: yes Priority: 800 Auth-Type: Primary Auth: sufficient pam_p11_opensc.so /usr/lib/opensc-pkcs11.so The interest is provided by the last line of the config, in which we indicate the type of the module, the name of the library and the parameters passed to the module. Our module takes as a parameter the path to the PKCS # 11 library.
Now we just have to execute the command.
$ pam-auth-update In the dialog that appears, you must select pam_p11. If you want to disable password authentication, you can disable Unix authentication. Since it was stated in the profile configuration file that the module will be “sufficient”, then upon receipt of the PAM_SUCCESS response from our module, the entire authentication process will be considered successful.

Key and certificate creation
To begin with, we create a key pair RSA of length 2048 bits with ID “45” (id should be remembered, you will need it when creating the certificate).
$ pkcs15-init --generate-key rsa/2048 --auth-id 02 --id 45 < PIN > Check the generated key:
$ pkcs15-tool --list-keys Using reader with a card: Aktiv Rutoken ECP 00 00 Private RSA Key [Private Key] Object Flags : [0x3], private, modifiable Usage : [0x4], sign Access Flags : [0x1D], sensitive, alwaysSensitive, neverExtract, local ModLength : 2048 Key ref : 1 (0x1) Native : yes Path : 3f001000100060020001 Auth ID : 02 ID : 45 Now, using OpenSSL, we will create a self-signed certificate. We start openssl and load the pkcs11 support module:
$ openssl OpenSSL> engine dynamic -pre SO_PATH:/usr/lib/engines/engine_pkcs11.so -pre ID:pkcs11 -pre LIST_ADD:1 -pre LOAD -pre MODULE_PATH:opensc-pkcs11.so (dynamic) Dynamic engine loading support [Success]: SO_PATH:/usr/lib/engines/engine_pkcs11.so [Success]: ID:pkcs11 [Success]: LIST_ADD:1 [Success]: LOAD Loaded: (pkcs11) pkcs11 engine Create a certificate in PEM format:
OpenSSL> req -engine pkcs11 -new -key 1:45 -keyform engine -x509 -out cert.pem –text In the last command, 1:45 is a pair: <key id>. Thus, we created a certificate based on a key pair stored on a token. In this case, a certificate file with the name cert.pem should be created in the current directory.
Now save the certificate for the token:
$ pkcs15-init --store-certificate cert.pem --auth-id 02 --id 45 --format pem < PIN > Entering the certificate in the list of trusted
At this stage, all we need to do is read the certificate with the required ID from the token and write it to the trusted certificate file:
$ mkdir ~/.eid $ chmod 0755 ~/.eid $ pkcs15-tool -r <certificate_id> > ~/.eid/authorized_certificates $ chmod 0644 ~/.eid/authorized_certificates Conclusion
In the article I tried to consider the mechanism of work of PAM, without particularly delving into the specifics of the work of its internal functions. In this regard, such things as the PAM dialog mechanism, functions for working with PAM structures, and some subtleties of setting the entire system remained without special attention. By themselves, they claim a separate article, so if there is interest, I can describe them in a new article.
The described steps for setting up an authentication system can be used as an instruction in any modern Linux distribution.
Source: https://habr.com/ru/post/144700/
All Articles