Mechanical display on the AVR from scratch. Part 0: Programmer (s)
Thanks to the easyelectronics.ru resource and personally DIHALT , most of the information was drawn from there, there will also be a bit of material to skip from this resource. In order to avoid unnecessary repetition, I recommend to start with it, there are clearly written such scary words as FUSE-bits, ISP programming or shift register. It is assumed that the reader of the sofa theorist has a small theoretical base.
The best training is practice. That is why, when I first saw an article about microcontrollers, I wanted to build something “such”. The first thing that caught my eye was the video:
Well, then we start! (Immediately I warn you, the device is not yet finished, one of the goals of this series of articles is to motivate yourself, your lazybeloved ).
')
Immediately tell the technical characteristics of your future device:
I didn’t want to understand LED-drivers, and all this happiness is ignited for educational purposes due to the greater prevalence through:
(Do not pay attention, I will whine a lot during the presentation, how difficult it was for me to get various components. This is true - I didn’t find a single radio point in my rather big city, I ordered everything via the Internet, but even in Belarus you don’t have much fun. )
So, let's begin. This is the first part of a series of articles devoted to the manufacture of its "bicycle", will be devoted to the manufacture of a very necessary tool - the programmer. With it, the microcontroller is flashed.
One of the simplest in its design, detailed instructions for manufacturing can be found, for example, here easyelectronics . This programmer has one very significant drawback - working through the COM port. Those for whom this fact is not a flaw, can safely close the article and wait for the next part, which will be entirely devoted to the technical part of the manufacturing of the mobile component. so
We need a programmer who is deprived of this flaw. Fortunately, human civilization has already reached the point when USB programmers began to appear. There are several well-known schemes, a little searching, I can call USBAsp on the ATMega48 or ATMega8 controller. But then I did not have them, there was only ATtiny2312 - and about a miracle, there is a ready solution for her too! For reasons unknown to me, this programmer is not as well known as the previous one, although it requires a cheaper microcontroller for its production. (You have not felt a trick yet? To work such a programmer, you must first teach it to work, that is, flash it, for example ... by Gromov’s programmer. But this is a one-time operation, if you do not have a COM port, you can get out of your lair and go to your more happy friend). Link to the original project page: ladyada.net . There are files for two versions of the programmer, I collected the first, because it has fewer parts.
The concept is pretty simple:

And wiring board:
I redrawed it for a one-sided printed circuit board and my smd capacitors, though it turned out not so compact:

List of required parts:
To teach you to persecute the board, I will not, not small. He made with the help of iron. After making the programmer, you need to flash it, for this we set the jumper JP5 (self pgm, pgm) and connect the flashing programmer to either of the two pin sets (there are two such sets on this programmer - 6 and 10 pins, for the most popular connectors). After the firmware, you need to install the usb driver on the computer, and that’s it - it’s written on the project’s website that AvrDude supports this programmer out of the box. I myself use the USBtiny500 program - the UsbTinyIsp <-> STK500 bridge, which allows you to flash directly from AVR Studio by selecting the STK500 programmer from the list. However, for this use, you must also install and configure the com0com program for virtual com ports, here is the instruction . And, finally, a few photos (sorry for the quality):
Programmer itself
What is already ready, even blinking lights :)
Project File Download Page . There you can take the driver (I put the version of "Windows USBtinyISP driver built with libusb v1.12")
Firmware for the programmer . File /spi/main.hex
Using the AVRDude program for firmware and its installation
Official forum
PS My first article, do not swear :).
PPS If anyone is interested, I can throw off my layout in lay format, just tell me where
The second part of
The best training is practice. That is why, when I first saw an article about microcontrollers, I wanted to build something “such”. The first thing that caught my eye was the video:
Well, then we start! (Immediately I warn you, the device is not yet finished, one of the goals of this series of articles is to motivate yourself, your lazy
')
Immediately tell the technical characteristics of your future device:
- " Brain " - ATmega8A-PU, frequency 16 MHz
- Rotational speed - the part that will rotate all this is not ready yet, but the firmware in theory should allow 15-9000 rpm. In this case, one of the differences of this implementation is that the speed is not rigidly embedded in the firmware, but is calculated dynamically.
- " Matrix " - 32 smd yellow LEDs (which ones I found, I think the blue ones would look more interesting)
I didn’t want to understand LED-drivers, and all this happiness is ignited for educational purposes due to the greater prevalence through:
- 4 shift registers 74hc595
- Firmware - only assembler, only hardcore!
(Do not pay attention, I will whine a lot during the presentation, how difficult it was for me to get various components. This is true - I didn’t find a single radio point in my rather big city, I ordered everything via the Internet, but even in Belarus you don’t have much fun. )
So, let's begin. This is the first part of a series of articles devoted to the manufacture of its "bicycle", will be devoted to the manufacture of a very necessary tool - the programmer. With it, the microcontroller is flashed.
Programmer times. "Gromov"
One of the simplest in its design, detailed instructions for manufacturing can be found, for example, here easyelectronics . This programmer has one very significant drawback - working through the COM port. Those for whom this fact is not a flaw, can safely close the article and wait for the next part, which will be entirely devoted to the technical part of the manufacturing of the mobile component. so
Programmer two. USBTinyISP
We need a programmer who is deprived of this flaw. Fortunately, human civilization has already reached the point when USB programmers began to appear. There are several well-known schemes, a little searching, I can call USBAsp on the ATMega48 or ATMega8 controller. But then I did not have them, there was only ATtiny2312 - and about a miracle, there is a ready solution for her too! For reasons unknown to me, this programmer is not as well known as the previous one, although it requires a cheaper microcontroller for its production. (You have not felt a trick yet? To work such a programmer, you must first teach it to work, that is, flash it, for example ... by Gromov’s programmer. But this is a one-time operation, if you do not have a COM port, you can get out of your lair and go to your more happy friend). Link to the original project page: ladyada.net . There are files for two versions of the programmer, I collected the first, because it has fewer parts.
The concept is pretty simple:
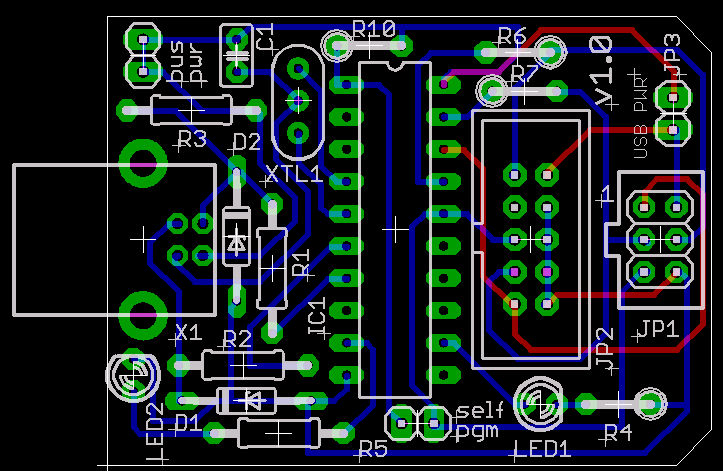
And wiring board:
I redrawed it for a one-sided printed circuit board and my smd capacitors, though it turned out not so compact:
List of required parts:
- ATTINY2313-20PU
- Quartz at 12 MHz
- Capacitor 100 nF (I have smd, in the original with legs)
- 2 capacitors at 22 pF (only in my implementation, as I understood in the original, they are combined with quartz)
- 10 kΩ resistor
- 5 resistors for 1.5 KΩ
- 2 resistors for 27-68 ohms
- 2 LEDs
- 2 zener diodes for 3.6 V
- Pins
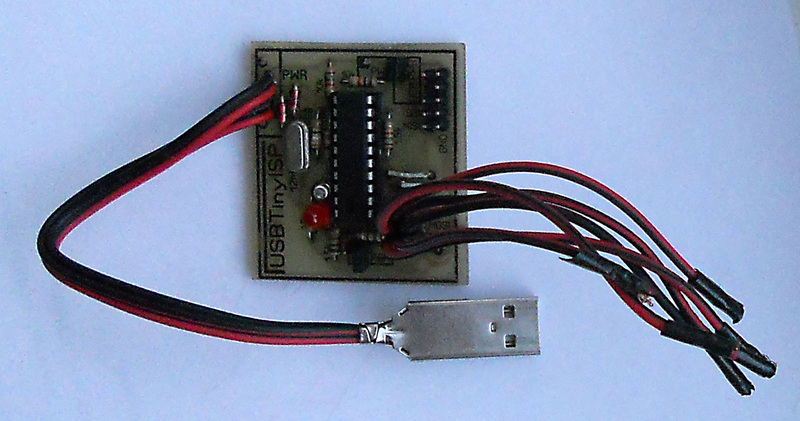
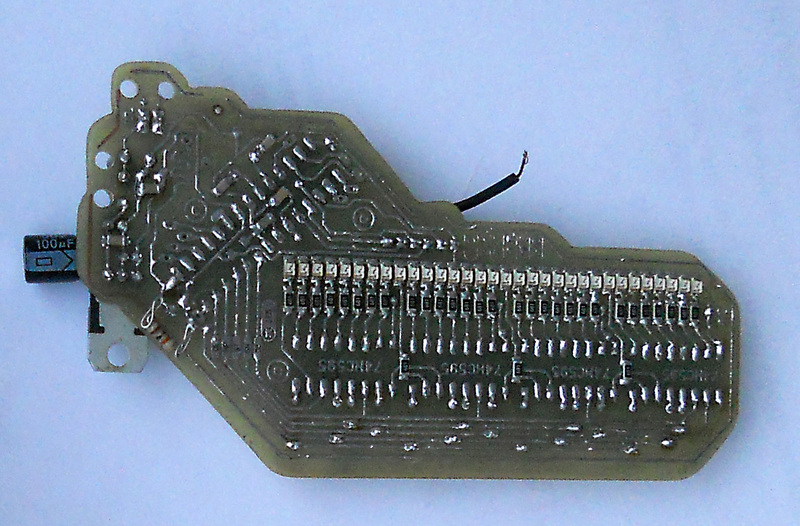
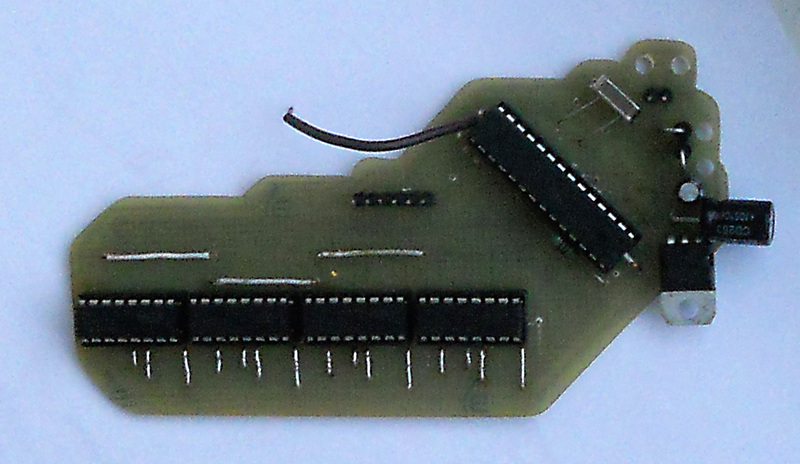
To teach you to persecute the board, I will not, not small. He made with the help of iron. After making the programmer, you need to flash it, for this we set the jumper JP5 (self pgm, pgm) and connect the flashing programmer to either of the two pin sets (there are two such sets on this programmer - 6 and 10 pins, for the most popular connectors). After the firmware, you need to install the usb driver on the computer, and that’s it - it’s written on the project’s website that AvrDude supports this programmer out of the box. I myself use the USBtiny500 program - the UsbTinyIsp <-> STK500 bridge, which allows you to flash directly from AVR Studio by selecting the STK500 programmer from the list. However, for this use, you must also install and configure the com0com program for virtual com ports, here is the instruction . And, finally, a few photos (sorry for the quality):
Programmer itself
What is already ready, even blinking lights :)
References:
Project File Download Page . There you can take the driver (I put the version of "Windows USBtinyISP driver built with libusb v1.12")
Firmware for the programmer . File /spi/main.hex
Using the AVRDude program for firmware and its installation
Official forum
PS My first article, do not swear :).
PPS If anyone is interested, I can throw off my layout in lay format, just tell me where
The second part of
Source: https://habr.com/ru/post/144671/
All Articles