x264 or how to encode video
 The problem with video encoding and its compression from gigabytes to megabytes, in my opinion, has always been relevant. If more or less professional operators, installers, etc. more than one cat eaten on this topic, for example, lovers and those who record video from the screen of their monitor sometimes scratch their heads for a long time before they achieve any serious results. As a result, a lot of wasted time, no one needs gigabytes of outgoing traffic to download
 Immediately make a reservation that initially the article is not mine. I stumbled upon it, about five years ago, when the task arose of doing something with recorded moments from the then beloved game Battlefield 2, on the popular domestic resource of video game makers. Gradually, the article was finished and published, here and there. I do not exclude that the original article came from behind the “hillock” and everything was translated into our mighty language.
So, the x264 codec has replaced such monsters of its time as DivX and XviD and successfully put both on the blades. In order to achieve a truly impressive result, we need the following things:
1. MeGUI - this we compress the video itself. Rather, it compresses the codec itself, and this is only a GUI that combines dozens of different specialized utilities.
2. Avisynth - frameserver. If suddenly someone does not know what it is, then it is an intermediary between our uncompressed video and the codec.
3. VLC media player - It's all very simple. Omnivorous player, able to work with streaming video. Popular enough.
4. K-Lite Codec Pack - pack all possible codecs for all occasions. We need a build Mega.
I strongly recommend updating the K-Lite Codec Pack, at least always before compressing the video. This is of course not necessary, but experience suggests that if you come up with incomprehensible errors / jambs / glitches / etc, then 50% or even more, updating the codecs will save you from unnecessary hemorrhoids.
By the way, MeGUI is quickly and often updated and supplemented. The screenshots below may no longer correspond to the current version, but this is not terrible. As a rule, the arrangement of the elements changes, something is pushed to the right, something is moved to another tab. The loss is very fast, so do not be alarmed.
')
Go. Install Avisynth , and then MeGUI . After MeGUI is updated, go to the folder where our prototype lies, and for convenience we create a file with the extension * .avs there. Open the notepad and write the cherished lines:
AVISource ("video.avi")
ConvertToYV12 ()
The first line tells MeGUI which file to work with. The second line indicates the color system used.
There are several different ways to represent color. For example: YUV and RGB color space. In the YUV color space, there is one component that represents luminance (luminance signal) and two other components that represent color (chrominance signal). While luminance is transmitted with all the details, some of the details in the components of the chrominance signal can be removed by lowering the resolution of the samples (filtering or averaging), which can be done in several ways (i.e. there are many formats for storing the image in YUV color space ). YV12 is one of these formats (here the chroma signal is a 2x2 pixel common to each block), which is supported by AviSynth.
We have a script. Go ahead. Open MeGUI and specify the location of the script. If the AviSynth script is in the same folder as your video, the second line will be filled automatically.
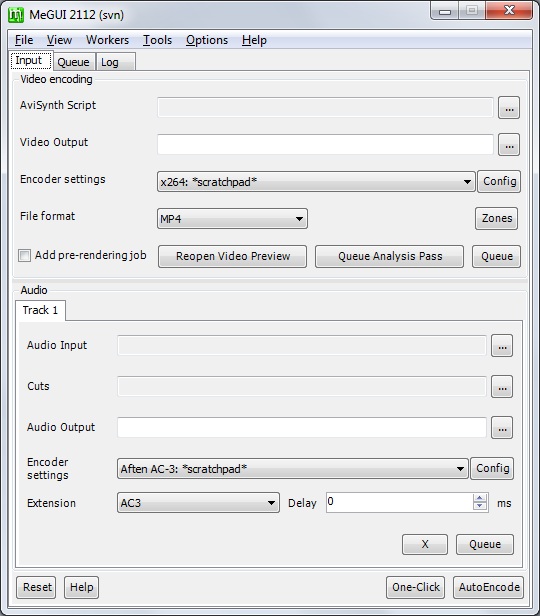
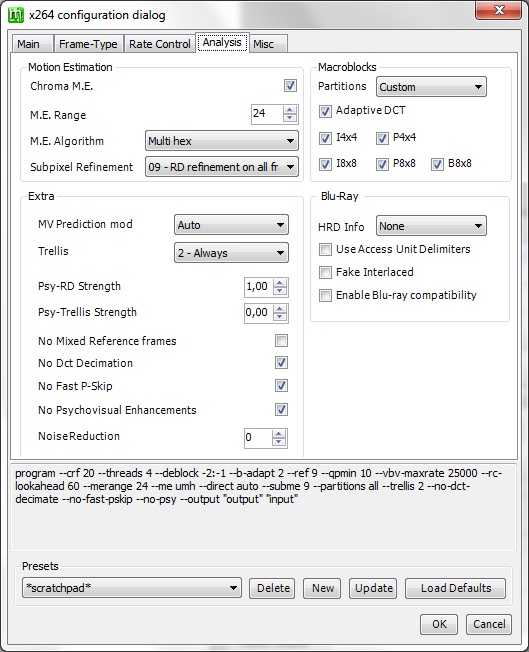
Open the codec settings by clicking on the Config button, to the right of Encoder settings . Put a tick, confirming that we really need advanced settings. Next we need to tick in accordance with the screenshots.
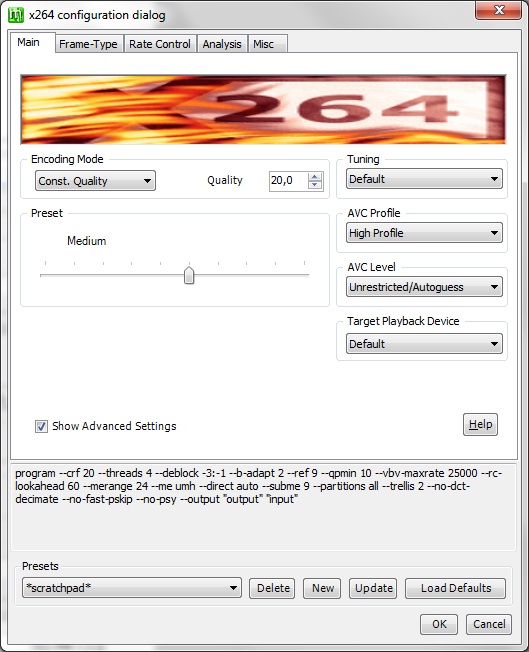

Click on the queue button and go to sleep, drink coffee, etc. depending on the preferences and power of the PC.
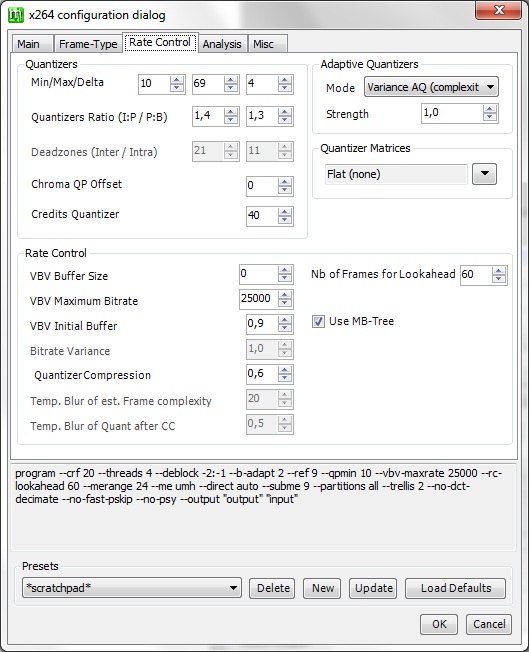
I want to make a reservation that this config is suitable for the original 720p video. For 1080p, you need to edit the config file a bit:
Frame-Type tab -> Change the Number of Reference Frames from 9 to 4.
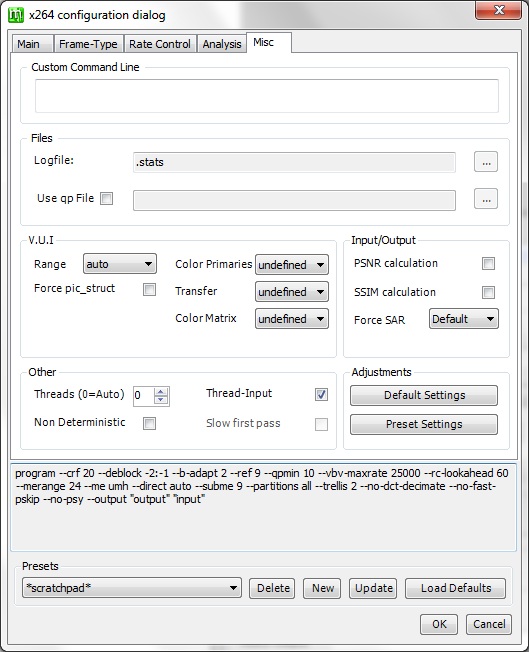
You can also indicate how many coders can use cores:
The Misc tab -> Other -> Threads section and specify how many threads compress the video. 1 thread per 1 virtual or physical core.
What we get in the end. I had the following video available:
Format: RGB
Codec ID: 0x00000000
Codec ID / Info: Basic Windows bitmap format. 1, 4 and 8 bpp versions are palettised. 16, 24 and 32bpp contain raw RGB samples
Duration: 3mn 42s
Bit rate: 663 Mbps
Width: 1 280 pixels
Height: 720 pixels
Display aspect ratio: 16: 9
Frame rate: 29.970 fps
Bit depth: 8 bits
Bits / (Pixel * Frame): 24,000
Stream size: 17.2 GiB (100%)
After waiting about 15-16 minutes, I got 184 MB on output.
If Habra is interested in such articles on the subject of video compression, then I will continue and share my experience. If you want to correct me and point out an error, then I will be happy to answer all the criticisms and comments.
Source: https://habr.com/ru/post/144033/
All Articles