Sensors are coming
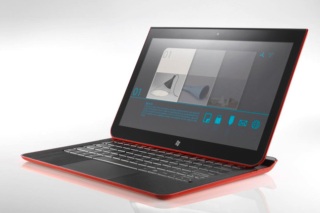 At the recent Intel Developer Forum 2012 in Beijing, Intel and its partners demonstrated new ultrabooks, one of the distinguishing features of which (apart from the design and availability of the touch screen) is the presence of sensors.
Moreover, these models are not just a conceptual design, they are examples of real devices that will begin to appear on the market in the near future. With their entry into the market, sensors will no longer be a wonder, but will become an integral part of any ultrabook.
What are they needed for
What sensors can give the user? The ability to use navigation, work with smart, context-sensitive applications, as well as new opportunities to interact with the user interface, a new class of games and much more.
For the programmer, this is an opportunity to add functions to the application that distinguish the program from competitors' products, or even the ability to find and “stake out” a new usage model. The topic is still new, each developer has a chance to create something that will become a “classic of the genre”.
Fortunately, the prerequisites for creating programs that work with sensors appeared in the Windows 7 - Sensor and Location Platform . This is a set of APIs in Windows that allow you to work with sensors. The unified interaction interface with sensors allows you to avoid confusion when each sensor was shipped with its own drivers and its own API. Now the sensors do not need your API, you need only the right driver.
')
How to start using sensors now
With the software figured out, now about the iron - ultrabooks with sensors on board on the market yet. What should I do if my hands are itching to play with sensors, practice and create something unique?
There are two options:
- Use a third-party sensor (set of sensors), for example, from Freescale or STMicroelectronics
- Use the sensors that already have, almost everyone - the sensors of the smartphone
Then I just want to talk about the second paragraph, using the example of using a smartphone based on Android OS as a “donor” of touch sensors.
Once, in search of a similar solution, I came across an interesting application - PCRemote, which is a program for remotely controlling a computer using Android devices. The network is full of similar projects, but this one turned out to be interesting because it offered to use not only the touch screen (like many other projects) to control a computer, but also sensors. Moreover, sensor support is organized in such a way that after installing all the necessary software in the system, real “virtual” sensors appear. Windows “sees” them as ordinary sensors connected to a computer, thanks to which it is possible to work with them through the standard API of the Sensor and Location Platform .
This solution supports the following sensors:
- GPS
- Accelerometer
- Orientation sensor
- Light sensor
The great advantage of using this solution is that after the “real, iron” ones come to replace the “virtual” sensors, the developer will not need to change anything, because for the program, interaction with sensors will remain the same, at the Sensor and Location Platform API.
How to install
The first thing you need to do is go to the RemoteSensors page and download the RemoteSensors driver for Windows 7. The site contains drivers for 32 and 64 systems. Download, run the installation, follow the prompts.
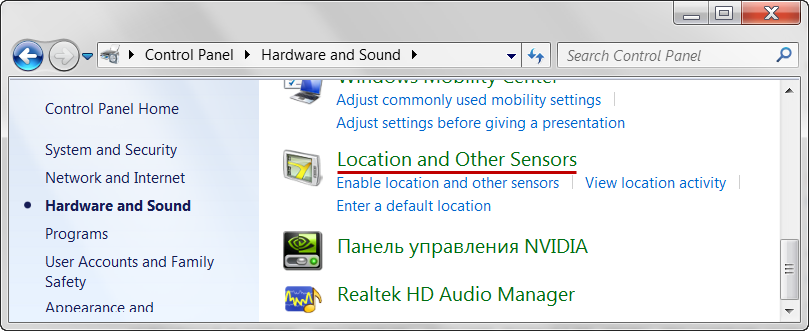
After the installation is completed, go to the control panel, the Hardware and Sound section, then Location and Other Sensors .
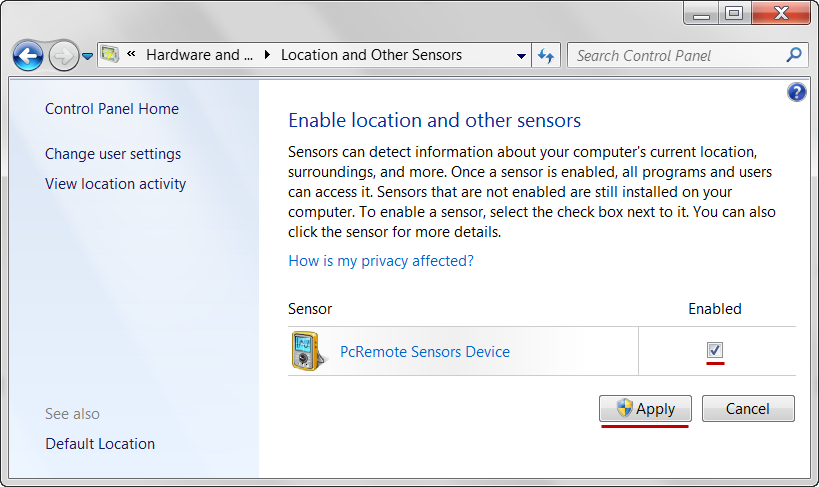
Put a tick (Enabled) opposite PcRemote Sensors Device and click Apply.
Sensors appeared in the system. It remains to bind their testimony to the readings of the sensors of the smartphone. To do this, download the application PCRemoteServer and run it.

The last step is to download and install the PcRemote Advance application through Google Play.
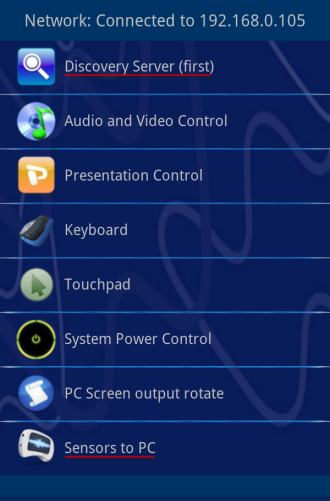
We start, select the Discovery Server item, after the server has been detected and the connection has been made - we select the item - Sensors to PC .
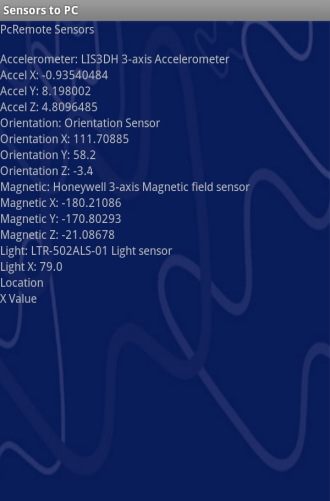
Done! Our PC (laptop, ultrabook, netbook) now has sensors!
How to check the performance of this solution? To do this, I wrote a simple application that initializes the Sensor and Location Platform when it starts up, lists all the sensors available in the system, and displays them as a list ( Sensors ). When you select a sensor in the list at the bottom of the window ( Values ), you can see the current sensor readings.
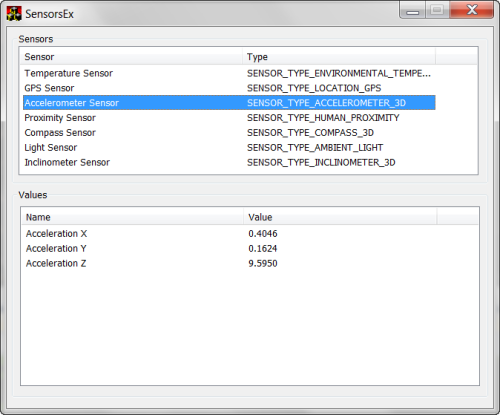
If everything was done correctly, then when you start the application you will see a list of sensors, as in the picture.
Now you can safely begin to develop a sensor-oriented application for new mobile platforms.
If you have any questions about how to use sensors in your applications - come to listen to reports on sensors on KRI and DevCon 12 .
Source: https://habr.com/ru/post/143885/
All Articles