Writing your Core Image Filter
Long ago, in 2005, they bought me the first camera phone with a camera - Siemens M65. After a decent amount of shots were taken, the need arose to streamline them - a small Delphi program was written that organized and allowed you to view images by date - by choosing the desired year, month and day. As time went on, the power of the phones increased, the number of megapixels, video support appeared - and all this was built into the program as it appeared. Later, a version of the program appeared under Mac OS X, which was written using the frameworks available in this OS for working with images (Core Image) and video (AV Foundation). Let's talk about the first framework and creating your own filter for it in more detail.
Core Image - image processing technology, which appeared in Mac OS X 10.4 - allows pixel-by-pixel operations with the original image using so-called plug-ins. There are a lot of built-in plug-ins - with a certain amount of time on the basis of Core Image, you can make some analogue of Photoshop with layers, blending modes, level adjustments, brightness, etc. And all the miscalculations will be made on the GPU (if available), which will give a significant speed in image processing.
Core Image Filter is an image processing plugin that has at least 2 functions: take an input image and display the result. On the embedded plugin description page there are examples of how the image will look before and after the filter. Also plugins are divided into categories:
')
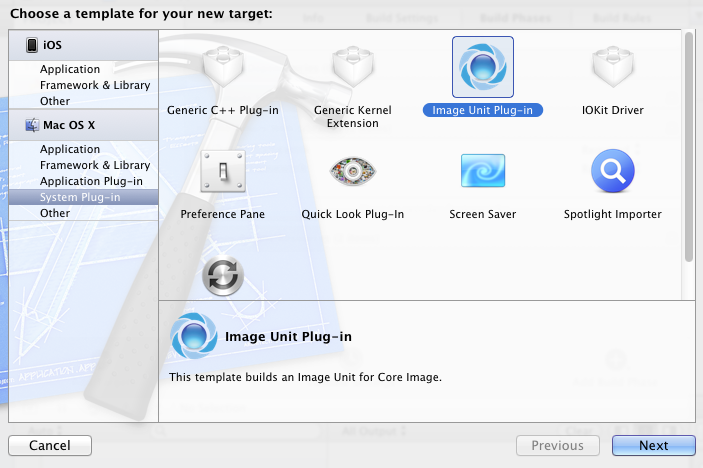
and select: Mac OS X -> System Plug-in -> Image Unit Plug-in:
Next, enter the name of the filter (my version is AnaglyphFilter) and immediately add it to the project assembly (Product - Edit Scheme - Build, Targets list). I also added the dependency of the main project build on the filter (so that the filter was probably built when building the project, Build Phases - Target Dependencies) and automatically copying the filter to the Resources folder, all the same main project (Build Phases - Add Build Phase - Add Copy Files) . Now you can proceed directly to the programming of the filter. But first, a little about the content of the plugin.
There are several procedures in the AnaglyphFilterFilter.m file, I provide a description:
The CIKL subroutine will look like this:
Core image
Core Image - image processing technology, which appeared in Mac OS X 10.4 - allows pixel-by-pixel operations with the original image using so-called plug-ins. There are a lot of built-in plug-ins - with a certain amount of time on the basis of Core Image, you can make some analogue of Photoshop with layers, blending modes, level adjustments, brightness, etc. And all the miscalculations will be made on the GPU (if available), which will give a significant speed in image processing.
Core Image Filter
Core Image Filter is an image processing plugin that has at least 2 functions: take an input image and display the result. On the embedded plugin description page there are examples of how the image will look before and after the filter. Also plugins are divided into categories:
- CICategoryBlur - image blur (example - Gaussian blur)
- CICategoryColorAdjustment - color management (example - work with color channels)
- CICategoryColorEffect - color effects (example - sepia)
- CICategoryCompositeOperation - image overlay (for example, 2-screen image overlay)
- CICategoryDistortionEffect - image distortion (example - "twisting" the image)
- CICategoryGenerator - image generators (example - image generator with specified color)
- CICategoryGeometryAdjustment - image geometry management (example - scaling, perspective)
- CICategoryGradient - gradient generators (example - linear, radial gradients)
')
Own filter
Training
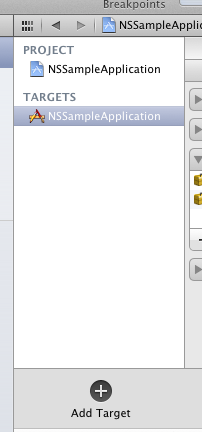
Our goal is to write our own plugin filter. And as an example, I decided to choose to create an anaglyph image to view it with red-turquoise glasses. All this was implemented in my program, which was discussed at the beginning of the article. To get started, run xcode. Next, we decide whether we will write the plugin as a separate project, or add it to the existing one. In my case, I added a new project to the existing one - for this, just below the TARGETS window, click Add Target:and select: Mac OS X -> System Plug-in -> Image Unit Plug-in:
Next, enter the name of the filter (my version is AnaglyphFilter) and immediately add it to the project assembly (Product - Edit Scheme - Build, Targets list). I also added the dependency of the main project build on the filter (so that the filter was probably built when building the project, Build Phases - Target Dependencies) and automatically copying the filter to the Resources folder, all the same main project (Build Phases - Add Build Phase - Add Copy Files) . Now you can proceed directly to the programming of the filter. But first, a little about the content of the plugin.
Inside view
After creating a new plug-in, you can see the following files in the <plug-in name> folder in the project tree:- AnaglyphFilterPlugInLoader .h / .m - the class of the loader of our plugin
- AnaglyphFilterFilter .h / .m is a plugin class that contains some auxiliary data.
- index.html - file with the description / help of our plugin
- Description.plist - information about our plugin
- Description.strings - localization file
- AnaglyphFilterFilterKernel.cikernel - the most interesting part is the Core Image Kernel Language (CIKL) program, which is responsible for working with pixels
We remove too much
The template that xcode made for us needs to be modified to suit our needs. The filter will have 2 input parameters: the main image (left) and right. The output will be a combined anaglyph image. For a start, we leave only the parameters we need. Open the AnaglyphFilterFilter.h file and convert the AnaglyphFilterFilter class to the following form:@interface AnaglyphFilterFilter : CIFilter
{
CIImage * inputImage; // input image (left)
CIImage * rightImage; // right image
}
@end
There are several procedures in the AnaglyphFilterFilter.m file, I provide a description:
- init - download the plug-in code from the file and convert it to a CIKernel object, you don’t need to change anything
- regionOf - returns the region of the image with which the filter will work. In our case, we need the whole image, so we change the code like this:
- ( CGRect ) regionOf : ( int ) sampler destRect : ( CGRect ) rect userInfo : ( NSValue * ) value
{
return rect;
} - customAttributes - setting and description of additional filter attributes. Add the attribute of the right image:
- ( NSDictionary * ) customAttributes
{
return [ NSDictionary dictionaryWithObjectsAndKeys :
[ NSDictionary dictionaryWithObjectsAndKeys :
[ CIImage class ] , kCIAttributeClass,
[ CIImage emptyImage ] , kCIAttributeDefault,
nil ] , @ "rightImage" ,
nil ] ;
} - outputImage is a subroutine call for working with an image. In the apply procedure, the leftSamp and rightSamp parameters are passed, which will be passed to the CIKL subroutine:
- ( CIImage * ) outputImage
{
CISampler * leftSamp = [ CISampler samplerWithImage : inputImage ] ;
CISampler * rightSamp = [ CISampler samplerWithImage : rightImage ] ;
return [ self apply : _AnaglyphFilterFilterKernel, leftSamp, rightSamp,
kCIApplyOptionDefinition, [ src definition ] , nil ] ;
}
CIKL program
This is CIKL code, which is a kind of OpenGL Shading Language . Subroutines that we call from the main code begin with the key word kernel and can be found using the name property of the CIKernel class. But in our case, we need only one procedure, so initialization is as follows (in the init procedure):_AnaglyphFilterFilterKernel = [ [ kernels objectAtIndex : 0 ] retain ] ;Similarly, you could get the procedure by name:
_AnaglyphFilterFilterKernel = [ [ kernels findKernelByName : @ "procedureName" ] retain ] ;The very procedure in the .cikernel file will look something like this:
kernel vec4 procedureName ( sampler leftSamp , sampler rightSamp )
{
// code to work with pixels
// return the result
}
Anaglyph
There are different ways of obtaining anaglyph images. For our case, we will use the full-color image overlay mode:- At the left image we remove the green and blue channels, it remains red
- At the right image we remove the red channel, remain green and blue
- We combine the image by the screen blending method.
The CIKL subroutine will look like this:
kernel vec4 anaglyphRedCyan ( sampler leftSamp , sampler rightSamp )
{
// get the pixel of the left image
vec4 l = sample ( leftSamp , samplerCoord ( leftSamp ) ) ;
// remove green and blue feeds
l . g = l . b = 0.0 ;
// get the pixel of the right image
vec4 r = sample ( rightSamp , samplerCoord ( rightSamp ) ) ;
// remove the red channel
r . r = 0.0 ;
// overlay with the image by the method "Screen"
vec4 ret ;
// red channel
ret . r = 1.0 - ( 1.0 - l . r ) * ( 1.0 - r . r ) ;
// green channel
ret . g = 1.0 - ( 1.0 - l . g ) * ( 1.0 - r . g ) ;
// blue channel
ret . b = 1.0 - ( 1.0 - l . b ) * ( 1.0 - r . b ) ;
// transparency is not used
ret . a = 1.0 ;
//result
return ret ;
}
Use filter
When downloading the main program, you need to insert the code that will load our filter (taking into account that we put it in the Resources folder):- ( void ) loadCoreImageFiltersNow you can use the filter in the same way as other filters:
{
NSString * path = [ [ NSBundle mainBundle ] pathForResource : @ "AnaglyphFilter" ofType : @ "plugin" ] ;
[ CIPlugIn loadPlugIn : [ NSURL fileURLWithPath : path ] allowExecutableCode : YES ] ;
}
CIFilter * anaglyphFilter = [ CIFilter filterWithName : @ "AnaglyphFilter" ] ;
[ anaglyphFilter setDefaults ] ;
[ anaglyphFilter setValue : leftImage forKey : @ "inputImage" ] ;
[ anaglyphFilter setValue : rightImage forKey : @ "rightImage" ] ;
CIImage * anaglyphImage = [ anaglyphFilter valueForKey : @ "outputImage" ] ;
Conclusion
Working with Core Image was not as difficult as it might seem. And here are the results:- source left image:
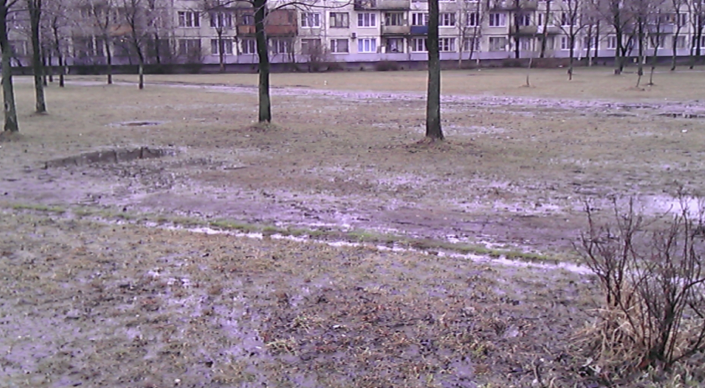
- original right image

- result

Source: https://habr.com/ru/post/142697/
All Articles