Cisco WAP2000-G5 Access Point Overview
Without network services, you can no longer work. Without Wi-Fi or 3G, most modern people associated with IT feel uncomfortable. The task that I had to solve, in general, is simple - to organize the work of a small office in a wireless network for my good friends. Each of the employees does not have a stationary computer, a Wi-Fi enabled printer was already there, so the router was not really needed, and an access point would be enough. It remained to install and configure it. The choice of the customer was made in favor of Cisco WAP2000-G5, the work was successfully completed, and I hot on the heels decided to tell a little and show this device to the audience.

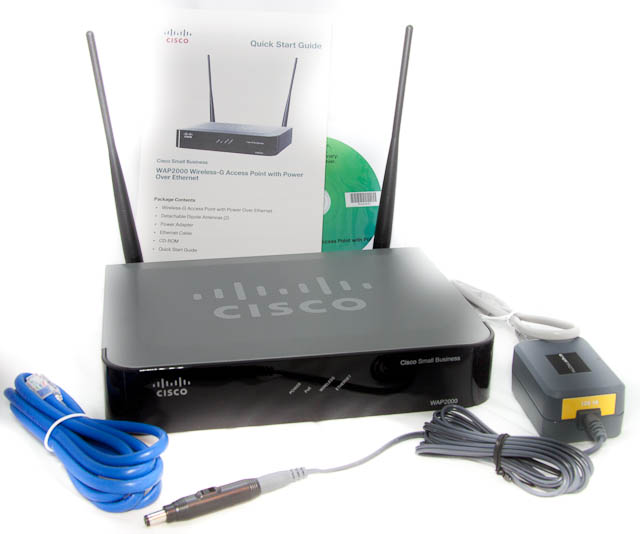
The Cisco WAP2000 access point is focused on the small business segment, so it is not necessary to expect any bright colors from the packaging. A regular brown cardboard box hides the following kit:
• access point
• power adapter
• software disc
• quick start guide
• patch cord
')
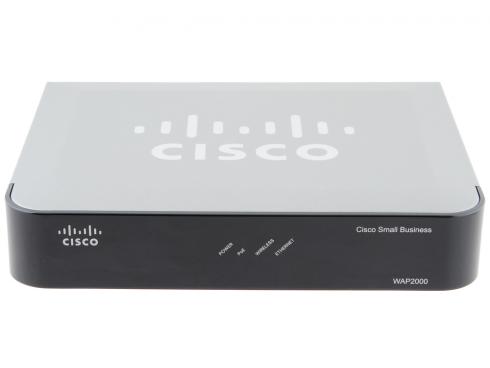
The front panel has 4 green lights. They inform you of the presence of power, the presence of a Power over Ethernet signal, the activity of the Ethernet port and the activity of the wireless network. The logo and the name of the model are applied in the upper left and lower right corners of the front panel, respectively.
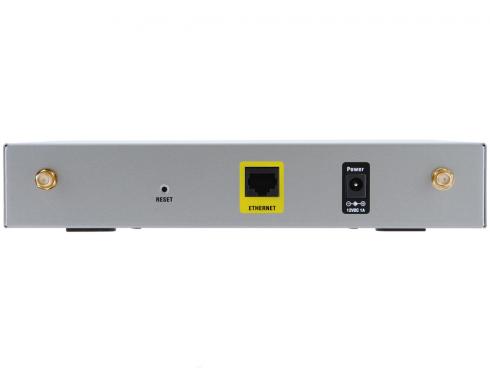
On the back of the device are two connectors for connecting antennas, an Ethernet port, a hole through which a Reset button is available and a connector for connecting a power adapter.
I was very interested in what was inside the device, and the benefit of the warranty seals on the case were missing, I disassembled the access point.
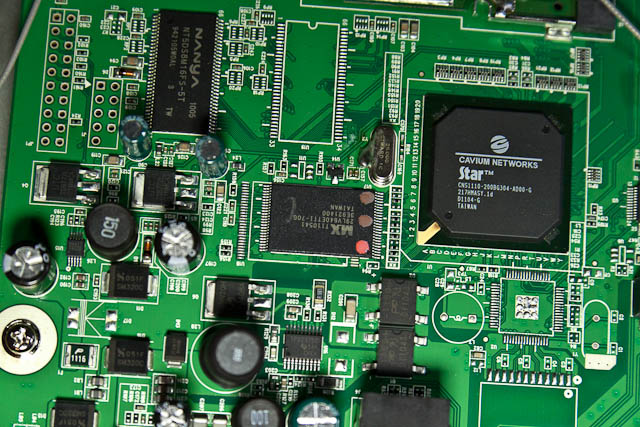
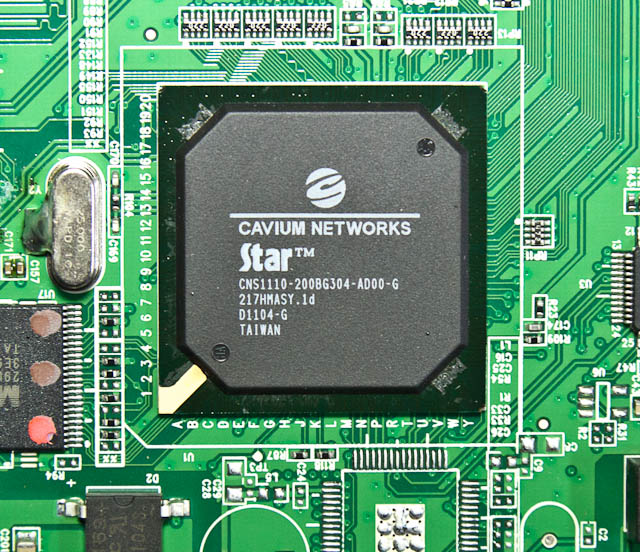
The general view of the insides slightly surprised me, I expected to see something more. On the board of a very modest dimensions, everything necessary for functioning is located. The heart of the device is the Cavium Networks CNS1110 processor.
RAM installed 128 megabytes of DDR. The Nanya production chip operates at 166 MHz with 3-3-3 timings (http://www.nanya.com/NanyaAdmin/GetFiles.ashx?ID=237).

The mini-PCI connector is wired to the board, in which a wireless network adapter based on the RaLink RT2661T chip is installed. It is interesting to note that the wires to the antennas are soldered to the exit points on the card instead of the usual fixing connectors that are customary to see in laptops. The latches holding the card are also soldered, apparently for a secure fit.

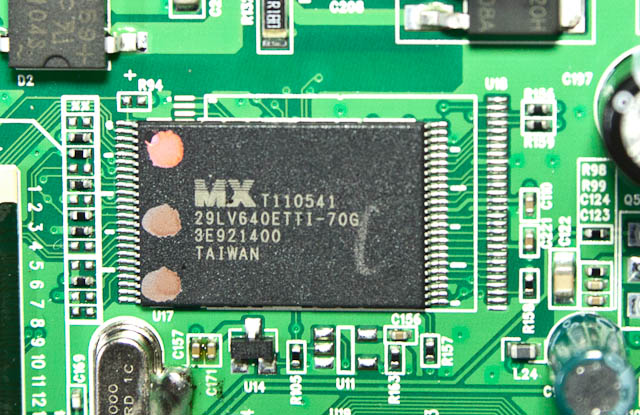
To store the firmware and the settings of the access point, a Macronix chip is used - the MX29LV640E with a capacity of 64 megabytes, that is, 8 megabytes. (http://pdf.pfind.ru/M/MX29LV640ETTI-70G.pdf)
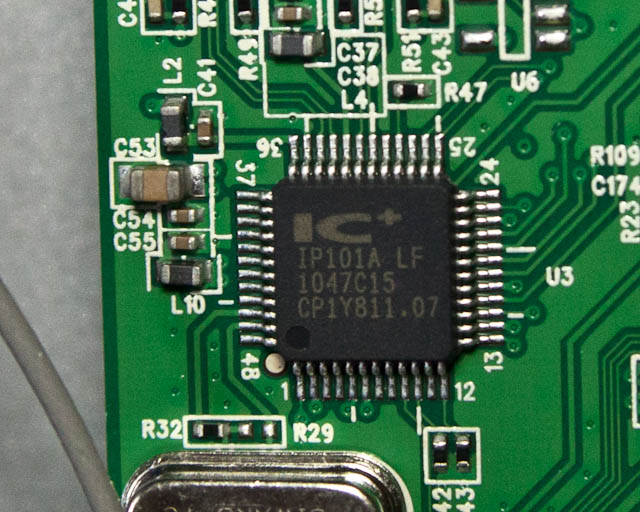
Control of the network interface is entrusted to the IC + IC - IP101ALF chip. (http://www.datasheetarchive.com/dl/Datasheets-2/DSA-36460.pdf). Supported interface speeds up to 100 Mbps.
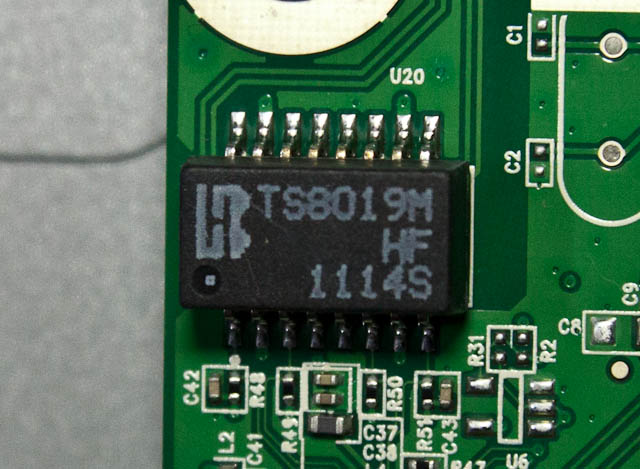
Separately, a module is installed on the board that monitors the operation of VoIP - TS8019M LF (http://www.bothhandusa.com/products/100BaseT/TS8019M%20LF(M)-RevA0-070213.pdf).
So, with a rich inner world everything seems to be clear. Now you need to connect and configure.
The default IP for this product is 192.168.1.248 and the network mask is 255.255.255.0. After entering the default login and password (login: admin pass: admin), the main screen appears with the settings of the access point.
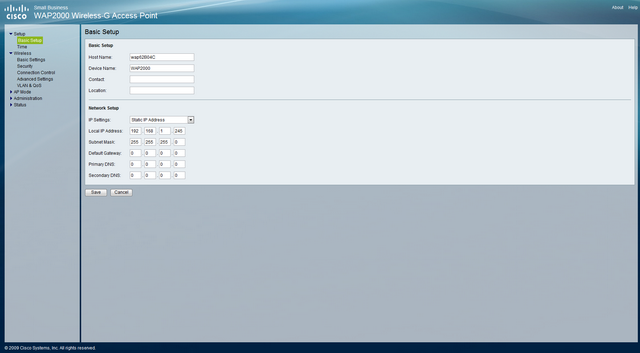
On the Basic Setup page, you can set the host name (network device name), device name, its location, and responsible contact. The network settings are also set here - local IP, network mask, default gateway, primary and secondary DNS.
The Time tab, oddly enough, allows you to manually set the time, date, and time zone, or set synchronization server parameters.

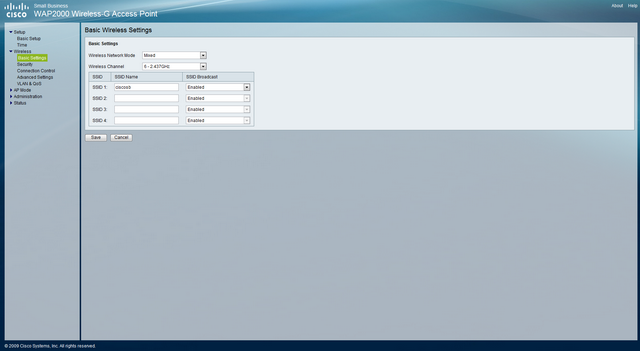
The Wireless item contains several tabs. The first of these: Basic Settings, provides the ability to select the mode of operation of the wireless network - b or g. Here, the work channel is selected and 4 names (SSID) for the Wi-Fi network are set. This is one of the features of the device - you can broadcast several networks simultaneously.
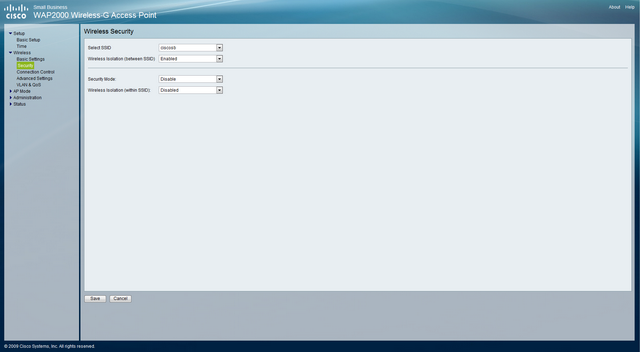
The Security tab provides access to security settings and allows you to isolate different SSID clients from each other.
Connection Control is needed to track connections and set up connection filtering by device MAC address. You can create a "white" or "black list" MAC to prevent unwanted connections. Needless to say, such a list can be made for each of the four SSIDs.

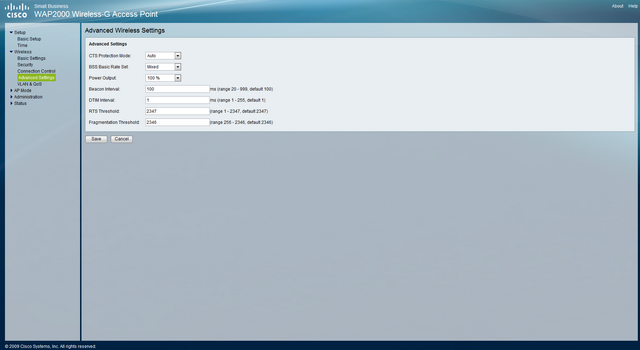
The advanced settings page includes the settings of CTS Protection Mode (selective transmission mode). By default, the Auto item is set, it is recommended to leave this item in this position or put it in Disabled, because turning it on will allow you to receive more transmissions, but will lower the network performance. Below you can adjust the transmitter power in percent. Here you can also set the frequency of sending a beacon - a packet that is transmitted to maintain network synchronization. The RTS Threshold and Fragmentation Threshold values describe the size of the data packets.
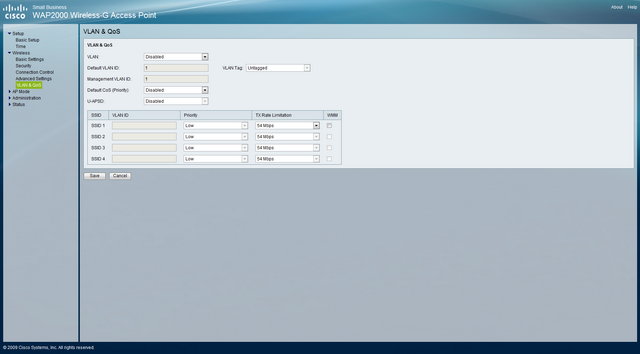
The next tab is used to configure VLAN (VLAN) and QoS (Quality of Service).
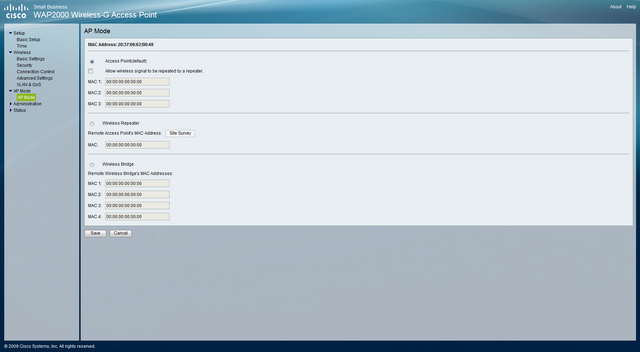
Item AP Mode is responsible for setting the mode of the access point - actually as an access point, as a repeater or as a bridge. Accordingly, you can set the MAC addresses of the associated devices when choosing the desired operation mode.
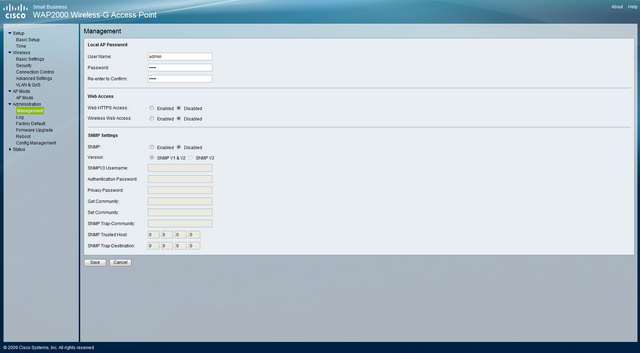
The administrative menu is rich in sub-items, although some of them could be combined. The main tab provides the ability to change the login and password for access, set the ability to access via the Web, and configure the SNMP management protocol.
The Log tab allows you to configure notifications and logging of the access point.

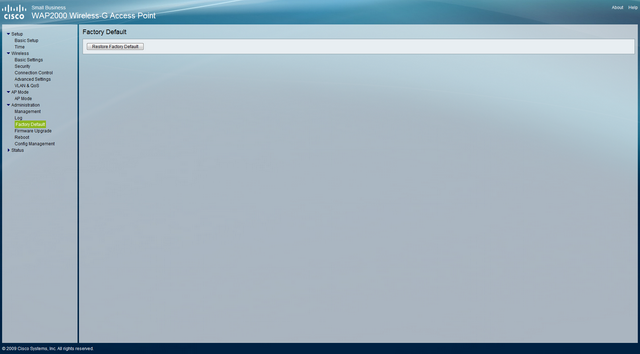
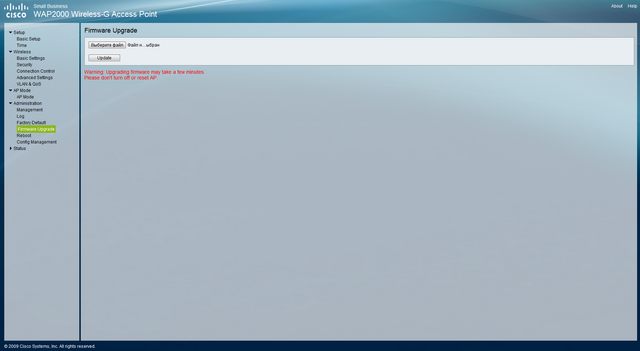
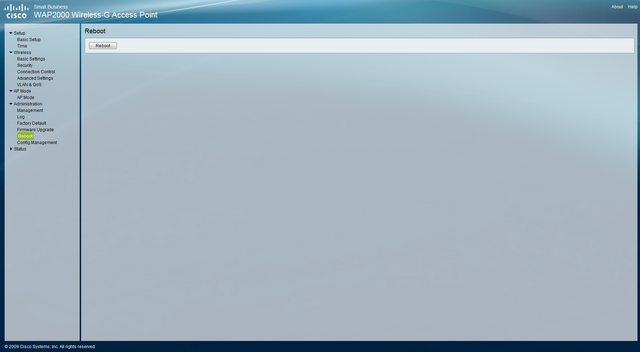
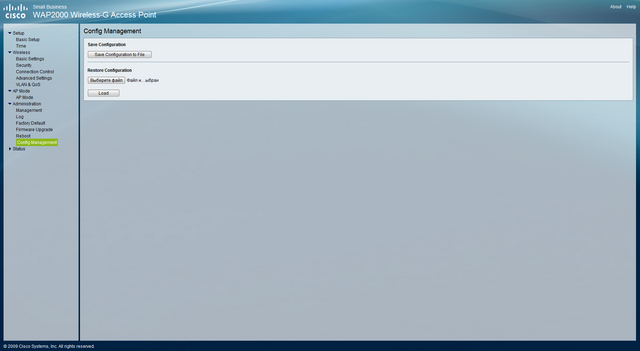
The following four sub-items of the menu are responsible for resetting the settings to factory defaults, updating the firmware from a file, rebooting the access point and saving the settings to a file. I would like to see instead of these four tabs one with all these items on one page.
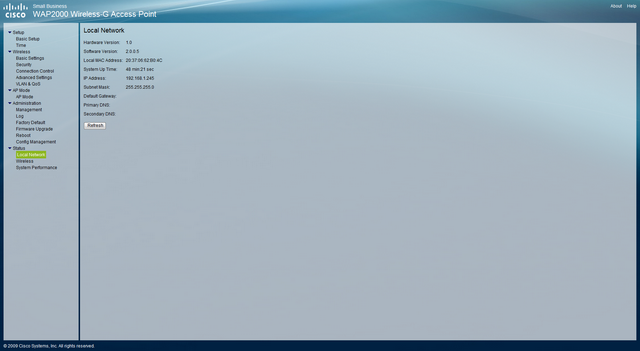
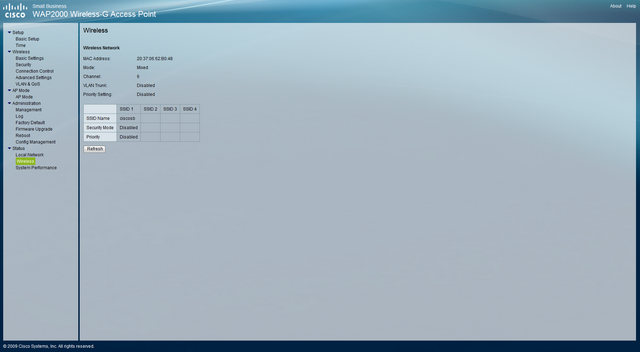
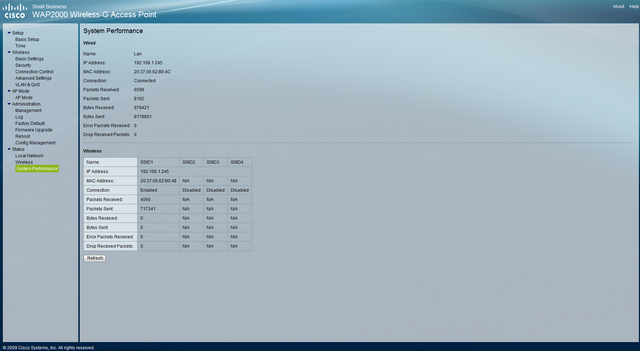
The resulting Status menu will tell you about the status of the Local Network — current versions of hardware and firmware, MAC address, IP, and operating time. The Wireless item will show the status of all connected wireless networks and their settings. System Performance is a kind of final report collected from all menus.
If it speaks of proprietary technologies used in the device, then, of course, it is worth noting RangeBooster, which increases the range of the network. Reliability adds the presence of "spare" firmware with automatic recovery in case of an error during the upgrade.
Briefly list the pros and cons of the Cisco WAP2000 access point
Pros :
• High-quality execution
• Eminent manufacturer
• Additional features (“spare” firmware, 4 SSID, RangeBooster)
• Metal case
• Support Power Over Ethernet
Cons :
• Lack of 802.11n support
The Cisco WAP2000 access point is focused on the small business segment, so it is not necessary to expect any bright colors from the packaging. A regular brown cardboard box hides the following kit:
• access point
• power adapter
• software disc
• quick start guide
• patch cord
')
The front panel has 4 green lights. They inform you of the presence of power, the presence of a Power over Ethernet signal, the activity of the Ethernet port and the activity of the wireless network. The logo and the name of the model are applied in the upper left and lower right corners of the front panel, respectively.
On the back of the device are two connectors for connecting antennas, an Ethernet port, a hole through which a Reset button is available and a connector for connecting a power adapter.
I was very interested in what was inside the device, and the benefit of the warranty seals on the case were missing, I disassembled the access point.
The general view of the insides slightly surprised me, I expected to see something more. On the board of a very modest dimensions, everything necessary for functioning is located. The heart of the device is the Cavium Networks CNS1110 processor.
RAM installed 128 megabytes of DDR. The Nanya production chip operates at 166 MHz with 3-3-3 timings (http://www.nanya.com/NanyaAdmin/GetFiles.ashx?ID=237).
The mini-PCI connector is wired to the board, in which a wireless network adapter based on the RaLink RT2661T chip is installed. It is interesting to note that the wires to the antennas are soldered to the exit points on the card instead of the usual fixing connectors that are customary to see in laptops. The latches holding the card are also soldered, apparently for a secure fit.
To store the firmware and the settings of the access point, a Macronix chip is used - the MX29LV640E with a capacity of 64 megabytes, that is, 8 megabytes. (http://pdf.pfind.ru/M/MX29LV640ETTI-70G.pdf)
Control of the network interface is entrusted to the IC + IC - IP101ALF chip. (http://www.datasheetarchive.com/dl/Datasheets-2/DSA-36460.pdf). Supported interface speeds up to 100 Mbps.
Separately, a module is installed on the board that monitors the operation of VoIP - TS8019M LF (http://www.bothhandusa.com/products/100BaseT/TS8019M%20LF(M)-RevA0-070213.pdf).
So, with a rich inner world everything seems to be clear. Now you need to connect and configure.
The default IP for this product is 192.168.1.248 and the network mask is 255.255.255.0. After entering the default login and password (login: admin pass: admin), the main screen appears with the settings of the access point.
On the Basic Setup page, you can set the host name (network device name), device name, its location, and responsible contact. The network settings are also set here - local IP, network mask, default gateway, primary and secondary DNS.
The Time tab, oddly enough, allows you to manually set the time, date, and time zone, or set synchronization server parameters.
The Wireless item contains several tabs. The first of these: Basic Settings, provides the ability to select the mode of operation of the wireless network - b or g. Here, the work channel is selected and 4 names (SSID) for the Wi-Fi network are set. This is one of the features of the device - you can broadcast several networks simultaneously.
The Security tab provides access to security settings and allows you to isolate different SSID clients from each other.
Connection Control is needed to track connections and set up connection filtering by device MAC address. You can create a "white" or "black list" MAC to prevent unwanted connections. Needless to say, such a list can be made for each of the four SSIDs.
The advanced settings page includes the settings of CTS Protection Mode (selective transmission mode). By default, the Auto item is set, it is recommended to leave this item in this position or put it in Disabled, because turning it on will allow you to receive more transmissions, but will lower the network performance. Below you can adjust the transmitter power in percent. Here you can also set the frequency of sending a beacon - a packet that is transmitted to maintain network synchronization. The RTS Threshold and Fragmentation Threshold values describe the size of the data packets.
The next tab is used to configure VLAN (VLAN) and QoS (Quality of Service).
Item AP Mode is responsible for setting the mode of the access point - actually as an access point, as a repeater or as a bridge. Accordingly, you can set the MAC addresses of the associated devices when choosing the desired operation mode.
The administrative menu is rich in sub-items, although some of them could be combined. The main tab provides the ability to change the login and password for access, set the ability to access via the Web, and configure the SNMP management protocol.
The Log tab allows you to configure notifications and logging of the access point.
The following four sub-items of the menu are responsible for resetting the settings to factory defaults, updating the firmware from a file, rebooting the access point and saving the settings to a file. I would like to see instead of these four tabs one with all these items on one page.
The resulting Status menu will tell you about the status of the Local Network — current versions of hardware and firmware, MAC address, IP, and operating time. The Wireless item will show the status of all connected wireless networks and their settings. System Performance is a kind of final report collected from all menus.
If it speaks of proprietary technologies used in the device, then, of course, it is worth noting RangeBooster, which increases the range of the network. Reliability adds the presence of "spare" firmware with automatic recovery in case of an error during the upgrade.
Briefly list the pros and cons of the Cisco WAP2000 access point
Pros :
• High-quality execution
• Eminent manufacturer
• Additional features (“spare” firmware, 4 SSID, RangeBooster)
• Metal case
• Support Power Over Ethernet
Cons :
• Lack of 802.11n support
Source: https://habr.com/ru/post/142267/
All Articles