"Let's cut off Susanin's foot?" (C)
 The overwhelming majority of those working with microcontrollers once faced a difficult choice:
- So, on this leg of PWM, on this - button, on these - LEDs ... Op-pa ... And the legs are over. Without LEDs ugly, without buttons non-functional. We'll have to take the crystal fatter: (
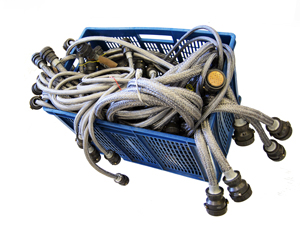
Or another situation - the board with a microcontroller is hidden from sight, but the wiring harness to the indicator with a sad snake pierces the bowels of the device.
It is time to tame this cable-legged monster by truncating the extra legs, and help us in this.
The ADC is such a simple circuit:

And now for those interested in a brief principle of operation.
Most of the time the circuit is engaged in the display. By giving on one leg 1, and on the other 0, we light the corresponding LED. One combination gives green color, the second red, and if you quickly pull back and forth, you get orange.
With the display sorted out, and now about the buttons. Suppose that on Port2 we provide a logical 0, and we turn on Port1 as an input for the built-in ADC. In this case, thanks to the resistor R1, we get some small potential on the LED. Please note that the green LED is turned on in the forward direction. As you know, green (and yellow, by the way, too) LEDs have a noticeably greater direct voltage drop than red ones. In our case, this voltage is quite enough to reliably read the state of the pressed buttons. When you press any of them, a voltage divider is obtained, and now it is enough just to digitize the received signal and transcode to the button press. By the way, even if you confuse the polarity of the inclusion of wires - with the correct selection of dividers, the buttons will remain operable, unless the display is messed up. The choice of resistors R3 and R4 is quite free, the main thing to remember are two rules - a smaller resistor should not interfere with lighting the LEDs, and a larger resistor should give a voltage drop sufficient for reliable detection. I just put the nominal values on the diagram from those that were lying around at hand, and then I simply registered the resulting voltages in the program. R2 - current-limiting, selected on the basis of the LEDs used and the parameters of the legs of the microcontroller, sometimes you can do without it at all.
And now the actual library to work with this scheme. In this particular case, ATMega48 was used as a platform, but I tried to write the code as iron-independent as possible, and to switch to another crystal, it is enough to change the initialization of the port and the ADC.
/* * biwire.h */ #ifndef BIWIRE_H_ #define BIWIRE_H_ // Define connections (PORTC only!) #define BWPORT1 1 #define BWPORT2 2 // Set pin functions #define ADCPORT BWPORT1 #define GNDPORT BWPORT2 // State for interrupt loop #define ADC_SET 0x01 #define ADC_WAIT 0x02 // LED flashing frequency (in parrots, without small wing) #define SCAN_FREQ 48 // Work together with SCAN_FREQ to get orange color #define MAX_COLOR_MIX 50 // Event bits when scan complete // Main keyboard event indicator - must be cleared after handle #define BW_EVENT 0x80 // Button pressed #define BW_EVBT1 0x01 #define BW_EVBT2 0x02 // add additional flags here, like BW_EVBT3=0x04 // EVFIN - event "Indication finished" #define BW_EVFIN 0x10 // Button released #define BW_EVOPN 0x20 // If button holds more than BW_LONG_PRESS cycles #define BW_EVLNG 0x40 // How long we wait for 'LongPress' #define BW_LONG_PRESS 10 Here you can write approximate values plus or minus bus stop. The main thing for us is to set boundaries for the precise definition of buttons. // ADC compare values #define BW_VBTN1 0x1F #define BW_VBTN2 0xFE // Define names for signal array enum SignalNames { LedOff = 0, OneGreen = 1, OneRed = 2, OneOrange = 3, TwoGreen = 4, TwoRed = 5, Alarm = 6, OrangeRG = 7 Similarly, add your signals to taste }; // ====== Externals ======= // LED sequence to indicate extern volatile enum SignalNames BwIndicate; // Data about button events extern volatile uint8_t BwButton; // If not null - delay of led indication, then switch LED off extern volatile uint8_t BwLedDelay; // Call on start void biwire_init(void); #endif /* BIWIRE_H_ */ Download .h
Well, the source itself:
/* * biwire.c */ #include <avr/io.h> #include <avr/interrupt.h> #include <stdint.h> #include "biwire.h" // Led blink matrix. Only upper 6 bits used for indication loop static uint8_t bwsignalsR[] = { 0x00, 0x00, 0xC0, 0xC0,0x00, 0xA0, 0xA0, 0xFC }; static uint8_t bwsignalsG[] = { 0x00, 0xC0, 0x00, 0xC0,0xA0, 0x00, 0x50, 0xC0 }; // LED sequence to indicate volatile enum SignalNames BwIndicate; // FSM and sequence counter static volatile uint8_t BwState; // "LongPress" counter static volatile uint8_t btn_cnt; // Data about button events volatile uint8_t BwButton; // Orange color created by mixing green and red static volatile uint8_t color_mix; // If not null - delay of led indication, then switch LED off volatile uint8_t BwLedDelay; void biwire_init(void) { // Timer interrupt TCCR0B = _BV(CS00) | _BV(CS01) | _BV(WGM02); // use CLK/64 prescale value, clear timer/counter on compareA match OCR0A = SCAN_FREQ; // preset timer0 OCR byte TIMSK0 = _BV(OCIE0A); // enable Output Compare 0 overflow interrupt // PIN init DDRC |= _BV(BWPORT1) | _BV(BWPORT2); // ADC init ADCSRA = _BV(ADEN) | _BV(ADPS2); // Activate ADC with Prescaler 16 --> 1Mhz/16 = 62.5kHz ADMUX = ADCPORT | _BV(REFS0) | _BV(REFS1) | _BV(ADLAR); // Select input pin using MUX, left adjust and Internal reference Atmel's internal reference is just 1.1 volts, which in the absence of pressed buttons gives a reliable and impenetrable 0xFF at the ADC output. DIDR0 = _BV(ADCPORT); // disable digital input for ADC // Set initial state for bw BwState = ADC_SET; BwIndicate = OneGreen; BwButton = BW_EVOPN; color_mix = 0; BwLedDelay = 0; } Timer interruption can be customized to your liking. Playing dividers and color_mix you can select the speed of the flash and the reaction time at the touch of a button. SIGNAL (SIG_OUTPUT_COMPARE0A) // handler for Output Compare 0 overflow interrupt { if (BwState&ADC_SET) { // Prepare to keyscan PORTC &= ~_BV(GNDPORT); DDRC &= ~_BV(ADCPORT); ADCSRA |= _BV(ADSC); //Start conversion BwState = ADC_WAIT; color_mix = MAX_COLOR_MIX; if (BwLedDelay) if (!(--BwLedDelay)) { BwIndicate = LedOff; BwButton |= BW_EVFIN; } } else { if (BwState&ADC_WAIT) { // Check if ADC complete if (ADCSRA & _BV(ADSC) ) return; // Wait another tick PORTB = ADCH; if (ADCH > BW_VBTN2) { // Both buttons open if (BwButton & (BW_EVBT1|BW_EVBT2)) { BwButton = BW_EVENT + BW_EVOPN; btn_cnt = 0; } } else if (ADCH > BW_VBTN1) { // Button 2 pressed PORTB ^= 0xff; if (BwButton & (BW_EVBT1|BW_EVOPN)) { BwButton = BW_EVENT + BW_EVBT2; btn_cnt = 1; } Similarly, you can determine the range for the third and all subsequent buttons, but with accuracy of operation you will have to tinker } else { // Button 1 pressed. Add compare values here if you need more than 2 buttons if (BwButton & (BW_EVBT2|BW_EVOPN)) { BwButton = BW_EVENT + BW_EVBT1; btn_cnt = 1; } } if (btn_cnt) { if(++btn_cnt > BW_LONG_PRESS) { // New event - long press BwButton |= BW_EVENT + BW_EVLNG; btn_cnt = 0; } } // Cleanup if (!(BwButton&(BW_EVBT1|BW_EVBT2|BW_EVOPN))) BwButton = BW_EVOPN; } If you don’t skip through the ADC_WAIT state here, then you can add the seventh bit to the LED blinking cycle. But I have six bits enough. And for a sixteen-bit BwState, you can make a crazy disco in general from LEDs. if (color_mix++ > MAX_COLOR_MIX) { // Get next state (LED sequence) BwState = (BwState >> 7) | (BwState << 1); // rotate left, replace by _asm to compact code // Indicate DDRC |= _BV(ADCPORT); PORTC &= ~(_BV(GNDPORT)|_BV(ADCPORT)); if(bwsignalsR[BwIndicate]&BwState) PORTC |= _BV(BWPORT2); if((bwsignalsG[BwIndicate]&BwState) && (!(bwsignalsR[BwIndicate]&BwState)) ) PORTC |= _BV(BWPORT1); color_mix = 0; } if((bwsignalsR[BwIndicate]&BwState) && (bwsignalsG[BwIndicate]&BwState)){ PORTC ^= (_BV(BWPORT1) | _BV(BWPORT2)); } } } Download .c
That's all. Paste this code into your sources and save wires and legs. Of the minuses - perhaps a somewhat "stupid" reaction to the button, but you get used to it quickly.
You can also add a third array after bwsignalsR / bwsignalsG, for example bwsignalsB, and use it to make dimming for smooth on-off. I will leave it to you as a homework :)
')
Oh yeah, I almost forgot. Example of working with the library:
#include "biwire.h" int main(void) { biwire_init(); sei(); while (1) { if ( BwButton & BW_EVENT ) { BwButton &= ~BW_EVENT; // Clear event flag if (BwButton & BW_EVLNG) { BwIndicate = OrangeRG; BwLedDelay = 5; } else if (BwButton & BW_EVOPN) { //BwIndicate = LedOff; } else if (BwButton & BW_EVBT1) { BwIndicate = OneRed; BwLedDelay = 5; } else if (BwButton & BW_EVBT2) { BwIndicate = OneGreen; BwLedDelay = 5; } } } } PS: Strange, is something vaguely remembered to me that in the old engine it was possible to directly paste source files from PasteBin? Why was such a good opportunity removed? Or am I confusing something?
Source: https://habr.com/ru/post/141696/
All Articles