Creating scenes for Flash games using StencylWorks
In short, StencylWorks is a designer for creating Flash and iOS games. A more detailed description can be found here .
Let's try to find out whether it’s really possible to create simple things in it so quickly, as the creators of the platform say.
In this article we will try to create an actor, a scene, apply actions and tilesets to them.
To create a game in StencylWorks, the first thing that is needed is an actor. In the projected game, all elements that have any actions and behavior are actors.
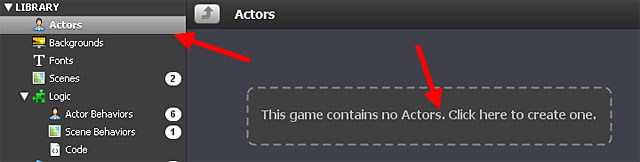
After the first click on the actors library (“Actors” library), you will see a warning that the game does not contain actors yet. In the process of creating the game, the developer will be shown a lot of such warnings, which, in fact, are tips for further action.
')
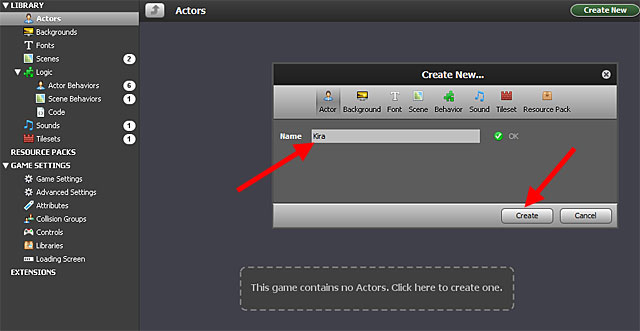
Give the actor a name and click Create.
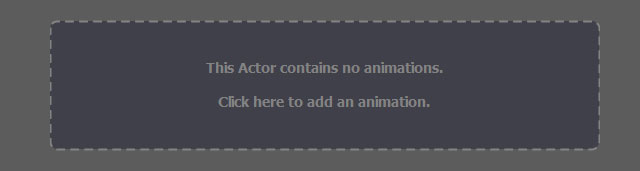
You will see a warning that the created actor has no animation. Clicking this warning will fill this space.
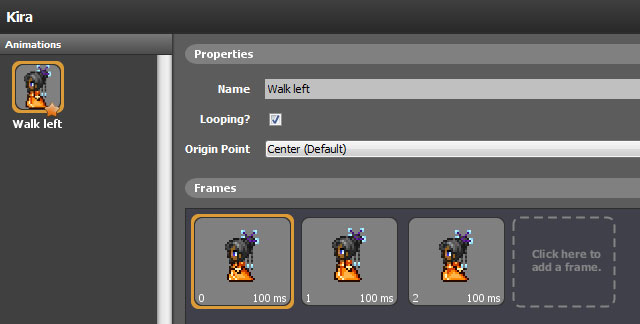
Give a new animation a name, for example, Walk left and click to create a new frame.
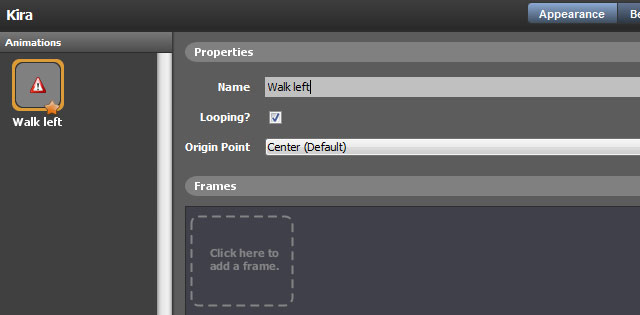
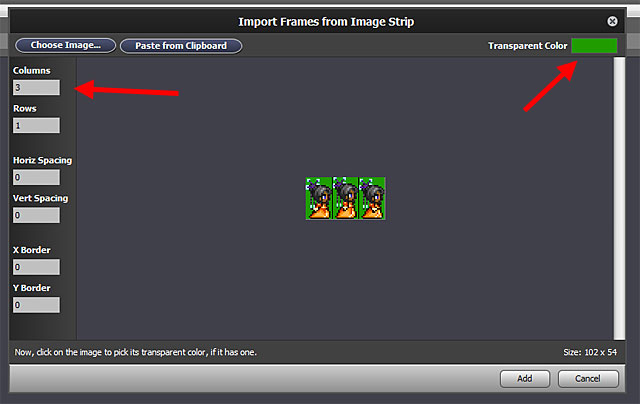
Then you can import frame-by-frame animation or load a storyboard image and set how many rows and columns of it need to be imported. Here you can also set some other parameters, such as transparent color (the so-called “transparency color”).
Since the image of the storyboard is automatically combined into frames, in fact, we immediately get the finished animation of movements left-right, up and running. In the left panel there is a possibility to preview the final animation, in the main panel the animation is viewed frame by frame.
By repeating the above steps, a new animation is created in the game. An asterisk (in the panel on the left) marks the default animation, that is, the one that is applied to the actor at first, as soon as he appears in the game. Also, the animation can consist of only one frame.

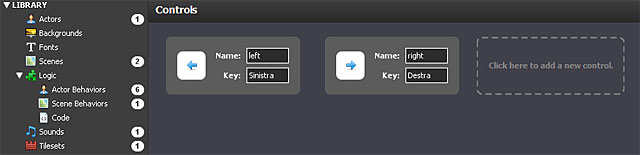
Spending relatively little time, we got an animated character. It's time to ask for management. In our case, this is done by naming the keys used for this. Now everything is ready to create a tileset.
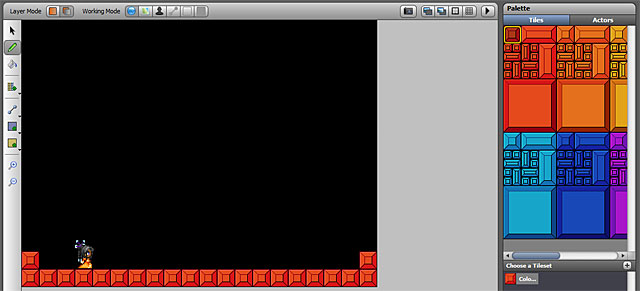
A tileset is a background cut into pieces that are then added to the game.
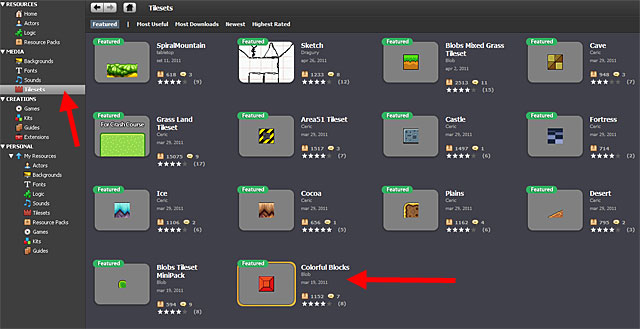
Tileset is created no more difficult than animation, in this case the “Colorful Blocks” component from the Media section is used.
Actor and tileset - the main elements of any scene. And this is how it is created:
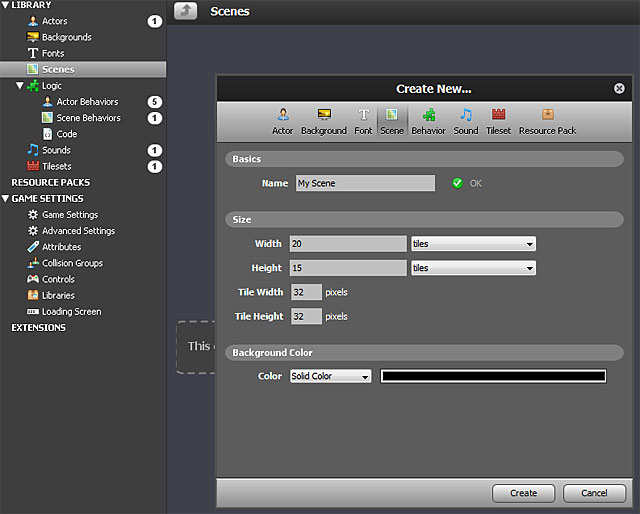
After creating the scene, drag our tilesets and actors onto it.
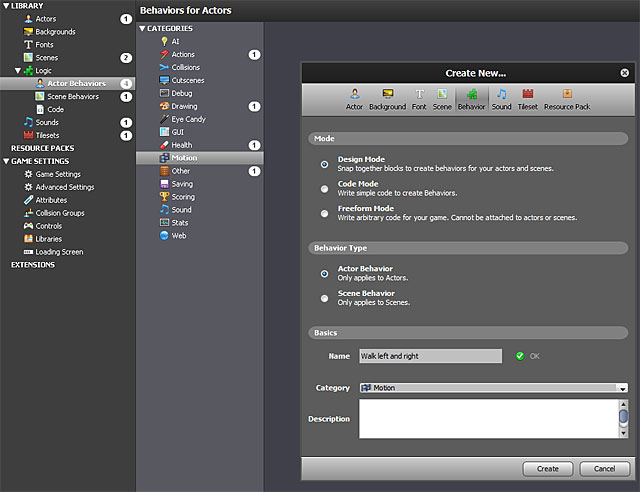
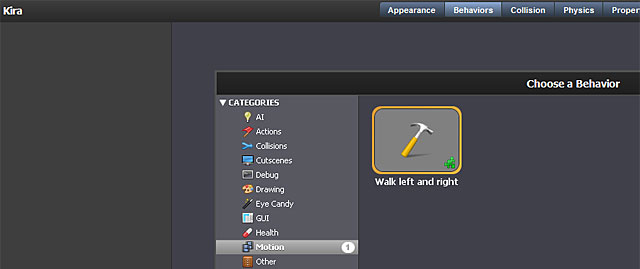
And finally, you need to define a specific set of behaviors (behaviors) that will define actions, for example, how an actor moves.
To set the behavior, use the developer mode (design mode). Determine how the movements of the actor will occur to the right and left.
The bottom of the figure shows the behavior screen, on the left is a visual display of the code, on the right is a set of elements for creating various combinations of actor's behaviors.
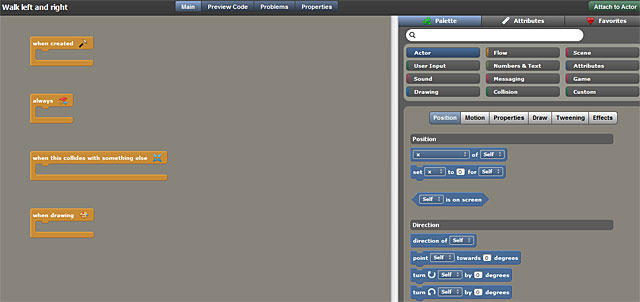
This is the ultimate model of our actor's behavior:

Let's comment on what we did.
The always block is the same as the Event.ENTER_FRAME listener. Further, if the arrow “Right” is pressed, then move our actor to the right showing the corresponding animation, try to decode the remaining blocks of the visual code yourself, I think there will be no special problems with this.
Translation of visual code in ActionScript listing:
Now apply the described behavior to our actor.
What about collisions (collisions, interactions of our actor with other objects of the scene)? All this is provided and is initially controlled by default settings.
And here is the result .
The text was prepared on the basis of a free translation of an article by an English-language blog of an Italian game developer.
Let's try to find out whether it’s really possible to create simple things in it so quickly, as the creators of the platform say.
In this article we will try to create an actor, a scene, apply actions and tilesets to them.
To create a game in StencylWorks, the first thing that is needed is an actor. In the projected game, all elements that have any actions and behavior are actors.
After the first click on the actors library (“Actors” library), you will see a warning that the game does not contain actors yet. In the process of creating the game, the developer will be shown a lot of such warnings, which, in fact, are tips for further action.
')
Give the actor a name and click Create.
You will see a warning that the created actor has no animation. Clicking this warning will fill this space.
Give a new animation a name, for example, Walk left and click to create a new frame.
Then you can import frame-by-frame animation or load a storyboard image and set how many rows and columns of it need to be imported. Here you can also set some other parameters, such as transparent color (the so-called “transparency color”).
Since the image of the storyboard is automatically combined into frames, in fact, we immediately get the finished animation of movements left-right, up and running. In the left panel there is a possibility to preview the final animation, in the main panel the animation is viewed frame by frame.
By repeating the above steps, a new animation is created in the game. An asterisk (in the panel on the left) marks the default animation, that is, the one that is applied to the actor at first, as soon as he appears in the game. Also, the animation can consist of only one frame.
Spending relatively little time, we got an animated character. It's time to ask for management. In our case, this is done by naming the keys used for this. Now everything is ready to create a tileset.
A tileset is a background cut into pieces that are then added to the game.
Tileset is created no more difficult than animation, in this case the “Colorful Blocks” component from the Media section is used.
Actor and tileset - the main elements of any scene. And this is how it is created:
After creating the scene, drag our tilesets and actors onto it.
And finally, you need to define a specific set of behaviors (behaviors) that will define actions, for example, how an actor moves.
To set the behavior, use the developer mode (design mode). Determine how the movements of the actor will occur to the right and left.
The bottom of the figure shows the behavior screen, on the left is a visual display of the code, on the right is a set of elements for creating various combinations of actor's behaviors.
This is the ultimate model of our actor's behavior:
Let's comment on what we did.
The always block is the same as the Event.ENTER_FRAME listener. Further, if the arrow “Right” is pressed, then move our actor to the right showing the corresponding animation, try to decode the remaining blocks of the visual code yourself, I think there will be no special problems with this.
Translation of visual code in ActionScript listing:
package scripts { import flash.display.BlendMode; import flash.events.*; import flash.net.*; import flash.filters.*; import Box2DAS.Collision.*; import Box2DAS.Collision.Shapes.*; import Box2DAS.Common.*; import Box2DAS.Dynamics.*; import Box2DAS.Dynamics.Contacts.*; import Box2DAS.Dynamics.Joints.*; import stencyl.api.data.*; import stencyl.api.engine.*; import stencyl.api.engine.actor.*; import stencyl.api.engine.behavior.*; import stencyl.api.engine.bg.*; import stencyl.api.engine.font.*; import stencyl.api.engine.scene.*; import stencyl.api.engine.sound.*; import stencyl.api.engine.tile.*; import stencyl.api.engine.utils.*; import org.flixel.*; import mochi.as3.*; import flash.ui.Mouse; public dynamic class Design_13_13_Walkleftandright extends ActorScript { override public function init():void {} override public function update():void { if (isKeyDown("right")) { actor.setXVelocity(7); actor.setAnimation("Walk right".toString()); } else if (isKeyDown("left")) { actor.setXVelocity(-7); actor.setAnimation("Walk left".toString()); } else { if (sameAs(actor.getXVelocity(), 7)) { actor.setXVelocity(0); actor.setAnimation("Stand right".toString()); } else if (sameAs(actor.getXVelocity(), -7)) { actor.setXVelocity(0); actor.setAnimation("Stand left".toString()); } } } override public function handleCollision(event:Collision):void { } override public function draw(g:Graphics, x:Number, y:Number):void { } public function Design_13_13_Walkleftandright(actor:Actor, scene:GameState) { super(actor, scene); nameMap["Actor"] = "actor"; } override public function forwardMessage(msg:String):void { } } } Now apply the described behavior to our actor.
What about collisions (collisions, interactions of our actor with other objects of the scene)? All this is provided and is initially controlled by default settings.
And here is the result .
The text was prepared on the basis of a free translation of an article by an English-language blog of an Italian game developer.
Source: https://habr.com/ru/post/141648/
All Articles