Lightcube (photobox, lightbox) do-it-yourself for 300r
Suppose you want to make high-quality photos of the gadget for review, or you are interested in subject shooting at home, but only an inexpensive soap dish is at hand. How to be? You need a lightcube! About how I made my inexpensive but durable lightcube, examples of photos and much more - under the cut.
')
What is it?
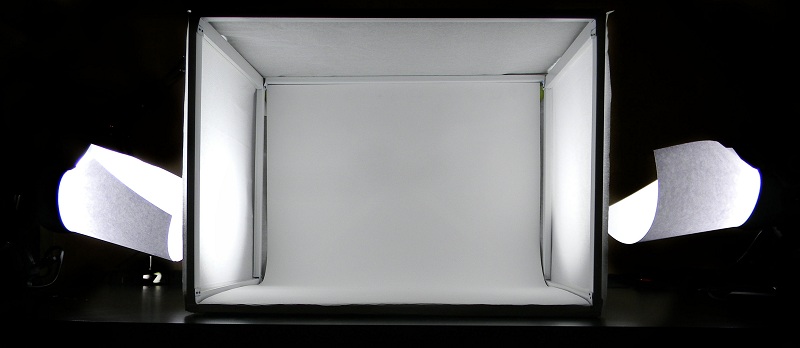
Lightcube is a construction of plastic / metal frames in the form of a cube, on the sides of which there is a stretched translucent scattering fabric. The bottom and back wall of such a cube are the “subject” table. It looks like this:

What for?
The reasons may be very different:
• Like photos on a white background
• I want to have my own “mini-studio”
• Interested in subject / macro shooting
• Conditions in the apartment do not allow to achieve high-quality photos.
• Like to work with your hands.
I decided to make a lightbox, because I wanted to get high-quality photos, but in my apartment there are absolutely inappropriate conditions for this - it is “dark”, the sun practically does not fall into it. With indoor lighting, photographs were rarely good. Lightbox solved all these problems.
Why exactly?
On the net you can find many articles on how to make your own lightcube from a cardboard box. And I had such a cube.
At first I liked everything about him, but gradually minuses began to appear: the speed of production negatively affects life expectancy, periodically there was not enough lightbox sizes (my last “cube” measured 35 * 35 * 40 cm), the cardboard skeleton is easily damaged when replacing “diffusers "And the subject table (they are torn and dirty with time).
Therefore, I decided to replace the skeleton of the “cube” with a more durable one, and to make it as large as I need, and not to start from the size I have cardboard boxes.
Design
The idea to make a skeleton from a wire box came spontaneously during a visit to the hardware store - for my “cube” I took 3 sticks, 2 meters in length.
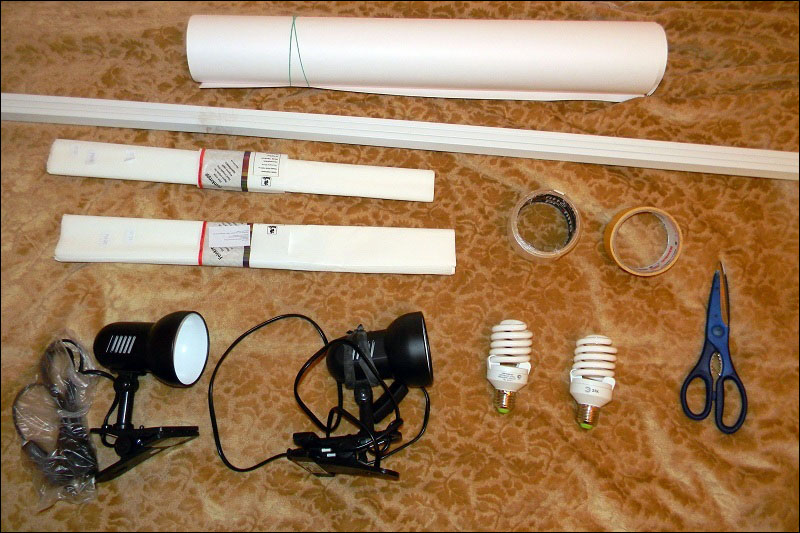
To create a lightbox you will need
• Whatman
• Wire box
• Corrugated paper
• Double-sided tape
• Small carnations
Box ~ 160r, Whatman ~ 20r, Corrugated paper ~ 50r, Scotch ~ 40r, carnations ~ 30r. Total 300r.
Shine
In the photo at the beginning of the last section you can see 2 lamps and 2 lamps. Before that, I had a table lamp and a “peg” lamp, but they had different bases. I decided to purchase the second one with the same “clothespin” and take two energy-saving lamps - 23W (corresponds to 160W for an incandescent lamp), 4200K (bright white light). Such 2 lamps and 2 lamps will cost 800-900r.
Assembly
Immediately make a reservation - I do not pretend to optimal design, because how to connect the faces of the "cube" with each other, I decided to "on the go." But I liked the result that turned out, and I decided to tell about it.
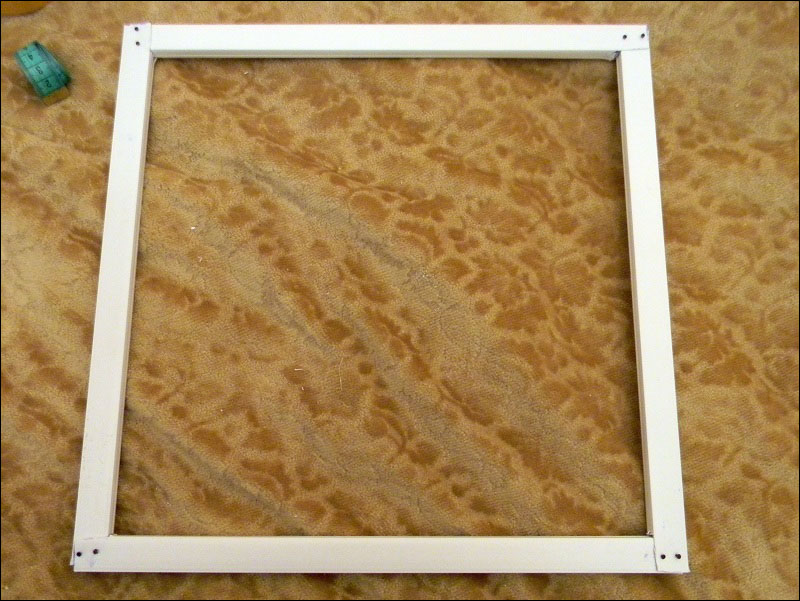
The boxes were cut as follows: 4 pieces of 50cm each and 8 pieces of 35cm each (it seemed to me that these lightbox sizes were optimal for use / storage):

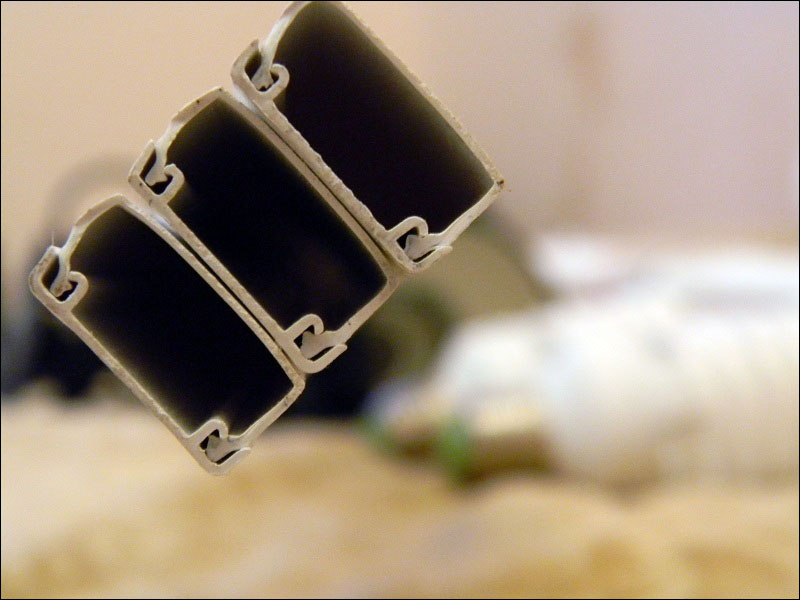
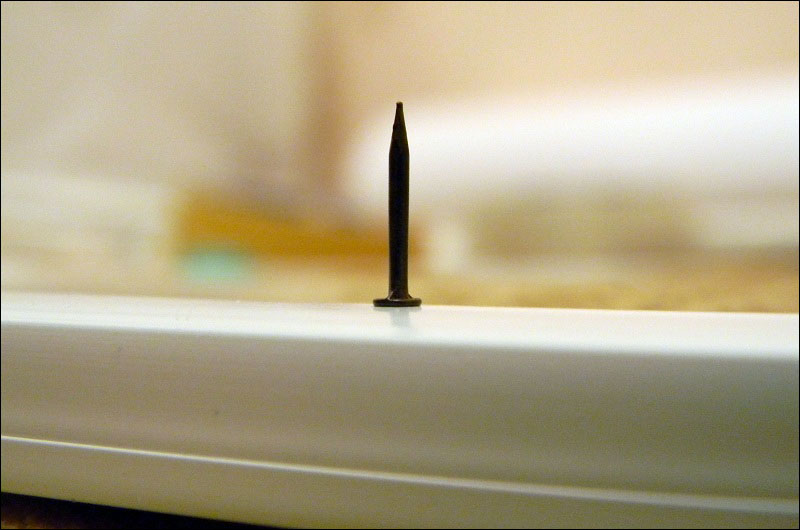
In order to connect the “sticks” to each other, I used the box feature - a hollow design:
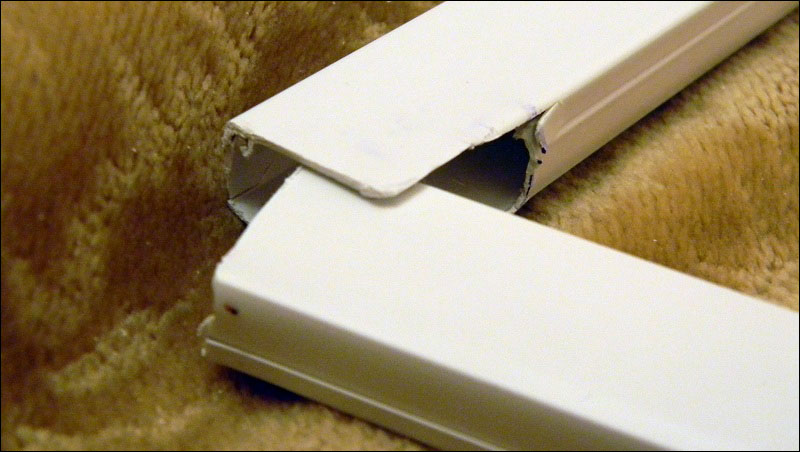
And he fixed the joints with small carnations:
First made the sides:
And then again used the hollow box construction for the construction of the base:

After some time, the skeleton was ready:

When I fastened all the sticks together and got a parallelepiped, I decided to add two stretch marks to the back wall to increase strength and stability. Stretching made from the remaining parts. Also added one “rail” to the bottom, so that the future bottom of the cardboard does not sag down.
After he attached the bottom and stuck the paper paper (to create a “subject table”):

At the end I pasted corrugated paper on the sides and on top of the lightbox:
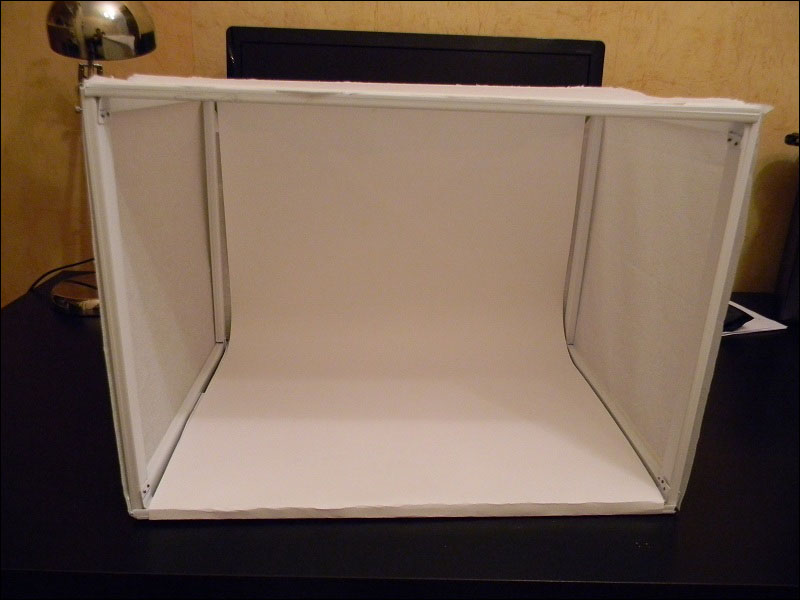

All lightbox ready. With its large size, the lightbox turned out to be strong - it does not stagger and does not bend. For the sake of experiment, a couple of times "accidentally" dropped the design from the table - the skeleton remained intact, even the paper from the sides did not have to be changed. And if the lightbox turned out to be quite durable with such dimensions, then if it were smaller, say 20x20x20cm, then it would be even stronger. And such a photobox is easy to make those sizes, what you want.
Result
"Working" condition of the lightbox:
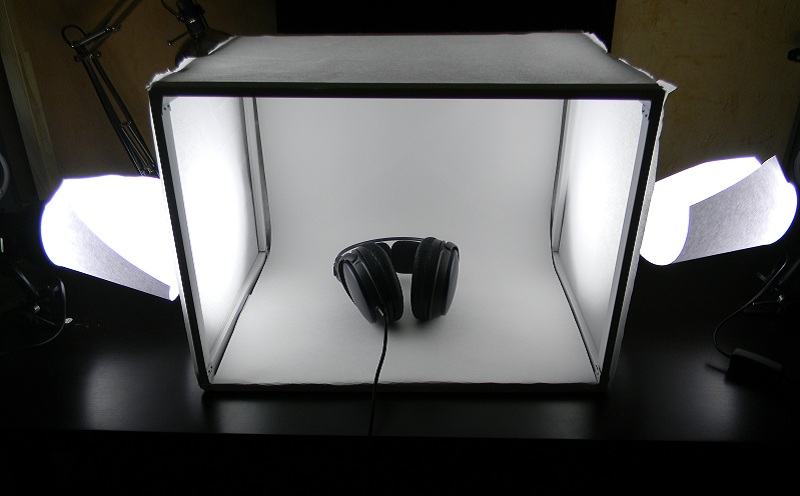
The purchased bulbs noticeably “crawl out” of the luminaire body, so I made a “continuation” of the body from paper to better focus the light on the lightbox, as well as to prevent direct rays from falling into the eyes.
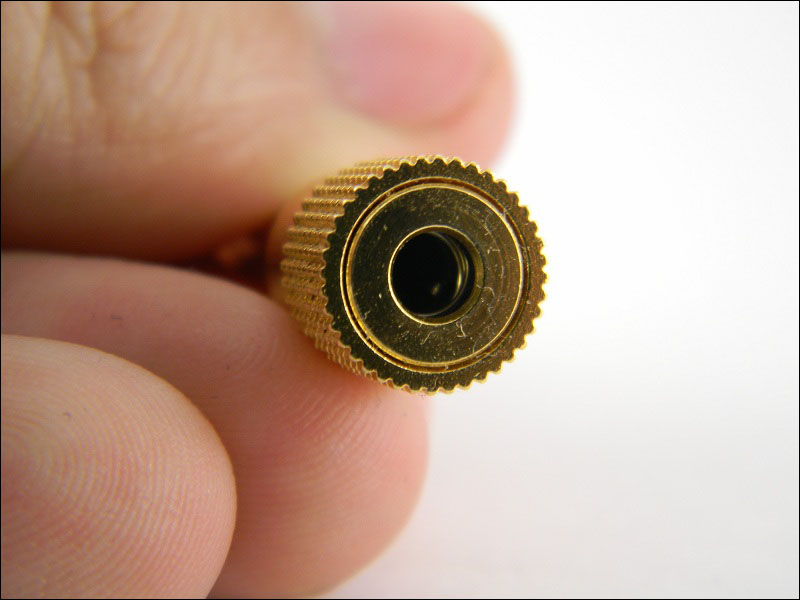
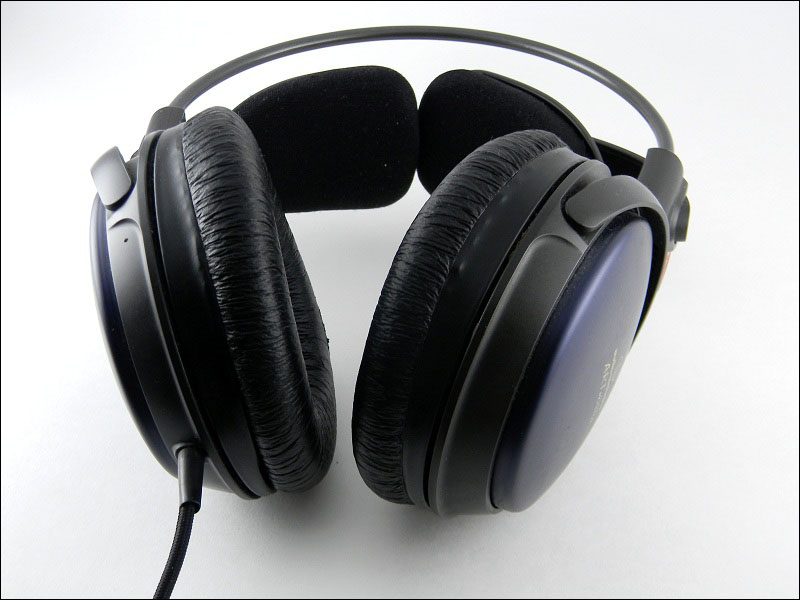
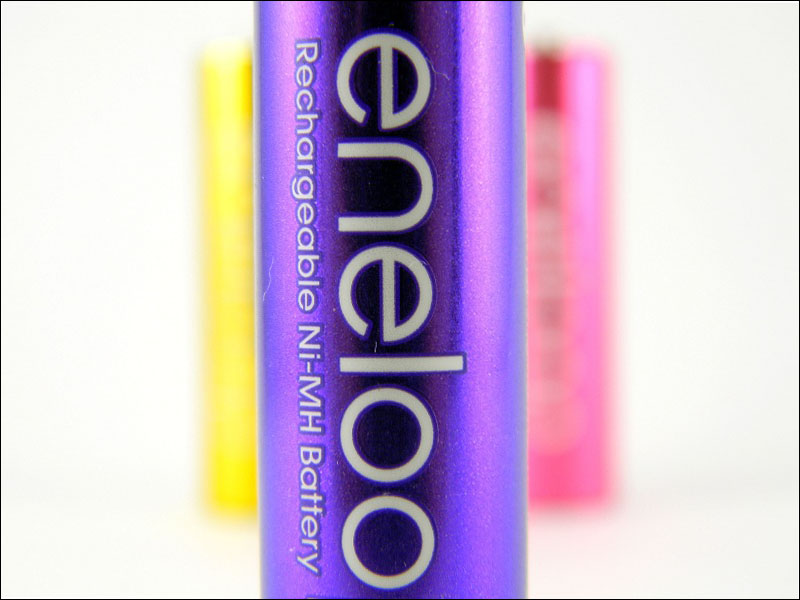
Photo examples
For a couple of years my camera has been the Nikon Coolpix L110 (budget hyperzoom). All the pictures were taken using it.


Total
It turned out an inexpensive but durable lightbox, the price of which is only 300 rub. I hope someone this article is useful.
Good luck with the experiments!
Source: https://habr.com/ru/post/141164/
All Articles