Casket with music lock
Introduction
What only locks have come up with! And with a cunning key, and a combination of numbers, and with the recognition of body parts. However, I wanted to make a lock, which I have not yet met. Since I am fond of playing the piano, I did not have to go far for the idea: it was decided to make a box that opens only after “hearing” a familiar melody.
In this post I would like to tell you about the algorithm for recognizing the melody, about the control scheme and about the process of creating the box.
')
What happened
Melody recognition
As you know, what we perceive as sound can be considered as air pushing into the eardrum. Air pressed - nerve registered. What we perceive as a note can be considered as an impulse with a constant period. In other words, if this nerve is tickled 130 times per second, we will “hear” the “before” note.
A device that recognizes notes, tries to understand how many times a second a microphone tickled him and what frequency it turned out (and, therefore, a note). The transition from frequency to note is a simple thing, there is a table “frequency → note” .
There are several different algorithms that convert microphone data into frequencies. The most famous is the Fourier transform . The principle of operation is as follows: at the entrance, with what force, the air was pushed on the microphone at each moment of time. At the output - how much what frequency was contained. His work is best explained by a picture:

So it would be possible to realize the recognition of notes. At each time point, determine which frequency is loudest. If it coincides with the expected, go to the recognition of the next note or open the lock, if the melody is over.
However, we will go the other way. It is not necessary for us to know exactly which notes play. We just need to find out if the note we are waiting for is playing at the moment. Görtsel's algorithm comes to the rescue. This algorithm is used in telephony when it is necessary to determine the tone. The essence is simple: the algorithm is given the desired frequency and data from the microphone, and he answers what the “loudness” of the desired frequency is.
You can look at the implementation of the algorithm in the NoteDetector.cpp file.
Component selection
I stopped at pretty standard components. That's what helped me:
ATMega328P with a crystal at 16Mhz - the "brain" of the device. The choice fell on him, since it was too easy to work with him.
Electret microphone with an OPA344 amplifier - these two devices were sold as a kit on a single board on the Sparkfun website . Data from this device can be read directly from the analog input of the microcontroller.
 Servo Spektrum SPMAS2000L - this servo opens and closes the lock. I was very glad I found such a detail. Servo works from 3.3V and supports the usual protocol. This is a linear actuator, that is, instead of a rotating head, the actuator has a slider that moves about an inch to the right and left. On the sides - ears for attachment.
This motor is usually used in the world of aeromodelling. As far as I understand, they regulate the deviations of the ailerons. You can read about it on the manufacturer's website .
The TPS2020 is an excellent switch with very low power consumption when it is turned off (10 μA). It will control the power of the servo.
The LM2936Z regulator is a 3.3V linear regulator with a small current at the operating point (≤ 15 μA). What you need for our device, which will be powered by a battery.
The MAX1555 charger is a chip that controls battery charging and flashes a light when the battery is full.
Scheme
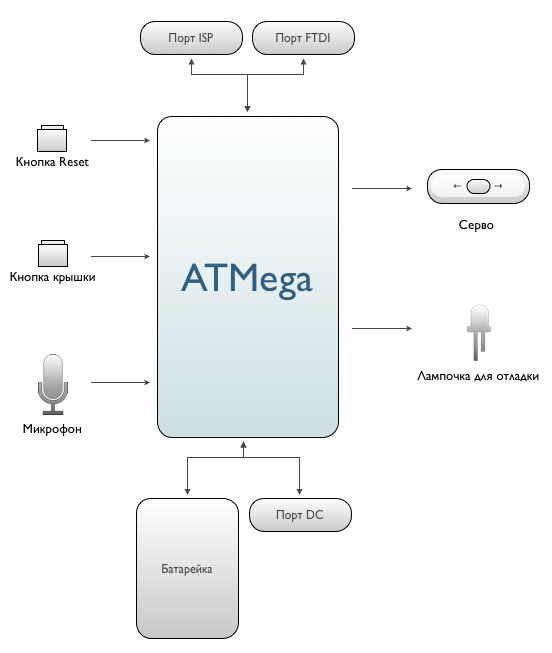
There is nothing especially difficult in the device scheme. Here you can find the complete scheme. And here is a simplified diagram that explains which components are involved in:
Quite an interesting thing turned out to be to arrange the board so that it fit into a small box. Since I decided to do everything myself, at home, options with a multilayer board did not fit. So I had to invent a fake multilayer board: the device consists of two levels, which are connected as shields for the Arduino. It turned out something like this:
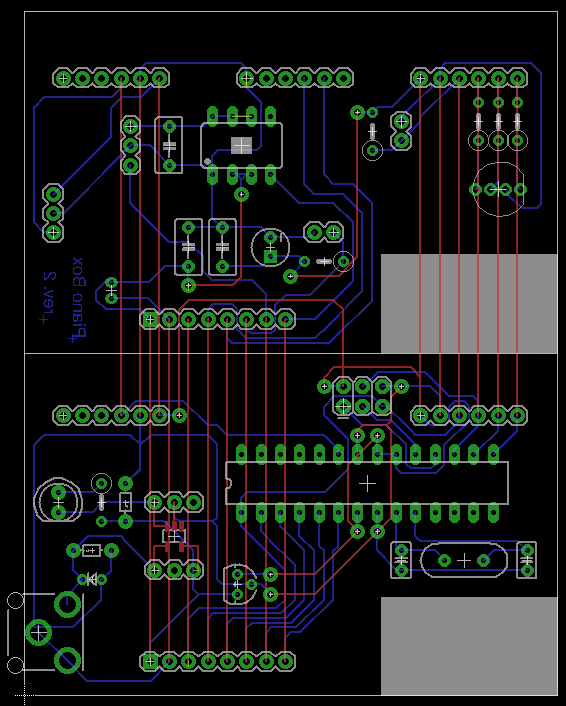
Blue connections are those that will be on the board itself. Red - those that will be added later, either by shield connectors, or by wires on top of the board.
Creating a board
I decided to use the photoresistive creation method. I described it in Habré , so I’ll just give you a couple of pictures.
We print the scheme on a transparent film and cut out the basis for the board:

Fee before tinning and making holes:

Fees on one side:

Fees on the other hand:
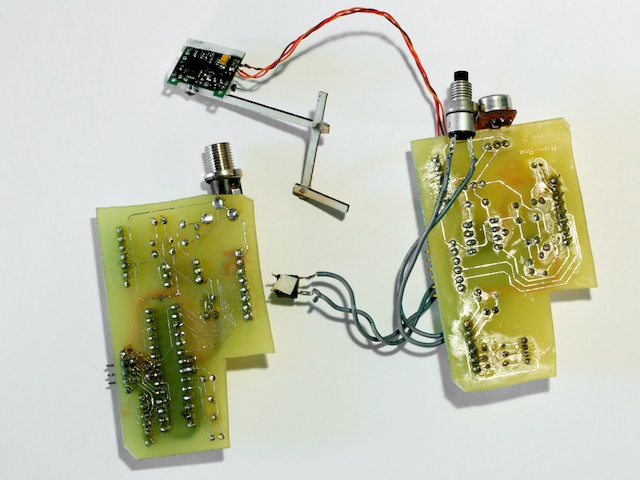
Fees collected:
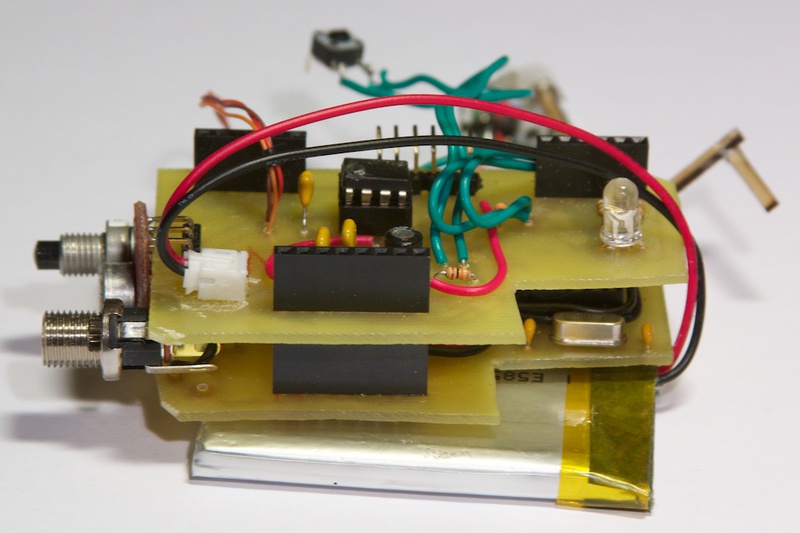
On the other hand:

Making a box
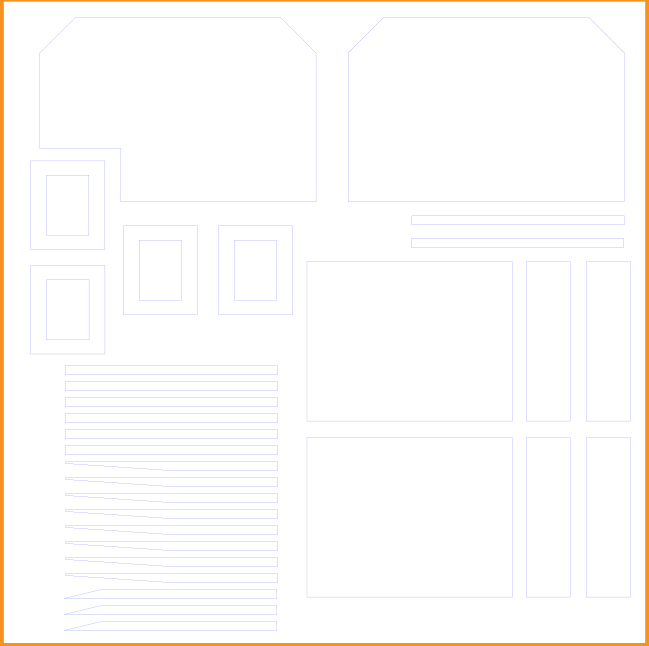
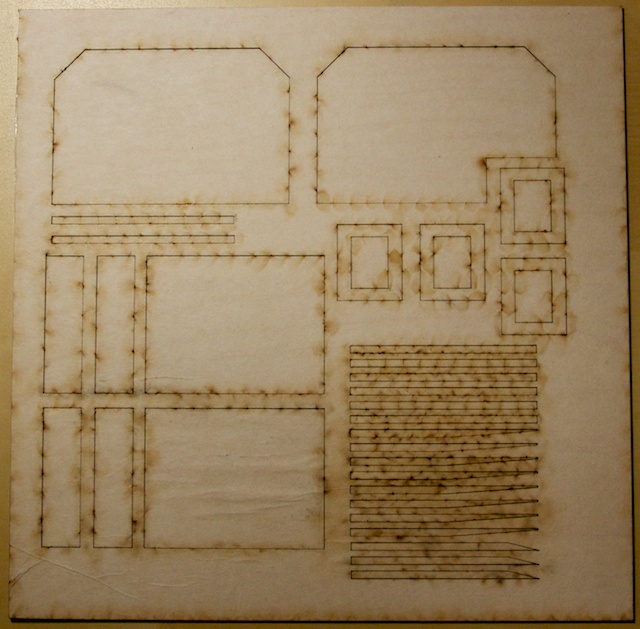
The box consists of the box itself and the walls surrounding the circuit and motor. I decided to buy an unprocessed box to cover it with paint and varnish myself. I ordered the walls and auxiliary parts on the Ponoko website: they can send a drawing to SVG, and they will cut it out with a laser on a thin plywood. Drawing can be found here . Here is what this drawing and its implementation looks like:
Plus three weeks:
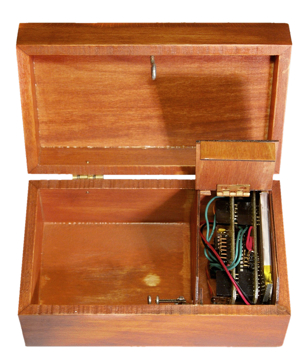
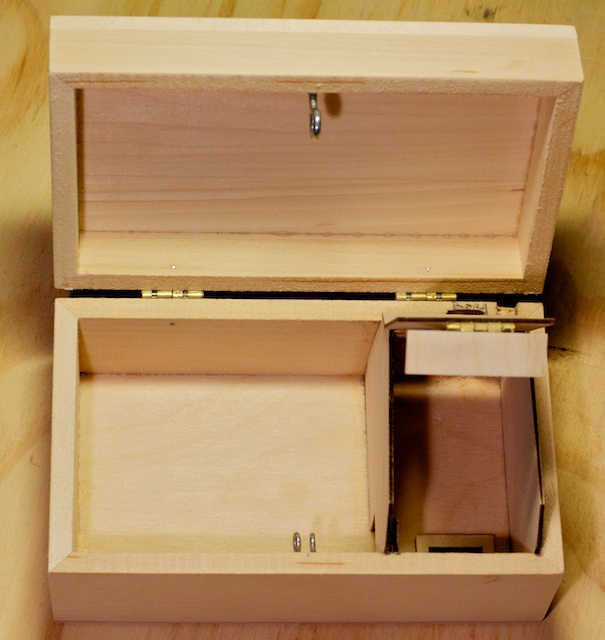
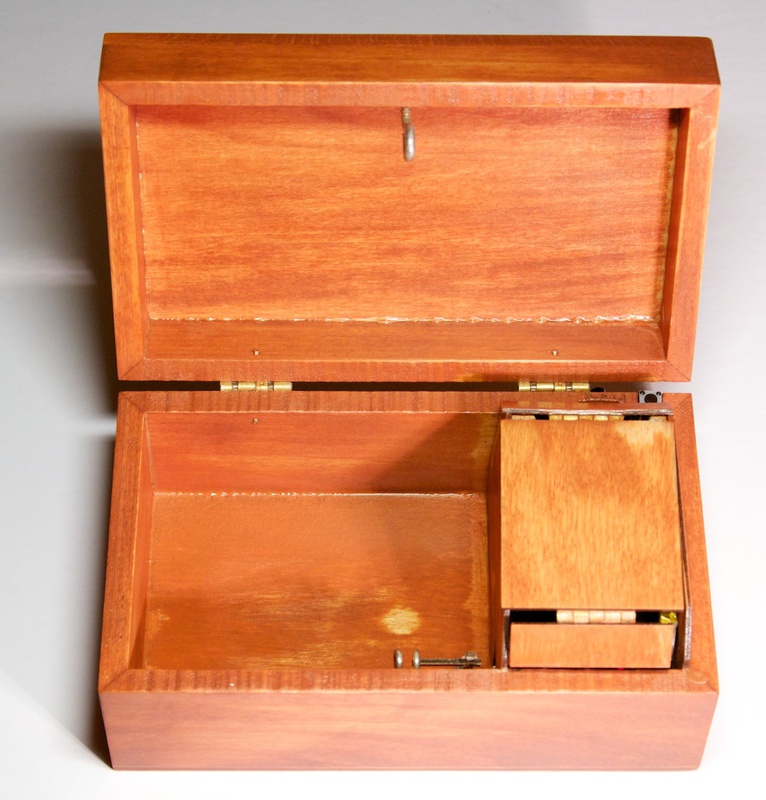
After these parts were integrated into the box, it turned out like this:
Now you can paint the box and varnish it. I applied two coats of paint and two coats of lacquer to last for ages. Perhaps there is nothing particularly difficult in this process. Unless it is necessary to sand the wood very high quality: the places where the shalturil are clearly visible. Here's what happened:

The lock mechanism looks like this:

Result
As a result, the scheme perfectly fit into the box:
I took the craft to several of my acquaintances: the correct melody is recognized on different pianos: on electronic pianos, and on ordinary pianos, and on the piano. Recognition accuracy: half tone.
The source code of the controller, the circuit and the drawing of the board can be found on Google Code . I will be happy to answer any questions, listen to criticism and suggestions.
Source: https://habr.com/ru/post/140640/
All Articles