Putting in order the outlet
I will start the article with a small statement.
I hate power supplies and chargers!
No, I'm not talking about computer, laptop power supplies, or even some tricky devices. I'm talking about the belching industry, which in English is called wall charger. They are disgusting: they can not stick into every outlet, heavy, bulky, loosen and break the outlet. They overlap the neighboring sockets in the extension cords, fall out, and they just look unattractive.
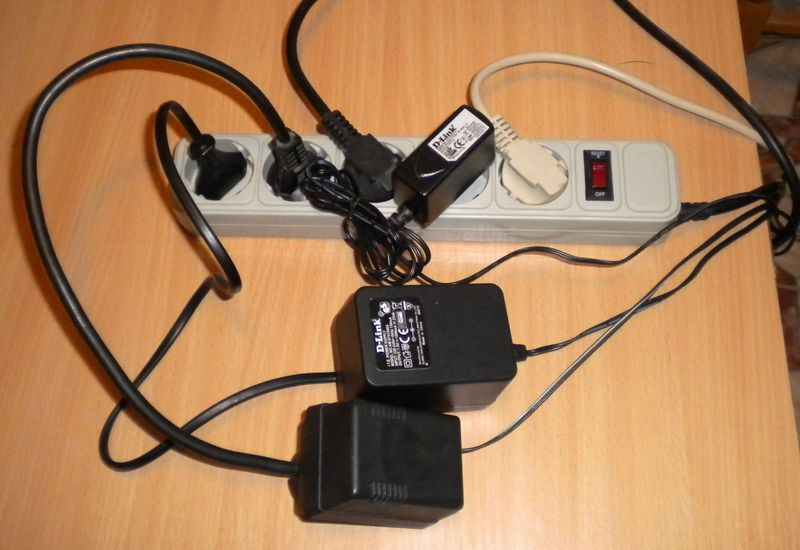
As you can see, two out of five nests are wasted.
')

Recently, in this blog (oh, excuse me, now this is a hub) they write about how to assemble your spaceship, build a skyscraper, or simply solder a processor out of improvised radio components. My post will be easier. I'll just tell you how I figured out my chargers and power supplies. Maybe I seem banal, maybe someone will be useful.
We will need the following things: a soldering iron, a screwdriver, a hammer, a knife, electrical tape (or better heat shrinkable tubing), power wires, and the chargers themselves.
We take the usual power cord (from the computer or from the home appliance).
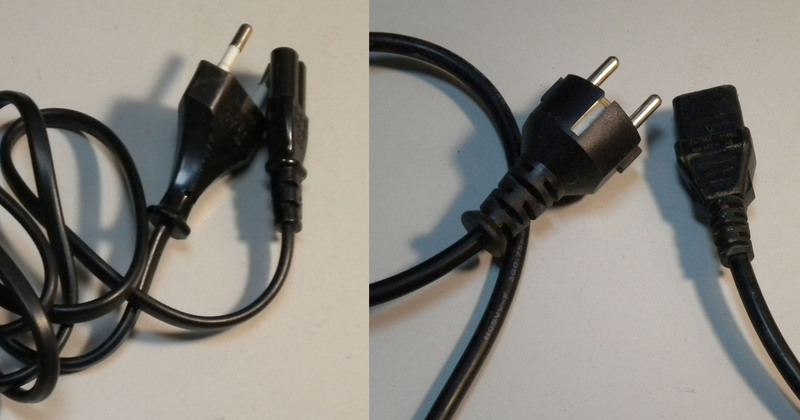
I bought similar in the usual electric store for 5 UAH. (20 rubles). I also have a certain amount of computer laces.
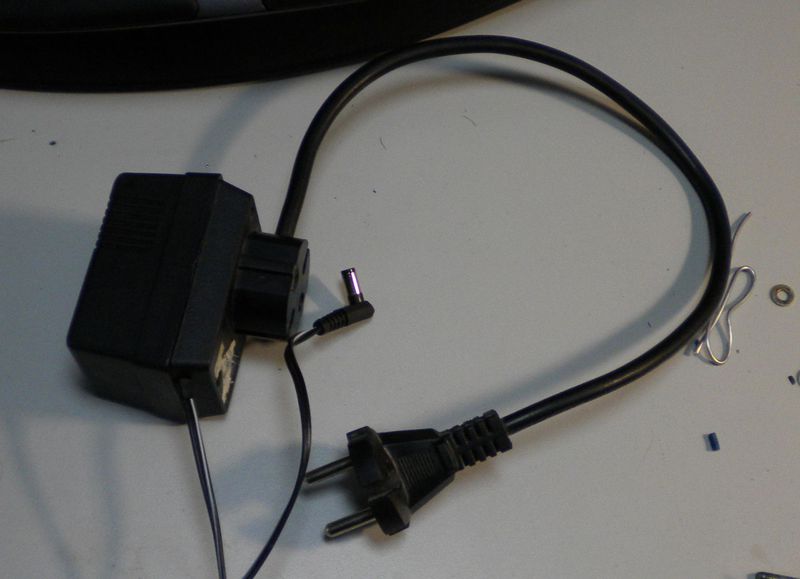
We first disassemble the power supply. They are of two types: collapsible and non-collapsible. We check for the presence of screws on the case, we also check under the stickers. If there are no screws, then the charger is not folding.
With a collapsible unit, everything is simple:

We take a screwdriver, disassemble, pick out the pins, cut off the power wire of the desired length. We drill (or dig in with a knife) in a suitable place the hole for the power wire. We clean the wire, put on heat shrinkage. Solder the wire to the contacts, heat shrink. In order for the wire not to vomit, fix the wire with either wire or plastic tie. Voila!
With indivisible charger will have to tinker a little more. First you need to disassemble this block. To do this carefully, we need a hammer and a knife. The knife can be quite blunt.
Put the power supply on a table or other stable surface. Insert the knife blade into the slot on the side of the PSU. Sharp confident movement beat with a hammer on the back of the knife. The main thing in this business is to keep the knife parallel to the gap, so as not to damage the body. If everything is done correctly, the BP will not suffer either externally or internally. As you can see, it turned out to open neatly:

Repeat the above steps: pick out pins, solder, isolate. Putting the block back. You can shalavit and reel tape, but it is better to use glue. Regular cyanoacrylate (superglue) is fine.
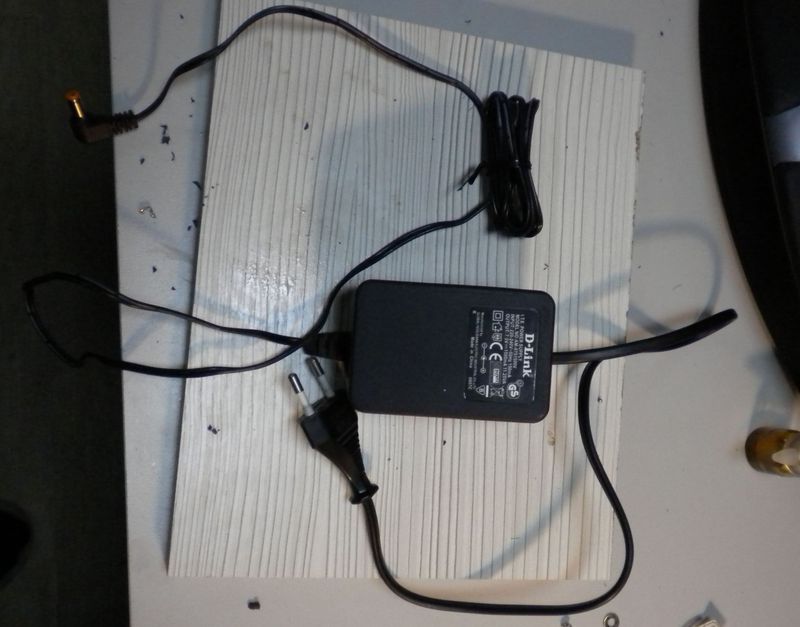
In the end, with minimal effort, we get something like the following:
I hate power supplies and chargers!
No, I'm not talking about computer, laptop power supplies, or even some tricky devices. I'm talking about the belching industry, which in English is called wall charger. They are disgusting: they can not stick into every outlet, heavy, bulky, loosen and break the outlet. They overlap the neighboring sockets in the extension cords, fall out, and they just look unattractive.
As you can see, two out of five nests are wasted.
')
Recently, in this blog (oh, excuse me, now this is a hub) they write about how to assemble your spaceship, build a skyscraper, or simply solder a processor out of improvised radio components. My post will be easier. I'll just tell you how I figured out my chargers and power supplies. Maybe I seem banal, maybe someone will be useful.
So let's get started.
We will need the following things: a soldering iron, a screwdriver, a hammer, a knife, electrical tape (or better heat shrinkable tubing), power wires, and the chargers themselves.
We take the usual power cord (from the computer or from the home appliance).
I bought similar in the usual electric store for 5 UAH. (20 rubles). I also have a certain amount of computer laces.
We first disassemble the power supply. They are of two types: collapsible and non-collapsible. We check for the presence of screws on the case, we also check under the stickers. If there are no screws, then the charger is not folding.
With a collapsible unit, everything is simple:
We take a screwdriver, disassemble, pick out the pins, cut off the power wire of the desired length. We drill (or dig in with a knife) in a suitable place the hole for the power wire. We clean the wire, put on heat shrinkage. Solder the wire to the contacts, heat shrink. In order for the wire not to vomit, fix the wire with either wire or plastic tie. Voila!
With indivisible charger will have to tinker a little more. First you need to disassemble this block. To do this carefully, we need a hammer and a knife. The knife can be quite blunt.
Put the power supply on a table or other stable surface. Insert the knife blade into the slot on the side of the PSU. Sharp confident movement beat with a hammer on the back of the knife. The main thing in this business is to keep the knife parallel to the gap, so as not to damage the body. If everything is done correctly, the BP will not suffer either externally or internally. As you can see, it turned out to open neatly:
Repeat the above steps: pick out pins, solder, isolate. Putting the block back. You can shalavit and reel tape, but it is better to use glue. Regular cyanoacrylate (superglue) is fine.
Total:
In the end, with minimal effort, we get something like the following:
Source: https://habr.com/ru/post/140383/
All Articles