Zentyal - all-in-one server for SMB

About 6 years ago, when I was a sysadmin in one office, I had to serve several servers on FreeBSD — a proxy, a mailer, a web server, ftp, ipfw, in general, everything is like everyone else. Everything worked on two physical servers, and I had the desire to get hold of some kind of universal graphical shell for the convenience of managing the entire economy. And, of course, there was no such anywhere. There were attempts by different craftsmen to create their own GUI for managing subsystems separately: one for squid, another for sendmail, etc. Of course, it was possible to perform some part of the control in webmin, but this did not give any pleasure. As they told me, it is wrong to work with * nix-systems through the GUI. No, of course the work on the command line did not cause inconvenience, but I wanted something more universal. As a result, I wrote several scripts that caused pseudographics on a black screen, where you could add / delete rules, steer users, etc., and somehow everything stopped, although the interest in user-friendliness through the GUI did not disappear.
Selection and description of the system
After some time, when I was already working in system integration, one of the customers had a question that I tried to solve long ago. And the search began again.
')
This time everything was much simpler - during this time a lot of systems appeared that allow you to manage certain services. First, my choice, despite the not very euphonic name for a Russian-speaking person, fell on the eBox Platform. And although the product at that time seemed damp, in principle, met all the requirements of the customer. Then interest in the subject again subsided - work, other matters and tasks ...
And suddenly again urgently needed "control all and all." Since that time, eBox has been reborn into a distribution called Zentyal, about which someone spoke poorly (bearing in mind the eBox bugs), and someone did not hide the pleasure of using.
It was about him that I wanted to tell. Looking ahead to say that I liked the distribution!
So, first go to the Zentyal website and download the distribution kit . The Zentyal image is based on Ubuntu, so installing it should not cause any problems. At the end of the installation, you will be prompted to open a browser and follow the link, although you can stay on the local server to further configure the system.
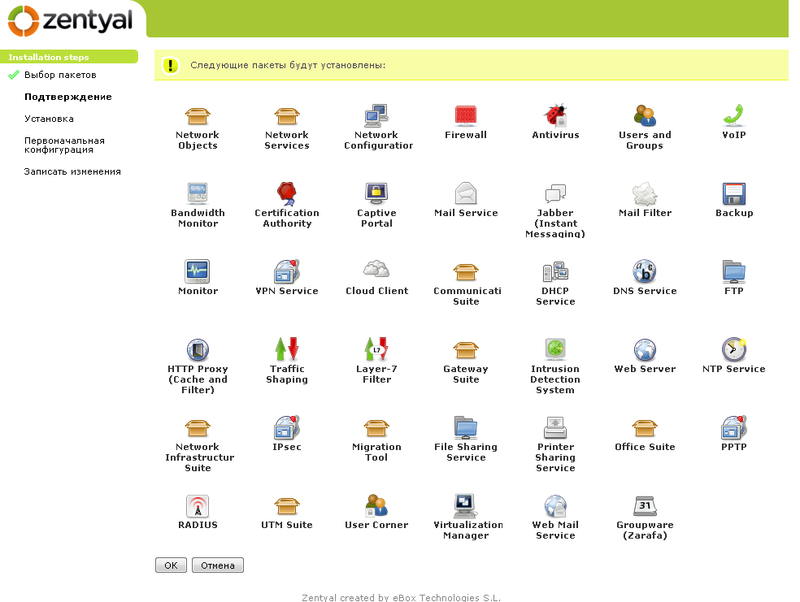
After logging in we get to the page for selecting packages for installation. Interestingly, you can install ready-made kits or just the necessary packages separately.

It is not interesting to put packages for the test separately, so we put everything at once!
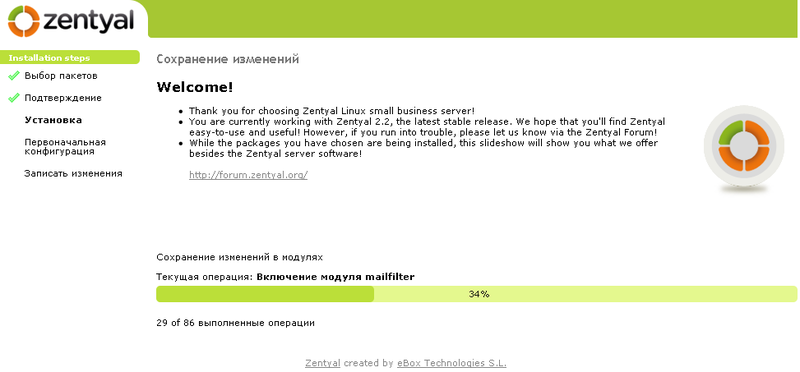
It is necessary, however, to wait a little bit. After everything is installed, it is necessary to do the initial system configuration.
First we set up the network. At once I will make a reservation that for further use of the server it is most convenient to have 2 network interfaces.

After setting up the network, you need to decide on the mode in which the server will work - just a dedicated server or as a slave (provided that there is already the first one - master). The meaning of the idea is reduced to the separation of services on different physical hosts. In the future, when scaling to the master server, you can connect slave servers that will perform their role / roles in the shared farm.

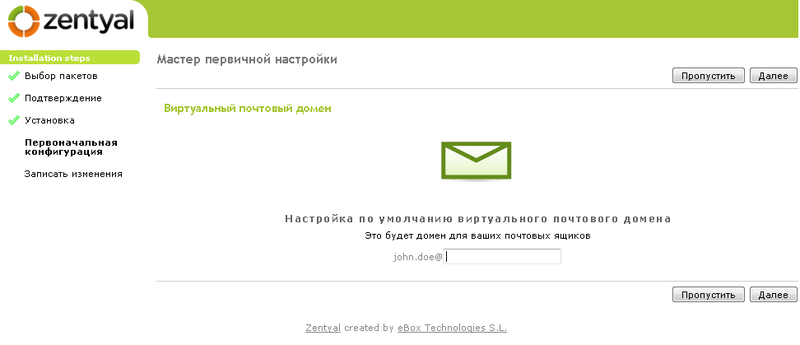
Setting up the primary mail domain:
Connection window "subscription". Very interesting thing!

You can register and buy support or use the free option. In the first case, you get the ability to install advanced security patches and telephone support, in the second case, standard patches and contacting support services with pay after delivery. But both in the first and in the second case there is a great opportunity to monitor the status of the server via the Internet. After registering on the Zentyal website and choosing a subscription type, you need to enter your data in the box below. Although this can be done later with further server configuration. After entering your credentials, the server establishes a VPN connection with the support server, and you get access to a dashboard, where you can monitor the status of your system. In case of paid support, the functionality will be richer.
So, the installation and initial configuration was successful ...
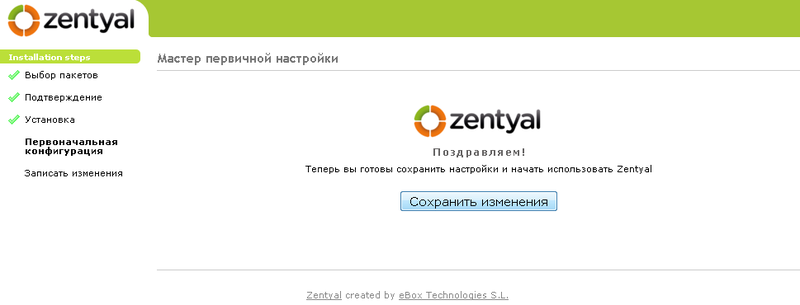
... and everything is ready for further palpation.
Admin panel
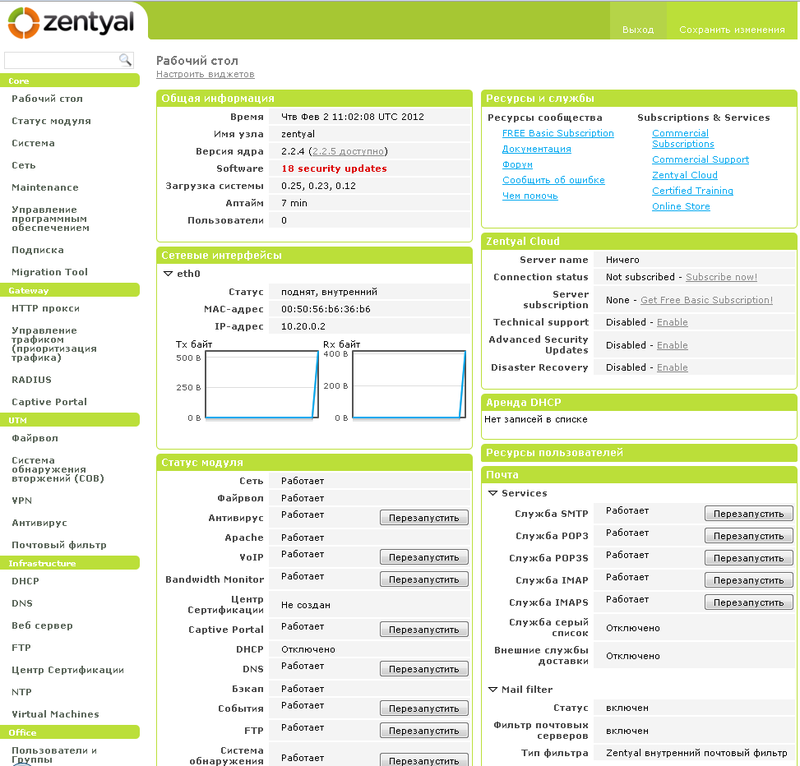
Admin panel Convenient, beautiful, nothing annoying. On the left is the module menu, in the center are widgets (by the way, you can drag them and place them at your discretion). Immediately it is clear that the system has found 18 updates. By clicking on this notification, we will see a list from which you can select the components to be installed.
I checked everything and clicked “Save Changes”.

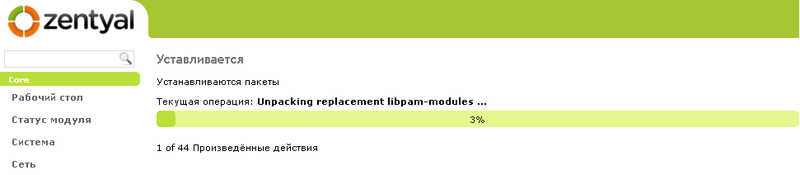
Went to install updates.
Module Description
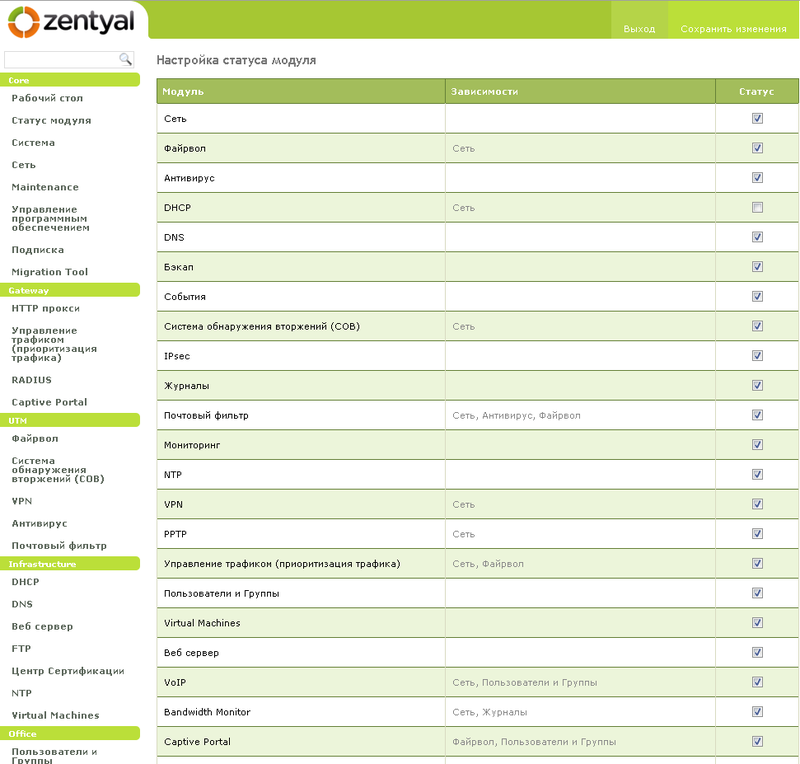
Briefly run through the modules. In the module status settings menu, you can choose what should work and which service will be turned off. Since the DHCP server, as a rule, already exists on the network, we do not touch this service.
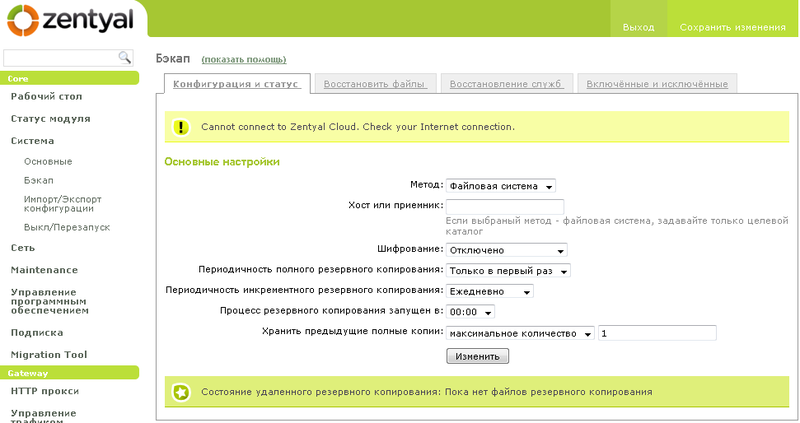
Backup menu. Here, too, everything is simple and clear. Schedule-where-to-where-to-exception and stuff ...
Import / export of configuration and system on / off are standard options, I don’t think they should be focused on.
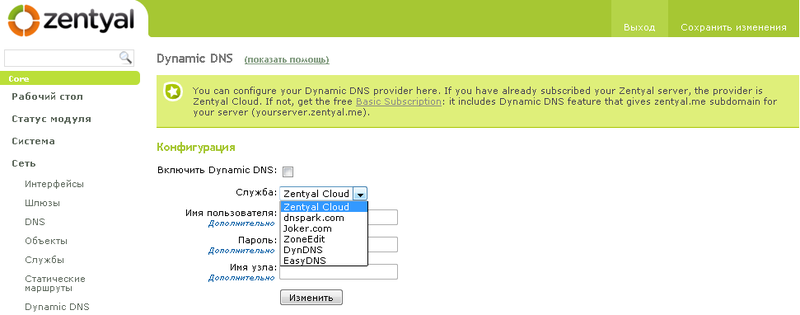
Option DynDNS - again, everything is standard.
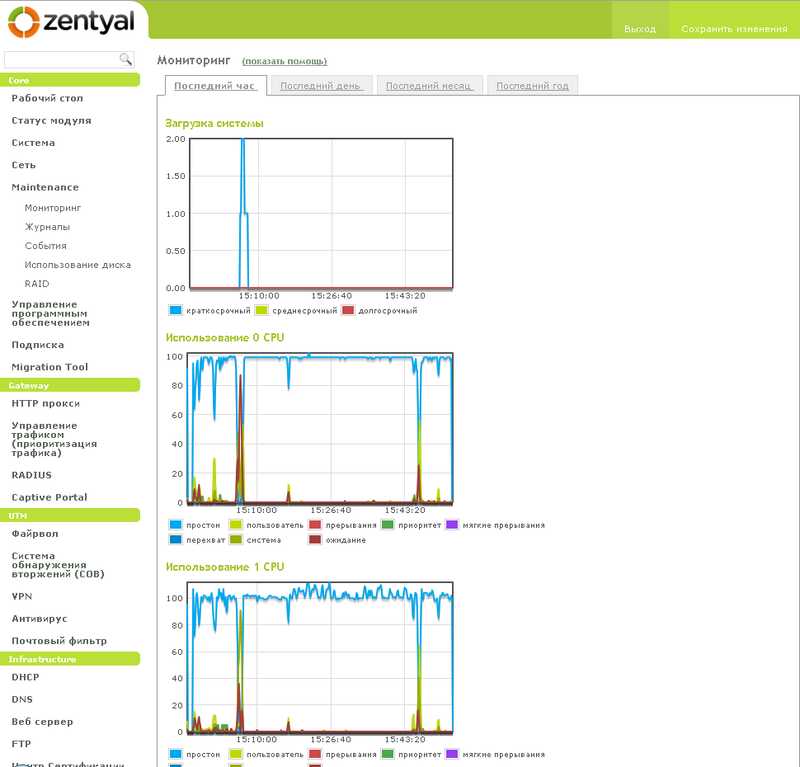
In the monitoring window, beautiful multicolored system loading graphs are built.
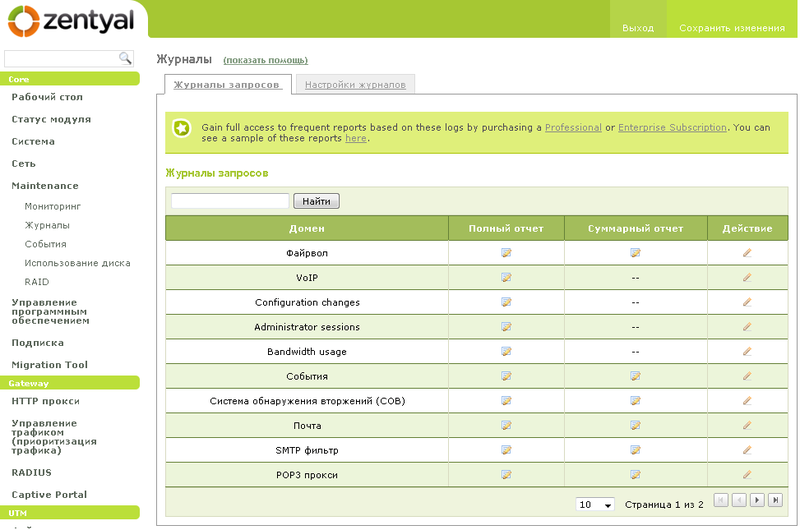
There is where to read the logs.
Proxy module. As you can see, you can configure a proxy with authorization or transparent, you can add the option to block ads. In the paid version, judging by the description, the functionality is richer.

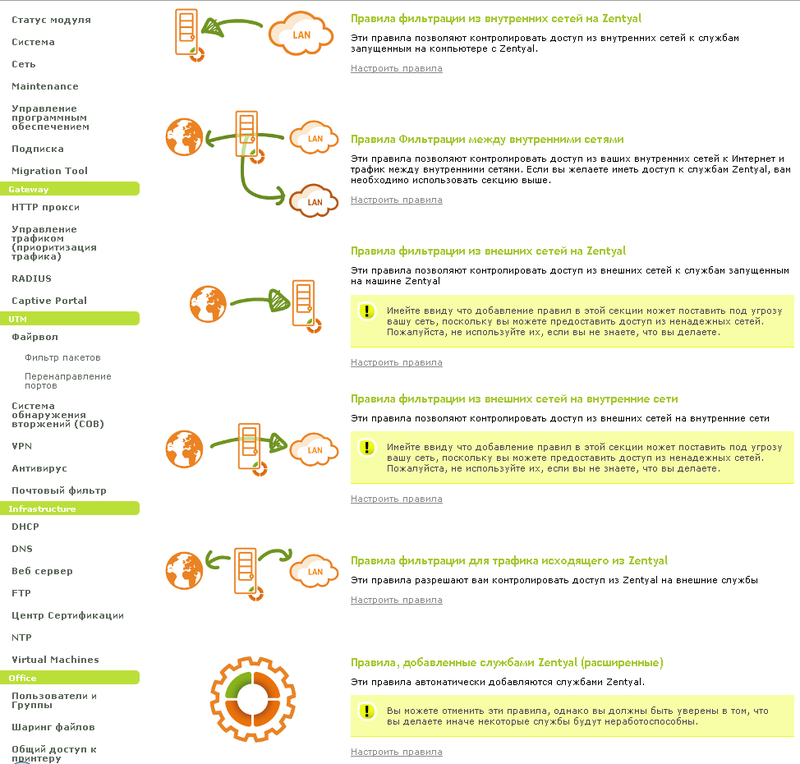
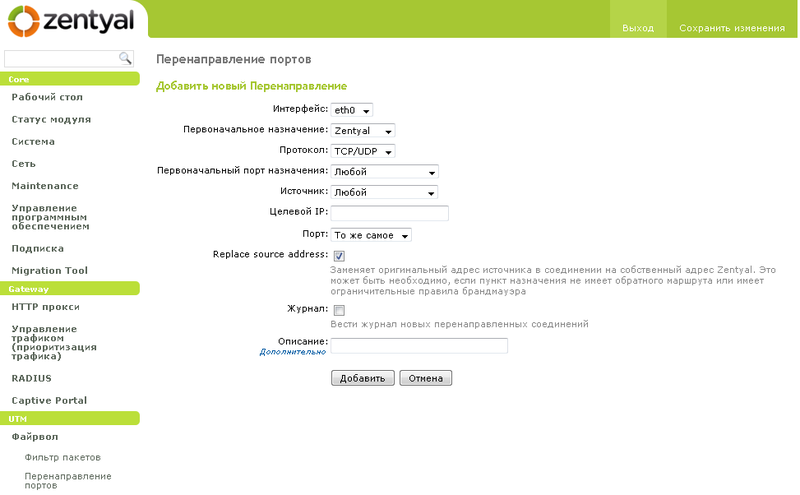
Firewall - everything is beautiful here! Through the GUI, you can configure almost any rule. Images on the page will not get confused when choosing.
... you may need the port forwarding option.
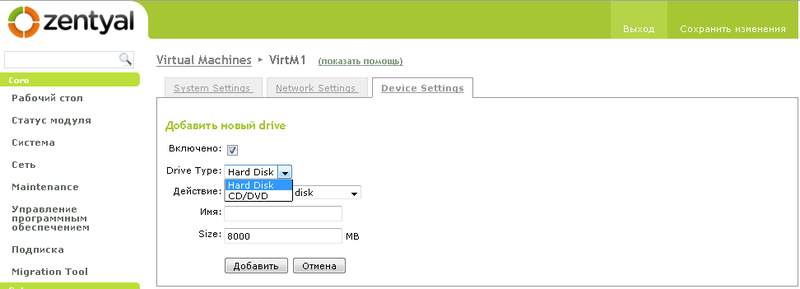
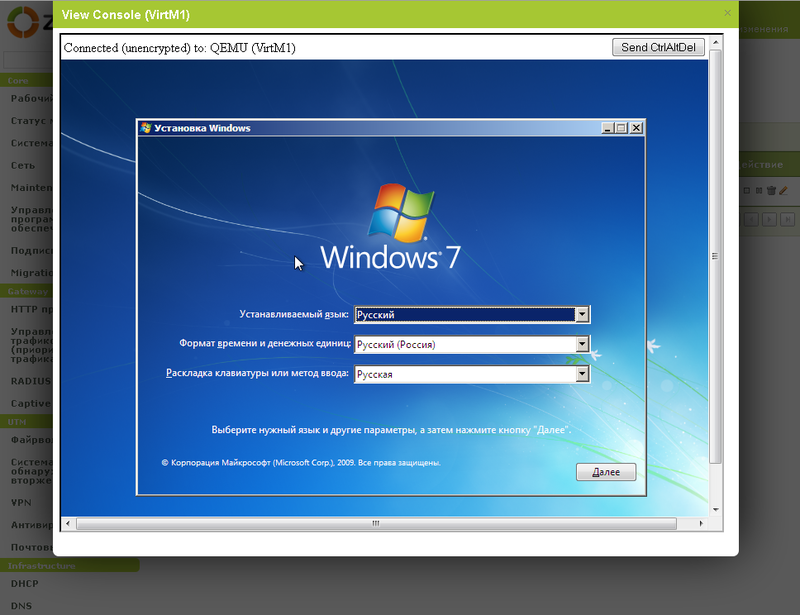
An interesting feature of the distribution is the creation and launch of virtual machines - where nowadays without virtualization? Everything is simple here - we create a virtual machine, describe the network, add disks and start. As a CD / DVD, you can use images of operating systems previously copied to the server.

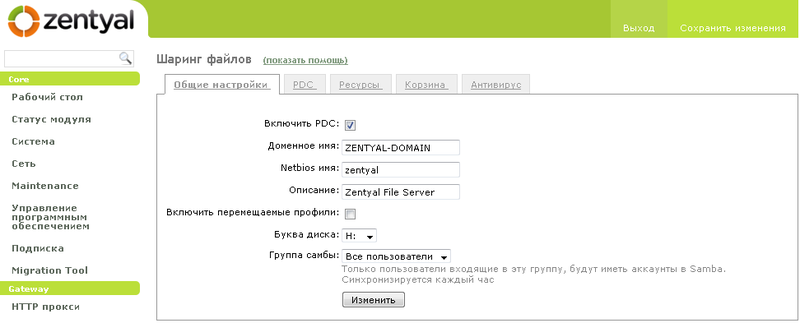
SAMBA settings are also not complicated - everything is as usual.

By the way, there is a handy chip - "Basket". Logs all file deletions from the balloon. You can see who and when deleted a file and restore it if necessary.
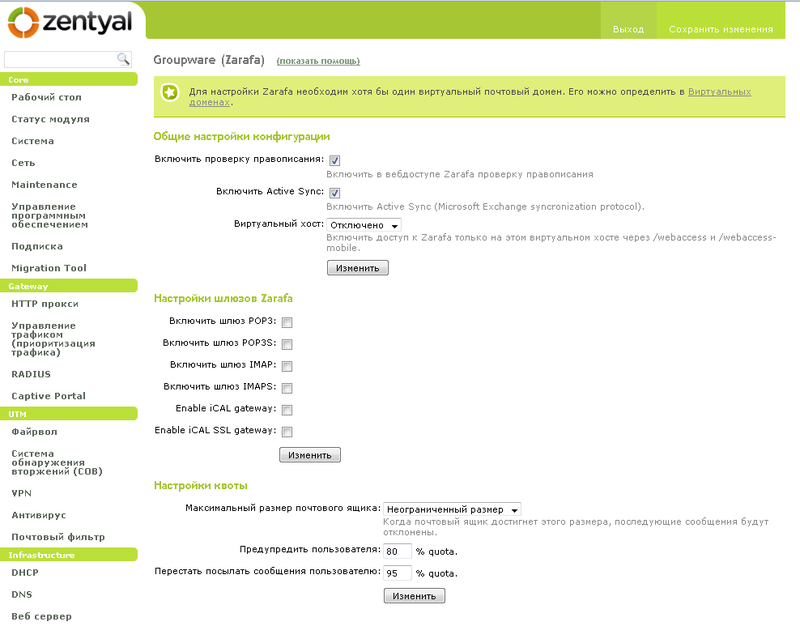
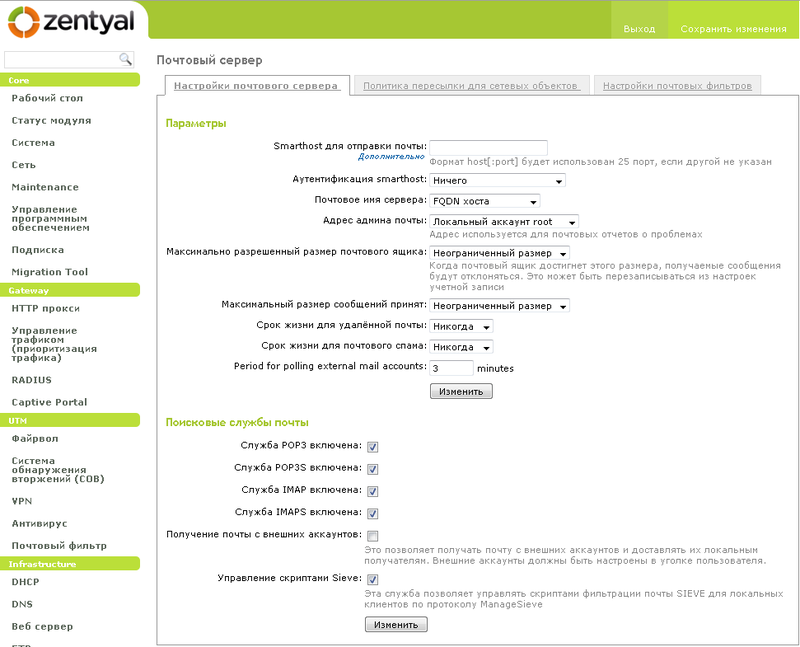
And now the most interesting: group work tools. The server-side settings are simple - we enable mail, we start users, we allow / prohibit message forwarding.


Among other things, you can configure a VoIP server.

User interface
So, server setup is complete. What did the user have at their disposal? It is clear that there are network balls, a VoIP server, a gateway is working, a proxy is writing logs. Login to the address that was specified after GroupWare setup:

And after entering we get ...
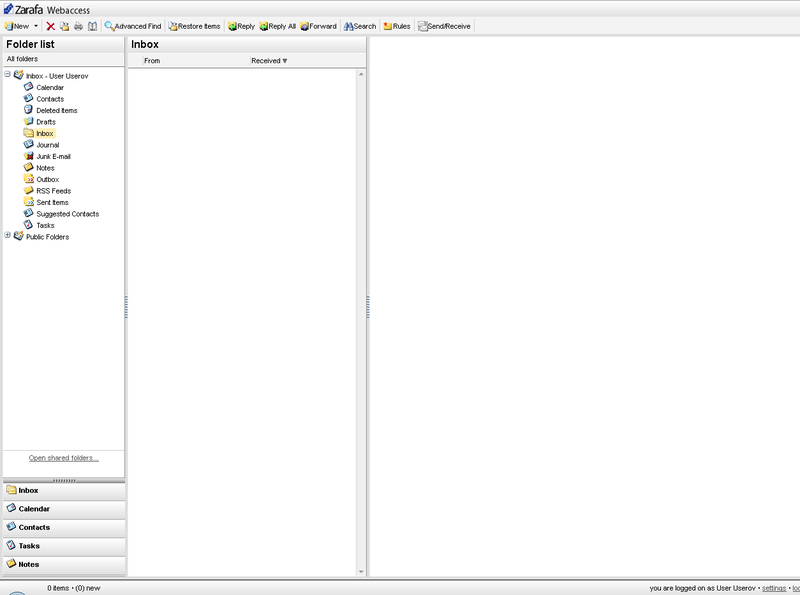
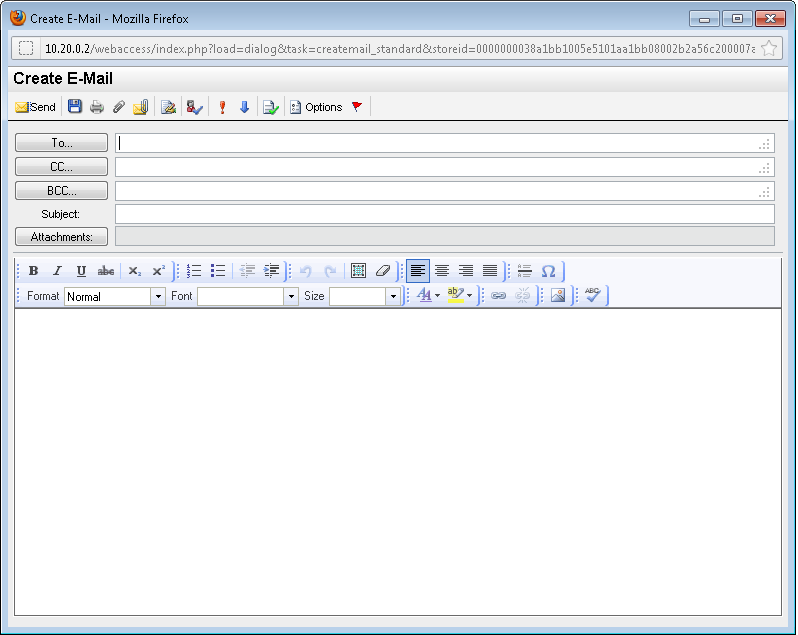
Nothing like? That's right, the MS Outlook interface. I do not know why the developers have made a similar interface, probably for the convenience of the end user. At the same time, here is the message creation window for comparison:

Calendar is also very similar to the creation of MS.

findings
Well, that's all, in general. The review was not very short, but in general, you can get an idea about the product.
After installation and configuration, the impression is that the product is complete. All items in their modules, competent translation into Russian, the availability of paid support - all at the proper level. In addition, a lot of materials in Russian.
For “adult” companies, this product is hardly suitable, since other money is spinning there, but for a small business level it is a very good choice.
madbug
Senior Systems Engineer DEPO Computers
Source: https://habr.com/ru/post/140240/
All Articles