IIS 8: Dynamic IP Access Restriction

IIS 7 and previous versions contained built-in functionality that allowed administrators to allow or deny access to the server for specific IP addresses (or their ranges). When the IP address was blocked, any HTTP client with this IP received an HTTP error "403.6 Forbidden" in response to a request to the server. This functionality allowed administrators to configure access to their server based on activity, which they could analyze by server logs. However, it was a manual process. Even though the management of functions could be configured through scripts to identify suspicious users by analyzing logs with utilities like Microsoft's LogParser, it still required a lot of manual work.
Decision
In IIS 8, the built-in functionality has been extended to offer the following features:
- Dynamic IP filtering, which allows administrators to configure their server to block IP addresses that create too many requests to the server;
- IP address filtering now allows administrators to specify server behavior when blocking IP addresses, so that requests from attackers can be interrupted by the server, instead of returning HTTP 403.6 to the client;
- IP filtering now supports the proxy mode function, which allows you to block addresses not only by the IP address of the client that the server receives, but also by the received values of the HTTP headers x -forwarded -for .
Step-by-step instruction
Requirements:
- Pre-installed Windows 8 with IIS 8 enabled;
')
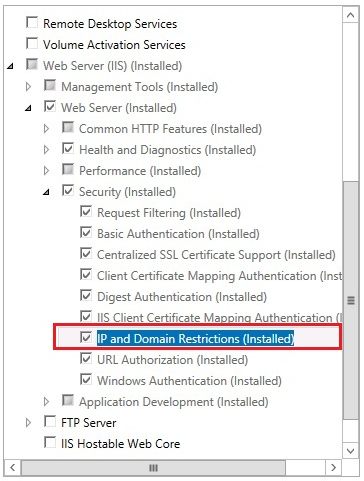
Configuring IIS to block access based on HTTP requests
IIS 8.0 server can be configured to block access to web sites based on a certain number of requests per unit of time that a client makes. Another option is to lock based on the number of simultaneous client connections.
To configure IIS to block access based on the number of HTTP requests, follow these steps:
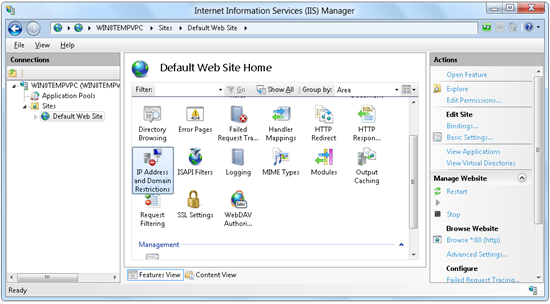
Log in to the system as an administrator. Open the Internet Information Services (IIS) Manager . Select your server, site or folder in the Connections window and then launch IP Address and Domain Restrictions in the function panel.
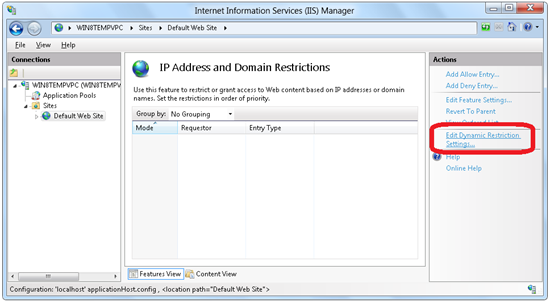
Click Edit Dynamic Restriction Settings in the Actions panel.
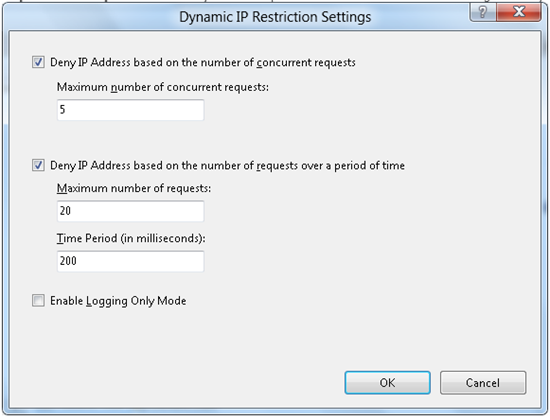
In the Dynamic IP Restriction Settings window, select Deny IP Address based on the number of concurrent requests if you want to prevent too many simultaneous connections from the user. If you want to prevent too many requests from the user, select Deny IP Address based on the number of requests over a period of time .
Click OK.
Configuring IIS behavior when IP addresses are banned
In IIS 7 and earlier versions, the server returned an HTTP error "403.6 Forbidden" when the IP address was blocked. In IIS 8.0, administrators can configure their server to deny access from IP addresses with several additional options.
To specify how IIS should do when it blocks an IP address, follow these steps:
Log in to the system as an administrator. Open the Internet Information Services (IIS) Manager . Select your server, site or folder in the Connections window and then launch IP Address and Domain Restrictions in the function panel.
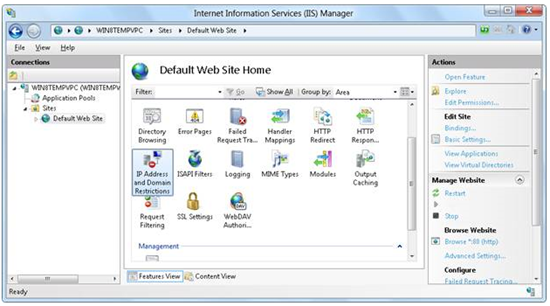
Click Edit Feature Settings in the Actions panel.

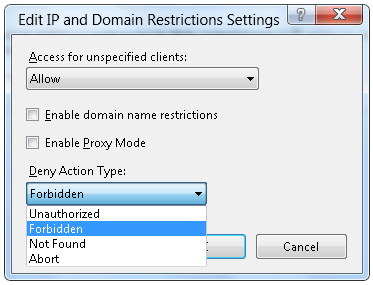
In the Edit IP and Domain Restriction Settings window, select the preferred server behavior from the Deny Action Type drop-down menu:
- Unauthorized: IIS will return an HTTP 401 response;
- Forbidden: IIS will return an HTTP 403 response;
- Not Found: IIS will return HTTP 404;
- Abort: IIS will close the HTTP connection.
Click OK.
Configuring IIS for Proxy Mode
One of the problems with IP filtering is a possible situation when many different clients access a server from the same IP address (through a firewall, load balancer, proxy). So for each such client, the IP address will be the same. In IIS 8.0, administrators can configure the server based on the x -forwarded -for HTTP header, in addition to the client’s IP address, in order to more precisely determine which particular requests should be blocked. This behavior is called "proxy mode".
To configure IIS for proxy mode, complete the following steps.
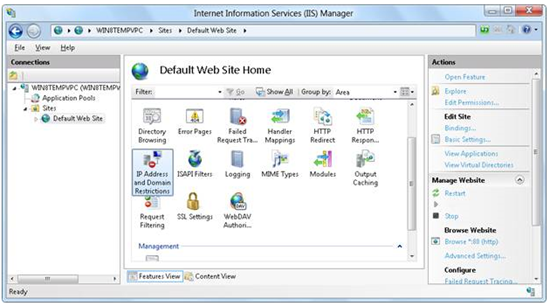
Log in to the system as an administrator. Open the Internet Information Services (IIS) Manager . Select your server, site or folder in the Connections window and then launch IP Address and Domain Restrictions in the function panel.
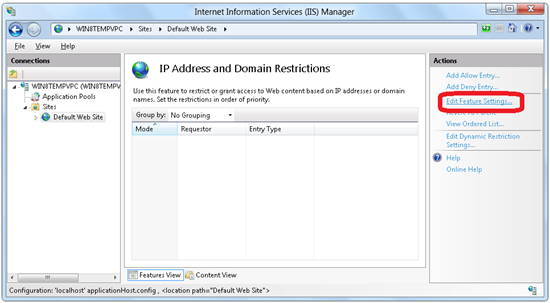
Click on Edit Feature Settings in the Actions panel.
In the Edit IP and Domain Restriction Settings window, select Enable Proxy Mode.
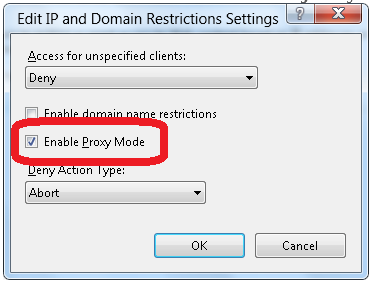
Click OK.
Conclusion
In this guide, you learned how to configure IIS to dynamically block access to your server based on the number of requests from the client, as well as how to configure the IIS behavior that the server will use when blocking potential intruders.
From translator
You can read a review article about many other innovations in IIS 8 (in Russian) at this address .
For completeness, I would like to supplement the article with useful links that more fully reveal many of the new features of IIS 8:
- Installing IIS 8 on Windows Server 8
- IIS 8.0 Using ASP.NET 3.5 and ASP.NET 4.5
- IIS 8.0 ASP.NET Configuration Management
- IIS 8.0 Application Initialization
- IIS 8.0 Dynamic IP Address Restrictions
- IIS 8.0 FTP Logon Attempt Restrictions
- IIS 8.0 CPU Throttling: Sand-boxing Sites and Applications
- IIS 8.0 Server Name Indication (SNI): SSL Scalability
- IIS 8.0 Centralized SSL Certificate Support: SSL Scalability and Manageability
- IIS 8.0 Multicore Scaling on NUMA Hardware
On April 3, a free WebProfessionals conference will be held in Samara, where IIS 8 and other elements of the Microsoft web platform will be discussed. Registration is now open .
Source: https://habr.com/ru/post/139849/
All Articles